
Summary of Contents for wattsonic WTS-6KW-3P
- Page 1 Wattsonic High Voltage Three Phase All-In-One ESS USER MANUAL Wattsonic AIO ESS | USER MANUAL...
-
Page 2: Table Of Contents
CONTENTS Overview -----------------------------------------------------------------------------------4 Important Safety Instructions -------------------------------------------------------5 What is Wattsonic All-in-one ESS? ------------------------------------------------8 Inverter Introduction -------------------------------------------------------------------9 Basic features -------------------------------------------------------------------------------9 Appearance Introduction -------------------------------------------------------------12 Display Interface -------------------------------------------------------------------------13 Specifications -----------------------------------------------------------------------------14 Standard Packing List ------------------------------------------------------------------16 Battery Introduction ------------------------------------------------------------------17 Specifications -----------------------------------------------------------------------------17 Standard Packing List ------------------------------------------------------------------18... - Page 3 Electrical Connection ------------------------------------------------------------------41 Communication Connection ---------------------------------------------------------48 Monitoring Device Installation -----------------------------------------------------51 System Start and Stop ----------------------------------------------------------------52 General Operation ---------------------------------------------------------------------53 Display Operation -----------------------------------------------------------------------53 Auto-Test ------------------------------------------------------------------------------------56 Monitoring and Configuration ------------------------------------------------------56 Troubleshooting ------------------------------------------------------------------------57 Fault Messages ---------------------------------------------------------------------------57 Maintenance -------------------------------------------------------------------------------59 Wattsonic AIO ESS | USER MANUAL...
-
Page 4: Overview
All specifications and descriptions contained in this document are verified to be accurate at the time of printing. However, because continuous improvement is a goal at Wattsonic, we reserve the right to make product modifications at any time. The images provided in this document are for demonstration purposes only. -
Page 5: Important Safety Instructions
Wattsonic All-in-one ESS installation and repair instructions assume knowledge of high voltage electricity and should only be performed by Wattsonic Certified Installers. Wattsonic assumes no liability for injury or property damage due to repairs attempted by unqualified individuals or a failure to properly follow these instructions. These warnings and cautions must be followed when using Wattsonic ESS. - Page 6 Do not impact, pull, drag, or step on Wattsonic LFP Battery. Do not subject Wattsonic LFP Battery to any strong force. To help prevent damage, leave Wattsonic LFP Battery in its shipping packaging until it is ready to be installed.
- Page 7 Caution: When installing Wattsonic LFP Battery in a garage or near vehicles, keep it out of the driving path. If possible, install the Wattsonic LFP Battery on a side wall and/or above the height of vehicle bumpers. ENVIRONMENTAL CONDITIONS Warning: Install Wattsonic LFP Battery at a height that prevents damage from flooding.
-
Page 8: What Is Wattsonic All-In-One Ess
Wattsonic All-in-one ESS thereby maximizes solar consumption and reduces energy spending. A FLEXIBLE SOLUTION Wattsonic All-in-one ESS can be charged from solar or grid power and can provide backup power. If greater amounts of energy are needed, multiple Wattsonic All-in-one ESS can be installed together to work as a larger system. -
Page 9: Inverter Introduction
Inverter Introduction Basic features Function Wattsonic WTS series is also known as hybrid inverter or storage inverter, which is mainly used to combine the PV array, lithium battery, loads and power grid to realize intelligent power management and dispatching. The WTS 6~12kW series hybrid inverter... - Page 10 Scheduled Charge --- Peak Valley Mode Inverter will use power from PV and battery to supply loads in the scheduled period and the insufficient part will be supplied by the grid. Scheduled Discharge --- Peak Valley Mode Wattsonic AIO ESS | USER MANUAL...
- Page 11 -30 ° C and + 60 ° C, and the relative humidity stored is less than 90%. 3) If a batch of inverters needs to be stored, the height of each pile should be no more than 6 levels. Wattsonic AIO ESS | USER MANUAL...
-
Page 12: Appearance Introduction
On-grid Output Terminal Inverter bottom view 175mm DC Switch(PV) Back Rail DC Input Terminal(PV) WIFI/LAN Port Back-up Output Terminal Inverter back view Back Rail Vent Valve 300mm Wall bracket view 150mm 150mm 150mm 150mm Wattsonic AIO ESS | USER MANUAL... -
Page 13: Display Interface
Display the inverter operation information. Display Display off to save power, press the button to wake up the display. Switch display information and set parameters by short press Button Physical button or long press. Wattsonic AIO ESS | USER MANUAL... -
Page 14: Specifications
③ Single-phase peak output power is the single-phase max output that won’t trigger overload protection, only 1 phase can reach peak output power at the same time. Wattsonic AIO ESS | USER MANUAL... - Page 15 <15 Topology Transformer-less Operating Temperature Range (°C) -30~60 Relative Humidity 0~100% Operating Altitude (m) 3000 Cooling Natural Convection Noise Level (dB) <25 Display OLED & LED Communication WiFi / LAN(Optional) IEC62109、IEC62116、VDE4105、VDE0126、AS4777、 Compliance RD1699、NBR16149、IEC61727、IEC60068、IEC61683、 EN50549、EN61000 Wattsonic AIO ESS | USER MANUAL...
-
Page 16: Standard Packing List
Inverter×1 Wall Bracket×1 Expansion Bolt×5 PV Terminal×2 AC Cover×1 Wattsonic Meter with 3 CTs ×1 Screw×6 Cord End Terminal × 8 PE Terminal×2 BAT Plug×1 Back Up AC Terminal×1 Cord End Terminal×6 On Grid AC Terminal×1... -
Page 17: Battery Introduction
IP21(Optional IP65, need be confirmed upon order) Installation Method Floor or Wall Mounted Cables Connection Method Connection from side Warranty 10 years or 10,000 cycles @90% DOD *Battery System Configuration Options: 230V/6.9kWh, 307V/9.2kWh, 384V/11.5kWh, 460V/13.8kWh, 537V/16.1kWh, 614V/18.4kWh Wattsonic AIO ESS | USER MANUAL... -
Page 18: Standard Packing List
Com Resistor Grounding Wire between Back Sheet Battery Modules and Sub- Expansion Screws Master BMS Stackable Fixed Frame Stackable Fixed Bar Spare Accessories Spared MC4 connectors for customized Inverter<-->Sub-Master BMS Power Cable(+/-) with different length Wattsonic AIO ESS | USER MANUAL... -
Page 19: Mechanical Installation
Mechanical Installation Selection of Installation Location The Wattsonic WTS 6~12kW series is designed with IP65 protection for indoor and outdoor installations. When selecting an inverter installation location, the following factors should be considered: The wall on which the inverter is mounted must be strong and can withstand the weight of the inverter for a long time. - Page 20 500m to top space to top space Minimum300mm Minimum Minimum Minimum Minimum Minimum 300mm 300m 300mm 300mm 300m to right space to left space to left space Minimum 300m to right space Minimum 70mm Wattsonic AIO ESS | USER MANUAL...
-
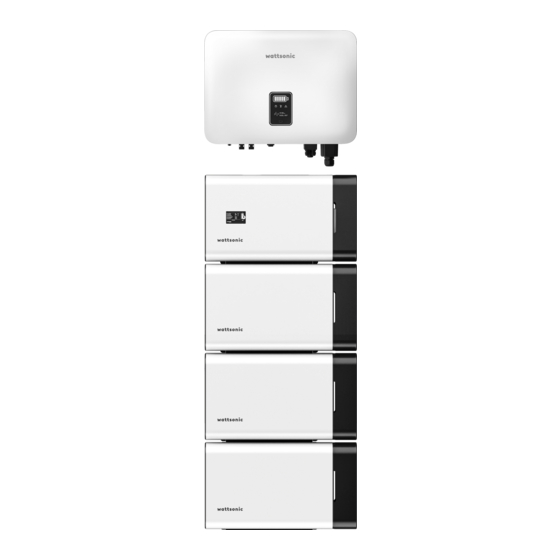
Page 21: Inverter+Sub-Master Bms + 3 Battery Modules
1276mm this manual for more details), push into the cables cover from the right side and use a cross screwdriver to lock and fix the screws reserved on the side. Wattsonic AIO ESS | USER MANUAL... -
Page 22: Battery Stack Installation
After all the cables are connected (please refer to cables connection instruction on page 39), push into the cables cover from the right side and use a cross screwdriver to lock and fix the screws reserved on the side. Wattsonic AIO ESS | USER MANUAL... -
Page 23: Inverter+Sub-Master Bms + 4 Battery Modules
1595mm this manual for more details), push into the cables cover from the right side and use a cross screwdriver to lock and fix the screws reserved on the side. Wattsonic AIO ESS | USER MANUAL... -
Page 24: Battery Stack Installation
After all the cables are connected (please refer to cables connection instruction on page 39), push into the cables cover from the right side and use a cross screwdriver to lock and fix the screws reserved on the side. Wattsonic AIO ESS | USER MANUAL... -
Page 25: Inverter+Sub-Master Bms + 5 Battery Modules
1276mm this manual for more details), push into the cables cover from the right side and use a cross screwdriver to lock and fix the screws reserved on the side. Wattsonic AIO ESS | USER MANUAL... -
Page 26: Battery Stack Installation
After all the cables are connected (please refer to cables connection instruction on page 39), push into the cables cover from the right side and use a cross screwdriver to lock and fix the screws reserved on the side. Wattsonic AIO ESS | USER MANUAL... -
Page 27: Inverter+Sub-Master Bms + 6 Battery Modules
1276mm this manual for more details), push into the cables cover from the right side and use a cross screwdriver to lock and fix the screws reserved on the side. Wattsonic AIO ESS | USER MANUAL... -
Page 28: Battery Stack Installation
After all the cables are connected (please refer to cables connection instruction on page 39), push into the cables cover from the right side and use a cross screwdriver to lock and fix the screws reserved on the side. Wattsonic AIO ESS | USER MANUAL... -
Page 29: Inverter+Sub-Master Bms + 7 Battery Modules
Total height 1595mm this manual for more details), push into the cables cover from the right side and use a cross screwdriver to lock and fix the screws reserved on the side. Wattsonic AIO ESS | USER MANUAL... -
Page 30: Battery Stack Installation
After all the cables are connected (please refer to cables connection instruction on page 39), push into the cables cover from the right side and use a cross screwdriver to lock and fix the screws reserved on the side. Wattsonic AIO ESS | USER MANUAL... -
Page 31: Wall Mounted (Vertical+Horizonal)
Total height 1595mm this manual for more details), push into the cables cover from the right side and use a cross screwdriver to lock and fix the screws reserved on the side. Wattsonic AIO ESS | USER MANUAL... -
Page 32: Battery Stack Installation
After all the cables are connected (please refer to cables connection instruction on page 39), push into the cables cover from the right side and use a cross screwdriver to lock and fix the screws reserved on the side. Wattsonic AIO ESS | USER MANUAL... -
Page 33: Battery Cables Connection Battery
Battery Input+ Step3, please plug into the COM resistor from standard accessories packed together with Sub-Master BMS to last b a t t e r i e s o p e n CO M port. Wattsonic AIO ESS | USER MANUAL... -
Page 34: Inverter+Sub-Master Bms + 4 Battery Modules
#4 B+ to Sub Master BMS Down Down a c c e s s o r i e s p a c k e d Battery Input+ together with Sub-Master BMS to last batteries open COM port. Wattsonic AIO ESS | USER MANUAL... -
Page 35: Inverter+Sub-Master Bms + 5 Battery Modules
Sub-Master BMS to hide it. Battery #2 Battery #5 The power cable and com cable can go through the back-sheet of Battery #4 to hide the cables for better cables management. Battery #3 Battery #4 Cross Cables Management Wattsonic AIO ESS | USER MANUAL... -
Page 36: Inverter+Sub-Master Bms + 6 Battery Modules
Battery #6 Battery #2 Battery #5 The power cable and com cable can go through the back-sheet of Battery #4 to hide the cables for better cables management. Battery #3 Battery #4 Cross Cables Management Wattsonic AIO ESS | USER MANUAL... -
Page 37: Inverter+Sub-Master Bms + 7 Battery Modules
Sub-Master BMS to hide it. The power cable and com cable can go through the back-sheet of Battery #5 to hide the cables for better cables management. Battery #4 Battery #5 Cross Cables Management Wattsonic AIO ESS | USER MANUAL... -
Page 38: Inverter+Sub-Master Bms + 8 Battery Modules
Sub-Master BMS to hide it. The power cable and com cable can go through the back-sheet of Battery #5 to hide the cables for better cables management. Battery #4 Battery #5 Cross Cables Management Wattsonic AIO ESS | USER MANUAL... -
Page 39: (Stackable) Battery Cables Connection
Battery #4 1800mm) to make power cable to packed together with Sub-Master plug in B+ in the bottom battery to BMS to last batteries open COM Sub Master BMS Battery Input+ port. Wattsonic AIO ESS | USER MANUAL... -
Page 40: Battery System Pe Connection
Battery Input Communication Cable connection Battery com Please customize the COM cable(RJ45) in inverter accessory box according to below Rj45 pin definition at Battery side. CAN-H CAN-H CAN-L CAN-L Sub-Master BMS 6-12KW Inverter BMS Wattsonic AIO ESS | USER MANUAL... -
Page 41: Inverter Cables Connection
Attention: Do not use other brands or other types of PV terminals other than the PV terminal in the accessory package. Wattsonic has the right to refuse all damages caused by the mixed-use of terminals. - Page 42 2) Fix the grounding terminal to the PE wire with a proper tool and lock the grounding terminal to the grounding hole in the lower right side of the inverter. Wattsonic AIO ESS | USER MANUAL...
- Page 43 6) Use an open-end wrench to screw the nut to the end to ensure that the terminal is Open-e nd Wren ch well sealed. Wattsonic AIO ESS | USER MANUAL...
- Page 44 3) Use a flathead screwdriver to open the clamping bracket in the connector. 4) Insert the stripped DC cable to the battery connector deep enough and toggle the clamping bracket to make sure it tightly locked with the stripped cable. Wattsonic AIO ESS | USER MANUAL...
- Page 45 2) Before making the connection of AC cable, please confirm all DC & AC power when making AC output connection. source are disconnected from the inverter. 3) The Wattsonic WTS 6~12kW series three-phase high voltage hybrid inverter applies to the three-phase power grid with a voltage of 230/400V and a frequency of 50/60Hz.
- Page 46 BACK-UP Caution: Please distinguish the on-grid and back-up port, and don’t mix up the on-grid port and back-up port when making the connection. 6) Lock the AC connector cover to the inverter with screws. Wattsonic AIO ESS | USER MANUAL...
- Page 47 Note: The rated current of CT in the inverter accessory box is 80A, and the maximum allowed inserted cable diameter is 16mm. If the max current through the CT exceeds the rated current or the cable diameter wider than 16mm, please contact Wattsonic for help.
-
Page 48: Communication Connection
100M. Insert the RJ45 heads into the meter RS485 port. METER RS485 Wattsonic AIO ESS | USER MANUAL... - Page 49 Communication between inverter and Note: Before purchasing the battery, you have to make sure the battery you selected is in the battery approval list of Wattsonic, otherwise, the system may not work battery properly. Please contact your installer or Wattsonic service team for confirmation if The communication between meter and you’re not sure about it.
- Page 50 DRM4/8 DRM3/7 DRM 2/6 DRM1/5 One key to shut off Wattsonic WTS kW hybrid inverter comes standard with one key to shut off function, and you can use this function by connecting Switch an external switch into the DRED interface if it requires in the installation place.
-
Page 51: Monitoring Device Installation
Monitoring Device Installation Wattsonic WTS 6~12kW series hybrid inverter can be monitored through either WiFi or LAN, and you can alternatively select according to your preference. Plug the WiFi or LAN module into the WiFi/GPRS port in the bottom of inverter by following the direction the side with indicator is up. -
Page 52: System Start And Stop
Wait for 5 minutes until the inverter is completely de-energized before operating. 5) Disconnect the AC and DC cables. Stop Battery Turn off the DC Switch on the Sub-Master BMS. Wattsonic AIO ESS | USER MANUAL... -
Page 53: General Operation
SN/FM Error Setting Setting Setting Version Message Power Feed in Export Battery_ID WorkMode CT Ratio Factor Grid Limit Setting Setting Setting Setting Setting Setting Language Modbus Time Set Re-Connect Addr Setting Setting Setting Setting Wattsonic AIO ESS | USER MANUAL... - Page 54 Charg. E. Charg. Discharg. S. Discharg. E. Freq time time P.Limit time time Setting Setting Setting Setting Setting Setting Password System Unbalan. Discharg. P. Maint. Out put Limit Restart Stop Setting Setting Setting Startup Wattsonic AIO ESS | USER MANUAL...
- Page 55 Set the percentage of the power that is allowed to feed to the grid Re-Conect Fault Reconnection Time CT Ratio Current Transformer Ratio Setting Modbus Addr Modbus Address Setting Battery_ID Set Set Battery Model System Maint. System maintenance, includes inverter stop and run, system restart Wattsonic AIO ESS | USER MANUAL...
-
Page 56: Auto-Test
CEI 0-21. Monitoring and Configuration Wattsonic inverter provides a monitoring port that can collect data from the inverter and transmit it to monitoring website via an external monitoring data collector WiFi or LAN module. Please check the WiFi user manual for more details. -
Page 57: Troubleshooting
Troubleshooting Fault Messages Wattsonic WTS 6~12kW series three-phase hybrid inverter is designed in accordance with grid operation standard, and conform to the requirements of the safety and EMC. The inverter had passed a series of rigorous tests to ensure it runs sustainably and reliably before shipment. - Page 58 2. Seek for help from the installer or manufacture. 1. Check the Meter wiring. Meter Comm Fault 2. Check whether the Meter is normal. 1. Restart the inverter. Bettery Fault 2. Seek for help from the installer or manufacture. Wattsonic AIO ESS | USER MANUAL...
-
Page 59: Maintenance
Attention: As the inverter contains no component parts that can be maintained, never arbitrarily replace any internal components. Attention: For any maintenance need, please contact us. Otherwise, Wattsonic shall not be held liable for any damage caused. Note: Servicing of the device in accordance with the manual should never be undertaken in the absence of proper tools, test equipment or the latest revision of the manual which has been clearly and thoroughly understood. - Page 60 WATTSONIC SERVICE GLOBAL CONTACT WATTSONIC CHINA B1-416, NO. 200 Linghu Road,Xinwu District, Wuxi 214110, CHINA T.+86 510 8102 6876 E.service@wattsonic.com Wattsonic AIO ESS | USER MANUAL...
Need help?
Do you have a question about the WTS-6KW-3P and is the answer not in the manual?
Questions and answers