Table of Contents
Advertisement
Quick Links
Please read and follow the installation and operation instructions carefully, to ensure
the long life and reliable operation of this appliance.
CONTENTS
Important Safety Instructions---------------------------------------------------------------------------page 2
Product Features --------------------------------------------------------------------------------------------page 3
Electrical Diagram ------------------------------------------------------------------------------------------page 4
Technical Data -----------------------------------------------------------------------------------------------page 5
Product Inner Structure------------------------------------------------------------------------------------page 5
Installation Guideline --------------------------------------------------------------------------------------page 6
Installation Method---------------------------------------------------------------------------------------- page 6
Operation Instructions-------------------------------------------------------------------------------------page 11
Trouble-Shooting---------------------------------------------------------------------------------------------page 12
Packing List ----------------------------------------------------------------------------------------------------page 13
Supplied by: Hitchon International Ltd
- 1 -
Advertisement
Table of Contents

Summary of Contents for Hitchon International XFJ60FDCH
-
Page 1: Table Of Contents
Product Features --------------------------------------------------------------------------------------------page 3 Electrical Diagram ------------------------------------------------------------------------------------------page 4 Technical Data -----------------------------------------------------------------------------------------------page 5 Product Inner Structure------------------------------------------------------------------------------------page 5 Installation Guideline --------------------------------------------------------------------------------------page 6 Installation Method---------------------------------------------------------------------------------------- page 6 Operation Instructions-------------------------------------------------------------------------------------page 11 Trouble-Shooting---------------------------------------------------------------------------------------------page 12 Packing List ----------------------------------------------------------------------------------------------------page 13 Supplied by: Hitchon International Ltd - 1 -... -
Page 2: Important Safety Instructions
Attention! This is not a do-it-yourself project. Failure to have this appliance installed by a licensed plumber and electrician will void all warranties. Under no circumstances should you attempt to install, repair or disassemble the electric instantaneous water heater without first shutting off all power to the unit directly at the circuit breaker box. -
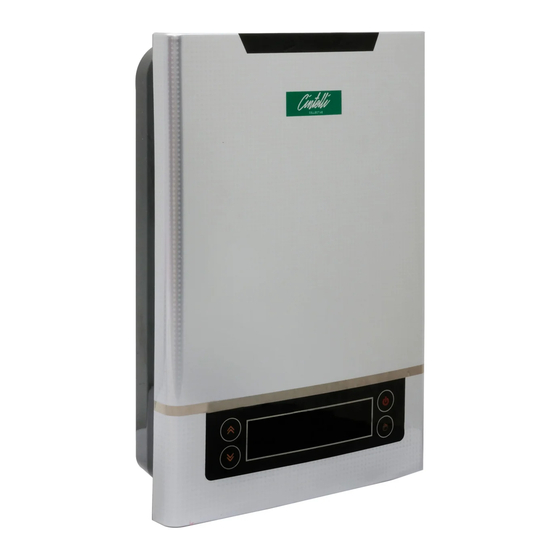
Page 3: Product Features
Automatic memory function avoid repeated operation. 7. Dry-heating thermal cut-off. When the heating temperature is over 90℃, the power will be cut off. 8. Micro-computer automatic electricity and water consumption calculating function. ■ Electrical Diagram XFJ60FDCH, XFJ70FDCH - 3 -... -
Page 4: Technical Data
XFJ100FDCH, XFJ120FDCH ■ Technical Data Model XFJ60FDCH XFJ70FDCH XFJ100FDCH XFJ120FDCH Rated Voltage 220V-240V Rated Power 6.5kw 7.5kw 11kw Rated Current 28.3A 32.7A 39.2A 47.9A Rated Pressure 0.6Mpa Efficiency t=25C 3.7L/min 4.3L/min 5.1L/min 6.3L/min Safety class IP25 Temp. setting arrange 30°C-55°C Overheat protection 67°C... -
Page 5: Product Inner Structure
■Product Inner Structure ■Installation Guideline The installation must be in compliance with the National Electrical Code, your local electrical and plumbing codes. - Product must be installed and disconnection must be incorporated in the fixed wiring in accordance with the wiring rules AS/NZS 3000 1. -
Page 6: Installation Method
7. Mount the unit onto a flat section of wall, well away from any potential splashes of water or spray. 8. Position the unit upright with all plumbing connections at the bottom of the unit. ■ Installation Method ●Mounting on The Wall 1. - Page 7 Fig 3 Remove the bracket from the appliance. Fig 4 Hold the back bracket hanger in position against the wall and mark the three mounting holes. Drill three holes of 6.00mm diameter, the distance between every two holes is 100mm. (Put plastic anchor in the hole, fix the bracket on the wall and secure the hanger using the screws supplied or an appropriate alternative method) - 7 -...
- Page 8 Fig 5 Uninstall screws on appliance to remove the front cover, Please use hand to pull out the screen row line plug carefully before removing the front cover. Fig 6 Fix the appliance to the bracket which was nailed to the wall, make sure the unit bracket onto the back metal hanger correctly - 8 -...
- Page 9 Fig 7 Connect the cable to the terminal blocks, please notice the guidance logo below the terminal blocks. Fig 8 Fix the front cover on appliance, before that, please plug in the screen row line plug. Then nail the screws to fix the front cover.
-
Page 10: Operation Instructions
Fig 9 Connect the water pipe to the water inlet and water outlet connections, please remember to install the rubber seal ring. If the appliance is equipped with a cable, it is no need to uninstall the case during the installation. -
Page 11: Trouble-Shooting
temperature. 5. Touch to adjust the outlet temperature. Outlet water temperature can be setting directly on the heater. The actual outlet temperature will reach the setting temperature and outlet temperature be constant. If the unit has been paused, you may initially get a short burst of very hot water while you turn on again. Please run the water through for a few seconds to let the temperature settle down. -
Page 12: Packing List
■ Normal Maintenance Note: Do not attempt to repair this water heater yourself, call a service person for assistance. Always turn off the power supply before servicing your unit It is not required any regular maintenance. However, to ensure consistent water flow, the following maintenance is recommended.
Need help?
Do you have a question about the XFJ60FDCH and is the answer not in the manual?
Questions and answers