Table of Contents
Advertisement
Available languages
Available languages
Quick Links
Advertisement
Chapters
Table of Contents

Summary of Contents for deviceSTYLE Brunopasso PD-1
- Page 1 INSTRUCTION MANUAL POD ESPRESSO MACHINE PD-1/ PD-1PLUS...
-
Page 2: Introduction
Introduction This product has been designed so that coffee pods can be used for easy preparation of espresso or cappuccino coffee with simple operation. Please read this manual carefully before use and handle the machine correctly. This manual applies for the PD-1 as well as for the PD-1PLUS. Accessories The following accessories are enclosed with this product. -
Page 3: Table Of Contents
Introduction (continued) Cautions for use Important ● Always fill fresh water into the water tank. ● Never raise the lever during extraction. Never fill in hot water or milk, coffee, alcohol, juice, Hot water or steam may spray out, which is very or other liquids than water, as this can cause defects. -
Page 4: Names
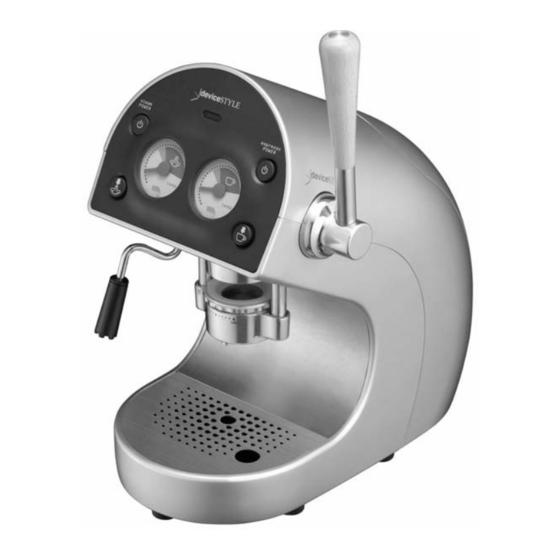
Names Pod tray set* * Parts marked with an asterisk can be removed. Steam nozzle* [Pod tray set] [Float] [Steam nozzle] Float* Water level warning indication Tank cover steam POWER button [Pod tray set] Steam thermometer Pod filter Steam ON indicator Pod filters can be purchased as expendable supplies. -
Page 5: Before First Use
Do not yet switch on the power for the Before first use operations on this page. Before first use, adjust the height of the pod holder and clean the inside. Wash the pod tray set and the outer steam nozzle with water. Wipe the pod holder thoroughly with a moist cloth or similar. - Page 6 Switch on the power for the operations Before first use (continued) shown on this page. Pass hot water through the espresso extraction opening and clean it. ① ① Press the “push release” (Tank open) button to open the tank cover. ②...
- Page 7 Before first use (continued) ⑦ ⑦ Press the espresso POWER button. espresso Perform the following operation POWER Please be careful, as the after the temperature indication top of the body becomes of the espresso thermometer is hot during operation. in the green range and the needle has stopped rising.
-
Page 8: Preparing Espresso Coffee
Preparing espresso coffee In case of operation directly after the procedures of pages 5 to 7, you can check the water level in the tank and skip the operations of pages 8 and 9 (passing hot water). Fill water into the water tank. ①... - Page 9 Preparing espresso coffee (continued) First, warm the cup (no coffee pod is used for this operation). Tips ① Lower the handle to the horizontal Perform the operation without position and set a cup. ① setting a coffee pod. 1) Push the handle securely all the way down. 1) ...
- Page 10 Preparing espresso coffee (continued) There are coffee pods for espresso (30 cc) and for regular coffee (100 cc). Use the correct pod for the intended use, as they have been produced especially for this use. Preparing a cup of espresso ① Set a coffee pod onto the pod tray set. ① Set the coffee pod horizontally and with the tab to the front. Take care to prevent burns! Coffee pod Pod tray set The parts around the pot holder become hot.
- Page 11 Preparing espresso coffee (continued) Remove the cup after extraction has been completed. 2) 1) Remove the cup to the tray cover and discard the hot water. 2) Raise the handle all the way. 1) ● For safety reasons, always operate the handle after the cup has been removed.
-
Page 12: Making Milk Foam
Making milk foam Making milk foam Tips ① Press the steam POWER button. ① First, fill the tank with water steam Perform the following operation POWER and connect the power cable after the temperature indication according to the procedure of the steam thermometer is in on page 8. -
Page 13: How To Make Good Milk Foam
How to make good milk foam Once you know a few tricks, you can make rich milk foam with much air in it. Preparations 1. Use cold milk from a refrigerator and with a fat content of 3.6 % or more. Milk will not foam well when it is not cold. -
Page 14: Replacement Of The Water Softening Resin Filter
Replacement of the water softening resin filter The water softening resin filter of the water tank can be used for approximately 2 months. Please replace it periodically as its water softening ability decreases with use over a long time. ① Remove the filter (water softening resin fil- ter) from the water tank. -
Page 15: Servicing After Use
Servicing after use After every use, check the water in the water tray and discard it, clean the water tray and the steam nozzle, and wash all parts which can be washed. Emptying and cleaning the water tray Emptying the water tank As water can freeze and damage the product When water accumulates in the water tray, the when the temperature is low, empty the tank... -
Page 16: Descaling
Descaling This product is equipped with a water softening filter for removal of minerals etc. from hard water, but minerals gradually may accumulate on the inside with use over a long time. Accumulation of scale in the water passages can cause clogging and trouble. Periodically per- form descaling at the time of filter replacement etc. - Page 17 Descaling (continued) ⑥ Insert the plug of the power cable into ⑥ a wall outlet, then press the espresso Tips POWER button. espresso POWER Perform the operation without Perform the following operation setting a coffee pod. after the temperature indication of the espresso thermometer is in the green range and the needle has stopped rising.
-
Page 18: Cleaning Of Float Part And Filter Tray Set
Descaling (continued) Replace the solution by fresh water to remove the citric acid. ① ① Replace the citric acid solution by fresh water and repeat steps 1 and 2 on pages 16 to 17 to thoroughly remove any citric acid. Fresh water Tips... -
Page 19: Troubleshooting
Troubleshooting If the product does not work, if espresso cannot be made, milk foaming is not possible, etc., please check according to the following table. Symptom Cause ● The power cord is disconnected. No power ● The height of the pod holder is low (the handle is loose). Espresso seeps from the pod →... -
Page 20: Specifications
Specifications Espresso extraction method Pump method, 15 atmospheres Steam generation method Pump method, 2.5 atmospheres Length of power cord 1.5 m Dimensions (W) 217 x (H) 417 x (D) 354 (mm) Weight (net) 7.7 kg Power source 220V - 240V AC, 50 Hz Power consumption 1473 W 657 W (espresso extraction) /816 W (steam generation) - Page 21 ISTRUZIONI PER L’USO MACCHINA ESPRESSO PER CIALDE PD-1/ PD-1PLUS...
-
Page 22: Introduzione
Introduzione Vi ringraziamo per aver scelto questa macchina per il caffè Pod Espresso Machine. Questo prodotto è costruito per l'utilizzo di cialde di caffè per espresso e per preparare il cappuccino in modo semplice per l'utente. Al fine di un corretto uso della macchina, leggere interamente questo manuale prima del suo utilizzo. -
Page 23: Precauzioni Per L'uso
Introduzione (continua) Precauzioni per l'uso Importante ● Riempire il serbatoio dell'acqua solo con acqua ● Non sollevare mai la leva durante l'uso. Questo fresca. potrebbe provocare la fuoriuscita di acqua bollente Non mettervi mai acqua o latte caldi, caffè, alcool, o vapore, che sono molto pericolosi. -
Page 24: Nome Delle Varie Parti
Nome delle varie parti Gruppo del vassoio porta cialda* * Le parti contrassegnate con un asterisco possono venire Ugello del vapore* rimosse. [Galleggiante] [Ugello del vapore] [Gruppo del vassoio porta cialda] Galleggiante* Indicazione di avvertenza del livello dell'acqua Coperchio del serbatoio Pulsante "steam POWER"... -
Page 25: Prima Del Primo Uso
Non accendere mai la macchina prima di fare le operazioni Prima del primo uso descritte in questa pagina. Prima del primo uso, regolare l'altezza del contenitore dei chicchi e pulirne l'interno. 1 Lavare il gruppo del vassoio per la cialda e la guaina dell'ugello del vapore con acqua. - Page 26 Prima di procedere con le operazioni viste in questa pagina, Prima del primo uso (continua) accendere la macchina. Far scorrere acqua calda attraverso l'ugello di estrazione del caffè espresso per pulirlo. ① ① Premere il “push release“ (apertura del serbatoio) per fare aprire il coperchio del serbatoio.
- Page 27 Prima del primo uso (continua) ⑦ ⑦ Premere il pulsante "espresso P O W E R " d e l c a f f è espresso POWER F a r e a t t e n z i o n e espresso.
-
Page 28: Preparazione Di Caffè Espresso
Preparazione di caffè espresso Nel caso si operi subito dopo aver eseguito le procedure delle pagine dalla 5 alla 7, si può controllare il livello dell'acqua nel serbatoio e saltare le operazioni delle pagine 8 e 9 (passaggio dell'acqua calda). Riempire di acqua il serbatoio dell'acqua. - Page 29 Preparazione di caffè espresso (continua) Per prima cosa riscaldare la tazzina (senza usare per questo Suggerimento una cialda di caffè). Eseguire quest'operazione ① Abbassare la leva in posizione ① senza caricare una cialda di orizzontale e mettere in posizione una 1) ...
- Page 30 Preparazione di caffè espresso (continua) Sono in commercio cialde di caffè per espresso (30 cc) e per caffè all'americana (100 cc). Usare la cialda adatta all'uso che se ne intende fare, dato che altrimenti non si otterrebbero i risultati desiderati. Preparazione di una tazzina di caffè ① Caricare una cialda di caffè. ① Posizionare la cialda del caffè orizzontalmente con la linguetta rivolta in avanti. Fare attenzione a non ustionarsi! Coffee pod Pod tray set...
- Page 31 Preparazione di caffè espresso (continua) Togliere la tazzina una volta che l'estrazione è terminata. 2) 1) Togliere la tazzina dalla base della macchina. 2) Sollevare del tutto la leva. 1) ● Per motivi di sicurezza, azionare la leva sempre dopo aver tolto la tazzina.
-
Page 32: Per Fare Schiuma Col Latte
Per montare il latte Montare il latte Suggerimento ① Premere il pulsante "steam POWER" ① Per prima cosa riempire il del vapore. steam POWER serbatoio con acqua e collegare Eseguire la seguente operazione il cavo di alimentazione come dopo che l'indicazione della visto a pagina 8. -
Page 33: Come Fare Buona Schiuma Col Latte
Come montare bene il latte Sapendo qualche semplice trucco, ottenere una crema densa e ricca col latte non è difficile. Preparativi 1. Usare latte freddo preso direttamente dal frigorifero e con un contenuto grasso almeno del 3,6%. Il latte non produce crema se non è freddo. 2. -
Page 34: Sostituzione Del Filtro In Resina Di Ammorbidimento Dell'acqua
Sostituzione del filtro in resina di ammorbidimento dell'acqua Il filtro in resina di ammorbidimento dell'acqua va sostituito circa ogni 4 mesi di uso regolare. Sostituirlo periodicamente, dato che la sua capacità di ammorbidire l'acqua diminuisce progressivamente col tempo. ① Rimuovere il filtro (filtro in resina di ammorbidimento dell'acqua) dal serbatoio dell'acqua. -
Page 35: Manutenzione Dopo Ciascun Uso
Manutenzione dopo ciascun uso Dopo ciascun uso, controllare ed eventualmente gettare l'acqua nel vassoio dell'acqua, pulire il vassoio dell'acqua e l'ugello del vapore, quindi lavare tutte le parti lavabili. Svuotamento e pulizia del vassoio Svuotamento del vassoio dell'acqua Dato che a temperature basse l'acqua può dell'acqua congelare e danneggiare il prodotto, si consiglia di svuotare il serbatoio dopo ogni uso... -
Page 36: Eliminazione Delle Incrostazioni
Eliminazione delle incrostazioni Questo prodotto incorpora un filtro di ammorbidimento dell'acqua che ne rimuove parzialmente i minerali, ma questi col tempo si accumulano ugualmente lungo i condotti dell'acqua, causando se non eliminati intasamenti e guasti. La macchina va quindi liberata dalle incrostazioni al momento di sostituzione del filtro o ad altra scadenza opportuna. - Page 37 Eliminazione delle incrostazioni (continua) ⑥ Inserire la spina di alimentazione in ⑥ una presa a muro, premere il pulsante Suggerimento "espresso POWER" del caffè espresso. espresso Eseguire quest'operazione POWER Eseguire la seguente operazione senza caricare una cialda di dopo che l'indicazione della caffè.
-
Page 38: Pulizia Del Gruppo Del Galleggiante E Del Gruppo Del Vassoio Porta Cialda
Eliminazione delle incrostazioni (continua) Sostituire acqua semplice alla ① soluzione per rimuovere l'acido citrico. ① Sostituire acqua semplice alla soluzione per rimuovere ogni traccia di acido citrico e ripetere le fasi 1 e 2 Acqua viste alle pagine 16 e 17 per togliere fresca ogni residuo di acido citrico. -
Page 39: Diagnostica
Diagnostica Se il prodotto non funziona, se il caffè espresso non riesce, se non si riesce a produrre crema, ecc., consultare la sezione che segue. Problema Causa ● Il cavo di alimentazione è scollegato. Manca la corrente. ● L'altezza del porta cialda è insufficiente (la leva non è del tutto tirata). Il caffè... -
Page 40: Caratteristiche Tecniche
Caratteristiche tecniche Metodo di estrazione del caffè espresso 15 atmosfere Metodo a pompa Metodo di generazione del vapore Metodo a pompa, 2,5 atmosfere Lunghezza del cavo di alimentazione 1,5 m Dimensioni (L) 217 x (A) 417 x (P) 354 (mm) Peso (netto) 7,7 kg Alimentazione...
Need help?
Do you have a question about the Brunopasso PD-1 and is the answer not in the manual?
Questions and answers