
Summary of Contents for Torq Fusion GT Series
- Page 1 GT SERIES USER MANUAL GT200PSS GT500PSS GT800PSS GT1300PSS GT2600PSS PNEUMATIC TORQUE WRENCH ®...
- Page 2 ® © USER MANUAL: GT SERIES 2 OF 40 WWW.TORQFUSION.COM REV 1411...
-
Page 3: Introduction
© USER MANUAL: GT SERIES INTRODUCTION Thank you for choosing TORQ Fusion as your torque tool manufacturer. We understand that our customers have many options when selecting their equipment and we truly appreciate the opportunity to serve your bolting needs. -
Page 4: Table Of Contents
® © USER MANUAL: GT SERIES TABLE OF CONTENTS INTRODUCTION .....................3 TABLE OF CONTENTS ....................4 SAFETY........................6 PPE – (Personal Protective Equipment)...............6 WARRANTY......................7 INSTALLATION ......................8 ABOUT THE TOOL ....................9 ABOUT THE FRL.....................11 STANDARD MODEL.......................11 inteliTORQ™ MODEL ....................13 OPERATING INSTRUCTIONS................14 REMOVING AND INSTALLING THE TOOL EXTENSION..........15 REMOVING AND INSTALLING THE REACTION ARM ..........15... - Page 5 ® © USER MANUAL: GT SERIES TOOL SPECIFICATION ..................32 PARTS & ACCESSORIES ..................32 PARTS & ACCESSORIES ..................33 DIMENSIONS ......................33 GT200PSS........................33 GT500PSS........................34 GT800PSS........................34 GT1300PSS........................35 GT2600PSS........................35 FRL – Standard and inteliTORQ™................36 TABLE OF FIGURES....................37 5 OF 40 WWW.TORQFUSION.COM REV 1411...
-
Page 6: Safety
Never disassemble or modify any portions of the tool or the FRL supplied by TORQ Fusion – doing so may result in personal injury and the product warranty to become void. Never strike or force... -
Page 7: Warranty
© USER MANUAL: GT SERIES WARRANTY TORQ Fusion LLC is proud to offer a one year limited warranty for your torque wrench and FRL assembly. We are confident in and stand behind all of the products we manufacture and sell. -
Page 8: Installation
FRL. Teflon tape must be used on the ½” MNPT fitting prior to installing it to the FRL – TORQ Fusion does not recommend the use of any other type of thread sealer. Proper torque for that size fitting must be applied (50-60 ft-lbs [68-81 N-m] is common practice). -
Page 9: About The Tool
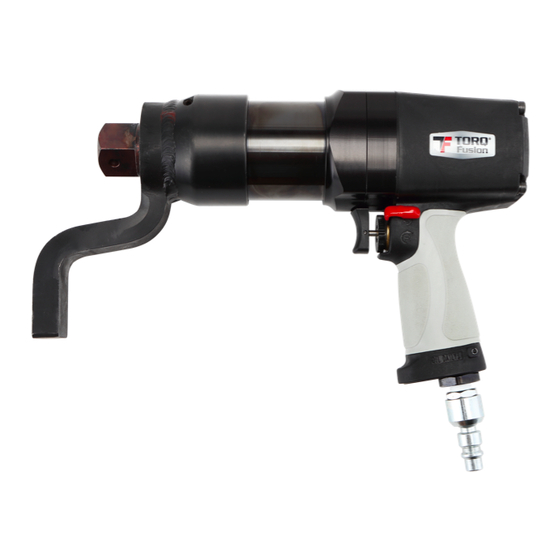
© USER MANUAL: GT SERIES ABOUT THE TOOL The GT series tool is a single speed pneumatic torque wrench designed to output continuous torque. The tool is based on a multi- vane pneumatic motor driving a high reduction multi-stage planetary gearbox. -
Page 10: Figure 2 - Rear View Of Tool
® © USER MANUAL: GT SERIES Serial number label Direction lever Cushioned grip Figure 2 - REAR VIEW OF TOOL 10 OF 40 WWW.TORQFUSION.COM REV 1411... -
Page 11: About The Frl
It is recommended that our tools only be operated with the FRL units supplied by TORQ Fusion and the serial number printed on the torque chart of the FRL matches the serial number printed on the back of the tool. -
Page 12: Figure 4 - Back View Of Frl
® © USER MANUAL: GT SERIES Tool Swivel fitting storage Air Hose Hose storage Rubber feet Figure 4 - BACK VIEW OF FRL Lubricator Filter Regulator Figure 5 - BOTTOM VIEW OF FRL 12 OF 40 WWW.TORQFUSION.COM REV 1411... -
Page 13: Intelitorq™ Model
© USER MANUAL: GT SERIES inteliTORQ™ MODEL TORQ Fusion also offers a more technologically advanced FRL designed to significantly reduce uncertainty and the possibility of human error. This model has all the features of our standard FRL plus the ability of converting pressure into torque for your specific tool and displaying the torque values directly. -
Page 14: Operating Instructions
® © USER MANUAL: GT SERIES OPERATING INSTRUCTIONS Before starting completely read this manual and ensuring all steps are understood. Any additional questions may be answered by contacting your sales representative factory info@torqfusion.com Ensure that the serial number on the back of the tool (see Figure 2) matches the serial number on torque chart located on the Standard FRL (see Figure 3) or on the display of the inteliTORQ™... -
Page 15: Removing And Installing The Tool Extension
® © USER MANUAL: GT SERIES REMOVING AND INSTALLING THE TOOL EXTENSION Your tool may be equipped with an optional extension depending on your application. The tool extension may be easily removed and re-installed for increased tool versatility. It can be installed in one of 8 positions on the spline of the gearbox housing. -
Page 16: Figure 9 - Reaction Arm Installation
® © USER MANUAL: GT SERIES The reaction arm may be installed in one of 8 positions on the spline of the gearbox housing. To install, remove the set-screw located on the reaction arm using a 1/8” hex wrench. Slide out the retaining pin –... -
Page 17: Removing And Installing The Output Drive
® © USER MANUAL: GT SERIES REMOVING AND INSTALLING THE OUTPUT DRIVE The output drive (square drive) of the torque wrench is designed to be field replaceable by the operator. Some of the reasons for changing the output drive could be changing the square drive size, replacing a broken output drive or replacing the standard output drive with a custom output drive. -
Page 18: Removing And Installing The 2600 Reaction Attachment
® © USER MANUAL: GT SERIES REMOVING AND INSTALLING THE 2600 REACTION ATTACHMENT If you have purchased a GT2600PSS you will be happy to know that it can be used as both a 2600 ft-lb and 800 ft-lb tool. To switch between modes the 2600 reaction attachment will need to be removed or installed. -
Page 19: Installing The Impact Socket
® © USER MANUAL: GT SERIES INSTALLING THE IMPACT SOCKET Only impact sockets must be used with your torque tool. They must be properly installed with locking pins and retainer ring. The output drive of your tool may be ¾”, 1” or 1-1/2” depending on how the tool was ordered or what additional accessories were purchased with it. -
Page 20: Standard Frl - Determining The Set Pressure
USER MANUAL: GT SERIES STANDARD FRL - DETERMINING THE SET PRESSURE The GT series tool is capable of operating under a wide range of pressures, not exceeding the maximum pressure listed on the torque chart. The toque output of the tool will increase as the pressure on the FRL is set to higher values. -
Page 21: Standard Frl - Linear Interpolation
® © USER MANUAL: GT SERIES STANDARD FRL - LINEAR INTERPOLATION Intermediate (interpolated) values may be calculated using linear interpolation in order to maintain a high level of accuracy for your tool. Example: To set the tool to 650 ft-lbs when that value is not listed... -
Page 22: Standard Frl - Adjusting The Set Pressure
® © USER MANUAL: GT SERIES STANDARD FRL - ADJUSTING THE SET PRESSURE Once the appropriate set pressure has been determined from the torque chart and/or by using the information in the previous sections, power on the pressure gauge and turn the air pressure adjustment knob (see Figure 12) until the set pressure is achieved. -
Page 23: Intelitorq™ Frl - Adjusting The Set Pressure
® © USER MANUAL: GT SERIES inteliTORQ™ FRL – ADJUSTING THE SET PRESSURE Power on the FRL by pressing either of the two buttons. Check the model number and serial number on the back of the tool you are using and ensure it is displayed on the lower row of the FRL display. -
Page 24: Intelitorq™ Frl - Changing The Active Tool
The intiTORQ™ FRL is capable of working with up to 4 different tools and the “LINE PRESSURE” mode which simply displays the set pressure. If you just purchased a new GT series tool and intend to use it with the inteliTORQ™ FRL, you must first add it to the FRL. The GT series tools contain a RFID chip in the serial number label with the tool’s torque chart;... -
Page 25: Tightening
® © USER MANUAL: GT SERIES TIGHTENING Once the reaction arm and appropriate size impact socket have been installed and the correct pressure/torque for your application has been set, you are ready to tighten your fastener. Depending on your application, you may be required to use lubrication on the nut being tightened and a backup wrench on the nut on the opposite end of the stud –... -
Page 26: Loosening
® © USER MANUAL: GT SERIES LOOSENING When loosening a fastener it is generally safe to use the maximum available torque. To do so power on the FRL and adjust it the maximum allowed setting (see “ADJUSTING THE SET PRESSURE”... -
Page 27: Best Practices
® © USER MANUAL: GT SERIES BEST PRACTICES Several steps should be taken when using the torque tool to maintain maximum torque accuracy: 1. If tool has not been used for a period of time, disconnect the FRl hose from the tool, add a few drops of tool oil (see the “TOOL SPECIFICATION”... -
Page 28: Frl - Cleaning The Filter
® © USER MANUAL: GT SERIES please contact your sales representative or the factory for additional information including cost. FRL - CLEANING THE FILTER The FRL unit contains a filter (see Figure 5) designed to protect the air motor from exposure to water particles or debris from the air line. -
Page 29: Frl - Replacing The Battery
® © USER MANUAL: GT SERIES FRL – REPLACING THE BATTERY Standard FRL: The digital pressure gauge uses a 9V battery which will need to be replaced periodically. The battery drawer is located on the left side of the FRL housing, next to the air inlet connection (see Figure 3). -
Page 30: Tool Calibration
The torque tool is factory calibrated when initially sold, but in order to ensure accurate delivery of torque, a periodic re-calibration is required. TORQ Fusion recommends that the torque tool be calibrated at least once a year. Tools that are used at a higher duty cycle might require calibration every 6 months or at a different interval. -
Page 31: Troubleshooting
® © USER MANUAL: GT SERIES TROUBLESHOOTING If you experience problems while operating the torque tool, please use the chart below prior to contacting your sales representative or the factory. PROBLEM POSSIBLE CAUSE ACTION Air supply not Connect air supply... -
Page 32: Tool Specification
® © USER MANUAL: GT SERIES TOOL SPECIFICATION 32 OF 40 WWW.TORQFUSION.COM REV 1411... -
Page 33: Parts & Accessories
® © USER MANUAL: GT SERIES PARTS & ACCESSORIES Visit WWW.TORQFUSION.COM for more info Standard ¾” Square Drive P/N 001-A-0053 Standard 1” Square Drive P/N 001-A-0054 6” Extension P/N 001-A-0044 12” Extension P/N 001-A-0043 18” Extension P/N 001-A-0038 Standard Reaction Arm... -
Page 34: Gt500Pss
® © USER MANUAL: GT SERIES GT500PSS All dimensions in inches Figure 24 – GT500PSS DIMENSIONS GT800PSS All dimensions in inches Figure 25 - GT800PSS DIMENSIONS 34 OF 40 WWW.TORQFUSION.COM REV 1411... -
Page 35: Gt1300Pss
® © USER MANUAL: GT SERIES GT1300PSS All dimensions in inches Figure 26 - GT1300PSS DIMENSIONS GT2600PSS All dimensions in inches Figure 27 – GT2600PSS DIMENSIONS 35 OF 40 WWW.TORQFUSION.COM REV 1411... -
Page 36: Frl - Standard And Intelitorq
® © USER MANUAL: GT SERIES FRL – Standard and inteliTORQ™ All dimensions in inches Figure 28 - FRL DIMENSIONS 36 OF 40 WWW.TORQFUSION.COM REV 1411... -
Page 37: Table Of Figures
® © USER MANUAL: GT SERIES TABLE OF FIGURES Figure 1 - FRONT VIEW OF TOOL..................9 Figure 2 - REAR VIEW OF TOOL ..................10 Figure 3 - FRONT VIEW OF FRL..................11 Figure 4 - BACK VIEW OF FRL ...................12 Figure 5 - BOTTOM VIEW OF FRL ..................12 Figure 6 - inteliTORQ™... - Page 38 ® © USER MANUAL: GT SERIES TOOL INFORMATION DATE PURCHASED: SERIAL NUMBER: INITIAL CALIBRATION: NEXT CALIBRATION: NEXT CALIBRATION: NEXT CALIBRATION: NEXT CALIBRATION: NEXT CALIBRATION: NEXT CALIBRATION: ASSET NUMBER: OTHER: NOTES: 38 OF 40 WWW.TORQFUSION.COM REV 1411...
- Page 39 ® © USER MANUAL: GT SERIES 39 OF 40 WWW.TORQFUSION.COM REV 1411...
- Page 40 ® © USER MANUAL: GT SERIES User Manual p/n: 001-F-0325 Patents Pending Copyright © 2011-2014 TORQ Fusion LLC 40 OF 40 WWW.TORQFUSION.COM REV 1411...
Need help?
Do you have a question about the GT Series and is the answer not in the manual?
Questions and answers