Table of Contents
Advertisement
Quick Links
Advertisement
Table of Contents

Summary of Contents for FONICA INTERNATIONAL FLAG
- Page 1 FLAG ISODYNAMIC SPEAKERS INSTALLATION AND USE www.fonicainternational.com...
-
Page 2: Technical Specifications
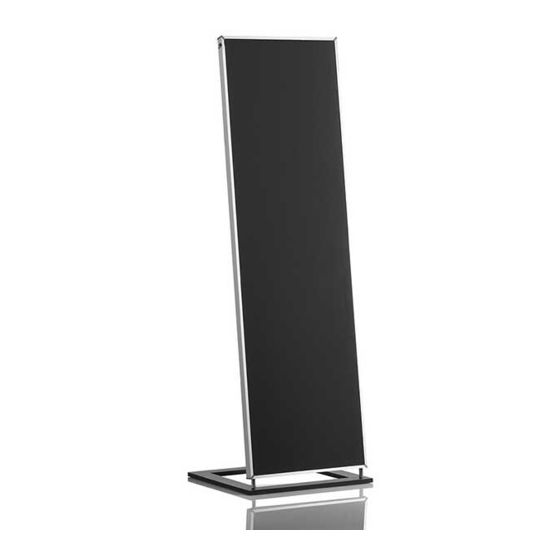
FLAG ISODYNAMIC SPEAKERS 1 / WARNINGS 2 / PACKAGING CONTENTS 3 / ASSEMBLY INSTRUCTIONS 4 / POSITIONING IN THE LISTENING ROOM 5 / SPEAKERS CONNECTIONS 6 / REMOTE CONTROL 7 / LED INDICATORS ON THE BACK PANEL 8 / TECHNICAL SPECIFICATIONS... - Page 3 • To safely proceed with the assembly and installation of the M and L model, we recommend FONICA INTERNATIONAL S.R.O. does not assume responsi- the assistance of a second person. bility for any damage caused to people and/or things due to •...
-
Page 4: Packaging Contents
FLAG ISODYNAMIC SPEAKERS FLAG ISODYNAMIC SPEAKERS 2 / PACKAGING CONTENTS FLAG M/L PASSIVE VERSIONS FLAG S FIGURA N° CONTENT PICTURE N° CONTENT Isodynamic panel Isodynamic panel Base Base M8 screws M8 screws Fixing bars Fixing bars Rubber feet Rubber feet Banana plugs Jumpers with N.4 banana plugs... -
Page 5: Assembly Sequence
FLAG ISODYNAMIC SPEAKERS FLAG ISODYNAMIC SPEAKERS 3 / ASSEMBLY SEQUENCE FLAG M/L ACTIVE VERSIONS CAUTION! For the M and L versions it is necessary the assistance of a second person. CAUTION! During the assembly phase, it is important to avoid touching the part of the speaker covered by the fabric. - Page 6 FLAG ISODYNAMIC SPEAKERS FLAG ISODYNAMIC SPEAKERS STEP 1 STEP 3 Place the packaging containing the isodynamic panel on a flat, clean and wide enough Pull out the planar speaker, holding it by the surface to be able to hold it up safely (as long as the package, at least twice wider than the side corners of the profiles, one person for package).
- Page 7 It must not be turned: the connections must remain on the top. The image represents a passive FLAG M, but the procedure is the same for active FLAG M with analog input, with digital input and for the relative versions of FLAG L.
- Page 8 FLAG ISODYNAMIC SPEAKERS FLAG ISODYNAMIC SPEAKERS STEP 6 Make sure the bend point should be perfectly on top. Also, make sure the bars are anchored to the panel frame by trying to extract them and pull without turning them. If they have not been inserted correctly, they will slip off.
- Page 9 FLAG ISODYNAMIC SPEAKERS FLAG ISODYNAMIC SPEAKERS 4 / POSITIONING IN THE LISTENING ROOM FLAG speakers are set with an angle of inclination which allows them to optimise the listening experience. To better appreciate the sound experience of the planar FLAG, the speakers should be...
-
Page 10: Connection Of The Speakers
FLAG ISODYNAMIC SPEAKERS FLAG ISODYNAMIC SPEAKERS 5 / CONNECTION OF THE SPEAKERS ONLY FOR PASSIVE FLAG M/L VERSIONS You can connect the speaker to an audio amplifier through MONOWIRING, BIWIRING ONLY FOR FLAG S or BIAMPLIFICATION connection (see the picture of connection possibilities). - Page 11 FLAG ISODYNAMIC SPEAKERS FLAG ISODYNAMIC SPEAKERS List of connection methods of passive flag M / L versions according to available cables: single (mono-wiring, with a bipolar cable +/- for each speaker) or double (bi-wiring, with double bipolar cable +/- for each speaker), with stripped cable or with existing banana plug mono-wiring with banana plugs cable, terminations.
- Page 12 FLAG ISODYNAMIC SPEAKERS FLAG ISODYNAMIC SPEAKERS ONLY FOR ACTIVE FLAG M/L VERSIONS DIGITAL INPUT VERSION ANALOG INPUT VERSION 1_ IEC 220V power socket with switch 1_ IEC 220V power socket with switch 2_ 3 poles XLR balanced analog signal input...
- Page 13 FLAG ISODYNAMIC SPEAKERS FLAG ISODYNAMIC SPEAKERS • Connect the power cords to both speakers by using the switch located on the back of each speaker, proceed with the ignition of the right speaker and then by turning on the left one.
- Page 14 FLAG ISODYNAMIC SPEAKERS FLAG ISODYNAMIC SPEAKERS AUDIO SOURCE CONNECTIONS amplifier following the diagram in the figure, then insert the connector into the appropriate space on the speaker. You must do it for both speakers. To connect the provided connector to the cable from the amplifier, unscrew the screws, insert •...
-
Page 15: Remote Control
FLAG ISODYNAMIC SPEAKERS FLAG ISODYNAMIC SPEAKERS 6 / REMOTE CONTROL • Press the XLR key to select the corresponding input • Press the RCA key to select the corresponding input ONLY ANALOG VERSIONS • Press the HI-LEVEL key to select the corresponding input... - Page 16 FLAG ISODYNAMIC SPEAKERS FLAG ISODYNAMIC SPEAKERS 7 / LED INDICATORS ON THE BACK PANEL The active speakers version have a LED in the center, next to the base of the speaker, as indicated on the illustration. It will light up according to the following: •...
- Page 17 FLAG ISODYNAMIC SPEAKERS FLAG ISODYNAMIC SPEAKERS www.fonicainternational.com www.fonicainternational.com...
-
Page 18: Cleaning And Maintenance
FLAG ISODYNAMIC SPEAKERS 8 / CLEANING AND MAINTENANCE • To clean the fabric parts of the speaker, gently stroke with asoft brush, making sure not to press too firmly. • To clean the aluminum parts of the speaker, use a damp soft cloth. - Page 19 FONICA INTERNATIONAL S.R.O. – Via Costanza Cerioli, 65 - 24068 · Seriate (BG) - Italy P.IVA CZ64508587 - info@fonicainternational.com www.fonicainternational.com...
Need help?
Do you have a question about the FLAG and is the answer not in the manual?
Questions and answers