Table of Contents
Advertisement
Quick Links
PURADIGM
User Manual
Introduction
Warnings
Warranty
Diagrams
Installations & Setup
Wall Mounting Setup & Installation
Base Stand Setup & Placement
Placement of Unit
Operations of Unit
Puradigm Technology Cell Replacement
Cleaning & Maintenance
Parts & Accessories
Specifications
© 2014 PURADIGM
®
ZONE
™
1
Advertisement
Table of Contents

Subscribe to Our Youtube Channel
Summary of Contents for PURADIGM ZONE
- Page 1 PURADIGM ® ZONE ™ User Manual Introduction Warnings Warranty Diagrams Installations & Setup Wall Mounting Setup & Installation Base Stand Setup & Placement Placement of Unit Operations of Unit Puradigm Technology Cell Replacement Cleaning & Maintenance Parts & Accessories Specifications © 2014 PURADIGM 1 ...
- Page 2 Introduction ® The PURADIGM ZONE is designed to provide years of troublefree service when it is properly operated and maintained. This guide will help you through the steps to operate your machine. Some parts of the unit will need to be replaced periodically. Replacement parts can be purchased from your authorized distributor or directly from www.PURADIGM.com. ® Thank you for purchasing the PURADIGM ZONE . © 2014 PURADIGM 2 ...
- Page 3 Warnings Use this unit only in a manner intended by the manufacturer. If you have questions, contact the manufacturer. Never insert hands into the unit’s fan motor while it is plugged in or running. Avoid looking directly at the UV lamps in the PURADIGM Technology Cell. Follow all installation instructions. Before servicing or cleaning the unit, unplug from its power source. Replace filter regularly to avoid damaging your unit. © 2014 PURADIGM 3 ...
-
Page 4: Limited Warranty
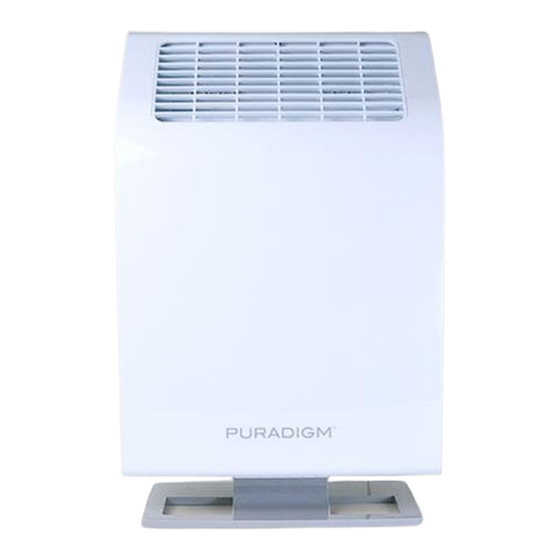
Warranty One Year Limited Warranty LIMITED WARRANTY ® Your PURADIGM ZONE (Product) is warranted to be free from all defects in material and workmanship in normal use for a period of 1 Year from date of purchase. Your PURADIGM Technology Cell’s Warranty is separate from your Product’s 1 Year Warranty. The warranty is granted only to the original purchaser. The warranty is subject to the following provisions: Any damages or malfunctions caused by negligence, abuse, or use not in accordance with the Product Owner’s Manual are not covered by this warranty. Likewise, any defects or damages caused by unauthorized service or the use of other than authorized PURADIGM Parts are not covered. PURADIGM, LLC. will, at its option, repair or replace a defective Product or part(s) for the Product that is/are covered by this warranty. As a matter of warranty policy, PURADIGM, LLC. will not refund the customer’s purchase. CONSUMER INFORMATION PURADIGM, LLC. declines all responsibility for all damages arising from improper use of the unit or in case of tampering with the unit. © 2014 PURADIGM 4 ... - Page 5 Diagrams Front of Unit Back of Unit © 2014 PURADIGM 5 ...
- Page 6 Side of Unit Remote Control © 2014 PURADIGM 6 ...
- Page 7 Installations & Setup ® Begin by finding an open area to place your PURADIGM ZONE . Make sure it is near a power receptacle and is easily accessible for maintenance or cleaning. NOTE: Ensure you remove the cover and then take off the Plastic Wrap that is on the HEPA filter prior to operation. There are (2) options of installation ● Option 1: Wall Mounting ● Option 2: Base Stand © 2014 PURADIGM 7 ...
- Page 8 Wall Mounting Setup & Installation ® The PURADIGM ZONE™ is designed to also be a wall mountable unit. The rear of the unit has 4 mounting screw holes designed for use with a standard VESA 300mm x 300mm wall mounting bracket. VESA wall mounting brackets are widely used for today’s flat screen TV’s and can normally be purchased in numerous locations where electronics and TV’s are sold. Please follow the instructions included with your mounting bracket ® to insure a proper secure mounting for your PURADIGM ZONE™. See the section “Ideal Placement” before choosing the wall mounting location for your PURADIGM ZONE. © 2014 PURADIGM 8 ...
- Page 9 Base Stand Setup & Placement Step One: Place the Base on the Bottom of the PURADIGM ZONE Unit. Step Two: Insert the 4 screws provided into the bottom of the Base. © 2014 PURADIGM 9 ...
- Page 10 Step Three: Ensure the Base is properly secured by standing the unit onto the Base on a level surface. © 2014 PURADIGM 10 ...
-
Page 11: Placement Of Unit
Placement of Unit There are several important factors to consider when selecting a ® location for your PURADIGM ZONE™: ● Make sure the location you choose is as far away from the HVAC air return duct as possible. This will ensure that the ® purification produced by the PURADIGM ZONE™ is optimally circulated. ● Place the unit on top of something such that the unit will be at about half the height of the room. A shelf, a table or a mounting bracket is ideal. ● To ensure the unit works properly, there should be as much open space as possible in front and to the sides of ® your PURADIGM ZONE™ so that it can efficiently process the air in the area. ● Never place an operating unit on the floor. © 2014 PURADIGM 11 ... - Page 12 Operations of Unit Once you have determined a proper location for your unit and calculated the area of the environment: NOTE: Ensure you remove the cover and then take off the Plastic Wrap that is on the HEPA filter prior to operation. PROPER ELECTRICAL GROUNDING IS ESSENTIAL FOR THE FUNCTIONING OF THE UNIT The following is a basic outline of core operations for the ® PURADIGM ZONE™ unit. Step One: Insert the Power Plug into the wall outlet. © 2014 PURADIGM 12 ...
- Page 13 Step Two: Turn the unit on by pressing the power button on the control panel located on the side of the unit or alternatively use the power button on the remote control. Step Three: Adjusting the fan speed. The fan has 4 settings/speeds. Pressing the fan button on the control panel or remote will allow you to cycle through each speed. Increasing the fan speed will provide more purification. Adjust the fan speed according to the contamination and size of the room. © 2014 PURADIGM 13 ...
- Page 14 Refresh Mode. Pressing the Refresh button on the control panel or remote control automatically sets the unit to the highest fan speed for a timed period. Setting 1 will run the Refresh Mode for (30) minutes. Setting 2 will run the Refresh Mode for (1) hour. Setting 3 will run the Refresh Mode for (2) hours. Setting 4 will run the Refresh Mode for (4) hours. Once the Refresh Mode cycle finishes running for the selected time. The unit will reset to the initial mode. © 2014 PURADIGM 14 ...
- Page 15 Puradigm Technology Cell Replacement If you need to replace your PURADIGM Technology Cell (that is no longer under warranty) for any reason you will need to contact your dealer to purchase a new one. If your PURADIGM Technology Cell is having problems and is still under warranty, please contact your Distribution agent for maintenance or replacement options. Unplug your unit before replacing your PURADIGM Technology Cell. Gently remove the Power Cable from your old PURADIGM Technology Cell and plug it into your new one. Once the power cable is installed, place the PURADIGM Technology Cell into its provided space above the fan. The © 2014 PURADIGM 15 ...
- Page 16 PURADIGM Technology Cell should be placed with the warning label facing out to ensure proper airflow through the unit. Install the Cover to secure the PURADIGM Technology Cell in place before plugging your unit in again. © 2014 PURADIGM 16 ...
-
Page 17: Cleaning And Maintenance
Cleaning & Maintenance Unplug your unit from the receptacle before any cleaning or maintenance is done. ® Your PURADIGM ZONE filter should be replaced every 23 months depending on the quality of air in the establishment. To clean your unit, use an Air Duster to first clear any debris inside the machine. If any remains, wipe it down with a damp cloth. Step One: Remove the Cover Plate Step Two: Remove the Screen in front of the Filter © 2014 PURADIGM 17 ... - Page 18 Step Three: Remove the Filter Step Four: Wipe down the inside of unit with soft moist cloth. ® If your PURADIGM ZONE unit has any maintenance problems or requires replacements of parts you will need to contact PURADIGM. © 2014 PURADIGM 18 ...
-
Page 19: Parts And Accessories
Parts & Accessories When talking to your dealer, retailer, or the manufacturer regarding replacement parts, please use the following parts number list below to reference the replacement parts. IMAGE PART NAME SERIAL & PART NUMBER PURADIGM® ZN_IW_TR_1.0 ZONE™ COVER BASE SCREEN FILTER (options) PG1_3H_2752WSPL20 PURADIGM® TECHNOLOGY CELL © 2014 PURADIGM 19 ... -
Page 20: Power Cord
ION NEEDLES POWER CORD © 2014 PURADIGM 20 ... -
Page 21: Specifications
Specifications Product Details SKU: ZNIWTR1.0 Weight (Not including Accessories): 6 kg (13.2 lbs) Electrical Input: 220V 50Hz Dimensions (HxLxD):(without base): 547 x 383 x 166 mm (21.5” x 15.1” x 6.5”) Dimensions (HxLxD):(with base): 601 x 383 x 180 mm (23.7” x 15.1” x 7.1”) Filter Type: HEPA Filter H12 Puradigm Technology Cell SKU: PG1H32752WSPL20 Estimated Area Coverage CADR Rating 153 m3/h (90 cfm) Passive Area Coverage 12.5m2 with 2.4m ceiling (135 sq/ft with an 8 ft ceiling) Active Area Coverage* 163m2 with 2.4m ceiling (1750 sq/ft with an 8 ft ceiling) Warranty: 1 Year Protected Under Patent: US8585979B2 and WO 2012/033818A1 *Based on proper placement of unit, adequate airflow and air circulation in the space and normal contamination levels. © 2014 PURADIGM 21 ... - Page 22 Visit our website for more information www.PURADIGM.com © 2014 PURADIGM 22 ...
Need help?
Do you have a question about the ZONE and is the answer not in the manual?
Questions and answers