Advertisement
Quick Links
Advertisement

Summary of Contents for midimori MDMR-9819
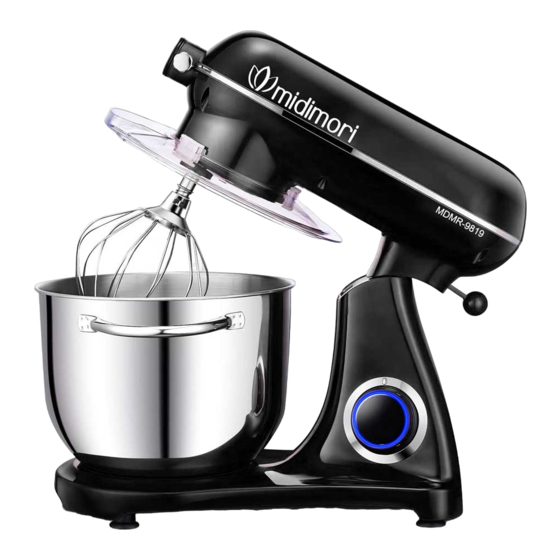
- Page 1 MULTI-FUNCTION KITCHEN MACHINE MDMR-9819 Instruction Manual Joint Stock Company No. 87 Trung Van Street, Trung Van Ward, Nam Tu Liem District, Hanoi. Tell: 024 3993 1800 Keep this manual for future reference and pass it on with the equipment to any future users.
-
Page 2: Technical Data
Technical Data Model: MDMR-9819 Rated voltage: 220-240V~ 50-60Hz Power consumption: 1800W Protection class: I General Safety Instructions Read the operating instructions carefully before putting the appliance into operation and keep the instructions including the warranty, the receipt and, if possible, the box with the internal packing. If you give this device to other people, please also pass on the operating instructions. -
Page 3: Overview Of The Components
Overview of the Components Main Components and Standard Accessories: Output shaft Helix handle metal ball Blade Speed knob Sieve Power Cord 15 Lock Mixing bowl Meat mincer presser Dough hook Filling tray Beater 18 Pusher Whisk 19 Cutter housing Pot cover 20a Coarse shredder 10 Front cover 20b Slicer... - Page 4 Using the Mixing Bowl 1. In order to lift the arm, clockwise rotation the Rise knob (2) . The arm will now move upwards.(FIG1) FIG2 2. Place the pot cover into its body. 3. Place the mixing bowl into its holding device(Step①) and turn the bowl clockwise until it locks into place(Step FIG3...
-
Page 5: Troubleshooting
Adjusting the Levels and Using the Dough Hook for not more than 1.5kg of Mixture Picture Levels Time(Min) Maximum Operation method 1 speed run for 30s, the 2 speed run for 1000g flour and 30s, and then the 3 Dough hook 538g water speed run for 2 min to 3 min to form a cluster. - Page 6 The rise button didn’t springback in ·Check if the pot cover placed on the machine place after installing the mixing bowl properly. and pot cover ·Check if the mixing bowl is properly installed. Meat mincer Function: How to use the mincer To mount the mincer parts, first place the blade(13) on the end of the helix(12) and then a sieve(14) of your choice.
- Page 7 Recommended formulation: Cut solid food into long strips and pass through the cutout.Put the plug in the socket then set the speed control to position 3-5.Then apply the appropriate force above the pressure block to press the food. after continuous operation of 5min, please stop working, do not work continuously for more than 15 minutes. Lest the performance of the machine be affected.
- Page 8 Hollow sausage Function: How to use the Hollow sausage accessories According to the illustration B, which in turn will 14.15.26.27.18 components installed, install the whole machine of ground meat output, and back-up wrench will lock nut and tighten. Method of use is the same as the sausage accessories. Recommended formulation: Streaky pork 1kg, salt16g,sugar70g、maple syrup 85g、white pepper 2g、Garlic powder 7g、Five-spice powder 5g、Cayenne pepper 7g、black pepper15g、potato starch 50g、Yellow rice wine 90g Developed for 1 hour, then...
- Page 9 Recommended formulation: Cut the mixture of flour 1Kg and water 500g dough into strips, and can pass through the feed mouth.Put the plug in the socket then set the speed control to position 3-6.Then apply the appropriate force above the pressure block to press the food.
- Page 10 How to use the Pasta roller PARTS AND FEATURES Pasta Roller Fettuccine Cutter (optional) Spaghetti Cutter (otional) FUNCTION Attachment Speed Noodle width Suggested Uses PASTA ROLLER Up to 140mm See roller settings chart FETTUCCINE CUTTER 6.5mm Egg noddles Fettuccine Spaghetti SPAGHETTI CUTTER Thin fettuccine Linguine fini...
- Page 11 WARNING! When using the pasta roller and the cutters, Do not wear ties, scarves, loose clothing or long necklaces; gather long hair with a clasp. 1. Cut dough into sections that fit in the pasta roller 2. Pull the pasta roller adjustment knob straight out and turn to setting 1. Release the knob, making certain the pin on the pasta roller housing engages the opening on the back of the adjustment knob, allowing the knob to fit flush against the roller housing.
Need help?
Do you have a question about the MDMR-9819 and is the answer not in the manual?
Questions and answers