
Summary of Contents for Gourmate SPM-128CSL
- Page 1 Smart Cooking Machine Item No.:GM-CM-128W Model No.:SPM-128CSL Manual en español disponible en línea: www.mygourmate.com Manuel en français disponible en ligne : www.mygourmate.com...
- Page 2 Thank you for choosing our product! Congratulations on the purchase of your Smart Cooking Machine. It has been designed to help you quickly prepare and cook delicious meals. To make sure you get the most out of this multi-functional Smart Cooking Machine, we recommend you read all the instructions, including the safety warnings, before using the product.
-
Page 3: Table Of Contents
Content 1. Safety Guide ....................5 For Your Safety ....................Signal Words ....................Hazards and Safety Instructions ..............2. Overview ......................13 3. Screen display ....................14 4. Functions overview ..................15 5. Items supplied ....................16 6. Before first use ....................16 7. - Page 4 Content 11. Knead mode ....................31 11.1 Knead mode presets ..................11.2 Starting the kneading process ............... 12. Sauté mode ..................... 32 12.1 Sauté mode preset ..................12.2 Starting the sautéing process ................ 13. Cleaning ......................33 13.1 Cleaning the main unit ..................
-
Page 5: Safety Guide
1. Safety Guide Foreseeable misuse WARNING! Risk of material damage! Do not use the appliance to chop particularly hard food such as bones or • nutmegs. 1.1 For Your Safety Safety is an essential part of every Cooking Machine. However, the product safety of the Cooking Machine can only be ensured if this chapter and the warning notices in the following chapters are followed. - Page 6 Risk of Electric Shock • An incorrectly installed power electrical wall outlet or the power socket may cause an electric shock. Only connect the appliance to an electrical wall outlet installed by a qualified • specialist. • Do not plug the power cord into an electrical outlet if it is wet or if the power socket is wet.
- Page 7 Scalding Risk Serious burns from hot liquids and steam may result from appliance being pulled off a countertop. Do not allow the cord to hang over the edge of the counter when it may be grabbed by children or become entangled with the user. •...
- Page 8 Scalding Risk Steam is generated during cooking, particularly when using the steaming trays and lid. Keep distance to ensure that the steam does not contact you to reduce the risk of burns and scalding from the steam. Keep away from the steam. •...
- Page 9 • Do not connect the main unit to an extension cord. Injury Risk To avoid fire, injury or electrical shock: Only use original accessories and parts; • • Never use non-original attachments, accessories or items; Do not use damaged attachments, accessories or items; •...
- Page 10 • Should an accessory get damaged, stop using it and contact Customer service for a replacement part. Burn Risk When preparing hot food, the mixing bowl and the accessories that are used will also get hot. Hot surfaces can cause burns even after the heating process has ended. •...
- Page 11 • Add water as needed, especially if you have subsequently increased the steaming time. However, do not exceed the maximum capacity, marked MAX. inside the mixing bowl. Damage Risk If the mixing bowl and blade are in contact with water, other liquids or food residues for a long time, they could get damaged.
- Page 12 MODE R E VERSE TURBO SCALE TARE MODE REVERSE TURBO SCALE TARE TIME SPEED TEMP TIME SPEED TEMP STAR T START PAUSE PAUSE 14 13 14 13 EN -...
-
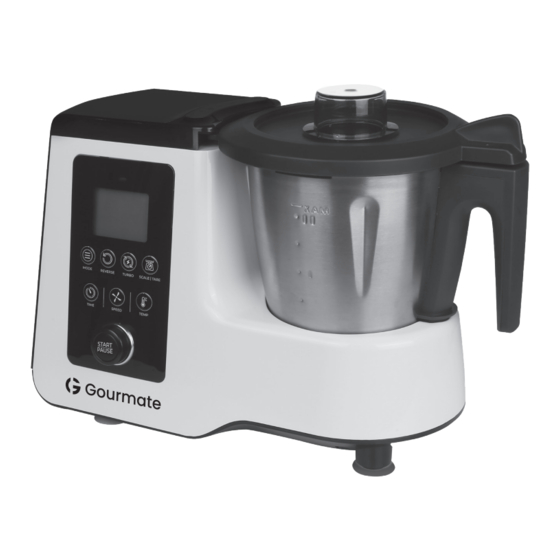
Page 13: Overview
2. Overview Steamer lid Shallow steaming tray Deep steaming tray Steamer seal Mixing bowl Unlocking lever Power switch Power cable with plug Silicone cover Blade socket Mixing bowl socket Blade socket Rubber feet Overflow hole Main unit Locking position Built-in scale TEMP button SPEED button START/PAUSE... -
Page 14: Screen Display
3. Screen display Knead mode Sauté mode Steam mode Wi-Fi Connection Status Warning! The mixing bowl is incorrectly inserted and / or the lid is not closed properly Warning! The turbo function cannot be used because the contents in the bowl are too hot. -
Page 15: Functions Overview
4. Functions overview Button/Component Function Notes Select Knead, Sauté or MODE button Steam or custom mode Steam mode uses the Can also be used with the steaming trays 2 and 3 to simmering basket 30 steam vegetables, fish and meat A maximum of 17.6 oz / 500 g of flour can be processed... -
Page 16: Items Supplied
Button/Component Function Notes The blade must be inserted to seal the bottom of the mixing To crush, chop and mix bowl Blade 29 ingredients If necessary, cut ingredients first in 3 - 4 cm / 1.18 - 1.57 inches pieces For liquid ingredients: To whip cream Should only be used... -
Page 17: Built-In Scale
NOTE: when in operation for the first time, some odour may be generated by the appliance. This is harmless. Please ensure adequate ventilation. 1. Remove all packing material. 2. Check to ensure that all parts are present and undamaged. 3. Clean the appliance prior to its first use! (see “Cleaning and Maintenance” on page 33). -
Page 18: Operating The Appliance
Weighing with tare function The tare function enables you to reset the weight on the built-in scale to zero. This function is useful when you want to measure an ingredient and not include the weight of the bowl, or when you want to weigh multiple ingredients individually as you place them into the same bowl. -
Page 19: Electronic Lock
8.3 Electronic lock This food processor has an electronic lock that is connected when the mixing bowl lid 5 or the deep steaming tray 3 are correctly installed. This is a safety function so the lid cannot be opened easily when the blade 29 is turning. - This lock is always activated when the appliance cooking program is in use. -
Page 20: Setting The Speed
NOTE: If the speed setting is higher than 6 and you set a time exceeding 15 minutes, the time will automatically be decreased to 15 minutes. 8.6 Setting the temperature 1. Press the TEMP button 18 to set the cooking temperature. 2. -
Page 21: Reverse Rotation
- The speed can be adjusted in 10 increments. - Speed 1 - 4: The butterfly whisk 31 can only be used at these 4 speeds. When the temperature value is selected, the max speed is 3. WARNING! • The butterfly whisk 31 must only be used with speed settings 1 to 4. On the screen 26, appears if you set a level above 4. -
Page 22: Turbo Function
8.9 TURBO function WARNING! When mixing liquids, the mixing bowl 5 must not contain more than 33.8 oz / • 1 L, otherwise the liquid might spill out. Never use this function when the butterfly whisk 31 is attached to the bowl. •... -
Page 23: Remove The Mixing Bowl
9.1 Remove the mixing bowl The mixing bowl 5 can only be removed if the mixing bowl lid 34 is opened. 1. Turn the mixing bowl lid 34 counterclockwise until the arrow of the locking position 16 points to the open lock symbol 2. -
Page 24: Inserting The Mixing Bowl
To remove the blade 29 , proceed as follows: 1. Position the mixing bowl 5 horizontally. 2. Press the unlocking lever 6 on the bottom of the mixing bowl 5 so that it points to the open lock symbol 3. Pull out the blade by holding the center 29 carefully towards the top. To insert the blade 29 , proceed as follows: 1. -
Page 25: Insert And Remove The Butterfly Whisk
9.5 Insert and remove the butterfly whisk The butterfly whisk 31 combines liquid foods and it can whip cream, beat egg whites and emulsifying ingredients such as when making mayonnaise. The butterfly whisk 31 is put onto the blade 29 as follows: - The wings of the butterfly whisk 31 are located in the spaces between the blades. -
Page 26: Using The Measuring Cup
Only when the mixing bowl lid 34 is correctly closed can the appliance start. NOTES: To facilitate the closing of the lid, put a few drops of oil on a cloth and rub it on • the seal 33 . The appliance can only be started when the mixing bowl lid 34 is locked into •... -
Page 27: Using The Spatula
8. Select the speed setting 1 for an even distribution of the heat in the water. 9. Press the START / PAUSE button 20. The appliance starts to operate. 10. When the countdown is finished, the appliance stops. 11. After several seconds an audio signal sounds. The lid can be opened. 12. -
Page 28: Steam Mode
10. Steam mode WARNING! Risk of burn injury! • When opening the lid 1 or 34 during operation, hot steam may escape. NOTE: these user instructions describe the basic functions such as mixing, chopping and steaming. For information on the preparation of special dishes, refer to the recipe book included in the box. -
Page 29: Starting The Steaming Process
NOTE: if the deep steaming tray 3 has not been put on correctly, the symbol will appear on the screen 26. 6. Place food into the deep steaming tray 3 and shallow steaming tray 2. NOTE: even if you only need the shallow steamer tray 2, both steaming trays 3 and 2 must be inserted all the time, so that no steam can seep out of the lid seal. -
Page 30: Checking The Cooking Status
4. After the temperature reaches 205 °F / 95 °C a short audio signal sounds and the countdown begins. NOTE: To start the Steam mode, press the START / PAUSE button 20 once. 5. When the timer counts down to 0, the cooking program is stopped and the lid can open. -
Page 31: Overheating Protection
5. Use the power switch 7 to switch on the appliance. 6. Start the program (see “Starting the steaming process” on page 29). 7. When the program comes to an end, open the mixing bowl lid 34 and remove the simmering basket 30 (see “Using the spatula”... -
Page 32: Sauté Mode
5. Press the START / PAUSE button 20. The Knead mode is started. The set time is counted down on the screen 26. The Knead mode automatically controls the clockwise/reverse function. 6. After the set time is finished, the screen 26 shows all the values at 0 and an audio signal sounds. -
Page 33: Cleaning
13. Cleaning WARNING! Risk of electric shock! Disconnect the main plug 8 from the wall socket before any cleaning. • Never immerse the main unit 15 in water. • WARNING! Risk of cut injury! • The blades are very sharp. Never touch the blades with your bare hands, to avoid cuts. -
Page 34: Cleaning The Accessories
NOTE: before cleaning the mixing bowl 5 in the dishwasher, always remove the blade 29 . Before every cleaning, remove the blade seal 28 from the rest of the blade 29. • Place plastic accessories on the top rack of the dishwasher to avoid deformation from the hot water and pressure. -
Page 35: Cleaning, Checking And Replacing The Spatula
Lid of the mixing bowl 34 Pull seal 33 off the underside of the lid of the mixing bowl 34. Insert the cleaned seal 33 or a new one in the lid for the mixing bowl 34. 13.5 Cleaning, checking and replacing the spatula The spatula 32 is provided with a detachable silicone scraper. -
Page 36: Storage
NOTE: more extended reaction periods do not improve the limescale deposits but may damage the parts permanently. 4. Rinse with clear water. 5. Allow the parts to dry completely before using them again. 13.7 Storage • Store the appliance protected against dust and dirt and out of the reach of children. 13.8 Replacing the blade socket If you process larger quantities than those specified in these instructions (e.g. -
Page 37: Troubleshooting
Insert the silicone cover 9 into the blade socket 10. • 14. Troubleshooting If your appliance fails to function as required, please try this checklist first. Perhaps there is only a minor problem, and you can solve it yourself. WARNING! Risk of electric shock! •... - Page 38 Problem Cause Solution The blade 29 has not been Insert blade 29 correctly inserted correctly so that the (see “Using and removing mixing bowl 5 leaks. the blade” on page 23). Insert new blade seal 28 Seal 28 for the blade is (see “Cleaning, checking defective.
-
Page 39: Error Messages On The Screen
Problem Cause Solution Stop the appliance, let it The electronic lock is cool and try removing the activated (see “Electronic mixing bowl lid 34 / the lock” on page 18). deep steaming tray 3. The mixing bowl Turn the mixing bowl lid lid 34 / the deep 34 / the deep steaming tray Did you try to open the... -
Page 40: Disposal
Packaging When disposing of the packaging, make sure you comply with the environmental regulations applicable in your country. 16. Technical specifications Model: GM-CM-128W / SPM-128CSL Mains voltage: 220V-240V or 120V Protection class: Class 1 Power rating:... - Page 41 This warranty does not include reimbursement for inconvenience, installation, set-up time, loss of use, postage, unauthorized service, or other products used in conjunction with Gourmate products. For warranty service, please contact Paragon Group USA Inc.
Need help?
Do you have a question about the SPM-128CSL and is the answer not in the manual?
Questions and answers