Advertisement
Quick Links
Specification
1.)
Product Name:
Product Code:
Required Motor Capacity:
Required Motor RPM:
Purpose:
Typical application of double stage pulveriser
2.)
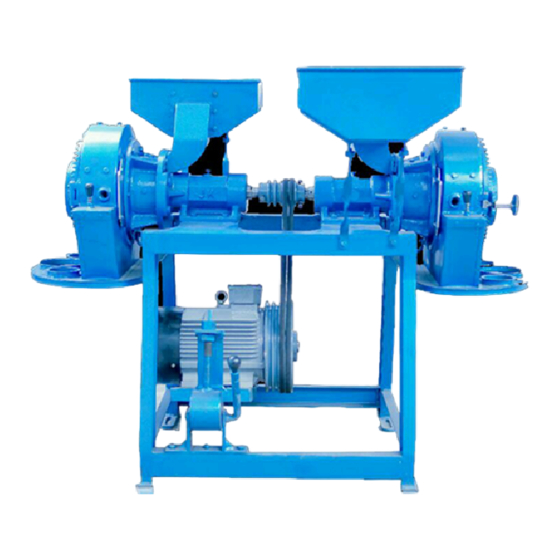
JK Machineries double stage Double head multi mill pulveriser can be
used for a wide range of application e.g. Grinding spices, food stuffs,
chemicals, pigments, pharmaceuticals, herbals, coffee seeds, tea leaves, fillers,
sugar, etc.,
Double Stage Double Head Multi Mill
DDS-40
10 to 15 HP
1440
Size reduction of the cereals, grains, spices, etc.
Original Instructions
1
Advertisement

Summary of Contents for JK Machineries Double Stage Double Head Multi Mill
- Page 1 Size reduction of the cereals, grains, spices, etc. Typical application of double stage pulveriser JK Machineries double stage Double head multi mill pulveriser can be used for a wide range of application e.g. Grinding spices, food stuffs, chemicals, pigments, pharmaceuticals, herbals, coffee seeds, tea leaves, fillers,...
- Page 2 Operating principle of multi mill pulveriser JK Machineries Double stage double head multi mills (Multi Chamber) are the latest version of the JK Machineries Pulveriser. It provided with a Pre - crushing chamber where the material undergoes a coarse grinding and passes on to the fine powdering chamber.
- Page 3 Original Instructions Servicing guidelines 4. a) General safety All mechanical equipment can be hazardous if operated without due care or correct maintenance. Most accidents involving machine operation and maintenance are caused by failure to observe basic safety rules or precautions. An accident can often be avoided by recognizing potentially hazardous situations before an accident occurs.
- Page 4 Original Instructions WARNING IGNORING INSTRUCTIONS HAZARD Faulty handling practice could cause death or severe injury. Read and follow the instructions in the operator’s manual. 4.a.ii) Care and Alertness All the time you are working with the product, take care and stay alert. Always be alert for hazards.
- Page 5 Original Instructions DANGER DUST HAZARD Breathing dust will cause death or severe injury. Always wear approved respirator. 4.a.v) Spare parts Use only genuine spare parts. Use only genuine cutting blades with crushers. The use of other spare part or cutting blade brands may damage the product.
- Page 6 Original Instructions 4.a.ix) Foundation requirements: The floor or foundations where the Pulveriser is to be located must be level. The floor must be at least 6" reinforced concrete on firm soil base. If concrete piers are used, they must be at least one foot square and not more than 6"...
- Page 7 Original Instructions Operations 6. a) Assembly instruction: The Pulveriser has been assembled at our factory and only the TRAY must be put together. • Check Foundation level. • Bolt four legs to Structural Mill Base Frame, Snug nuts. • Lift Frame with legs and locate over Foundation, using nylon straps around Frame.
- Page 8 Original Instructions • Install Receiving Container. • Connect power to Control Box.( • Run pulveriser empty for 1/2 hour to check bearing temperature and listen for any unusual noise or vibration. • After the run-in period, re-check all bolts and fasteners for tightness. 6.
- Page 9 Original Instructions • Feed raw material into the Hopper. • Stop system as required to change Receiving Container and/or Air Relief Bag. Follow Shut-Down Procedure. • NOTE: Once the rotor has stopped, any material that remains in the grinding chamber must be removed before the mill is restarted. Since the fan action of the rotor may also pull certain types of material past the feed screw, the hopper and feed trough should also be free of material before starting a grinding cycle.
-
Page 10: Maintenance
Original Instructions Before attempting to re-start the Main Motor, the grinding chamber must be emptied. Caution: Before opening the Mill, make sure that the Main Power Switch is disconnected, properly tagged out and locked out. When the grinding chamber is empty, re-start the pulveriser by following the Start-up procedure (Par. - Page 11 Original Instructions 8. b) Daily preventive maintenance: Check Rotor housing for any unusual temperature change. After the mill has run for one hour under load, carefully touch the housing. If you cannot hold your hand to the pillow block, the bearing is too hot (over 140°F) and requires attention.
- Page 12 Original Instructions • Stop feeding the pulveriser but keep the Mill running until the grinding chamber is empty. • Stop Main Motor. • Disconnect Main Power Switch, lock it out, and tag it out. • Remove belt guard. • Loosen motor mounting bolts and move motor to loosen and remove drive belts.
- Page 13 Original Instructions • Loosen motor mounting bolts and move motor to loosen and remove drive belts. Remove hosing bolts. • Remove Rotor assembly (T-beater, Back Beater) • Remove All the bolts which is attached to the housing. • Remove the machine pulley using a puller •...
-
Page 14: Troubleshooting Chart
Original Instructions TROUBLESHOOTING CHART Remedy Equipment Symptoms Possible Cause Section MILL Mill stops - Starter heaters a.- Feeding too fast Slow Feeder Reverse rotation Remove object See following symptom Overload b.- Rotating backwards Foreign object jamming rotor Reduce stickiness of feed Screen blinding material... - Page 15 Original Instructions TROUBLESHOOTING CHART Remedy Equipment Symptoms Possible Cause Section Provide specified MILL Premature bearing failure a- Improper lubrication Keep oil to specified level b- Insufficient lubrication Procure correct bearing Wrong bearing Balance rotor d- Rotor imbalance Install hammers per Improper hammer instructions Installation...
- Page 16 Original Instructions TROUBLESHOOTING CHART Remedy Equipment Symptoms Possible Cause Section Replace with new set MILL Reduced capacity a.- Worn hammers Replace with new liner b.- Worn liner Check drive for worn or loose c.- Reduced rotor speed V-belts. Replace belts with matched set.
- Page 17 Original Instructions...
Need help?
Do you have a question about the Double Stage Double Head Multi Mill and is the answer not in the manual?
Questions and answers