
Summary of Contents for Intrise AIR ZERO AZ Series
- Page 1 USER’S MANUAL ( AZ-Series NOZZLE TYPE VACUUM SEALER ) www.airzero.co.kr INTRISE CO., LTD. 27, Haean-ro 213beon-gil, Danwon-gu, Ansan-si, Gyeonggi-do, Korea TEL : +82-31-407-9000 / FAX : +82-31-407-9090...
-
Page 2: Table Of Contents
TABLE OF CONTENTS INTRODUCTION ·······························································P 4 -5 1-1 The type of electricity and electricity plug 1-2 Caution label 1-3 Location of caution label OPENING THE PACKED BOX OF THE MACHINE ························P 6 2-1 The machine 2-2 Spare Parts 2-3 Tool set 2-4 Others SPECIFICATION OF THE MACHINE ·······································... - Page 3 P 22 14-4 END OF OPERATION ··································································· MAINTENANCE P 23 15-1 Cleaning of nozzle ······································································ P 23 15-2 Cleaning of vacuum and gas line ····················································· P 24 15-3 Cleaning of vacuum filter ································································ CONSUMABLES CHANGE P 25-26 ································································ 16-1 HEAT WIRE 16-2 TEFLON SHEET 16-3 TEFLON TAPE 16-4 UPPER TEFLON TAPE...
-
Page 4: Introduction
For any accident or injury caused by that the user does not conform to this user’s manual, INTRISE CO. LTD has no legal liability. Therefore, please keep this user’s manual near you whenever you use the machine. -
Page 5: Location Of Caution Label
The caution against a danger of burn by heat around heat wire 1-3 Location of caution label... -
Page 6: Opening The Packed Box Of The Machine
2. OPENING THE PACKED BOX OF THE MACHINE After opening the packed box of the machine, please check up as follows ; Is the model same as your order ? Are there all things listed from 2-1 to 2-4 ? Is there any damage to all things listed from 2-1 to 2-4 ? The machine Spare Parts... -
Page 8: Caution For Use
4. CAUTION FOR USE Caution for safety 1) In case of emergency, please pull off the power plug. Basically, circuit protection fuses are installed to cut off any irregular electricity shock. Nevertheless, if there is any emergency including a breaking out of a fire on the Teflon tape, pull off the power plug. 2) The user must use just the electricity power stipulated at this manual. -
Page 9: Method To Make A Good Sealing
Method to make a good sealing 1) Please set sealing time as short as possible in the range that sealing is possible. An unnecessary long sealing time can do damage to Teflon sheet, Teflon tape, heat wire, etc, make sealed surface of packing film bad, and cause low productivity and high electricity consumption. -
Page 10: Definition & Basic Function Of The Machine
5. DEFINITION & BASIC FUNCTION OF THE MACHINE 5-1 DEFINITION OF THE MACHINE Airzero vacuum sealer is a nozzle type vacuum and gas flushing packaging machine. The machine does vacuuming and gas flushing directly to the inside of the vacuum bag by using a nozzle to protect packed goods from oxidation, moisture, external shock, static electricity, etc. -
Page 11: Name Of Each Part
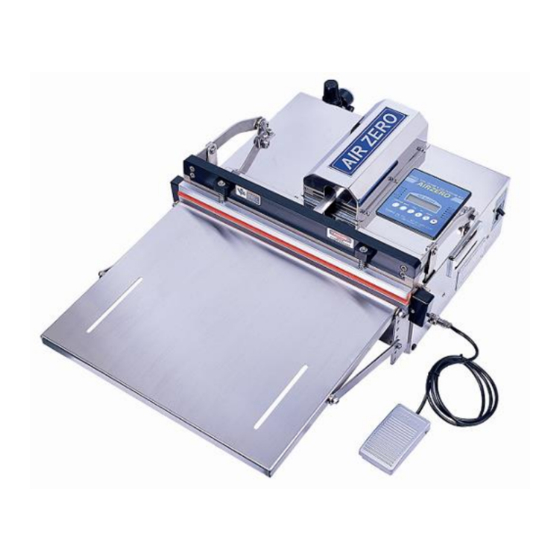
7. NAME OF EACH PART AZ-type... -
Page 12: Azv-Type
AZV-type 1) NOZZLE : This is to suck air from and insert gas to the packing envelope. UPPER SEALING BAR : This is to press the front of the packing envelope during the 1 going-down of upper sealing bar and to seal the front during the 2 going-down of upper sealing bar. - Page 13 5) AIR REGULATOR : This is to control the pressure degree of compressed air supplied to the machine. 6) UP/DOWN BUTTON : This is to control the height of the machine’s upper body. 7) PIN TO FIX HEAD : The user adjust and fix the angle of the head between 0 ~ 90 ° by using this.
-
Page 14: Installation
8. INSTALLATION Place the machine on a plane around where it is well ventilated to be not humid and protected from any external shock. By using the caster, set the horizontal of the machine and locate it to the proper place. ( Except for DESKTOP TYPE ) If you use any other Connect electricity strictly according to the name board on the machine (... -
Page 15: Vac/Time ~ 10-6 Stop
10-1 VAC/TIME This button is to select whether you control vacuum procedure by time or by vacuum degree. ( T and V appear at the lower-left side of LCD ) T : Time of vacuuming The machine is operated by the preset time for vacuuming. When you select 25, the vacuum works for 2.5 second and the nozzle moves backward after that. -
Page 16: Operation Procedure
10-3 TIME This button decides target time or target degree of each process the user wants to get. With each pressing of TIME button, the turns are changed one by one from VACUUM1, VACUUM2, GAS1, GAS2, and SEALING to COOLING. Then, for each of them, you can adjust time or vacuum degree by UP and DOWN button. -
Page 17: Special Function
SEALING MODE ). The value of counting is at the up-right side of LCD, which increases by one for each cycle of work. 11-7 When the above setting is under way, the operation of machine is impossible to start. That is, the operation of machine can start only when ‘... -
Page 18: Setting Of Proper Time/Vacuum Degree
12-2 If you want the nozzle not to move forward automatically, press STOP button and UP button at the same time. If you want the nozzle to move forward automatically, press once more STOP button and UP button at the same time. 12-3 To make counter value as 0 (zero), turn off and on the electricity power. -
Page 19: Process Of Each Mode
PROCESS OF EACH MODE 14-1 VACUUM MODE Step on FOOT S/W Nozzle moves forward. Then, insert an envelope Step on FOOT S/W 1st going down ( Sensor 2 turns on ) Step on FOOT S/W Vacuum 1 works as long as preset vacuum time or vacuum degree Nozzle moves back ( Sensor 4 turns on ) 2nd going down. -
Page 20: Programmable Mode
14-2 PROGRMMABLE MODE ( 1 ~ 8 ) Step on FOOT S/W Nozzle moves forward. Then, insert an envelope Step on FOOT S/W 1st going down ( Sensor 2 turns on ) Step on FOOT S/W Vacuum 1 works as long as preset vacuum time or vacuum degree Gas 1 works as long as preset gas 1 time Nozzle moves back ( Sensor 4 turns on ) -
Page 21: End Of Operation
14-3 SEALING MODE Insert an envelope. Step on FOOT S/W. Sealing bar goes down. ( Sensor 2 and 3 turn on ) Then, Sealing works as long as preset sealing time. Cooling works as long as preset cooling time Sealing bar goes up ( Sensor 1 turns on ) and 1st work completes 14-4 End of operation 10) Push the STOP button on control box. -
Page 22: Cleaning Of Nozzle
MAINTENANCE 15-1 Cleaning of nozzle For many case, as an easy method, you can clean the nozzle if you set the work at V1 MODE and push out any gas through nozzle. But, if you can not clean the nozzle by that method, please do as follows ;... -
Page 23: Cleaning Of Vacuum Filter
15-3 Cleaning of vacuum filter Vacuum filter is located between nozzle and vacuum pump. Its function is to keep any alien substance, which comes in through nozzle, from vacuum pump. ( The filter type can be different according to the model and options. -
Page 24: Consumables Change
CONSUMABLES CHANGE 16-1 Heat Wire : It is located under Teflon sheet ⑪ of the lower sealing bar. Separate lower sponge bar ⑤ and Teflon sheet. (please refer to Teflon sheet change method) and open heat wire holder cover ③. Loosen the bolt which lock heat wire and change it. 16-2 Upper and Lower Teflon Sheet : Separate the lower or upper sponge bar and change them. - Page 25 UPPER SEALING BAR LOWER SEALING BAR HEAT WIRE HEATER HOLDER COVER TEFLON TAPE HEATER HOLD BOLT TO FIX HEAT WIRE LOWER SPONGE BAR LOWER TEFLON SHEET UPPER SPONGE BAR UPPER TEFLON SHEET SEALING RUBBER COMPRESSION SPONGE...
-
Page 26: Lay-Out Drawing
LAY-OUT DRAWING ( The real shape and size including frame, sealing bar and work tray, etc can be changed according to the model and options ) 17-1 AZ-type... -
Page 27: Azv-Type
17-2 AZV-type... -
Page 28: Inside Drawing
INSIDE DRAWING 18-1 AZ-type... - Page 29 Frame Transformer Solenoid valve set Air regulator Vacuum valve Vacuum filter Gas cock Gas valve Fuse holder plate Electricity inlet N.F.B Air solenoid Grip Control box 2P connector Heat wire holder Nozzle cylinder ( Sensor 4 is attached ) Middle cylinder Left cylinder ( Sensor 1, 2, 3 are attached )
-
Page 30: Azv-Type
18-2 AZV-type 17) Upper body In the case of AZV-type, the parts including 2, 4 ,6 ,9 and 10 on the drawing of AZ-type are moved to the sub-box. 18) Sub-box... - Page 31 * Please understand there could be changes of parts according to the model and option.
-
Page 32: Electricity Circuit Diagram
ELECTRICITY CIRCUIT DIAGRAM According to model and option, main and heater fuse type can be changed to 30 A or 40A. 19-1 AZ-type... -
Page 34: Azv-Type
19-2 AZV-type... - Page 35 19) 電氣 : 220, 1Ph...
- Page 36 20) 電氣 : 220, 3Ph...
- Page 37 21) 電氣 : 380, 3Ph...
-
Page 38: Trouble Shooting
TROUBLE SHOOTING * If it is difficult for you to troubleshoot despite the following method, please contact to the seller of the machine. 20 - 1 If the electricity power of the machine does not turn on, 1) Check up whether the electricity is well supplied to the electricity outlet → If so, 2) Check up whether the plug inserted rightly into the electricity outlet, →... - Page 39 Check up whether UP turns on and BACK turns off, among input led on the control box → If not, adjust the location of sensor 1 and 4 ( Refer to 21. SENSOR SETTING ). But, if so, Check up whether MIDDLE among output led on the control box turns on → If so, 1 going down solenoid is out of order.
- Page 40 20 - 5 If sealing can not be done, after vacuum or gas inserting, 1) Check up whether DOWN turns on among input led on the control box → If not, adjust the location of sensor 3. ( Refer to 21. SENSOR SETTING ) But, if so, 2) Check up whether SEALING TIME, COOLING TIME and AIR PRESSURE are set properly ( Refer to 8-5 and 13 ) →...
-
Page 41: Sensor Setting
SENSOR SETTING * Please do not adjust this sensor setting by yourself as far as possible. It is fixed at optimized condition. * Regarding the location of cylinder and sensor, refer to 18. INSIDE DRAWING 21-1 Set sensor 4 to turn ON when the nozzle moves back. 21-2 If you connect compressed air of 5~6.5 kg/㎠... -
Page 42: Warranty Paper
Warranty Paper Limited Warranty The seller warrants to the purchase of the Product ( defined herein as the boxed AIRZERO packaging machine’s body and work tray except spare parts, tool box, and tools ) in its original sealed packaging (“Original Purchaser “) as follows : if the Product properly used and installed, it will be free from defects in material and workmanship and will substantially conform to the seller ’s publicly available specifications for a period of one (1) year after the date the Product was purchased in its original sealed packaging in the case of an Original Purchaser. - Page 43 HOW TO OBTAIN WARRANTY SERVICE To obtain warranty service for the Product, you may contact your original place of purchase in accordance with its instructions, or you may contact to the seller. To request warranty service from the seller you must contact to the seller or a the seller’s Customer Support center in your region within the warranty period during normal business hours (local time) excluding holidays and return the Product to the seller or a the seller’s Customer Support.
- Page 44 NOT ALLOW LIMITATIONS ON HOW LONG AN IMPLIED WARRANTY LASTS, SO THIS LIMITATION MAY NOT APPLY TO YOU. LIMITATIONS OF LIABILITY THE SELLER’S RESPONSIBILITY UNDER THIS, OR ANY OTHER WARRANTY, IMPLIED OR EXPRESS, IS LIMITED TO REPAIR, REPLACEMENT OR REFUND, AS SET FORTH ABOVE. THESE REMEDIES ARE THE SOLE AND EXCLUSIVE REMEDIES FOR ANY BREACH OF WARRANTY.
Need help?
Do you have a question about the AIR ZERO AZ Series and is the answer not in the manual?
Questions and answers
gas flow rat