Table of Contents
Advertisement
Advertisement
Table of Contents

Subscribe to Our Youtube Channel
Summary of Contents for Brand Developers Limited Taste the Difference HD15
- Page 1 INSTRUCTION MANUAL Air Roaster Model: HD15 1360 BDV2 WATTS OF POWER...
- Page 2 Throughout Australasia by: Brand Developers Aust Pty Ltd Unit 3, 2 Roussos Place, Truganina, VIC 3029, AUSTRALIA AUST Customer Care: 1800 890 840 Brand Developers Limited Unit H, 686 Rosebank Road, Avondale, 1026 Auckland, NEW ZEALAND NZ Customer Care: 0800 002 999...
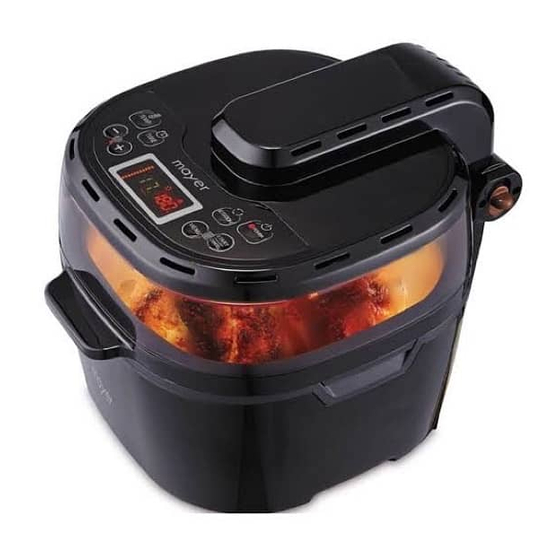
- Page 3 Taste the Difference™ - Air Roaster The Features “TruSurround” fan-forced convection cooking – the high-efficiency overhead fan pushes heat from the halogen element deep into your food, while the second element in the base cooks from below. This creates rapid heat circulation, sealing in flavours and juices, cooking quickly and evenly, and reducing the need for food turning.
-
Page 4: Important Safeguards
Important Safeguards Read and follow these instructions carefully before use: Before switching on the Air Roaster, ensure that the voltage indicated on the rating label is the same as that in your home. This Air Roaster is intended for household use only, it is not intended for commercial or industrial use. - Page 5 Important Safeguards Cont... younger than 8 years. This appliance is intended to be used in household and similar applications such as: Staff kitchen areas in shops, offices and other working environments Farm houses By clients in hotels, motels, bed & breakfasts, and other residential-style environments.
- Page 6 Important Safeguards Cont... Do not attempt to use Air Roaster if it refuses to start. If Air Roaster refuses to stop, unplug from wall immediately, do not attempt to restart. If shell of body or lid deform or warp, or Air Roaster does not perform normally, please contact service centre.
-
Page 7: Before Use
Before Use Clean the inner dish and all accessories with a clean wet sponge before first use. Ensure all packaging materials are removed from the Air Roaster, including any paper from beneath the non-stick inner dish. When placing the inner dish into the base, make sure it is seated properly, with its handles flush to the sides of the Air Roaster –... - Page 8 Taste the Difference™ - Air Roaster Structure and Assembly Lid Handle Glass Cover Control Vents Panel Louvre PC Cover Inner Dish Inner Dish Handle Power Cord Base Bottom Handle Rotisserie Rod Bracket Halogen Inner Dish Tube Handle Rotisserie Rod Drive Socket Inner Cover PTC Bottom Element...
-
Page 9: Control Panel
Control Panel Teperature Time Setting Rotation Power Setting Button Button Setting Button On/Off (-) Setting (+) Setting Display Functions Start/Cancel Button Button Screen Button Rotation Operating Power Indicator Indicator Indicator Time Temperature Indicator Indicator Functions Indicator AIR ROASTER 7... - Page 10 Taste the Difference - Air Roaster ® Accessories STANDARD ACCESSORIES Grill Rack Grill Tray Handling Tongs ROTATING ACCESSORIES Skewers and Skewer Rack Rotisserie Chicken Forks & Rod Rotisserie Tumble Fryer Rotisserie Cage 8 AIR ROASTER...
- Page 11 How to place the inner dish Place the Air Roaster on a firm level heat-resistant surface and open the lid (Figure 1). When the Air Roaster is in the opening status (Figure 2), hold the handles (Figure 3) and place the Inner Dish in position (Figure 4). NOTE: make sure that the bracket inside the Inner Dish is in front, and the hole is at the back.
-
Page 12: Assembling The Accessories
Assembling the Accessories Using the Rotisserie Assembly Slide one of the Rotisserie Forks onto the Rotisserie Rod and screw down tight. Push the Rod through the chicken or meat you wish to cook until the Fork engages with the food. Slide the second Fork onto the other end of the Rod then push firmly into the food –... - Page 13 Assembling the Accessories Cont... Using the Skewer Rack Before assembling the Skewer Rack slide bite-sized food pieces onto Skewers – leave 2cm clear at the end of each Skewer. Assemble Skewer Rack Discs onto Rotisserie Rod, and screw on tightly. Mount Skewers onto Discs one at a time –...
- Page 14 Assembling the Accessories Cont... Using the Tumble Fryer Assembly Slide the Tumble Fryer onto the Rotisserie Rod. Screw the Rod down tight at each end. Place the Tumble Fryer Assembly in position on the main body of the Air Roaster making sure that the longer squared end of the Rod engages with the Drive Socket at the back of the dish.
- Page 15 Assembling the Accessories Cont... Using the Rotisserie Cage Assembly Remove the Rotisserie Cage lid by squeezing the lid handles then insert food into the Rotisserie Cage (food not shown). Place the Rotisserie Cage lid back inside the cage, making sure it is at a height that holds the food firmly in place.
- Page 16 Operation Instructions Place the Inner dish in the Air Roaster as previously described in this booklet. Open the Lid of the Air Roaster and position the required accessory. Always make sure to leave sufficient space between the food and the cover. Close the Lid.
-
Page 17: Technical Parameters
Technical Parameters Voltage 220-240V Frequency 50Hz Power 1360W Temperature adjustment range 80°C~240°C Time setting range 1-99(MIN) Air Roasters size(mm) 436 (W) X 335 (D) X 321 (H) Giftbox size(mm) 431 (W) X 431 (D) X 378 (H) Container capacity Net weight 6.5KG Cleaning methods Disconnect the Air Roaster from the mains socket, and allow to cool completely... - Page 18 Recipes for Reference FOOD TIME(MIN) TEMPERATURE(°C) Chicken (drums) 220-240 Chicken (pieces) 220-240 Chicken (wings) 15-18 200-220 Chicken (whole) 40-50 190-220 Steak 12-18 Fish 10-15 180-210 Lamb 15-25 220-240 Cake 20-30 150-165 Shrimp 10-12 190-210 Sausage 10-13 150-180 Tumble-roasted Nuts 10-15 135-165 Baked bread 8-10...
- Page 19 Only the defective product or parts returned to place of purchase will be replaced under this warranty. New Zealand Contact Australia Contact Brand Developers Limited Brand Developers Aust Pty Ltd Unit H, 686 Rosebank Road, Unit 3, 2 Roussos Place,...
Need help?
Do you have a question about the Taste the Difference HD15 and is the answer not in the manual?
Questions and answers
How to close the lid
To close the lid on the Brand Developers Limited HD15 Air Roaster, simply lower it until it is fully shut. This is necessary before use, as a safety cut-off prevents the Air Roaster from turning on when the lid is open.
This answer is automatically generated