
Subscribe to Our Youtube Channel
Summary of Contents for GRIPGEAR DIRECTORS SET
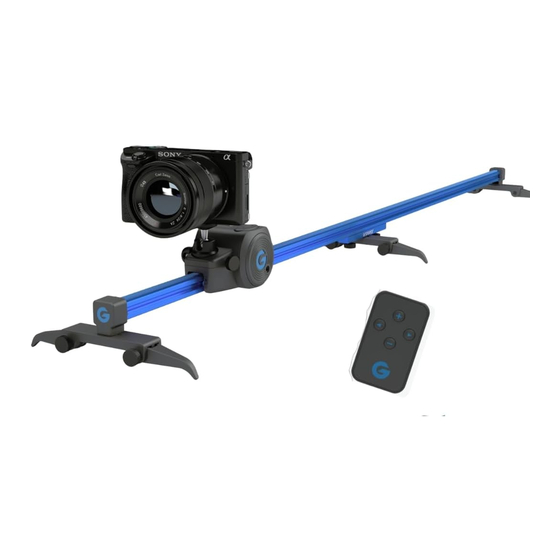
- Page 1 DIRECTORS SET Electronic & Manual Slider + 360 Degree Panoramic Function + 9-speeds Electronic Dolly + Manual Function SOCIAL MEDIA: @ GRIPGEARGLOBAL CUSTOMER CARE EMAIL: SERVICE@GRIPGEAR.COM GRIPGEAR.COM TAG US: #SMALLCAMSCAN #GRIPGEARGLOBAL #GRIPGEAR...
- Page 2 WHAT’S INCLUDED Congratulations on aquiring your Directors Set! If you have any questions regarding the parts, set up or usage please email us anytime, we are happy to help! Email: gripgear@gripgear.com Movie Maker 2 Ball Joint Phone Mount Aluminium middle joint...
- Page 3 Micro Dolly cradle base and fastening screw MD 360 Mount Power Wheel...
- Page 4 Power Options / d-pad Manual D-pad for direction (arrows) and speed choice (1-9) To stop manually, Reset hole press arrows in same USB power and direction the Movie recharge Maker is going Power switch...
- Page 5 SLider MODE: Step 1 Install Ball Joint...
- Page 6 Step 2 Fasten screw to tighten Rotate the swivel to lock in place...
- Page 7 step 3 If using a smartphone install the Phone Mount...
- Page 8 STep 4 Place the track onto the leg attachment, repeat on the other side of the track...
- Page 9 step 5 Slide the aluminium joint onto the track...
- Page 10 step 6 Pull blue clover pin out to unlock. Then slide the Movie Maker 2 onto the track Location of blue clover pin...
- Page 11 Step 7 Slide the second track ontp the metal mid joint For optimal track alignment, hold the joint then fasten screws...
- Page 12 motorized mode Push the blue clover pin back in to engage the motor. Now you are ready to start the Movie Maker in motorized mode.
-
Page 13: Manual Mode
Manual Mode Pull the blue clover pin out to dis-engage the motor. Now you are ready to use the Movie Maker in manual mode. -
Page 14: Adjusting The Legs
Adjusting the legs Legs are adjustable to use the Movie Maker on uneven ground... - Page 15 Folding the legs Fasten the legs with the hand screws Fold the legs fully inside when using the Movie Maker on a flat surface...
- Page 16 1/4” compatibility at all touchpoints Hole for 1/4” tripods or suction cups etc...
- Page 17 Shooting vertical or inverted Run the Movie Maker vertical or even inverted by simply attaching small flexible tripods or suction cups.
- Page 18 bounce-back clips Attach bounce-back clips on track for desired shorter distance...
- Page 19 360 panorama mode: Step 1 Install the 360 panorama mount by clicking onto the blue clover pin Screw mount underneath for attaching to tripod...
- Page 20 Step 2 If using a smartphone screw the phone mount onto the ball join Screw the ball joint onto the 360 panorama mount...
- Page 21 Ready to shoot 360! Finished !
- Page 22 Setting up the micro dolly- Step 1 Place the Movie Maker into the Micro Dolly cradle base and fasten using the fastening screw...
- Page 23 Step 2 Attach the MD 360 Mount to the blue clover pin...
- Page 24 Step 3 Screw and fasten the power wheel...
-
Page 25: Automatic Mode
Automatic mode When the ring is down, the power wheel is engaged with the motor... - Page 26 Manual Mode Pull handle upwards to a 90° angle to disengage the motor for use in manual mode...
- Page 27 filming in straight line For straight movement keep wheels aligned parallel...
- Page 28 shooting a curve Adjust wheel angle for desired curved movement...
- Page 29 How to store your Micro Dolly Place the Power Wheel into the Micro Dolly cradle base...
- Page 30 How to store your Micro Dolly Rotate the wheel to lock into place...
- Page 31 How to store your Micro Dolly Store option together with the MD 360 Mount...
- Page 32 How to store your Micro Dolly Rotate Power Wheel to lock into place.
-
Page 33: Useful Tips
useful tips • Important: The Movie Maker will automatically turn off when in speed “0”, but not in speed 1-9. • You can enable or disable the bounce-back function: On the D-Pad, hold “+” for 3 seconds. When the dot is flashing very fast it is disabled, slow flashing means is enabled. - Page 34 7, 8, and X users Note: : The main camera lens has built-in optical image stabilization that will affect your results, use the front camera lens when in slider mode. If you have any other questions please feel free to email us anytime! service@gripgear.com...
- Page 35 useful tips Speeds of Dolly in straight line using orange gear and Blue Gear. Rotation speed in Panorama mode for orange and blue gear. Slider mode Micro Dolly Panorama Mode Speed Travel mm/ minute Travel MM/Minute Rotation 1 turn of 360/ minute Orange Blue Orange...
- Page 36 MOTION CONTROL FOR SMALL CAMERAS SOCIAL MEDIA: @ GRIPGEARGLOBAL CUSTOMER CARE EMAIL: SERVICE@GRIPGEAR.COM GRIPGEAR.COM TAG US: #SMALLCAMSCAN #GRIPGEARGLOBAL #GRIPGEAR...
Need help?
Do you have a question about the DIRECTORS SET and is the answer not in the manual?
Questions and answers