Table of Contents
Advertisement
Quick Links
Welcome
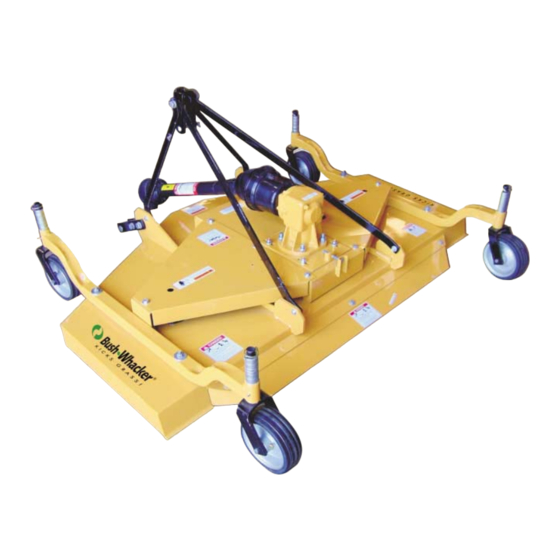
Thank you for selecting the Bush-Whacker RDF 48, 60, or 70 Finishing
Mower. Your machine has been carefully inspected by both the factory and
the dealership prior to being received by you to ensure that it is ready for
operation.
This manual explains the proper operation of your machine. It is very im-
portant that you read and understand these instructions before operating
or maintaining the machine. Failure to do so could result in personal injury
or even death to you or passersby. Consult your Bush-Whacker dealership
if you do not understand the instructions in this manual or need additional
information.
Hall Manufacturing, Inc. reserves the right to make changes at any time
without notice or obligation. Additional copies of the manuals are available
from your local Bush-Whacker dealer.
Hall Manufacturing, Inc.
3706 E. Washington Ave., P.O. Box Drawer 5638
North Little Rock, AR 72119
2
2014 RDF 60, 72
Advertisement
Table of Contents

Related Manuals for Bush-whacker RDF 48


Summary of Contents for Bush-whacker RDF 48
- Page 1 Welcome Thank you for selecting the Bush-Whacker RDF 48, 60, or 70 Finishing Mower. Your machine has been carefully inspected by both the factory and the dealership prior to being received by you to ensure that it is ready for operation.
-
Page 2: Table Of Contents
Table of Contents Introductory Page ....................2 Mower Safety ......................4-11 Safety Information ..................4-6 Safety Decal Location .................. 7 Safety Decals ....................8-11 Mower Introduction ....................12-13 Mower Assembly ....................14-15 A-Frame Attachment ..................14 Three-point Attachment................15 Caster Wheel Attachment ................15 Driveline Attachment .................. -
Page 3: Mower Safety
Mower Safety There are obvious and hidden potential hazards in the operation of this mower. DANGER! Remember, the blades of this mower can throw objects at very high speeds. Serious injury or death may occur unless care is taken to insure the safety of the operator, bystanders or passer by in the area. - Page 4 Mower Safety continued WARNING! Do not modify or alter, or permit anyone to modify or alter, this equipment or any of its components or any equipment function without first consulting your equipment dealer. WARNING! The operator and all support personnel should wear hard hats, safety shoes and safety glasses at all times for protection from injury and items thrown by the machine.
- Page 5 Mower Safety continued DANGER! Never leave the mower in the raised transport position. Mower could fall causing injury to anyone who might inadvertently be under mower. DANGER! Never clean or adjust PTO driven equipment with the tractor engine running. WARNING! Never allow riders on either tractor or mower.
- Page 6 ITEM PART NO. QTY. DESCRIPTION DANGER—Rotating driveline DANGER—Rotating blades DANGER—Thrown object hazard WARNING— To prevent serious injury WARNING—Moving part hazard IMPORTANT NOTICE DANGER— Stay away minimum 160 ft DANGER—Hand and foot injury BUSH—WHACKER label 2014. RDF 60, 72...
-
Page 7: Safety Decals
Safety Decals 2014 RDF 60, 72... - Page 8 Safety Decals 2014. RDF 60, 72...
-
Page 9: Mower Introduction
Mower Introduction The purpose of this manual is to familiarize and instruct the operator for the correct operating procedures and safe procedures of the BUSHWHACKER finishing mowers. The assembly chapter instructs the owner/operator in the correct assembly of the mower using standard and optional equipment. -
Page 10: Three-Point Attachment
Introduction continued DANGER! For non-agricultural applications, OSHA, ASAE SAE and ANSI standards require the use of chain guards, deflectors or solid skirts at all times. The mower manufacturer strongly recommends the use of chain guards or solid skirts for agricultural applications as well, to reduce the risk of property damage, serious bodily injury or even death from objects thrown or from contact with the cutting blades. -
Page 11: Mower Operation
Mower Operation The safe operation of this mower is the responsibility of the operator. The operator should be familiar with the machine, tractor and all safety practices before starting operation. This mower is designed for lawn and grass mowing. It is not designed for rough conditions or heavy weed mowing. The mower is equipped with suction type blades, which are best suited for lawn mowing. -
Page 12: Driveline Attachment To Tractor
Mower operation continued the top link so it will pin to the hole in the A-Frame floating top link. DANGER! Never allow children to operate, ride or come close to the mower or tractor. Usually, 15-16 year old children who are mature and responsible can operate the mower with reasonable safety if they have read the operator’s manual, been trained in safe operation of the machine, and are physically large and strong enough to reach and operate the controls easily. -
Page 13: Cutting Speeds
Mower operation continued To start operation, reduce engine speed and engage the tractor PTO. Before starting to cut, gradually increase the engine speed to develop full PTO speed. Enter the area to be cut with the cutter operating at PTO speed and, if it becomes necessary to temporarily regulate engine speed during operation, increase or decrease the speed gradually. -
Page 14: Detaching And Storing
Mower operation continued Detaching and storing Lower the mower to the ground. Park the tractor with transmission in the correct gear (Automatic transmissions should be set on Park; Standard transmissions should be set on Neutral). Set the parking brake, turn off the engine and remove the keys from the ignition. Wait until the PTO stops rotating completely before dismounting the tractor. -
Page 15: Front Gauge Wheel Interference Check
Mower operation continued Front gauge wheel interference check. Do not operate the mower until this interference check has been performed. If you use the mower with a different tractor, you must perform the check for that particular mounting again. 1. Raise the mower with the tractor hydraulic system to the maximum height of lift. 2. -
Page 16: Adjusting Driveline Length
Mower operation continued Adjusting driveline length 1. Slide the driveline together until it “bottoms out”. 2. Apply colored tape to the inner plastic shield tube 1/8” from the end of the outer shield tube. 3. Reconnect the driveline to the tractor PTO shaft. 4. -
Page 17: Troubleshooting
Troubleshooting Problem Possible cause Solution Streaking Slow blade tip speed Operate PTO at 540 RPM Worn blade tips Replace with genuine BUSHWHACKER blades Dull blades Sharpen blades uniformly Blades unable to cut that part of grass Slow tractor’s ground speed but pressed down by tractor’s tire path or maintain 540 RPM PTO speed mower’s casters... - Page 18 Troubleshooting continued Problem Possible cause Solution Belt slippage Mower is overloading, grass is too Slow tractor’s ground speed but tall or heavy maintain 540 RPM PTO speed. Cut grass twice. Raise the mower for the first pass and lower to the desired cutting height for the second and cut at 90 degrees to the first pass.
-
Page 19: Mower Maintenance
Mower maintenance Before operating the mower, make sure that it is properly lubricated and thoroughly inspected. Only a minimum of time and effort is required to regularly lubricate and maintain it. Following a regular program will provide long life and trouble free operation. WARNING! Always disengage the tractor PTO before raising the mower for transport or making adjustments. -
Page 20: Gearbox
Mower maintenance continued Gearbox lubrication The gearbox must be filled with COTTON PICKER SPINDLE GREASE oil before operating. To fill gearbox to the correct operating level: Place the mower on an even and leveled surface. Remove filler and test level plug (see figure 8 for location of plugs). Add oil through the filler plug until it starts running out of the test plug. -
Page 21: Driveline Lubrication
Mower maintenance continued Driveline lubrication Grease fittings are located on the cross and bearing kit assemblies of both U-joints. U-joints should be greased after every 8 hours of operation. See figure 10 for the location of the grease fittings. Do not force grease through the needle bearing cup assemblies. -
Page 22: Blade Sharpening
Mower maintenance continued Use only genuine BUSHWHACKER blades on your mower. They are manufactured of special heat- treated alloy steel. Substitute blades may not meet specifications and may fail in a hazardous manner, which could cause injury. Blade sharpening To maintain a proper blade balance, always sharpen both ends of the blade equally. Follow the sharpening pattern as shown on figure 12. -
Page 23: Drivebelt Adjustment Procedure
Mower maintenance continued Drive belt adjustment Shut off mower and tractor. Remove drive belt shield fasteners and belt shields. Loosen all four nuts (item 1) on the gearbox slide plate (item 2). See figure 14. Loosen jam nut (Item 3) on the tension adjustment bolt (Item 4) Tighten adjustment bolt (Item 4) until the belt deflection along the front side of the belts (Items 5&6) is 3/4”... -
Page 24: Storage
Mower maintenance continued Storage Your mower represents an investment from which you should get the greatest possible benefit and use. Therefore, when the cutting season is over, the mower should be thoroughly checked and prepared for storage so that a minimum amount of work will be required to put it back into operation for the next season. -
Page 25: Blade Spindle Service Instructions
2014 RDF 60, 72... -
Page 26: Replacement Parts
Replacement Parts For maximum safety and reliability, always use genuine BUSHWHACKER replacement parts. The use of inferior replacement parts may cause premature or catastrophic failure which could result in serious injury or death. For questions regarding parts please contact BUSHWHACKER North Little Rock, Arkansas. - Page 27 RDF 60- General mower assembly 2014 RDF 60, 72...
- Page 28 RDF 60 General mower assembly - Parts list ITEM PART # DESCRIPTION ITEM PART # DESCRIPTION 5267 LOCK NUT 5287 PLASTIC SPACER 5268 WASHER 5288 WHEEL 5321 BLADE 5289 SLEEVE 4 -12 5257 ROTOR ASSEMBLY 5290 SPACER 5284 SPINDLE SHAFT 5291 LOCK NUT 5259...
- Page 29 RDF 72— General mower assembly 2014 RDF 60, 72...
- Page 30 RDF 72 General mower assembly - Parts list ITEM PART # DESCRIPTION ITEM PART # DESCRIPTION 5267 LOCK NUT 5287 PLASTIC SPACER 5268 WASHER 5288 WHEEL 5256 BLADE 5289 SLEEVE 4 -12 5257 ROTOR ASSEMBLY 5290 SPACER 5284 SPINDLE SHAFT 5291 LOCK NUT 5259...
- Page 31 Notes 2014 RDF 60, 72...
- Page 32 Hall Manufacturing further warrants that if any genuine Bush-Whacker part or component utilized by an authorized Bush-Whacker dealer proves to be defective in material or workmanship, within thirty (30) days of such utili- zation, Hall Manufacturing will, at its option, repair or replace the defective part without charge. Owner shall be responsible for all freight charges including labor to and from the place where the warranty work is per- formed.
- Page 33 Hall Manufacturing will approved or deny claim within thirty (30) days of receiving a claim. Hall Manufacturing will issue credit for all genuine Bush-Whacker parts or components as well as all approved Dealership employee labor time at a rate of $30.00 per hour within thirty (30) days of the claim approval.
- Page 34 WARRANTY REGISTRATION ** Return to Hall Manufacturing within sixty (60) days of purchase Date of Purchase ___________ Purchaser _____________________________ Address __________________ City_____________________ State ________ Product ___________________ Model#___________ Serial#_____________ Dealer Address City State Signature of Original Buyer Signature of Dealer or Dealer’s Agent * Please include a copy of the original bill of sale...
- Page 36 TO THE OWNER AND OPERATOR To keep your mower running efficiently and safely, read your manual thoroughly and follow the instructions and safety messages in this manual. The table of contents clearly identifies each chapter where you can easily find the information you need. The Occupational Safety and Health Act (1928.51 Subpart C) makes these minimum safety requirements of tractor operators: Required of the owner:...
Need help?
Do you have a question about the RDF 48 and is the answer not in the manual?
Questions and answers