Table of Contents
Advertisement
Available languages
Available languages
Quick Links
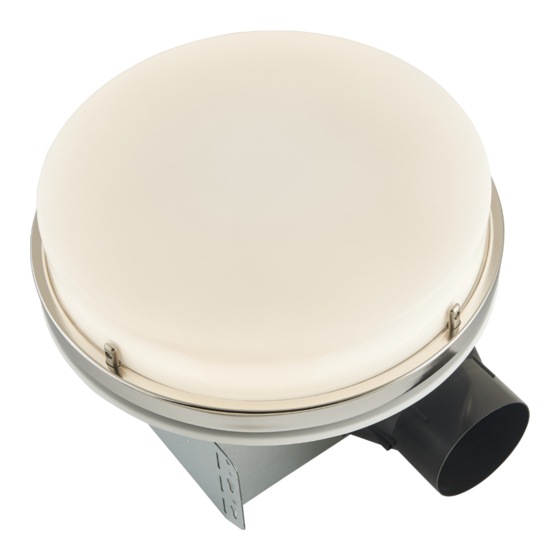
ROOMSIDE SERIES
Decorative Fan-Light
Ventilateur luminaire décoratif
Ventilador con luz decorativo
Broan
Hartford, Wisconsin
Venmar Ventilation ULC
Drummondville (Quebec), Canada
www.broan.com
800-558-1711
Model number:
Numéro de modèle :
Número de modelo:
USE & CARE INSTRUCTIONS
INSTRUCTIONS D'INSTALLATION,
D'UTILISATION ET D'ENTRETIEN
INSTRUCCIONES DE INSTALACIÓN,
www.broan.ca
877-896-1119
AER110LBN
INSTALLATION AND
USO Y CUIDADO
English - See page 2
Français - Voir page 7
Español - Consulte la página 12
Advertisement
Table of Contents

Related Manuals for Broan ROOMSIDE AER110LBN


Summary of Contents for Broan ROOMSIDE AER110LBN
- Page 1 INSTRUCTIONS D’INSTALLATION, D’UTILISATION ET D’ENTRETIEN INSTRUCCIONES DE INSTALACIÓN, USO Y CUIDADO English - See page 2 Français - Voir page 7 Español - Consulte la página 12 Broan Hartford, Wisconsin www.broan.com 800-558-1711 Venmar Ventilation ULC Drummondville (Quebec), Canada www.broan.ca 877-896-1119...
-
Page 2: Cleaning And Maintenance
Register this product at broan.com, broan.ca, nutone.com or nutone.ca. For Warranty Statement, or to order Service Parts: go to the appropriate website and type the model number in the “Model Search” field. Installer: Leave this manual with the homeowner. READ AND SAVE THESE INSTRUCTIONS... -
Page 3: All Installations
ALL INSTALLATIONS 2. Remove wiring panel from fan housing (if already installed). Start here. COOKING AREA Do not install above or inside this area. NOT FOR USE IN Cooking A COOKING AREA. Equipment Floor 3. A pair of flanges may be IMPORTANT - The ducting from this fan to the outside attached to housing if of the building has a strong effect on the air flow, noise and... - Page 4 NEW CONSTRUCTION 7. Connect 4-in. round duct. For Retrofit Installation - Skip to Page 5. 5. Attach damper/duct connector to fan housing. Push connector through opening from inside of housing. Engage tabs and secure with screw from parts bag. 8. Connect wiring. TABS Connect power cable to housing with appropriate UL approved connector (not included).
- Page 5 RETROFIT 9. Install blower. Re-install blower. Secure blower with (2) screws from parts bag and 5. Remove old fan. plug blower into black receptacle. Enlarge ceiling opening (if necessary) to 9¾” (parallel to joist) by 10½” (perpendicular to joist). Leave ductwork and wiring in place.
-
Page 6: Wiring Diagram
7. Connect wiring. 9. Connect 4-in. round duct. Connect power cable to housing with appropriate Pull existing ducting through housing discharge UL approved connector (not included). Make wiring opening. connections as shown in “Wiring Diagram” section. Re- install wiring panel and secure with screw from parts bag. Attach and tape ducting to duct connector. -
Page 7: Nettoyage Et Entretien
Pour enregistrer le produit, se rendre à broan.com, broan.ca, nutone.com ou nutone.ca. Pour lire l’énoncé de garantie ou commander des pièces, se rendre sur le site Web approprié et saisir le numéro de modèle dans le champ Recherche d’un modèle. - Page 8 TOUTES INSTALLATIONS 2. Retirer le panneau de câblage du boîtier (si déjà Début installé). ZONE DE CUISSON Ne pas installer au-dessus ou à l’intérieur de cette zone. NE PAS UTILISER DANS Appareil UNE ZONE DE CUISSON de cuisson Plancher 3. Au besoin, fixer une paire IMPORTANT –...
- Page 9 NOUVEAU BÂTIMENT 7. Raccorder le conduit rond de 4 po. Pour un remplacement, sauter à la page 10. 5. Fixer le raccord de conduit muni d’un clapet au boîtier. Pousser le raccord à travers l’ouverture à partir de l’intérieur du boîtier. Placer les languettes et fixer le raccord avec des vis du sac de pièces.
- Page 10 REMPLACEMENT 9. Installer le ventilateur. Replacer le ventilateur. Le fixer avec deux (2) vis du sac de pièces et 5. Enlever l’ancien ventilateur. brancher sa fiche sur la prise noire. Agrandir l’ouverture au plafond (au besoin), pour qu’elle fasse 9 ¾ po (côté parallèle à la solive) sur 10 ½...
-
Page 11: Schéma De Câblage
7. Brancher les fils. 9. Raccorder le conduit rond de 4 po. Raccorder le câble d’alimentation au boîtier par un connecteur homologué UL adéquat (non inclus). Tirer le conduit existant à travers l’ouverture Brancher les fils comme l’indique le schéma de câblage. d’évacuation du boîtier. -
Page 12: Limpieza Y Mantenimiento
Para ver la declaración de garantía Registre este producto en o para ordenar piezas de repuesto: ir al sitio web apropiado y escriba el número de modelo en el campo “Model Search” (Buscar modelo). Aviso al instalador: Deje este manual con el dueño de la casa. - Page 13 TODAS LAS INSTALACIONES 2. Retire el panel de cableado de la cubierta del ventilador Comience aquí. (si ya está installado). ÁREA DE COCINA No instale el equipo sobre o dentro de esta área. NO USE EL PRODUCTO Equipo EN UN ÁREA DE COCINA. de cocina Piso IMPORTANTE - Los conductos desde este ventilador hacia...
- Page 14 CONSTRUCCIÓN NUEVA 7. Conecte el conducto redondo de 4 pulg. (10 cm). Para instalaciones de conversión: Pase a la página 15. 5. Acople el conector del regulador de tiro/conducto a la cubierta del ventilador. Empuje el conector a través de la abertura desde el interior de la cubierta.
- Page 15 CONVERSIÓN 9. Instale el soplador. Vuelva a instalar el soplador. File el soplador con (2) tornillos de la bolsa 5. Quite el ventilador viejo. de piezas y conecte el soplador en el receptáculo negro. De ser necesario, agrande la abertura del cielo raso a 9 ¾...
-
Page 16: Diagrama De Cableado
7. Conecte el cableado. 9. Conecte el conducto redondo de 4 pulg. (10 cm). Conecte el cable eléctrico a la cubierta con una conexión apropiada aprobada por UL (no incluido). Pase el conducto existente por la abertura de Haga las conexiones de cableado como se muestra en descarga de la cubierta.
Need help?
Do you have a question about the ROOMSIDE AER110LBN and is the answer not in the manual?
Questions and answers