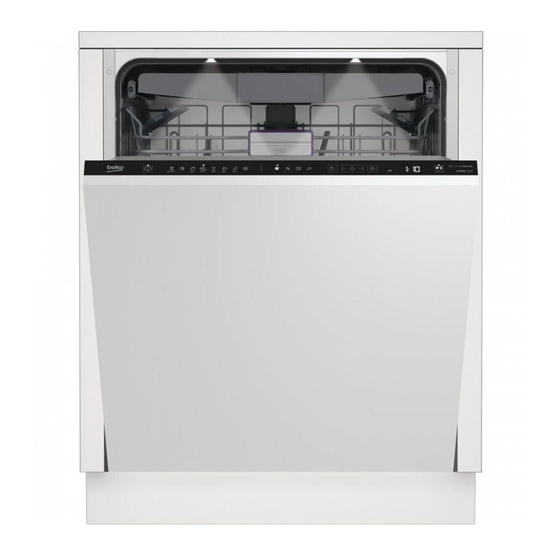
Beko BDIN Series Instructions Manual

Beko BDIN Series Instructions Manual

Hide thumbs Also See for BDIN Series:
Table of Contents

Advertisement

Quick Links

Dishwasher
Instructions
BDIN...
BDIT...
DFN...
DIN...
EDDN...
EDIN...
ENG
18 7638 0400_BEKO_E9_NL/ 05-11-21.(10:16)

Advertisement

Table of Contents
loading

Summary of Contents for Beko BDIN Series

  • Page 1 Dishwasher Instructions BDIN... BDIT... DFN... DIN... EDDN... EDIN... 18 7638 0400_BEKO_E9_NL/ 05-11-21.(10:16)
  • Page 2 Dear Customer, Please read this user manual carefully before using the product. Thank you for choosing the Beko product. We hope you get the best results from your product, which is manufactured with the latest high quality technology. Please read this entire user manual and all other accompanying documents carefully before using the product.
  • Page 3: Table Of Contents

    CONTENT 1 SAFETY INSTRUCTIONS Front Loader Supports ..........27 Upper basket multifunctional crockery rack . 28 Intended use..........4 Bottle and plate holder on the lower Safety of children, vulnerable persons and basket ............28 pets ............... 4 Adjusting the height of the upper basket..
  • Page 4: Safety Instructions

    This product should only be 1- Safety Precautions used to wash household † This section contains dishes. safety precautions to help This product is not suitable for prevent personal injury or commercial or collective use. damage to property. † The life of your product is †...
  • Page 5: Electrical Safety

    leaving the room it is in. importer, to avoid Children and pets can possible hazards. become trapped in the Push the power cord product and suffocate. not under or behind the product. Don't post Cleaning and heavy objects on the power cord.
  • Page 6: Installation Safety

    † Do not install the product in The product is heavy, do environments where the not move it alone. temperature drops below 0°C. STATEMENTkeep it Do not place the product on Do not hold the product by the carpets or similar surfaces. door or panel to move it.
  • Page 7: Operational Safety

    Operational Safety product. Have the grounding installed by a qualified † Only safe electrician. Do not use the dishwashing detergents, product if the grounding does brighteners and additives not comply with local/national may be used. regulations. Never use chemical Insert the plug into an solvents in the product.
  • Page 8: Safety During Maintenance And Cleaning

    Always turn serving forks, detergents, gas, gasoline, bread knives, etc. upside thinner, alcohol, varnish, etc. down so that their pointed STATEMENTForget the ends face down or lie filter of the product after horizontally in the plate cleaning. Otherwise, the pumps rack.
  • Page 9: Environmental Regulations

    no harmful and prohibited 2-Environmental Regulations materials as stipulated in the Compliance with the WEEE directive. directive on the disposal Packing Formation of waste products Packaging materials of This product complies with the EC the product are WEEE Directive (2012/19/EC). This made of product bears the classification recyclable materials in...
  • Page 10: Technical Specifications

    Technical specifications Note for the test organisms: Data required for performance testing will Maximum washing capacity ('check be provided upon request. the energy label and the table Applications can be mailed to the program data and average consumption following address: values in the quick start guide.) dishwasher@standardloading.com Height (refer to...
  • Page 11: Your Dishwasher

    3- Your dishwasher Overview 1. Upper basket 2. Top nozzle 3. Lower jet 4. Silver crockery basket (depending on the model) 5. Door 6. Nameplate 7. Control Panel 8. Detergent dispenser 9. Lower basket 10. Filters 11. Salt reservoir lid 12.
  • Page 12: Installation

    When installing the product, take 4- Installation care not to damage the floor, walls, Read the part first pipes, etc. Do not hold the product "Safety regulations"! Installation by the door or panel to move it. procedures should always be performed by the manufacturer, authorized service agent, or a qualified person designated by Suitable installation location...
  • Page 13: Connecting The Water Supply

    Connection to the drain Connect water supply The water drain hose can be We recommend installing a filter in connected directly to the drain hole or the water supply to prevent dirt (sand, sink drain. Refer to the installation clay, rust) in the water supply or in manual that came with your machine your home water pipes from for additional information.
  • Page 14: Electrical Connection

    Electrical connection Aquasafe+ (depending on model) Connect the product to a grounded outlet protected by a The Aquasafe+ system protects against fuse of the rating specified in the water leakage at the water supply hose. "Technical Specifications" table. Water contact with the valve body of the Our company cannot be held system must be avoided to avoid responsible for any damage...
  • Page 15: Preparation

    affect the washing, rinsing and 5- Preparation drying performance of the machine. Read the “Safety Customize it Instructions” section first! water softening system Washing performance will improve Energy Saving Tips when the water softening system is set The following information will help you correctly.
  • Page 16: Salt

    The salt reservoir will be filled with water when you start the product. Therefore, add the salt before operating the machine. 1. First take out the bottom basket 0.05 12.3-14.7 0.05 9.6-12.2 0.05 9.0-9.5 0.05 8.0-9.0 0.05 7.0-7.9 3. Only add 1 liter of water to the salt reservoir before using your machine for the first time.
  • Page 17: Dishwasher Detergent

    washed away and cannot cause rust in the machine. If you are not going to wash immediately, run the machine empty on the shortest program. Since different salt brands on the market have different grain sizes, and because the hardness of the water can vary, it can take a few hours to dissolve the salt in the water.
  • Page 18: Detergent Tablets

    3. Press the lid of the detergent show their effect up to a certain water dispenser to close it. When hardness level (21°dH). Water softening closing the lid, a "click" sounds. salt and rinse aid should also be used together with the detergent if the water hardness is higher than the stated level.
  • Page 19: Rinse Aid

    rinse aid 4. If stains remain on the tableware after washing, the level should be The rinse aid used in dishwashers is increased, and if a blue trail a special combination that is aimed remains after rubbing by hand, the at more efficient drying and the level should be lowered.
  • Page 20: Placing The Dishes In The Dishwasher

    Place the dishes in the dishwasher Depending on the capacity of your dishwasher, you can only use your dishwasher optimally in terms of energy consumption and washing and drying performance if you place the dishes in an orderly manner. † Wipe coarse food particles (bones, seeds, etc.) from the dishes before placing them in the dishwasher.
  • Page 21 Examples of other possible plate- Wrong placement singing of the racks lower basket upper rack Wrong placement 21/NL...
  • Page 22: Silver Crockery Basket

    silver crockery basket silver crockery basket (depending on model) (depending on model) The silverware basket is designed to The silverware basket is designed to wash your cutlery, such as knives, wash your cutlery, such as knives, forks, forks, spoons, etc. in a cleaner way. spoons, etc.
  • Page 23: Folding Lower Racks

    Foldable lower baskets Foldable lower baskets (depending on model) (depending on model) The six flip-up racks (A) in the lower The six flip-up racks (A) in the lower basket of the machine are designed basket of the machine are designed for easier loading of large items, such for easier loading of large items, such as pans, bowls, etc.
  • Page 24: Supports For Tray Wash

    SoftTouch Accessory Supports for Tray Wash (depending on model) (depending on model) Use the supports to wash dishes in the The SoftTouch Accessory found in the lower basket. bottom basket of your machine ensures safe washing of your delicate glassware. Refer to the Utilities section for correct program and function selection.
  • Page 25: Lower Basket Multifunctional / Height-Adjustable Crockery Rack

    Lower basket multifunctional / To close the shelves: 1. Fold up the rack (A). height-adjustable crockery rack 2. Slide the rack up (B). (depending on model) This accessory in the lower rack of your 3. Place the rack in the vertical position (C). machine allows you to easily wash 4.
  • Page 26: Bottom Rack For Bottles

    top basket Bottom rack for bottles multifunctional service rack (depending on model) The bottle rack is designed for easier (depending on model) washing of long items with a wide Located in the top basket of your nozzle. You can take the bottle rack machine, this accessory allows you to out of the rack when not in use by easily wash items such as extra long...
  • Page 27: Front Loader Supports

    Support front loader (depending on model) You can use the front loader supports if you want to wash a drawer on your bottom basket. Refer to the Additional Functions section to select the correct program and function. You can fold this part when not in use so that you can put your dishes in the You can also remove the part if required, as shown in Figures 1...
  • Page 28: Bottle And Plate Holder On The Lower Basket

    top basket Bottle and plate holder on the lower basket multifunctional crockery rack (depending on model) The multi- (depending on model) function crockery rack in the top (depending on model) basket of your appliance makes it The bottle and plate holder (A) on the easy to load and wash tableware lower basket is designed to make it and kitchen utensils.
  • Page 29: Adjusting The Height Of The Upper Basket

    Adjusting the height of the 1. To raise the basket, while holding the basket cables, pull the basket upper basket up with both hands while the (depending on model) basket is in the lower position (B). The top basket height adjustment system is designed to allow you to create 2.
  • Page 30: Adjusting The Height Of The Top Basket

    Adjusting the height of the To lower the basket while it is in the upper position; top basket 1. Take the wires from the top (depending on model) The upper basket with both hands, lift the basket height adjustment basket slightly and press while mechanism is designed to create releasing the catches as shown larger spaces in the lower and upper...
  • Page 31: Collapsible Wire Racks In Top Basket

    Collapsible wire racks in Height adjustment with empty rack top basket (depending on model) In this model, the height of the upper (depending on model) upper rack can be changed using the You can use collapsible wire racks wheels mounted at two different when you need more space for your heights.
  • Page 32: Cutlery Baskettop

    Cutlery basket above (depending on model) The cutlery basket above is designed to wash your cutlery such as forks, spoons etc. by placing them between the fences in the basket. When the center tray is in the lowest position, you can load long/tall items such as coffee cups, ladles, etc.
  • Page 33: Operation Of The Product

    7- Operation of the product Read the “Safety Program selection Instructions” section first! 1. Press the On/Off button to turn on the machine. Read the “Quick Start Guide” section first. Power key 2. Check that the salt and rinse aid indicators light up and add salt When you press the Power button, the and/or rinse aid if necessary.
  • Page 34 half load (depending on (depending on This one will be fashion model) The AquaIntense rotor has been completed located under the 1. Put your va low rotor helps 2. Turn on the ma when washing test. heavily soiled dishes placed on the right 3.
  • Page 35 SteamGloss Function IonGuard Function on/off (depending on model) This feature provides superior drying performance. Settings menu functions (depending on model) Depending on the model, you will find a number of additional functions under the settings menu of your product. Press the menu key for 3 seconds to access these functions.
  • Page 36 EverClean Filter Volume of the (depending on model) customize warning sound With this function, your microfilter is 1. After turning on your machine, cleaned with a special system at the press the menu key for 3 end of the wash cycle and ready for the seconds.
  • Page 37: Planning The Washing Time

    Floor lighting Planning the washing time Warning to indicate that the Delay machine is in the washing phase If a reduced electricity rate is applied in your region, you can use the Deferral (depending on model) function to have the dishes washed during Your machine reflects light to the floor during the the times when this rate applies.
  • Page 38: Adjusting The Amount Of Rinse Aid

    holds. The Postpone indicator will turn machine and/or on the dishes off at the end of the cancel process if the depending on the program phase delay process has been canceled. during cancellation. You can select and start a new Salt indicator ( ) program after the Delay function is cancelled.
  • Page 39: Program End

    Water shut-off warning 2 doses of rinse aid are filled in P:2 position. If the water supply is turned off or the tap 3 doses of rinse aid are filled in P:3 is turned off, the machine will not be able position.
  • Page 40: Maintenance And Cleaning

    7-Maintenance and cleaning Cleaning the filters Clean the filters at least once a week Read the “Safety to keep the machine running Instructions” section first! efficiently. Check if there are any food Unplug the product and turn off residues on the filters. If there are any the tap before starting any cleaning food residues, remove them and rinse procedures.
  • Page 41: Cleaning The Hose Filter

    Cleaning the hose filter The impurities from the tap water or your own water installation (such as sand, dirt, rust, etc.) can cause damage to the machine. This can be prevented by the filter attached to the water inlet hose. Check the filter and hose regularly and clean them if necessary.
  • Page 42: Cleaning The Spray Arms

    Cleaning the spray arms For efficient machine operation, clean the spray arms at least once a week. Spray arm lower Do not try to rotate the spray arm by holding it by the ends. Check if the holes on the lower spray The drive system in the spray arm (1) are clogged.
  • Page 43: Troubleshooting

    8- Troubleshooting Machine does not start. † The power cable is not connected to the mains socket. >>> Check whether the power cable is connected to the wall socket. † The fuse has blown. >>> Check the fuses in the house. †...
  • Page 44 † The lid of the detergent compartment has been left open. >>> Make sure the lid of the detergent compartment is closed properly after adding detergent. Dishes are not dry at the end of the cycle † The dishes are not correctly placed in the machine. >>> Load the dishes in such a way that no water can remain in them.
  • Page 45 Limescale remains on the dishes and glassware takes on a hazy appearance † Not enough rinse aid has been used. >>> Check the rinse aid indicator and add rinse aid if necessary. Increase the rinse aid setting if the machine contains sufficient rinse aid.
  • Page 46 † Intensive cleaning agents such as bleach have been used. >>> The protective layer on metal surfaces becomes damaged and loses its effectiveness over time if it comes into contact with cleaning agents such as bleach. Do not wash your dishes with bleach.
  • Page 47 † Er lekt zout. >>> Let erop dat u tijdens het bijvullen van zout, geen zout rond het gat morst. Gemorst zout kan krassen veroorzaken. Zorg ervoor dat het deksel van het zoutreservoir na het bijvullen goed wordt gesloten. Draai het voorwasprogramma om ervoor te zorgen dat het gemorste zout in de machine wordt verwijderd.
  • Page 48 Kitchen utensils are broken. † The dishes are not correctly placed in the machine. >>> Load the dishes as described in the user manual. † Baskets are overloaded. >>> Do not load the baskets beyond their capacity. At the end of the programme, water remains in the machine. †...

Table of Contents