Advertisement
Available languages
Available languages
Advertisement

Summary of Contents for Auto Vox W10
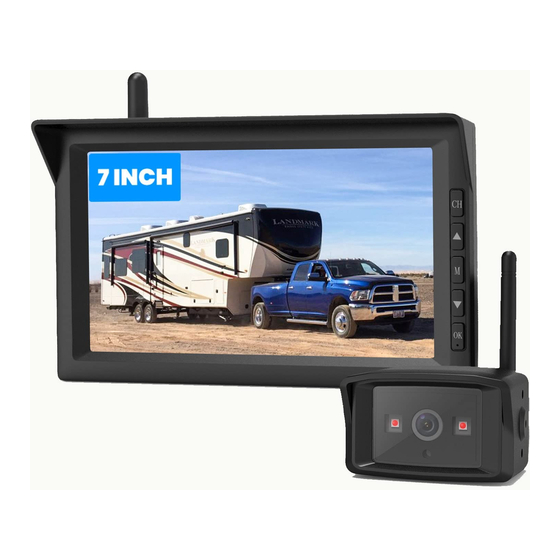
- Page 1 Digital Wireless Backup Camera Kit Multilingual User Manual...
- Page 3 English .................................... Deutsch ..................................Français ..................................Italiano ....................................
- Page 4 ontents Introduction ..................................... Package Contents ..................................Installation ....................................... Installing the Monitor ................................... Installing the Backup Camera ..............................Operating Instructions ................................Monitor Operations ..................................Monitor Menu Settings ................................Basic Operations ..................................Technical Specifications ................................Troubleshooting .................................... Care and Maintenance ................................Warranty and Service ..................................
- Page 5 ntroduction Thank you for purchasing this digital wireless backup camera kit. Please read all of the installation instructions carefully before installing the product. Improper installation will void manufacturer's warranty. The installation instructions do not apply to all types of vehicles, and are written as guidelines to assist in installing the backup camera kit. ackage Contents 7 inch monitor with antenna Mount holder with rotary knob...
- Page 6 nstallation Pre-Installation note: ● When installing the unit, do not impair the equipment, control units and systems inside the vehicle. Follow local applicable laws and safety regulations for vehicles! ● Park in even and safe location. ● Before installing your backup camera, please test all the components of the product using your vehicle power or an external power supply to check if the product can work properly.
- Page 7 ● If you need to remove the monitor, you can separate the monitor from the mount Antenna holder by unscrewing the rotary knob on the back of the monitor. 2) Connect the monitor cable with the car charger cable. Plug the car charger into 12V/24V cigarette lighter port in your car.
- Page 8 2) Connect the power cable a. Open the inner plastic panel and remove it from the hatch or tailgate. (The panels are usually attached to the tailgate by clips. This may take a bit longer time to avoid clip damages. Once this panel is removed, the work will be done easily) b.
- Page 9 4) Connect the camera cable Connect the 2 pin male plug of the camera cable to the female plug of the power cable. Make sure you don’t lose the waterproof rubber ring. Then tighten the nut. Make sure the cables are not pinched or knotted. Male plug How to find the reverse light (Positive)? a.
- Page 10 perating Instructions 7 inch Screen Monitor operations 1) CH: Switch CAM1/CAM2 channel. 2) ▲: Forward/increase. 3) M: Menu/Return/Confirm. 4) ▼: Back/decrease. DOWN 5) OK: Confirm. Monitor menu settings 1) Press M to access menu mode. 2) Press ▲ and ▼ to advance the following menu items: Pair: pair the monitor with backup cameras.
- Page 11 Step4: Press ▲ or ▼ to choose from 6 different sizes. Press M/OK to confirm. Note: The setting screen will close automatically if no operation is performed for about 5 seconds, then the settings will be saved. 2) Pair the Camera If you need to re-paired/change the camera or install the Cam2, please follow the steps: Step1: Press M to enter the main setting menu, select Pair.
- Page 12 4) Daytime and Nighttime mode Daytime mode The camera automatically switches to daytime mode in daytime or high light conditions, and the screen displays color images. Nighttime mode The camera automatically switches to nighttime mode in nighttime or low light conditions and the infrared lights turn on to fill light, then the screen displays black and white images.
- Page 13 roubleshooting Q1: The ignition is on and the R-gear is engaged, but the monitor display is blank. 1) When you charge the monitor, the brand logo is not displayed on the screen. ① Possible cause: The monitor or the car charger is broken. Solution: Power the monitor, if the red light on OK is always on after 15 seconds which indicates the monitor is broken, please replace the monitor;...
- Page 14 Q2: The monitor image isn’t clear enough. ① Possible cause: Bright light is hitting the camera lens. Solution: Move the backup camera out of the area of the interfering light. ② Possible cause: The protective films on the monitor and backup camera aren’t removed. Solution: Remove films from the monitor and backup camera.
- Page 15 ● Keep liquids away from the display. ● Wipe the unit gently with a soft cloth moistened with water. Do not allow residue or liquids to enter any part of the appliance as this may cause risk of electrocution. CAUTION: Always disconnect from the mains before cleaning. Never use solvents such as benzene, thinner or cleaners available commercially to clean the system.
- Page 16 For speedy processing of your warranty claim you will need: ● Copy of the receipt showing the purchase date. ● Reason for the claim (description of defect). For more information or support, see www.auto-vox.com Alternatively, send an e-mail to a service representative at service@auto-vox.com...
-
Page 17: Table Of Contents
nhaltsverzeichnis Einleitung ......................................Lieferumfang ....................................Installation ....................................... Installieren des Monitors ................................Installieren der Rückfahrkamera .............................. Bedienungsanleitung .................................. Bedienung des Monitors ................................Menüeinstellungen ..................................Grundoperationen ..................................Technische Daten ..................................Fehlerbehebung .................................... Wartung Und Pflege ..................................Garantie ...................................... - Page 18 inleitung Vielen Dank, dass Sie sich für dieses digitale drahtlose Rückfahrkamera-Kit entschieden haben. Bitte lesen Sie die vorliegenden Bedienungsanleitung vor Einbau und Inbetriebnahme sorgfältig durch. Unsachgemäße Installation führt wegen Nichtbeachtung der Bedienungsanleitung zum Erlöschen der Gewährleistung. Die Installationsanweisungen gelten nicht für alle Fahrzeugtypen und dienen nur als Richtlinien für die Installation des Rückfahrkamera-Kits. ieferumfang Monitor Monitorständer...
-
Page 19: Installation
nstallation Antenne Vorsichtsmaßnahmen vor der Installation: ● Beschädigen Sie beim Einbau des Geräts nicht die Geräte-, Steuergerät- und Systemfunktionen im Fahrzeug und halten Sie sich an die örtlichen Gesetze und Vorschriften. Auto-Ladegerät ● Bitte parken Sie das Fahrzeug an einem flachen und sicheren Ort. Monitor Schnittstelle ●... -
Page 20: Installieren Der Rückfahrkamera
● Entfernen Sie die Monitorständer nicht, nachdem sie geklebt wurde, da das Klebeband seine Haftung verlieren kann. ● Wenn Sie das Monitor entfernen müssen, können Sie die Basis vom Monitor trennen, indem Sie den Knopf auf der Rückseite des Monitors abschrauben. 2) Schließen Sie die Verkabelung an die 8-Pin Schnittstelle des Autoladegeräts an und stecken Sie das Autoladegerät in den Zigarettenanzünderanschluss, um die Stromversorgung zu gewährleisten. - Page 21 2) Schließen Sie das Versorgungskabel von Netzanschlusskasten an. a. Öffnen Sie die innere Kunststoffverkleidung und entfernen Sie sie von der Luke oder Heckklappe. (Die Verkleidungen werden normalerweise mit Clips an der Heckklappe befestigt. Dies kann etwas länger dauern, um Beschädigungen der Clips zu vermeiden. Sobald diese Verkleidung entfernt ist, können die Arbeiten problemlos durchgeführt werden.).
- Page 22 Selbstschneidende Schrauben 4. Schließen Sie die Kamera an das Netzkabel an. Netzkabels und stellen Sie sicher, dass der wasserdichte Gummiring nicht verloren geht, und ziehen Sie dann die Mutter fest. Achten Sie darauf, dass die Kabel nicht gequetscht oder verknotet werden. Wie findet man den+Pol des Rückfahrlichts ? Schritt a.
-
Page 23: Bedienung Des Monitors
Hinweis: 1. Das oben erwähnte Stromanschlussverfahren der Kamera gilt auch für die zweite Kamera. Sie können Strom für Kamera auch beziehen, indem Sie andere ACC-Netzteile im Auto anschließen oder externe Netzteile verwenden. 2. Aufgrund unterschiedlicher technischer und konstruktionsbezogener Fahrzeugtypen gelten diese Gebrauchsanweisungen nicht für alle Fahrzeugmodelle. -
Page 24: Grundoperationen
Grundoperationen 1) Wählen Sie die Größe der Richtlinie Schritt1: Stellen Sie sicher, dass Guide line in der Menüoption auf ON eingestellt ist Schritt2: Rückwärtsgang, lassen Sie den Monitor das Kamerabild anzeigen und stellen Sie sicher, dass sich der Bildschirm in einer Nicht- Menü-Oberfläche befindet. - Page 25 3) Cam1, Cam2 Kanäle umschal ten oder geteiltem Bildschirm Wenn der Monitor mit Cam1 und Cam2 erfolgreich gekoppelt ist und auf dem Bildschirm das Bild einer der Kameras angezeigt wird (nicht im Menümodus), drücken Sie die Kanaltaste (CH). Sie können zwischen Cam1 und Cam2 wechseln, oder rufen Sie den Splitscreen-Anzeigemodus auf.
-
Page 26: Technische Daten
echnische Daten Monitor Bildschirmdiagonale 7,0 Zoll Bildschirmhelligkeit 500 cd/m² (Typ.) Übertragungsbildrate 25 FPS Stromversorgung Max 300mA (@12V) Arbeitstemperatur -20°C~65°C Betriebsspannung DC 12-24V Kamera Blickwinkel 135°±5° Mindestbeleuchtung 0 Lux (Vollautomatischer Nachtschalter Infrarotlicht Fülllicht) Arbeitsband 2.4GHz ISM Arbeitstemperatur -20°C ~65°C Betriebsspannung DC 12-24V Stromversorgung Max 650mA (@12V) ehlerbehebung... - Page 27 2) Beim Aufladen des Monitors erscheint das Markenlogo. ① Mögliche Ursache: Die Kamera befindet sich an einem versiegelten/metallischen Ort. Lösung: Bitte halten Sie die Kamera von der versiegelten/metallenen Stelle fern. Versuchen Sie, die Kamera in der Nähe des Displays zu halten. Infrarotlicht ②...
-
Page 28: Wartung Und Pflege
② Mögliche Ursache: Die Länge des Automodells beträgt mehr als 10 Meter. Und das Bild wird stabil, wenn sich die Kamera in der Nähe des Monitors befindet. Lösung: Wenn die Länge des Automodells 10 Meter überschreitet, wird empfohlen, eine extra Antenne zu kaufen. ③... - Page 29 arantie Sie (als Endverbraucher) erhalten ab dem Verkaufsdatum eine 12 Monate Garantie. Bitte wenden Sie sich während der Garantiezeit an die Verkaufsstelle oder an qualifizierte Spezialisten für Schäden, Reparaturen oder andere Probleme mit dem Produkt. Die allgemeinen Garantiebedingungen beziehen sich auf Produktions- und Materialdefekte. Bitte senden Sie das defekte Produkt an die Verkaufsstelle zurück.
- Page 30 atalogue Introduction ..................................... Composants ....................................Installation ....................................... Installation du moniteur ................................Installation de la caméra ................................Instruction ......................................Opérations du moniteur ................................Paramètres ....................................Opérations de base ..................................Spécification ....................................Dépannage ....................................... Entretien et Maintenance ................................Garantie ......................................
- Page 31 ntroduction Merci d'avoir commandé cette caméra de recul sans fil numérique. Avant d'installer le produit, veuillez lire attentivement toutes les instructions d'installation. Une installation inappropriée invaliderait la garantie. Les instructions d'installation ne s'appliquent pas à tous les types des véhicules, mais servent à vous aider comme un guide d'installation de caméra de recul.
- Page 32 nstallation antenne câble d’allume-cigare Précautions avant l'installation: ● Lors de l'installation de l'unité, ne pas endommager l'équipement, l'unité de contrôle et les fonctions du système à l'intérieur du véhicule et se conformer aux lois et règlements locaux. ● Garez le véhicule dans un endroit plat et sûr. écran port ●...
- Page 33 ● l'angle du moniteur peut être réglé en tournant le moniteur à gauche et à droite. ● ne pas enlever la base du moniteur après le collage, sinon le papier adhésif peut perdre de l'adhérence. ● si le moniteur doit être retiré, la base peut être séparée de l'écran en dévissant le bouton situé...
- Page 34 2) Connectez le câble d'alimentation au feu de recul ou à la partie métallique. a. Ouvrez le panneau en plastique intérieur du feu de recul, et retirez-le de la trappe ou du hayon (Les panneaux sont généralement fixés sur le hayon par des clips. Cela peut prendre un peu plus de temps pour éviter des dommages au clip. Une fois ce panneau est sorti, le travail marchera plus facilement.) b.
- Page 35 Étape2: Après avoir fixé le support sur la carrosserie, passez le fil et bouchez le bouchon écrou étanche. Comme le montre l'image: 4) Connectez la caméra au câble d'alimentation. Connectez le fil mâle à 2 broches de la caméra à l'écrou du cordon d'alimentation et assurez- vous qu'il n'y a pas d'anneau étanche manquant avant de serrer l'écrou.Notez que le câble fiche mâle n'est pas pressé...
- Page 36 nstruction Moniteur antenne Opérations du moniteur Support 1) CH: commuter le canal 2) ▲: avancer/augmenter Bouton de réglage DOWN 3) M: menu/retourner/confirmer 4) ▼: reculer/baisser Support de moniteur 5) OK: confirmer Ligne de connexion Paramètres 1) Appuyez sur le bouton (M) pour entrer en mode menu. M/U Control: choisir l'affichage d'image normale/miroir/inversée/miroir 2) Utilisez les boutons (▲) et (▼) pour choisir les éléments inversée.
- Page 37 2) Appairer la caméra Remarque: Veuillez d’abord finir les étapes 1-2, et puis branchez la caméra, sinon l’appairage n’aura pas réussi. Le mode d’appairage se retirera automatiquement Lorsque le temps d’appairage a dépassé 30 secondes et entrer en mode veille. Dans ce cas, veuillez réappairer en suivant les étapes ci-dessous.
- Page 38 Mode nuit La caméra passe automatiquement en mode nuit pendant la nuit ou dans de mauvaises conditions d'éclairageet, la lumière infrarouge sera activée pour compléter la lumière, et en ce moment l'écran affiche une image en noir et blanc. Remarque: lorsque la lumière extérieure passe soudainement de l'obscurité...
- Page 39 épannage L'allumage est activé et la vitesse est mise à la position "R", mais l'image manque sur l'écran 1) le logo ne se présente pas sur l'écran lorsque le moniteur est chargé. ① Cause possible: Le câble d'allume-cigare est en panne. Solution: 15 secondes après avoir branché...
- Page 40 L'image du moniteur n'est pas assez claire. ① Cause possible: La lumière vive frappe la lentille de la caméra. Solution: Gardez la caméra à l'écart de la lumière forte. ② Cause possible: Les films électrostatiquesn sur le moniteur et sur la caméra ne sont pas enlevés. Solution: Enlevez les films électrostatiques du moniteur et de la caméra.
- Page 41 ● Éloignez l'écran du liquide. ● Lors du nettoyage de l'appareil, veuillez utiliser un chiffon souple et mouillé et ne pas laisser le liquide ou les débris pénètrent dans l'appareil. Sinon cela peut causer une électrocution. ● Lors du lavage de la voiture, n'utilisez pas de pistolet à eau haute pression pour pulvériser la caméra à courte distance, afin d'éviter l'entrée d'eau.
- Page 42 ontenuti Introduzione ..................................... Componenti ..................................... Installazione ....................................Installazione del monitor ................................Installazione della telecamera ..............................Operazione ....................................... Operare il monitor ..................................Impostazioni del menu ................................Funzioni di base .................................... Specifiche tecniche ..................................Risoluzione dei problemi ................................Cura e manutenzione ................................... Garanzia ......................................
- Page 43 ntroduzione Grazie per aver scelto questo kit di retrocamera digitale senza fili. Prima di installare il prodotto, leggere attentamente tutte le istruzioni di installazione. Un'installazione impropria invaliderà la garanzia del produttore. Le istruzioni di installazione non si applicano a tutti i tipi di veicoli e servono solo come una guida per assistervi nell'installazione. omponenti Monitor Supporto per monitor...
- Page 44 nstallazione antenna Caricabatteria per auto Precauzioni prima dell'installazione: ● Durante il processo di installazione, non danneggiare l'attrezzatura, l'unità di controllo e le funzioni del sistema all'interno del veicolo e rispettare le leggi e i regolamenti locali. ● Parcheggiare il veicolo in un luogo piano e sicuro. Monitor interfaccia ●...
- Page 45 ● Quando è necessario rimuovere il display, stacca la base dal display svitando la manopola sul retro del display. 2) Collegare il cablaggio al connettore 8-pin del caricatore per auto e inserire il caricatore per auto nella porta dell'accendisigari per l'alimentazione. (Fare riferimento all'immagine sulla destra) Nota: ●...
- Page 46 2) Collegare il cavo della scatola di alimentazione. a. Aprire il pannello di plastica interno e rimuoverlo dal portello o dal portellone posteriore. (I pannelli sono generalmente fissati sul portellone posteriore mediante clip. Questa operazione potrebbe richiedere più tempo per evitare danni alle clip. Una volta rimosso questo pannello, il lavoro sarà...
- Page 47 Passaggio2: Dopo aver bloccato la staffa alla carrozzeria, far passare il cavo e collegare la Il dado spina impermeabile. Come mostrato in figura 4) Collegare la fotocamera e il cavo di alimentazione. Il cavo maschio Collegare il cavo maschio a 2 pin della telecamera al connettore femmina del cavo di alimentazione e assicurarsi che non manchi l'anello di gomma impermeabile, quindi serrare Il connettore femmina il dado.
- Page 48 ● A causa delle differenze nella tecnologia e nei relativi tipi di veicoli, queste istruzioni non sono applicabili a tutti i modelli. ● Durante il lavaggio dell'auto, evitare di utilizzare una pistola ad acqua ad alta pressione per spruzzare la fotocamera a distanza ravvicinata per evitare l'ingresso di acqua. perazione Monitor antenna...
- Page 49 Funzioni di base 1) Scegliere le dimensioni delle linee ausiliarie: Passaggio1: assicurarsi che il Guide line nelle opzioni di menu sia impostata su ON . Passaggio2: mettete la retromarcia, lasciare che il monitor visualizzi l'immagine della telecamera e assicurarsi che lo schermo sia in un'interfaccia non-menu.
- Page 50 3) Commutazione dei canali Cam1 e Cam2 o visualizzazione a schermo diviso. Quando il display è accoppiato con Cam1 e Cam2 e lo schermo è in interfaccia non menu, premere il tasto CH per cambiare il canale di Cam1 e Cam2 o entrare nella modalità di visualizzazione a schermo diviso. Nota: quando entrambe le telecamere sono accese e in un'unica schermata, l'immagine CH1 verrà...
- Page 51 pecifiche tecniche Specifiche del display Dimensione dello schermo 7.0 inch Luminosità dello schermo 500 cd/m² (Typ.) Tensione di esercizio DC 12-24V Frequenza dei fotogrammi 25 FPS Corrente di funzionamento Max 300mA (@12V) Temperatura d'esercizio -20°C~65°C Specifiche della telecamera Angolo di visione diagonale 135°±5°...
- Page 52 2) Quando si carica il monitor, il logo del marchio viene visualizzato sullo schermo. ① Possibile causa: la telecamera è collocata in un luogo sigillato/metallico. Soluzione: tenere la telecamera lontano dal luogo sigillato/metallico, provare ad avvicinare la telecamera allo schermo. Luci a infrarossi ②...
- Page 53 ② Possibile causa: la carrozzeria supera i 10 metri e l'immagine è stabile quando la telecamera è vicina al display. Soluzione: se la carrozzeria supera i 10 metri, si consiglia di acquistare un'antenna di estensione. ③ Possibile causa: guidare attraverso aree complesse come ponti, tunnel, fabbriche e grattacieli oppure la velocità supera gli 80 km/h. Soluzione: allontanarsi dalle aree complesse di cui sopra.
- Page 54 aranzia Lei (come utente finale) riceva una garanzia di 12 mesi dalla data di acquisto. Inoltre, è possibile contattare il nostro rappresentante dell'assistenza tramite l'indirizzo e-mail sulla scheda di garanzia per ottenere una garanzia estesa di 6 mesi. Per i prodotti che vengono sostituiti entro il periodo di garanzia di un anno, il periodo di garanzia seguirà il periodo di garanzia rimanente dell'ordine originale;...
- Page 56 www.auto-vox.com Email: service@auto-vox.com Ver-1.0...
Need help?
Do you have a question about the W10 and is the answer not in the manual?
Questions and answers