
Summary of Contents for CasaCam VS5102
- Page 1 10.1” Wireless System with Night Vision Camera VS5102 USER MANUAL www.casacamusa.com For tech support, contact us at service@casacamusa.com...
-
Page 2: Table Of Contents
Table of Contents What’s Included in the Box? ..................... 3 Overview ............................. 3 2.1 Wireless Receiver (7”Touchscreen Monitor) ....................3 2.2 Camera ................................4 Set up the Hardware ........................5 3.1 Monitor ................................5 3.2 Camera ................................5 3.2.1 General ..............................5 3.2.2 Placement Considerations ........................ -
Page 3: What's Included In The Box
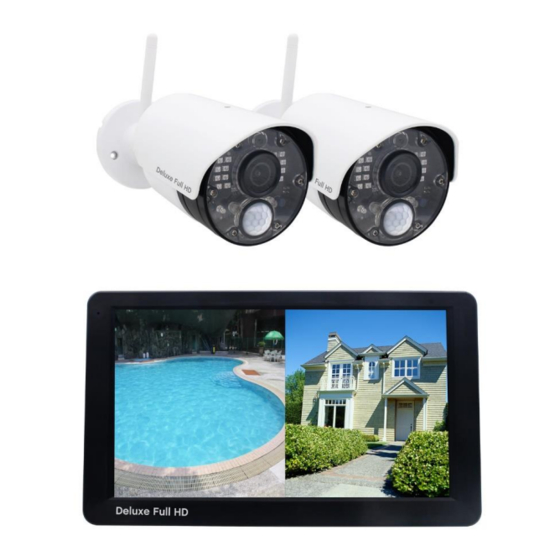
1. What’s Included in the Box? 2. Overview 2.1 Wireless Receiver (10.1” Touchscreen Monitor) -
Page 4: Camera
2.2 Camera Item What it is What it does Captures the sound on camera side and transmits the sound from Microphone camera to monitor. Catches the video in front of the lens and transmits video from Lens camera to Monitor. IR LED Infrared LEDs provide viewing in no/low light conditions. -
Page 5: Set Up The Hardware
Camera antenna Receives & Sends signals to or from the Monitor. Use the bracket to mount the camera on a wall or other flat Bracket surfaces. The pair button is located on the back of the camera. Press pair Pair button button when monitor is in pairing mode. -
Page 6: Placement Considerations
overhang or eave. As rainwater drops on the camera glass, it may create spots that will reflect the light from the infrared LEDs used for night vision, thus causing lower quality video. Also, as dust, grime, and cobwebs accumulate on the camera glass, they can reflect light from the infrared LED and might lower video quality. -
Page 7: System Operation
4. System Operation Live Screen Icons (Single channel) In single channel, touch live view area (not operation icon), it will switch to quad/split display. Live Screen Icons (Quad) In split/quad display, touch live view area (not operation icon), it will switch to related single channel display. - Page 8 Signal Strength: Shows how strong the camera's signal is. Signal ranges from 4 bars down to 0 bars (out of range). Camera Number: Displays the current channel number you are currently viewing. If viewing multiple cameras in quad/split display, the camera indicator will appear above each video display.
- Page 9 Flashing Red - Low battery Mute: Means audio for this channel is off (mute), touch this icon can turn on the audio. Audio cycle: This icon appears only at quad or split mode, touch this icon (this icon will change to green) will set the audio in cycle mode, each channel will turn on audio for 10 seconds and then turn on audio for next channel.
-
Page 10: Menu
different date. Talk button: Push and hold to talk to camera, when it is pushed, the will be displayed near the battery icon. Channel loop: Touch this button will set monitor in channel auto switch mode, monitor will display from channel 1—channel 2—channel3—channel4 and cycle, will be displayed on the lower left of the monitor. -
Page 11: Recording Setup
1. Pairing. This system comes with cameras already paired. Use Pairing to assign these cameras to different channels or to pair additional new cameras to the monitor. 2. Camera On/Off. Make the cameras visible to the monitor. 3. Brightness. Adjust camera brightness for different camera separately. 4. - Page 12 1. Duration. Set the length of time the camera records once motion triggers the camera to record. Choices are 15 seconds, 30 seconds, or 1 minute (Default - 15 seconds) 2. Schedule Recording. Set up a schedule for pre-determined recording times and lengths. In following “Schedule Recording Over view”, you can view your schedules you set before.
-
Page 13: System Settings
If you don’t select “Motion” (the button in grey background), means system will record continuously in the schedule you set no matter if there is motion or not. To delete a schedule. From Menu\Recording Setup\Schedule Recording. Shows “Schedule Recording Overview”, select different day to show all schedules. Find the schedule you want to delete. -
Page 14: Motion Detection Settings
2. Network Setup 1). WiFi Channels To setup WiFi channels used between camera and monitor. 2). Advanced Setup To setup DHCP or Static IP when you connected your monitor to internet 3). Reset Password To reset your device password in App to default: 000000 4). -
Page 15: Alert
If you want to turn off motion detection, pls touch “Sensitivity” in above page, select “VMD or HDM (PIR)”, set both VMD and HMD to off. 6.5 Alert Alert settings for Monitor and Camera. 1. Alert on Monitor. 1). Alert Volume: Adjust alert volume on monitor. -
Page 16: Light Settings
2). Channel Alert On/Off: Turn on/off alert on monitor for each camera separately. 3). Alert Mute Schedule. Setup schedules for muting alert on monitor from different camera 2. Alert on Camera. Turn on/off alerts (Deterrent Light & Voice Message) for each camera. 6.6 Light Settings *Please note that the Light Setting is not available for this model. -
Page 17: Monitor Basic Operation (Quick Guide)
camera, you have to pair it to the monitor (that is, you have to “introduce” the camera and monitor to each other so they can communicate). • If a camera is already assigned to the channel you want to assign the new camera to, the monitor will overwrite the existing camera and link with the new one. - Page 18 2. Press again to stop recording. Set up automatic 1. From Menu\Recording Setup\Schedule recording Recording, the Schedule Recording Overview schedule screen displays. 2. Touch “Modify” button to setup/modify recording schedules. Delete recording schedule 1. From Menu\Recording Setup\Schedule Recording. Shows “Schedule Recording Overview”, select different day to show all schedules.
-
Page 19: Operating The Deluxecam App
8. Operating the DeluxeCam App 1. Download DeluxeCam from App Store or Google Play to your smart phone or tablet. 2. Connect the monitor to your router using an Ethernet cable so that it has an Internet connection (the icon is green). 8.1 Android 8.1.1 Add Camera 1. -
Page 20: Operating The App
(menu==System Settings==Network Setup==Reset Password==Yes) to reset the password back to default 000000 (six zeros). 8. Tap the desired camera to view its live image. 8.1.2 Operating the APP While the live image is displayed, you can use the icons at the bottom of the display to access the following functions: - Access to the snapshots / photos (which you have triggered with the app). -
Page 21: Iphone / Ipad (Ios)
- Displays the list of captured snapshots. - Delete device: The camera is removed from the APP. 8.2 iPhone / iPad (iOS) 8.2.1 Add Camera Start DeluxeCam and tap the icon. 1. There are two ways to add the camera: ... -
Page 22: Operating The App
8.2.2 Operating the APP While the live image is displayed, you can use the icons at the bottom of the display to access the following functions: - Access to the snapshots / photos (which you have triggered with the app). - Take a snapshot. -
Page 23: Maintenance
9. Maintenance • Clean the housing surfaces with a soft, fluff−free cloth. • Never use cleaning agents or solvents. 10. Technical Data Monitor Screen size 7" capacitive touchscreen LCD Screen Resolution 1024(H)×600(V) Video input 4x1008p\4x720p Video Video format Audio output Built-in speaker Audio Audio format... -
Page 24: Important Safety Instructions
Camera Resolution 2MP 1920x 1080 1/2.9” CMOS sensor Sensor Minimum illumination 0.02Lux @ (F2.1, AGC ON), 0 Lux with IR Lens & Angle 2.8mm Horizontal view angle:100° , Diagonal 118° Camera Day & night switching mode ICR Infrared filter type VMD detection VMD sensitivity adjustable, selected mask area Night fill light mode &... -
Page 25: Trouble Shooting
device on a pad or mat. • Only use the power adapter plugs contained in the material supplied since other power adapter plugs could damage the devices. • Ensure access to the power adapter plugs is not obstructed by furniture or such. •... -
Page 26: Out Of Range
system is connected to the internet. If it is in white, please re-boot the monitor and home router, then wait for 15 minutes to get the green icon. A brief introduction to the network status indicator on the monitor: Red - monitor is not connected to router. Check the RJ45 cable connection. White - monitor is connected to router, but router is not connecting to internet. - Page 27 approved by the party. Responsible for compliance could void the user’s authority to operate this equipment. (Example- use only shielded interface cables when connecting to computer or peripheral devices). This equipment complies with Part 15 of the FCC Rules. Operation is subject to the following two conditions: (1) This device may not cause harmful interference, and (2) This device must accept any interference received, including interference...
Need help?
Do you have a question about the VS5102 and is the answer not in the manual?
Questions and answers
VS802 Will not hook up to a eero Monitor is connected to router,but router not connected to the internet.
@Tom ARVIN Frequency is 2400 dsl is 5
@Tom ARVIN do you have a phone number to call