Advertisement
Quick Links
Advertisement

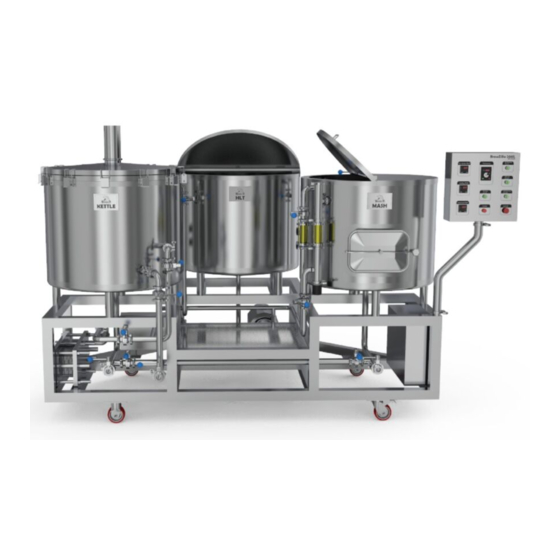
Summary of Contents for KegLand BrewZilla 200L KL22590
- Page 1 USER MANUAL Date: Sept.2021...
- Page 2 This will allow you to become familiar with the operation process, and allow any needed adjustments or troubleshooting. Please contact KegLand for further technical support if required.. Happy brewing! Cheers!
- Page 3 1. Set Up Control Panel Design Power Standard: 400V, 50HZ, 3 Phase This product is pre-wired and tested before shipment. A licensed electrician is required to install the correct outlets. Total consumable power(maximum) is: 12KW (kettle/whirlpool) + 12KW(Hot water tank) + 5kw (RIMS) + 0.55KW(wort pump) + 0.55KW(hot water pump) + 0.1KW (Control cabinet) = 30.2 kw...
-
Page 4: Control Panel
2. Control Panel The Control Panel is attached by tri-clamps and can be moved into a suitable position. Do not remove Control Panel. Wort Pump Frequency Converter ON/OFF control of Hot Water Tank (HLT) Heating Elements Hot Liquor Tank Temperature Monitor ON/OFF control of Kettle Heating Elements Kettle/Whirlpool Tank Temperature Monitor... - Page 5 3. Starting Tips Pump: Electric Heating Element: There are two sets of pumps on the brewhouse system. The left There are 2 sets of elements in the HLT and Kettle. side is the wort pump, used for transferring wort between tanks. Please ensure that all elements are turned off before powering up the brewhouse.
- Page 6 4. Filling HLT The pipeline marked in blue is for adding the initial brew water into your HLT. With the ball valve closed , it can also be used to cycle the cooling water from Plate Heat Exchanger back into the HLT during the knockout process.
- Page 7 4. Filling HLT The ring inside the Mash Tun (coloured blue in the diagram) Is for Sparging Water. This is connected by a tri-clamp. Remove the Sparging Ring before adding malt to the Mash Tun. Replace when it is time to sparge.
- Page 8 5. Mashing In This is the first step to start the brew day. Please make sure your malts are milled and ready to use before this step. Add the desired amount of strike water to the Mash Tun. Add the grains and ensure they are thoroughly stirred. The flow speed is controlled by a butterfly valve on the side of the Mash Tun (coloured blue in the diagram).
- Page 9 6. Recirculation Wort recirculation is a process that will help improve the clarity and quality of your wort. To recirculate during the mash, open the valves in the is pipeline first. Then gradually power on the wort pump to allow the wort to recirculate from the bottom of the Mash Tun to the top.
- Page 10 6. RIMS (Recirculating Infusion Mash System) A RIMS (Recirculating Infusion Mash System) uses direct heat on the tube to heat the wort as it is recirculated. The 200L BrewZilla can be converted to a full RIMS setup with the addition of KL22996 – 6kw RIMS Heater...
- Page 11 7. Lautering Once the mashing process is completed, it’s time to lauter your wort into the kettle. Open all these valves (coloured blue in the diagram) before switching on the wort pump. Monitor flow rate etc before opening the pumps fully. Button number 1 (see diagram) powers on the pump.
- Page 12 8. Sparging Sparging is the process of “rinsing” the grains to maximise efficiency and get enough wort in the kettle. First, reattach the sparge ring back into position. The liquid flow rate is controlled by the valve. The BrewZilla 200L uses fly or continous sparging, widely regarded as the most efficient method of sparging.
- Page 13 9. Boiling The boil can be started as soon as the element in the kettle is fully submerged during the lautering process. To begin the boil, turn the Kettle element ON, and set the temperature to 100°C. Attention: 1. Ensure that the elements are completely submerged before turning on heating.. 2.
- Page 14 10. Whirlpool Whirlpooling is the best way to minimise the risk of clogging the heat exchanger, and to maximise the clarity of the transferred wort. Open the valves in this diagram before powering on the wort pump. As with wort re circulation during the mash, slowly increase the speed of the VFD controller of the pump to the preferred value.
- Page 15 11. Knocking-Out After around 30 mins of whirlpooling, the wort can be knocked out through the plate heat exchanger into the fermenter. Sanitise all tubing and the fermenter before transferring. Tips: 1. Connect hose on the outlet of heat exchanger and the bottom drain port of your fermenter (see diagram) 2.
- Page 16 11. Knocking-Out Before engaging the knockout pump, ensure that the cold water inlet and outlet are firmly connected. Water from the outlet can be drained or captured back into the HLT for use in brewing. Once the cold water flow is established, open the knockout valves and switch on the wort pump. As before, start at a slow flow rate and increase gradually.
- Page 17 Congratulations, your first brew is done!


Need help?
Do you have a question about the BrewZilla 200L KL22590 and is the answer not in the manual?
Questions and answers