Table of Contents
Advertisement
Quick Links
Advertisement
Table of Contents

Summary of Contents for ATICA MC DTC Series
- Page 1 USER MANUAL MC DTC Series MC DTC Series – User manual 1 / 51...
- Page 2 FOR OTHER COUNTRIES (NOT IN THE EU) The treatment, collection, recycling and disposal of electric and electronic devices will be carried out in accordance with the laws in force in the country in question. MC DTC Series – User manual 2 / 51...
- Page 3 2) Cet appareil doit accepter toutes les interférences, y compris celles qui pourraient entraîner un mauvais fonctionnement de l'appareil. General Note: - This equipment must be used by – Ordinary person / Instructed person / Skilled person MC DTC Series – User manual 3 / 51...
- Page 4 These cautions indicate the heated surface & involve the risk of heat injury if persons touch them with a bare hand. These cautions indicate where the touch of the surface with a bare hand is prohibited. MC DTC Series – User manual 4 / 51...
-
Page 5: Table Of Contents
Magnetic encoding ........................47 9.2.1 Configuration ........................47 E-locks & manual lock ....................... 47 Duplex activation........................48 Troubleshooting .......................... 49 10.1 Sensor setting display in LCD ....................50 Ribbons and cleaning kits ......................51 MC DTC Series – User manual 5 / 51... -
Page 6: Product Overview
⬤ functionality ✓ ✓ Display ⬤ Laminator compatibility (inline) Note: If upgrades are required, please contact the Matica agent quoting options or kit numbers. ⬤ Optional ✓ Standard X Not available MC DTC Series – User manual 6 / 51... -
Page 7: Technical Characteristics
255,6 x 202 x 405,4 mm Weight 10 kgs Power supply Auto-switching external power supply unit with interchangeable power cords Input 220-240 volts AC, 50-60 Hz, 1.6 A Output 24 volts DC, 3.0 A MC DTC Series – User manual 7 / 51... - Page 8 XP SP3, Vista, W7, W8, W10, W22 as a standard driver supplied with the printer EDIsecure® driver to facilitate integration and service bureau Software Available for system integrators upon request Warranty Check T&Cs MC DTC Series – User manual 8 / 51...
-
Page 9: Getting Started
✓ ✓ ✓ ❺ Ribbon cartridge ✓ ❻ USB stick ✓ ✓ ✓ ❼ Cleaning card ✓ ✓ ✓ ❽ Cleaning swab ✓ ✓ ✓ ❾ Quick start guide Paper copy MC DTC Series – User manual 9 / 51... -
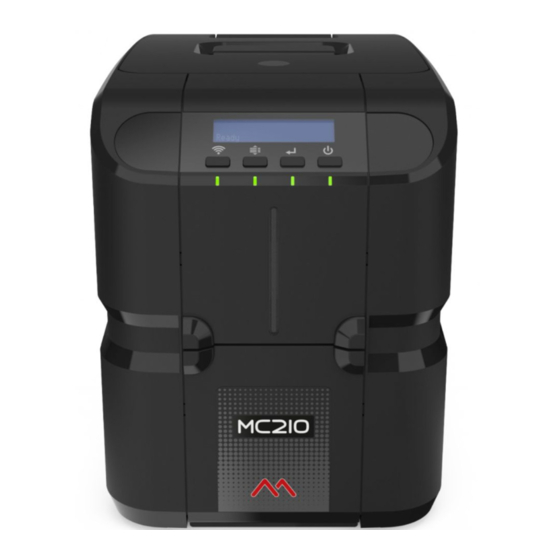
Page 10: Front View
Off – indicates there is no card available in the input hopper Red intermittent – indicates cards in the input hopper are running low. Red – indicates there are cards available in input hopper MC DTC Series – User manual 10 / 51... -
Page 11: Operator Panel
Green intermittent – indicates printer is receiving data or printing ⓭ Wi-Fi LED Off – indicates Wi-Fi is not available Blue intermittent – indicates Wi-Fi is available but not connected Blue – indicates printer is connected to Wi-Fi MC DTC Series – User manual 11 / 51... -
Page 12: Rear View And Bin Installation
USB 2.0 Port – No.2 ⓳ Rejection bin fixing slot ⓴ Kensington lock 4.3.1 Power supply The printer comes with an external auto-switching power supply. Note: Only use the power supply provided with the printer. MC DTC Series – User manual 12 / 51... -
Page 13: Lcd Display Menu Options
4.4 LCD display menu options MC DTC Series – User manual 13 / 51... -
Page 14: Installation Procedures
Move the door handle in the direction shown and open the top cover. 3 . Ribbon cartridge should be positioned inside the printer, color matching the guides with the cores as shown below: MC DTC Series – User manual 14 / 51... - Page 15 Make sure the cartridge is inserted properly and the cores are positioned at the bottom of the guides, then close the top cover. Note: Ribbon cartridge should be assembled without touching/damaging the printhead. MC DTC Series – User manual 15 / 51...
-
Page 16: Card Feeding
Insert the card inside the slot as shown below. Note: contact chip cards to be inserted face up, magnetic stripe cards should be inserted with the magnetic stripe facing downwards towards the right. MC DTC Series – User manual 16 / 51... -
Page 17: Adjusting The Card Thickness
1. Open the printing module compartment cover. 2. Slide the card thickness selection lever to match the card thickness which is to be printed, then close the top lid. MC DTC Series – User manual 17 / 51... -
Page 18: Connecting The Power Supply And Powering On The Printer
Connect the power cord to the power brick. Then connect the power supply. Insert the power supply to the printer as shown below. Press the power button to turn the printer ON. MC DTC Series – User manual 18 / 51... -
Page 19: Installing The Software And Configuring The Printer
6.1.1 Printer connection through USB 1. Download/save a copy of Matica XPS driver installer software onto your PC/Laptop. 2. Double click on the installer, then click Next 3. Accept the license agreement and click Next. MC DTC Series – User manual 19 / 51... - Page 20 - click Yes. b. If no driver is detected, move to step 9. 6. A dialog box appears, please disconnect or switch OFF the printer, then click OK. MC DTC Series – User manual 20 / 51...
- Page 21 Once the installation is near completion, a pop-up message will ask to either connect or switch ON the printer, please do so and click OK. 9. The install is complete, click Finish. MC DTC Series – User manual 21 / 51...
-
Page 22: Printer Connection Through Lan/Ethernet
OFF the printer. 1. Download/save a copy of Matica XPS driver installer software onto your PC/Laptop. 2. Double click on the installer, then click Next 3. Accept the license agreement and click Next. MC DTC Series – User manual 22 / 51... - Page 23 If an older version is detected, a pop-up will ask permission to remove the existing driver. It is recommended to do so - click Yes. d. If no driver is detected, move to step 9. MC DTC Series – User manual 23 / 51...
- Page 24 6. A dialog box appears, please disconnect or switch OFF the printer, then click OK. 7. Restart is required, click Yes. 8. Connect the printer with an Ethernet cable (not supplied) and switch it ON. 9. For DHCP connections select DHCP and click Next MC DTC Series – User manual 24 / 51...
-
Page 25: Static Ip
Then switch the printer OFF and ON again. 3. Go to Control Panel > Devices and Printers > right click on MC DTC > Printer Properties then select the Network tab. MC DTC Series – User manual 25 / 51... - Page 26 6. To connect the printer through Static IP run the installer and follow the steps 1 to 11 in chapter 6.1.2.1 DHCP. 7. Connect the LAN cable, then turn the printer OFF and ON again. 8. Select Static IP Address and click Next. MC DTC Series – User manual 26 / 51...
- Page 27 9. Enter the Static IP Address noted in step 4, then click Next. 10. Click Finish to complete the Matica XPS driver setup wizard. MC DTC Series – User manual 27 / 51...
-
Page 28: Uninstall Program Tabs
Control Panel > Devices and Printers > Right click on MC DTC > Printer Properties About In the About tab, you can check the firmware version installed in the printer and other related information. MC DTC Series – User manual 28 / 51... -
Page 29: Printing
& set the input feeder & output option. Card type selection: drop down menu enables the user to select & set type of card to be printedr. Printer model & ribbon details MC DTC Series – User manual 29 / 51... -
Page 30: Card Front Setting Tab
1. If printer is already printing remove the ribbon from the printer and switch the printer off and then on. 2. Open the MC310/MC210 printer properties, in the print tab select the card type as Rewritable. MC DTC Series – User manual 30 / 51... - Page 31 5. Once rewritable option is activated in printer, return to the print tab of MC310/MC210 printer properties. Select Rewritable card type and select Erase before Print. Click OK and the feature is ready to be utilized. MC DTC Series – User manual 31 / 51...
-
Page 32: Card Back Setting Tab
& then clicks OK. In-line Coding: Users can choose and set theStart Character and End Character for encoding tracks. Magnetic Encoding Tool: A standalone tool provided to encode magnetic encoding stripe cards. MC DTC Series – User manual 32 / 51... -
Page 33: Laminator
By default, the Brightness and Contrast settings in printer properties show as Automatic. To customize color printing select Manual from the drop-down menu, adjust Brightness, Contrast and Sharpness and click Apply and OK. MC DTC Series – User manual 33 / 51... -
Page 34: Monochrome Option
The user can adjust the required Brightness and Contrast value for each panel and click OK. 7.8 Monochrome Options In Monochrome Options the user can set Contrast for monochrome, Halftone & Resin Areas extraction. MC DTC Series – User manual 34 / 51... -
Page 35: Resin Area Extraction
Remove tab. Note: Once the user has defined a resin area, this will always need to be removed or readjusted for a different card layout. MC DTC Series – User manual 35 / 51... -
Page 36: Printing Rest Cards Using Printer Menu
• Press the Selection button to open the respective sub-menu • Scroll to Test Print • Press the Selection button to print the test card Refer to the navigation chart below: MC DTC Series – User manual 36 / 51... -
Page 37: Printer Maintenance
8 Printer maintenance Four different cleaning processes are available for the MC DTC series. 8.1 Standard cleaning • Suggested frequency forcolor printing: each time the ribbon is changed • Mandatory frequency (to prevent voiding the warranty):after every 1,000 prints.Thenprinter will alert the user for Basic Cleaning in the display and with an intermittent amber LED. - Page 38 Also th Extended card e image below shows an extended card? For MC310 for MC110 and MC210 4. Clean the printhead referring to Chapter 8.4, then click Finish. MC DTC Series – User manual 38 / 51...
-
Page 39: Card Path Advanced Cleaning
2. Insert the T-card in the slot of the printer as guided in driver wizard Note: For the MC110 and MC210 carry out advanced cleaning with the T-card via the automatic hopper. MC DTC Series – User manual 39 / 51... -
Page 40: Cleaning Roller Advanced Cleaning
Step 1: Hold the encoder cover Step 2: Move the cover downward as shown in the image to disengage Step 3: Slide out the encoder cover in the direction shown in the image MC DTC Series – User manual 40 / 51... - Page 41 , pressing downwards until you hear a locking click. ❶ ❷ ❸ 6. To complete the procedure, insert the encoder cover and ribbon cartridge back into position, then close the top cover. MC DTC Series – User manual 41 / 51...
-
Page 42: Printhead Cleaning
1. Using the pen included in the cleaning kit, clean the printhead by rubbing the pen in the direction indicated by the arrow in the figure below. 2. Close the top cover, the printhead cleaning procedure is now complete. MC DTC Series – User manual 42 / 51... -
Page 43: Printhead Replacement Procedure
To remove the print head. Press in the direction indicated by the arrow to loosen the spring and to release this from its housing and click Next to continue. MC DTC Series – User manual 43 / 51... - Page 44 5. Connect the printer to the power supply, switch it on and connect it to a computer with the USB cable. Click Next to continue, then enter the Print Head Serial Number and confirm with the Set button. 6. Click Finish to complete the print head replacement operation MC DTC Series – User manual 44 / 51...
-
Page 45: Options
9 Options 9.1 Smart card chip encoding (Contact and Contactless) The smart card chip encoder is an optional module for the MC DTC series that enables the encoding of contact and contactless smart cards. Available chip encoding modules and related functionalities:... - Page 46 To perform the test, click Load card and wait for the card to move to the encoding position, then click Read ATR. The software will read and display the card’s ATR once the test has completed successfully. MC DTC Series – User manual 46 / 51...
-
Page 47: Magnetic Encoding
E-lock and manual lock options are available for specific variants of Matica DTC printers. i.e.: S3110 for Financial Instant Issuance comes with pre-installed electromechanical locks for the feeder door and top cover. MC DTC Series – User manual 47 / 51... -
Page 48: Duplex Activation
9.4 Duplex activation The duplex activation kit is an optional module for the MC DTC Series that enables printing on both sides of the card. Available duplex activation kits and related functionalities: MC DTC Series Duplex Activation Kit Code PR10300016 To enable the dual sided printing please follow the instructions below: 1. -
Page 49: Troubleshooting
Difficulties or failures in the code reading ATR • Use PC/SC test wizard to check the smart encoding option with different smart cards. If it is not resolved contact your Matica Service Center. MC DTC Series – User manual 49 / 51... -
Page 50: Sensor Setting Display In Lcd
3. Click Retry to start the calibration. 4. Once the color sensor is calibrated successfully, the job will print. 5. Switch the printer off, then on again. Note: Ribbon carrier should be assembled without touching/damaging the printhead. MC DTC Series – User manual 50 / 51... -
Page 51: Ribbons And Cleaning Kits
It is strongly suggested to exclusively use original ChromXpert Matica ribbons. The use of non-original accessories could damage the product and therefore void the factory warranty. www.maticacorp.com MC DTC Series – User manual 51 / 51...
Need help?
Do you have a question about the MC DTC Series and is the answer not in the manual?
Questions and answers