Table of Contents
Advertisement
Available languages
Available languages
Quick Links
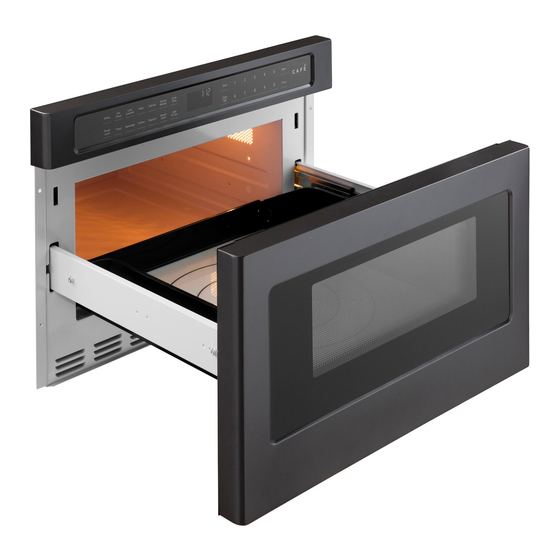
Drawer Microwave
Thank You! ... for your purchase of a Café brand appliance.
Register Your Appliance: Register your new appliance online at your convenience!
Timely product registration will allow for enhanced communication and prompt service under the terms of your warranty,
should the need arise. You may also mail in the pre-printed registration card included in the packing material.
For a full manual in English and Spanish visit
Para un manual completo en inglés y español
IMPORTANT SAFETY INFORMATION
READ ALL INSTRUCTIONS BEFORE USING THE APPLIANCE
BEFORE YOU BEGIN
Read these instructions completely and carefully.
IMPORTANT
IMPORTANT
• Note to Installer — Be sure to leave these instructions with the Consumer.
• Note to Consumer — Keep these instructions
with your Owner's Manual for future reference.
• Skill Level — Installation of this appliance requires basic mechanical and electrical skills.
• Proper installation is the responsibility of the installer. Product failure due to improper installation is not covered
under the warranty. See Owner's Manual for warranty information.
IMPORTANT
Use this oven only for its intended purpose. Never use the oven for warming or heating a room.
Prolonged use of the oven without proper ventilation can be hazardous.
WARNING
If the information in this manual is not followed exactly, a fire or electrical shock may result that
could cause property damage, personal injury or death.
WARNING
To reduce the risk of tipping, the Drawer Microwave must be secured by a properly installed Anti-
Tip block.
• This Drawer Microwave must be electrically grounded in accordance with local codes.
• Make sure the wall coverings and the cabinets around the Drawer Microwave can withstand the heat generated by
the Drawer Microwave.
WARNING
Never leave children alone or unattended in the area where a Drawer Microwave is in use.
Never leave the drawer open when the microwave is unattended.
READ AND SAVE THESE INSTRUCTIONS
cafeappliances.com/register
cafeappliances.com/literature
Save these instructions for local inspector's use.
—
Observe all governing codes and ordinances.
—
Installation
Instructions
CWL112P2RS1
CWL112P4RW5
CWL112P3RD5
31-7000166 Rev. 2 09-22 GEA
Advertisement
Table of Contents

Related Manuals for Cafe CWL112P3RD5


Summary of Contents for Cafe CWL112P3RD5
- Page 1 Instructions CWL112P2RS1 Drawer Microwave CWL112P4RW5 CWL112P3RD5 Thank You! ... for your purchase of a Café brand appliance. Register Your Appliance: Register your new appliance online at your convenience! cafeappliances.com/register Timely product registration will allow for enhanced communication and prompt service under the terms of your warranty, should the need arise.
-
Page 2: Clearances And Dimensions
Installation Instructions WARNING Stepping, leaning or sitting on the drawer may result in serious injuries and can also cause damage to the Drawer Microwave. • Do not use the Drawer Microwave as a storage space. This creates a potentially hazardous situation. •... -
Page 3: Anti-Tip Block
Installation Instructions 24” DRAWER MICROWAVE MEASUREMENTS • Figures 1 and 2 contain many drawer microwave measurements for reference when planning the drawer location. • This drawer microwave can be installed below any electric or gas wall oven or under selected cook top models. -
Page 4: Electric Outlet
Installation Instructions DRAWER INSTALLATION ELECTRIC OUTLET The electrical requirements are a 120 volt 60 Hz, AC Figure 5 only, 15 amp. or more protected electrical supply. It is recommended that a separate circuit serving only this appliance be provided. The drawer is equipped with a 3-prong grounding plug. -
Page 5: Important Notes To The Installer
Flush Mount Installation Instructions IMPORTANT NOTES TO THE PARTS INCLUDED INSTALLER Description Flush Mount • Read all of the Installation Manual that is included Deflector Vent with the Drawer Microwave before installing in the flush mount configuration. • Observe all governing codes, ordinances, and safety instructions. - Page 6 Flush Mount Installation Instructions 1. Prepare cabinet opening as shown in Figures 6, 7, 8, and 9 (cont). Figure 7 Anti-Tip Block Mounting Cleat Cabinet Drawer Face ” 11/2” Face 22” mounting cleat opening width NOTE: the mounting surface of the finished cleat must sit 1-1/2”...
- Page 7 Flush Mount Installation Instructions 2. Install deflector as shown in Figures 10 and 11 7. When you are sure the cord is out of the way, slide the drawer ¾ way back into the opening. Remove Shelf detail showing the deflector vent during the string by pulling on one end of the loop.
- Page 8 31-7000166 Rev. 2...
-
Page 9: Antes De Comenzar
Instrucciones de Instalación CWL112P2RS1 Microondas de Cajón CWL112P4RW5 CWL112P3RD5 ¡Gracias! ... por la compra de un electrodoméstico de la marca Café Registre su electrodoméstico: ¡Registre su nuevo electrodoméstico en línea cuando lo desee! cafeappliances.com/register El registro oportuno del producto permitirá una mejor comunicación y un servicio rápido bajo los términos de su garantía, en caso de que surja la necesidad. - Page 10 Instrucciones de Instalación ADVERTENCIA Pararse, apoyarse o sentarse sobre el cajón puede producir lesiones graves y también puede ocasionar daños sobre el Microondas de Cajón. • No use el Microondas de Cajón como espacio de almacenamiento. Esto crea una situación potencialmente riesgosa. •...
-
Page 11: Bloque Anti-Volcaduras
Instrucciones de Instalación MEDIDAS DEL MICROONDAS DE CAJÓN DE 24” • Las figuras 1 y 2 contienen muchas medidas para microondas de cajón, como referencia para planificar la ubicación del cajón. • Este microondas de cajón puede ser instalado debajo de cualquier horno de pared eléctrico o a gas o debajo de modelos de superficies de cocción seleccionadas. -
Page 12: Tomacorriente Eléctrico
Instrucciones de Instalación TOMACORRIENTE ELÉCTRICO INSTALACIÓN DEL CAJÓN Los requisitos eléctricos son contar con un suministro eléctrico protegido de 120 voltios, 60 Hz, CA únicamente, 15 amperes o más. Se recomienda contar con un circuito separado que se use únicamente con este electrodoméstico. El cajón está... -
Page 13: Notas Importantes Para El Instalador
Montaje al Ras Instrucciones de Instalación NOTAS IMPORTANTES PARA EL PIEZAS INCLUIDAS INSTALADOR Cant Descripción Ventilación con • Lea todo el Manual de Instalación incluido con el Deflector con Microondas de Cajón, antes de instalar la configuración Montaje al Ras del montaje al ras. - Page 14 Montaje al Ras Instrucciones de Instalación 1. Prepare la abertura del gabinete como se muestra en las Figuras 6, 7, 8 y 9. Figura 7 Bloque Antivolcaduras Taco de Montaje Cara del Cara del ” 11/2” Gabinete Cajón Ancho de la abertura del taco de montaje de 22”...
- Page 15 Montaje al Ras Instrucciones de Instalación 7. Cuando esté seguro de que el cable se encuentra 2. Instale el deflector como se muestra en las Figuras 10 y 11. fuera del recorrido, deslice el cajón hacia atrás ¾ del recorrido en la abertura. Retire la cuerda Detalle de la repisa donde se muestra la ventilación del empujando desde un extremo del enrosque.
- Page 16 31-7000166 Rev. 2...
Need help?
Do you have a question about the CWL112P3RD5 and is the answer not in the manual?
Questions and answers