
Related Manuals for Kaye LTR -90


Summary of Contents for Kaye LTR -90
- Page 1 Validation Kaye LTR -90 Operating Manual X0395, X0395CE, X0395JP, X0395AS Amphenol M4590E Rev. B Advanced Sensors June 2014...
- Page 2 Copyright © 2014 Amphenol Thermometrics, Inc. 967 Windfall Road St. Marys, Pennsylvania 15857 Web: www.amphenol-sensors.com...
- Page 3 Kaye LTR -90 Ultra Cool Dry Well Calibrator Operating Manual M4590E Rev. B June 2014 Amphenol ©2014 Amphenol Thermometrics, Inc.. All rights reserved. Advanced Sensors Technical content subject to change without notice.
- Page 4 [no content intended for this page]...
-
Page 5: Table Of Contents
6.1.2b Set the Temperature with a Preset SETPOINT..........30 Kaye LTR -90 Operating Manual... - Page 6 7.3 Troubleshooting..................41 Kaye LTR -90 Operating Manual...
-
Page 7: Chapter 1. Product Overview
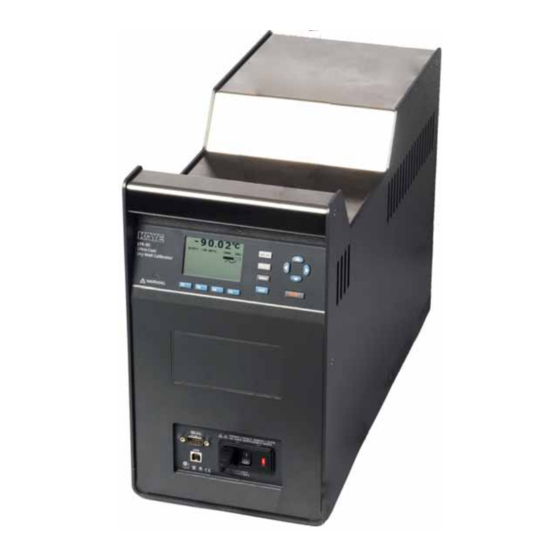
Chapter 1. Product Overview Chapter 1. Product Overview The LTR -90 Ultra-Cool Dry Well Calibrator is a benchtop temperature calibrator that can calibrate precision temperature instruments from-95°C to 140°C (see Figure 1 below). Figure 1: LTR-90 Ultra-Cool Dry Well Calibrator... -
Page 8: Safety Information
Use only the mains power cord and connector approved for the voltage and plug configuration in your country and rated for the Product. Replace the mains power cord if the insulation is damaged or if the insulation shows signs of wear. Kaye LTR -90 Operating Manual... - Page 9 Do not touch the probes to a voltage source when the test leads are connected to the current terminals. Keep fingers behind the finger guards on the probes. Do not exceed the Measurement Category (CAT) rating of the lowest rated individual component of a Product, probe, or accessory. Kaye LTR -90 Operating Manual...
-
Page 10: Contact Amphenol Advanced Sensors Customer Service
1. Contact the Amphenol Advanced Sensors Service Center in your area to schedule the calibration or repair. 2. Pack and secure the Calibrator in a shipment box with a minimum of 2 inches of packing around the Calibrator to prevent damage. 3. Send the Calibrator to the Service Center. Kaye LTR -90 Operating Manual... -
Page 11: Chapter 2. Specifications
The LTR-90 operates over the range of -95°C to 140°C. The LTR-90 is most commonly used with Kaye's Intelligent RTD (IRTD) probe and Kaye Validator to make up a complete validation system. The LTR-90 has the ability to rapidly heat and cool, making it an ideal instrument for performing multiple-point calibrations for a variety of processes, such as freeze dryer, cold rooms, incubators and steam sterilizers. -
Page 12: Specifications
Part Numbers and Descriptions X0395 LTR -90 Low Temperature Dry Well -95° to 140°C, (115Volts, 60Hz) X0395CE LTR -90 Low Temperature Dry Well --95° to 140°C , (230Volts, 50Hz) X0395JP LTR -90 Low Temperature Dry Well -95° to 140°C, (115Volts, 50/60Hz) X0395AS LTR -90 Low Temperature Dry Well -95°... - Page 13 100 V to 115 V (±10%) 50/60 Hz, 575 W (X0395, X0395JP) 200 V to 230 V (±10%) 50/60 Hz, 575 W (X0395CE, X0395AS) System Fuse Ratings 115 V: 6.3 A T 250 V (Kaye part #:193-100) 230 V: 3.15 A T 250 V (Kaye part#: 193-099) Safety...
- Page 14 Chapter 2. Specifications [no content intended for this page] Kaye LTR -90 Operating Manual...
-
Page 15: Chapter 3. Quick Start
WARNING! To prevent possible fire or personal injury: Do not operate the LTR -90 in orientations other than upright. A fire hazard can be made if the LTR -90 is put on its side. Do not remove Inserts when the product shows temperatures more than 50 °C. -
Page 16: Connect To Mains Power
Do not turn the Product upside down. The inserts will fall out. To prevent damage to the cooling system, do not tilt the LTR -90 on its side or upside down while the LTR -90 is operating. -
Page 17: Set Display Contrast
6. Push to save the password. To change the security level: 1. Push 2. Push 3. Push 4. Enter the current 4-digit password to open the password screen (the default factory password is 1234). Kaye LTR -90 Operating Manual... - Page 18 Chapter 3. Quick Start 5. Push to highlight HIGH LOW. 6. Push to save the selection. [no content intended for this page] Kaye LTR -90 Operating Manual...
-
Page 19: Chapter 4. Parts And Controls
Chapter 4. Parts and Controls Chapter 4. Parts and Controls 4.1 Calibrator Features Table 4 identifies and describes the panels on the front of the Calibrator. Figure 2: The LTR -90 Front Panel Table 4: LTR -90 Front Panel Item Name... -
Page 20: Display And Control Panel
Do not transport or remove Inserts until the indicator is off. WARNING! For safe operation and maintenance of the product, do not remove Inserts when the Block Temperature indicator is illuminated. Kaye LTR -90 Operating Manual... -
Page 21: Power And Remote Interface Panel
The block (Figure 5 below) provides a relatively constant and accurate temperature environment in which the sensors that are to be calibrated are inserted. There are 4 holes for sensors (9mm - 0.354") and 2 holes for IRTDs (6.7mm - 0.265"). Figure 5: Constant Temperature Block Kaye LTR -90 Operating Manual... -
Page 22: Startup And Main Screen
Limits, the indicator shows as a flat line (---) which indicates that a measurement can be made. See “Stable Limits” on page 26. Note: To prevent inaccurate measurements, do not make measurements until the Stability Indicator shows as a flat line (---). Kaye LTR -90 Operating Manual... -
Page 23: Setting The Temperature
Chapter 4. Parts and Controls 4.2 Setting the Temperature When you calibrate thermocouples using the LTR-90 and the Kaye Validator, the set-points are defined as part of the calibration procedure and automatically downloaded from the Kaye Validator to the LTR-90. To utilize automated calibration with the LTR-90, the Validator will require version 3.62 software and firmware. - Page 24 Chapter 4. Parts and Controls [no content intended for this page] Kaye LTR -90 Operating Manual...
-
Page 25: Chapter 5. General Operation
To provide maximum accuracy, a two-point calibration should be performed close to the operating temperature of the process. The Kaye Validator automatically downloads the calibration set-points defined in your setup to the LTR-90 and controls the entire sensor calibration procedure. -
Page 26: Insert Installation And Removal Procedure
If the insert cannot be removed, turn off the Calibrator and contact Amphenol Advanced Sensors Customer Service (see Chapter 1). 3. Put the rubber well insulation cap back on the well. Kaye LTR -90 Operating Manual... - Page 27 Chapter 5. General Operation Figure 7: Insert Installation and Removal Kaye LTR -90 Operating Manual...
-
Page 28: Probe Insertion And Removal Procedure
Make sure the unused holes are covered with the plugs. Temperature changes at lower temperatures are slow. This is because high integration values are necessary to keep the controller stable (1,200 seconds) at the lower temperatures. Kaye LTR -90 Operating Manual... - Page 29 Chapter 5. General Operation Figure 8: Probe Insertion Figure 9: Rubber Insulator Kaye LTR -90 Operating Manual...
- Page 30 Chapter 5. General Operation [no content intended for this page] Kaye LTR -90 Operating Manual...
-
Page 31: Chapter 6. Calibrator Operation
SETUP menu has three submenus: SETUP, CUTOUT, and STATUS. 66.03°C T E M E R A T U R E S E T U P M E N U SETUP CUTOUT S TATUS Figure 10: Temperature Setup Menu Kaye LTR -90 Operating Manual... -
Page 32: Temperature Setup
±0.1°C, the Stability Status indicator on the Main screen changes to a flat line (---) and the Stable Alarm sounds once. Note: The LTR -90 should not be expected to operate better than the stability specification found in the Specifications section of this manual. Thus, the minimum setting of the Stability Limit should not be less than the stability specification. -
Page 33: Cutout
Calibrator and instrument. When in Cutout mode, the instrument displays above the Stability Status indicator. The instrument stays in Cutout mode until the temperature is below the cutout SETPOINT and the cutout is reset. See “Reset an Over- Temperature Cutout” on page 31. Kaye LTR -90 Operating Manual... -
Page 34: Cooler Status
Cooler Status Table 11 shows and describes the menu selections on the Cooler Status menu. Note: The information on the Cooler Status menu is not editable. Kaye personnel use this information to help troubleshoot the system if a malfunction occurs. -
Page 35: Set Temperature
S E T T E M P E R A T U R E S E T P O I N T SETPOINT: +080.00 °C S E L E C T SAVE/ P R E S E T D I S A B L E Figure 14: Set Temperature SETPOINT Kaye LTR -90 Operating Manual... -
Page 36: Set The Temperature With A Preset Setpoint
6. Push to save the preset. 6.1.3 Cancel or Stop Temperature Change To cancel or stop temperature change: Push on the Main screen. Push Kaye LTR -90 Operating Manual... -
Page 37: Set A Soft Cutout
If the Soft or Hard Cutout is exceeded, the Calibrator enters Cutout Mode and must be reset. To exit Cutout mode and reset the Calibrator: 1. Let the Calibrator cool to below the Soft Cutout limit. 2. After it has cooled, push followed by to reset the Calibrator. Kaye LTR -90 Operating Manual... -
Page 38: Programs (Automated Tests)
6.1.6b Stop a Program To stop a Program: 1. Push 2. Push 3. Push 4. Push to change the TEST STATUS 5. Push to save. 6. Push twice to leave programming. Kaye LTR -90 Operating Manual... -
Page 39: Program Menu (Prog Menu)
P R O G R A M S E T U P MENU P R O G TEST STATUS: OFF MENU Figure 18: Program Setup Menu Sequence Table 12: Program Setup Menu Item Function TEST STATUS starts (ON) or stops (OFF) a Program. Kaye LTR -90 Operating Manual... -
Page 40: Ramp/Soak
Program sequences from the first SETPOINT to the last and then reverses direction sequencing from the last to the first. SETPOINTS MENU opens a menu to set each of the SETPOINTS for the Program. Only the number of SETPOINTS defined by NO. SETPOINTS will be displayed. Kaye LTR -90 Operating Manual... -
Page 41: System Menu (System Menu)
(ON) or turns off (OFF) the key-beep sound. See “Toggle Key Beep On or Off” on page 11. Note: With the Main screen shown in the display, push at the same time to quickly toggle key beep on or off. Kaye LTR -90 Operating Manual... -
Page 42: Communications Setup
CAUTION! Do not change the values of the control parameters from the factory set values. Calibration parameters must be correct for the instrument to function properly. Kaye LTR -90 Operating Manual... -
Page 43: System Information
MODEL shows the model number of the Calibrator. SERIAL shows the serial number of the Calibrator. FW VER shows the firmware version of the Calibrator. CAL DATE shows the calibration date of the heat source. Kaye LTR -90 Operating Manual... - Page 44 Chapter 6. Calibrator Operation [no content intended for this page] Kaye LTR -90 Operating Manual...
-
Page 45: Chapter 7. Maintenance And Troubleshooting
“Insert Installation and Removal Procedure” in Chapter 5. To clean the insert, remove the insert with the removal procedure in Chapter 5. After the insert is cool, wipe the insert with a cloth. Kaye LTR -90 Operating Manual... -
Page 46: Change The Fuse
1. Disconnect the mains-power cord from the power-entry module. 2. Open the power entry module and remove the fuse holder. 3. Replace the fuse with exact replacements as indicated in the specifications in Chapter 2. Product Fuse Figure 24: Changing the Product Fuse Kaye LTR -90 Operating Manual... -
Page 47: Troubleshooting
If this happens, the unit enters cutout mode and will not actively heat or cool until the user issues the command to clear the cutout or resets the instrument. See “Reset an Over-Temperature Cutout” in Chapter 6. Kaye LTR -90 Operating Manual... - Page 48 Removal Procedure” in Chapter 5.If this does not remove the insert, contact Amphenpol Advanced Sensors Customer Service. Password needed. Cause: Password is required to change certain parameters. Solution: Enter password. The password by default is 1234. Kaye LTR -90 Operating Manual...
- Page 50 Customer Support Centers U.S.A. U.S.A. Technical Support: Sales and Services (Repair/Calibration): Amphenol Thermometrics, Inc. Amphenol Thermometrics, Inc. St Marys Center St Marys Center 967 Windfall Road 967 Windfall Road St Marys, Pennsylvania 15857 St Marys, Pennsylvania 15857 U.S.A. U.S.A. T: 814-834-9140 T: 814-834-9140 F: 814-781-7969 F: 814-781-7969...
Need help?
Do you have a question about the LTR -90 and is the answer not in the manual?
Questions and answers