Advertisement
Quick Links
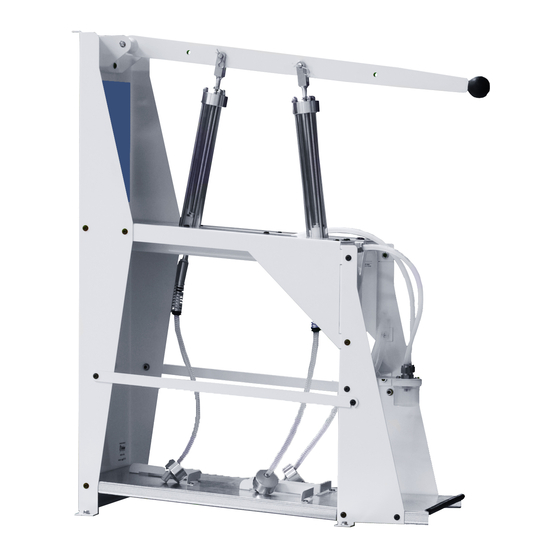
Manual Propor�oning Unit
Dedoes P# MPU02
MPU Maintenance and Repair Guide
How to perform a pressure test on a MPU02
• Perform a pressure test after each repair or replacement of parts within the MPU02 before use to ensure there are no leaks.
• Turn both of the front pump valves to the "ON" position.
• Unscrew the wetting cup and set it aside.
• Visually check that both pump pistons go completely down within each pump and are adjusted correctly.
• Pour one quart of reducer in a container and place under front pump.
• Place both of the front pump suction hoses into the front container with the reducer.
• Pour one quart of reducer into a container and place under the rear pump.
• Place the rear pump suction hose into the rear container with the reducer.
• Pump the lever in quick short strokes making sure the lever is going completely down until both pumps are primed.
• Once the air is pumped out of the pumps, pump the lever one full stroke and verify that the pumps are working correctly.
• With the lever at the half stroke and reducer lling the pumps, block the end of one of the discharge tubes with your nger.
• Pull the lever down rmly and hold it down.
• Visually inspect the seals in each pump to be sure that uid does not by-pass the seals.
• Visually check all connections of the pump for any leakage. If none, lift lever slightly to release your nger.
• Verify that both pump assemblies and hose assemblies do not leak under pressure using the steps above.
• Pull the lever down completely.
• Remove the full container and replace it with an empty container.
• Pump the unit until both pumps are empty.
• Shake suction the hoses to drain as much uid as possible.
• Leave the hoses hanging to air dry.
• Wipe the unit o using paper towels.
• Screw the wetting cup in place.
• Place new product on the MPU02 and prime the pumps. (Refer to the user manual for priming instructions)
• Dispense enough uid to ensure the reducer has been ushed from MPU02 unit entirely.
• Dedoes suggests a spray panel test to verify clear coat nish quality.
Call or Visit @ 248-624-7710 / www.dedoes.com
PART # P2764 KD RV.0 - 2022-05-12
Advertisement

Summary of Contents for Dedoes MPU02
- Page 1 How to perform a pressure test on a MPU02 • Perform a pressure test after each repair or replacement of parts within the MPU02 before use to ensure there are no leaks. • Turn both of the front pump valves to the "ON" position.
- Page 2 Manual Propor�oning Unit Dedoes P# MPU02 P# SA0153 Complete MPU Pump Assembly P0436 P0478 P1888 P0465 P0472 P0466 P0468 P0476 P2603 P1893 SA0154 P0439 P0477 P0470 P1891 SA0255 DISCHARGE CHECK VALVE SA0256 SUCTION CHECK VALVE Call or Visit @ 248-624-7710 / www.dedoes.com...
- Page 3 P0435 Clip P0436 P0478 P0472 P0435 Rod P1888 P0465 P0444 SA0255 Discharge Check Valve P0439 Compression Nuts P0444 P0444 P1892 P0441C SA0256 P0444 Front Discharge Suc�on Check Valve Hose P0441D Rear Discharge Hose Call or Visit @ 248-624-7710 / www.dedoes.com...
- Page 4 • With the Arm in the down posi�on, the internal parts of both pumps should completely bo�om out at the same �me. If adjustment is needed, make adjustments to P0436. • Perform a pressure test to check for leaks prior to use. See page 1 for pressure test steps. Call or Visit @ 248-624-7710 / www.dedoes.com...
- Page 5 • Apply Stainless Steel pipe sealant to the end that arrow points to on the SA0256 Suc�on Check Valve. Do not apply sealant to first two threads. Dedoes recommends to use Teflon tape and ensure that the tape does not get into the body of the valve.
- Page 6 Replacements are marked with a “S” • Perform a pressure test to check for leaks prior to use. See page 1 for These have a 1/3 Lb Pressure test steps. crack pressure. Call or Visit @ 248-624-7710 / www.dedoes.com...
- Page 7 Push P0449 all the way up to P1225. P0454 • Repeat the above step for any remaining suc�on hoses. P0440 * NOT INCLUDED. Re-use original component. P0458 P0464 P0445 P0451 BACK PUMP FRONT PUMP Call or Visit @ 248-624-7710 / www.dedoes.com...
- Page 8 Adjust pumps so both pumps bo�om out at the same �me. P1891 • Perform a pressure test to check for leaks prior to use. See page 1 for Pressure test steps. SA0256 P0439 Call or Visit @ 248-624-7710 / www.dedoes.com...
- Page 9 • Adjust height of P0436 so both P0476 parts bo�om out or touch P1891 parts at the same �me. Tighten P0478 against P0436. • Perform a pressure test to check for leaks prior to use. See page 1 for Pressure test steps. Call or Visit @ 248-624-7710 / www.dedoes.com...
- Page 10 A�ach the MPU to the table using the four remaining nuts and bolts provided (B). MPU Ra�o S�ckers Assembly Instruc�ons - Dedoes P# P1196, P1197, P1198 • Prepare decal for applica�on to the front cylinder facing forward as shown on figure 1.
Need help?
Do you have a question about the MPU02 and is the answer not in the manual?
Questions and answers