Table of Contents
Advertisement
Advertisement
Table of Contents

Related Manuals for Kodak EasyShare Z710


Summary of Contents for Kodak EasyShare Z710
-
Page 1: Installing The Software
Installing the software IMPORTANT: Before connecting any cables, install the software that was included with your camera. Follow the on-screen instructions. www.kodak.com/go/z710support After installing the software, return to this Getting Started Guide. -
Page 2: Loading The Batteries
Loading the batteries CRV3 lithium Ni-MH 2 AA lithium or Ni-MH (non-rechargeable) (rechargeable) (may be rechargeable or non-rechargeable) Turning on the camera www.kodak.com/go/easysharecenter... - Page 3 Setting the language, date/time www.kodak.com/go/z710support Language: to change. OK to accept. Date/Time: At the prompt, press OK. to change. for previous/next field. OK to accept.
-
Page 4: Taking A Picture/Video
Press the Shutter button halfway to focus and set exposure. When the AF/AE indicator turns green, press the Shutter button completely down. Videos Press the Shutter button completely down and release. To stop recording, press the Shutter button again. www.kodak.com/go/easysharecenter... - Page 5 Reviewing pictures/videos Press Review. (Press again to exit.) for previous/next. Videos: OK Play/pause. Adjust the volume (during playback). Rewind to beginning (during playback) Next picture/video (during playback). www.kodak.com/go/z710support...
-
Page 6: Transferring Pictures/Videos
Transferring pictures/videos USB cable Kodak EasyShare printer dock or camera dock (May be sold separately.) For dock compatibility, visit www.kodak.com/go/dockcompatibility. To purchase accessories, visit www.kodak.com/go/z710accessories. To use an EasyShare dock, see its Getting Started Guide. www.kodak.com/go/easysharecenter... - Page 7 • taken pictures • transferred pictures to your computer Keep learning! Finish reading this book, so you can take and share your best pictures! Visit www.kodak.com/go/z710support and www.kodak.com/go/easysharecenter for: • the extended user’s guide • interactive troubleshooting and repairs • interactive tutorials •...
-
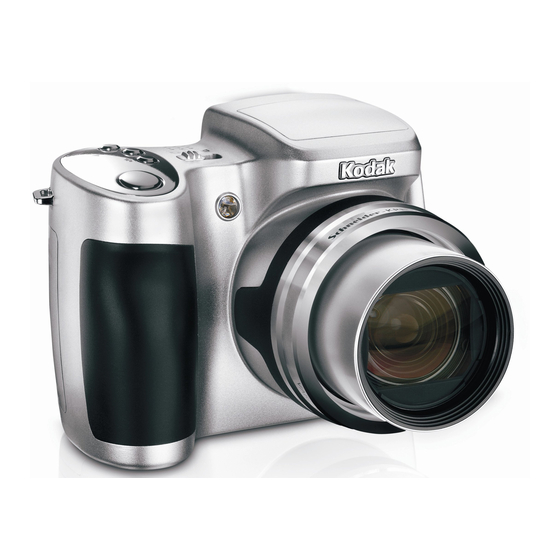
Page 8: Front View
Front view Grip Low-light assist, Self-timer light Shutter button Flash button Close-up/Landscape button Self-timer/Burst button Power/Favorites switch Speaker Flash 10 Open Flash switch 11 Neck strap post 12 Microphone 13 Lens 14 DC-In (3V) ,for optional AC adapter www.kodak.com/go/easysharecenter... -
Page 9: Back View
2 Menu button 3 Delete button 4 Tripod socket 5 Dock connector 6 LCD 7 Info button 8 EVF (Electronic viewfinder) www.kodak.com/go/z710support EVF/LCD button 10 Zoom (Wide Angle/Telephoto) 11 Share button 12 Joystick/OK button 13 Mode dial 14 USB, A/V Out... -
Page 10: Doing More With Your Camera
NOTE: You cannot use digital zoom for video recording. You may notice decreased image quality when using digital zoom. The blue slider on the zoom indicator pauses and turns red when the picture quality reaches the limit for an acceptable 4 x 6-in. (10 x 15 cm) print. www.kodak.com/go/easysharecenter... -
Page 11: Using The Flip-Up Flash
Red Eye The flash fires once so the eyes become accustomed to the flash, then fires again when the picture is taken. Never www.kodak.com/go/z710support Doing more with your camera Press the flash button repeatedly to scroll through flash modes. The current flash mode is depicted in the LCD/EVF status area. -
Page 12: Using The Self-Timer
• Again for a 2-sec. delay (for a steady, shutter release on a tripod) • Again for 2 pictures (after a 10- and 18-second delay) Compose the scene. Press the Shutter button halfway, then completely down. The picture is taken after the delay. www.kodak.com/go/easysharecenter... -
Page 13: Capture Modes
Telephoto to exaggerate background blur. Night Use at night to capture subject and background. Scene Point-and-shoot simplicity when taking pictures under special conditions. Video Video with sound. More creative control. (See PASM www.kodak.com/go/z710support Doing more with your camera page 15.) -
Page 14: Scene Modes
3 Take a picture. NOTE: After you take the picture, the camera stays in the Close-up or Landscape setting. To exit, press the Close-up/Landscape button until the icon turns off (or turn off the camera). www.kodak.com/go/easysharecenter 15.) icon appears in the... -
Page 15: Close-Up Pictures
Program mode offers the ease of auto shooting with full access to all menu options. Press settings. Press the Menu button to change other settings. (See www.kodak.com/go/z710support Doing more with your camera to gain sharpness and detail in pictures at close range. Use Close-up focus distance –... - Page 16 Use Reset to Default to reset P, A, S, or M mode to its default setting. to select settings. Press the Menu button to change page 17.) to select settings. Press the Menu button to change page 17.) to select settings. Press the page www.kodak.com/go/easysharecenter 17.)
- Page 17 If the picture is too light, decrease the setting; if it’s too dark, increase the setting. Shutter speed—control how long the shutter stays open. A shaking hand icon warns of slow shutter speeds. (Use a tripod for slow shutter speeds.) www.kodak.com/go/z710support Doing more with your camera PASM Options White—selectable Grey—non-selectable...
- Page 18 Smaller f-stop numbers indicate a larger lens opening; good for portraits and ■ low-light conditions. Larger f-stop numbers indicate a smaller lens opening; keeps the main subject ■ sharp; good for landscapes and well-lit conditions. www.kodak.com/go/easysharecenter...
-
Page 19: Working With Pictures/Videos
Working with pictures/videos Reviewing pictures and videos Press the Review button to view and work with your pictures and videos. Magnifying a picture www.kodak.com/go/z710support Press Review. (Press again to exit.) for previous/next. Videos: Play/pause. Adjust the volume. Rewind to beginning (during playback). -
Page 20: Deleting Pictures And Videos
Working with pictures/videos Viewing multi-up (thumbnails) Deleting pictures and videos View multi-up thumbnails. View previous/next row or thumbnail. View single picture. Press Review. View previous/next. Press Delete. Follow the screen prompts. www.kodak.com/go/easysharecenter... -
Page 21: What The Review Icons Mean
Scroll arrows Running a slide show Use the Slide Show to display your pictures and videos on the camera. To save battery power, use an optional Kodak 3-volt AC adapter. (Visit www.kodak.com/go/z710accessories.) Starting the slide show 1 Press the Review button, then press the Menu button. -
Page 22: Cropping Pictures
Press the Menu button to exit the menu. Press Review. for previous/next. Press Menu, highlight Crop, then press OK. Press Telephoto (T) to zoom in, or Press OK, then follow the screen prompts. www.kodak.com/go/easysharecenter to move the crop box. -
Page 23: Using The Histogram To View Picture Brightness
If the peak is to the right of the graph, the subject is bright; if it’s to the left, the subject is dark. Optimal exposure is achieved when the peak is in the middle of the histogram. www.kodak.com/go/z710support Working with pictures/videos... -
Page 24: Troubleshooting
■ ■ LCD says “Memory is full” ■ ■ www.kodak.com/go/z710support Turn off the camera. Remove the batteries; confirm that they are the correct batteries for your camera. Insert a set of new or fully charged batteries. Turn on the camera. - Page 25 If the LCD breaks, do not touch the glass or liquid. Contact Kodak customer support. ■ The use of an accessory that is not recommended by Kodak may cause fire, electric shock, or injury. ■ Use only a USB-certified computer. Contact your computer manufacturer if you have questions.
- Page 26 Request for Warranty service will not be accepted without proof of date of purchase, such as a copy of the original dated Kodak EasyShare digital camera or accessory sales receipt. (Always keep the original for your records.) This warranty does not apply to the battery(s) used in digital cameras or accessories.
- Page 27 Appendix adapters and cables), or claims made after the duration of this warranty. Kodak makes no other express or implied warranty for this product. In the event that the exclusion of any implied warranty is ineffective under the law, the duration of the implied warranty will be one year from the purchase date.
- Page 28 NMB-003 du Canada. Waste Electrical and Electronic Equipment labeling In the European Union, do not discard this product as unsorted municipal waste. Contact your local authorities or go to VCCI Class B ITE Australian C-Tick N137 www.kodak.com/go/recycle for recycling program information. www.kodak.com/go/easysharecenter...
- Page 29 Rochester, New York 14650 © Eastman Kodak Company, 2006 Kodak, EasyShare, and Perfect Touch are trademarks of Eastman Kodak Company. Schneider-Kreuznach and C-Variogon are trademarks of Jos. Schneider Optische Werke GmbH used under license by Eastman Kodak Company. 4J4891_en www.kodak.com/go/z710support...
Need help?
Do you have a question about the EasyShare Z710 and is the answer not in the manual?
Questions and answers