Table of Contents
Advertisement
Quick Links
Advertisement
Table of Contents

Subscribe to Our Youtube Channel
Related Manuals for SVP UDR-70


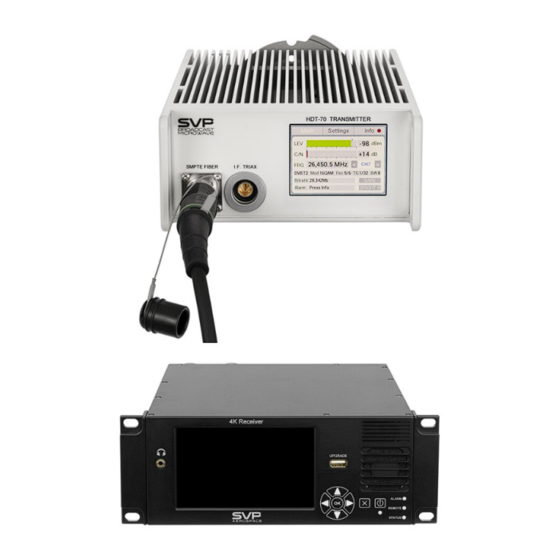
Summary of Contents for SVP UDR-70
- Page 1 UDR-70 Portable Receiver User Manual V1.0...
- Page 2 Accessories included in this manual: QPT Pan & Tilt Positioner SCDA HAP-60...
- Page 3 In this chapter the Autotracking antenna control and how to configure this option is explained. Chapter 6: GPS This chapter indicates the operation of the UDR-70 GPS system and specifies the parameters that are shown in the GPS screen. Chapter 7: Web Server This chapter provides a detailed description of the Web Server tool.
- Page 4 This chapter explain the procedure that should be followed during the Receiver's live. Chapter 11: Warranty This chapter contains warranty considerations and conditions. Annex A: QPT User’s Guide Annex B: SCDA User’s Guide Annex C: HAP-60 User’s Guide Annex D: Modulation standards UDR-70 H.265 Portable Receiver USER’S MANUAL V1.0...
- Page 5 Dear Customer, We would like to thank you for selecting this equipment and welcome you to the SVP’s growing family of products. We are sure that the addition of this equipment will give complete satisfaction to you with your existing installation.
- Page 6 About this manual This user’s guide provides indications and explanations about how to set up the UDR-70 receiver easily for the most common use cases. This document is intended to help first time users: To find their way around the GUI.
- Page 7 Important Notes 1. The UDR-70 H.265 Portable receiver is fully compatible with the DVB-T standard included in European Standard ETSI EN300744, with DVB-T2 standard included in ETSI EN300755, with DVB-T standard included in European Standard ETSI EN300744, with DVB-S2 standard included in EN302307 and with DVB-S standard included in ETSI EN 300421.
- Page 8 6. As consciousness returns the victim will start to breathe on his own, and a ‘pink’ color replaces the ‘blue’ look: this is the time to stop resuscitation. Continue to hold his chin up and so keep the airway clear. UDR-70 H.265 Portable Receiver USER’S MANUAL V1.0...
- Page 9 If help as available or as soon as resuscitation is no longer required, the wound should be covered with a DRY clean dressing. d) Oil or grease in any form should not be applied. e) If severely burnt, get the victim to hospital immediately. UDR-70 H.265 Portable Receiver USER’S MANUAL V1.0...
-
Page 10: Table Of Contents
4.2.2.4.7 Unit Firmware Screen ............65 Chapter 5: Autotracking Antenna (optional) ........70 Autotracking Multisector AMS Antenna ............. 71 5.1.1 How Does It Work ............71 5.1.2 Installation and Configuration ........... 72 Autotracking Parabolic Antenna .............. 74 UDR-70 H.265 Portable Receiver USER’S MANUAL V1.0... - Page 11 Antenna Installation ................128 Chapter 9: Down Converter ............129 Front Panel..................129 Display ..................... 130 9.2.1 Receiver threshold ............131 9.2.1.1 DVB-T2 .................. 131 9.2.1.2 DVB-T ................... 134 Alarms ..................... 136 Connections ..................137 UDR-70 H.265 Portable Receiver USER’S MANUAL V1.0...
- Page 12 DVB-S ................160 D.3.1. How Does It Work ............160 D.4. DVB-S2 ................161 D.4.1. How Does It Work ............161 D.4.2. Pilots in DVB-S2 ............. 164 D.4.3. DVB-S vs DVB-S2 ............164 UDR-70 H.265 Portable Receiver USER’S MANUAL V1.0...
-
Page 13: Chapter 1: Introduction
It is an H.265, H.264 and MPEG-2 12G/3G/HD/SD professional broadcast quality decoder. Also, it works in 4:2:2 with 10 bits. Ultra low latency (end to end) of less than one frame is achieved as long as it is used together with SVP transmitters. -
Page 14: Chapter 2: Technical Features
LDPC FEC (DVB-S2): 1/4, 1/3, 2/5, 1/2, 3/5, 2/3, 3/4, 4/5, 5/6, 8/9, 9/10 FEC (DVB-S): 1/2, 2/3, 3/4, 5/6, 7/8 Max. Symbol Rate 25 Msymb/s Max. Bandwidth: 30 MHz Max. Bitrate: 109 Mbps UDR-70 H.265 Portable Receiver USER’S MANUAL V1.0... - Page 15 Analogue 2 pair Line level Output: SDI Embedded Analogue Data Channels: Data channel: User data/GPS Data rate: 1,200 to 57,600 bps ASI and IP: Outputs and Inputs: ASI Transport Stream Transport Stream over IP (Optional) UDR-70 H.265 Portable Receiver USER’S MANUAL V1.0...
- Page 16 TFT Video screen 5” Antenna Control (Optional): Parabolic: Autotracking with positioner in 2 axis Remote polarization control Multisector: Autotracking with panel switching Power Supply: AC input: 90 to 240 V DC input: 9 to 36 V UDR-70 H.265 Portable Receiver USER’S MANUAL V1.0...
- Page 17 2 RU Half rack size Weight: 3.2 Kg Max. distance control 400 m (triax cable 11 mm) unit- RF head 2000 m with Fiber-Optic Control unit-IF head connection Triax Lemo 3 SMPTE Fiber-Optic Lemo (Optional) UDR-70 H.265 Portable Receiver USER’S MANUAL V1.0...
-
Page 18: Chapter 3: How To Order
Chapter 3: How to Order UDR-70 H.265 Portable Receiver USER’S MANUAL V1.0... -
Page 19: Chapter 4: Receiver Operation And Menus
Chapter 4: Receiver Operation and Menus This section contains all the necessary information to operate, control and configure the UDR-70 receiver. 4.1 Display To switch the equipment on and off, press ON/OFF button. When the equipment is turned on, the display will show a start-up, and then it will display the first main screen. -
Page 20: St Main Screen For The Dvb-T
Received bitrate (Mbps) Video Codification (H.265 / MPEG-2) Video Format (1080p, 1080i, 720p, 576i, 480i) Video options: Profile (4:2:0 or 4:2:2) Delay (Standard (S), Low delay (L) or Super Low delay (SL)) UDR-70 H.265 Portable Receiver USER’S MANUAL V1.0... - Page 21 RF received signal, the number of cuts counter will increase its value in 1. To reset and set to 0 this value, press left button. Table 2:Main screen for DVB-T standard UDR-70 H.265 Portable Receiver USER’S MANUAL V1.0...
-
Page 22: St Main Screen For The Dvb-T2
Codification Signal Format DVBT2: 26.2Mb H.265 576/50i 420/S Received Signal Standard 2,300.0MHz Q64 5/6 8MHz 8K 0 Reception Frequency Number of cuts Modulation Carriers Guard Bandwidth Interval Figure 2: 1 Main screen DVB-T2 UDR-70 H.265 Portable Receiver USER’S MANUAL V1.0... - Page 23 In case there is a cut in the RF received signal, the number of cuts counter will increase its value in 1. To reset and set to 0 this value, press left button Table 3: Main screen for DVB-T2 standard UDR-70 H.265 Portable Receiver USER’S MANUAL V1.0...
- Page 24 Before the audio status field, there could be a padlock depending on the encryption mode. If the input signal is BISS encrypted, then a padlock will appear in this field. UDR-70 H.265 Portable Receiver USER’S MANUAL V1.0...
-
Page 25: St Main Screen For The Dvb-S/S2 (Optional)
Number of cuts Modulation Bandwidth Figure 3: 1 Main screen DVB-S/S2 Parameter Function nº Received standard (DVB-S or DVB-S2) Received bitrate (Mbps) Video Codification (H.265 / MPEG-2) Video Format (1080p, 1080i, 720p, 576i, 480i) UDR-70 H.265 Portable Receiver USER’S MANUAL V1.0... - Page 26 Table 4: Main screen for DVB-T2 standard Before the audio status field, there could be a padlock depending on the encryption mode. If the input signal is BISS encrypted, then a padlock will appear in this field. UDR-70 H.265 Portable Receiver USER’S MANUAL V1.0...
-
Page 27: St Main Screen For The Asi Input
Profile (4:2:0 or 4:2:2) Delay (Standard (S), Low delay (L) or Super low delay (SL)) Number of services available Name of the selected service Table 5: Main screen for ASI input UDR-70 H.265 Portable Receiver USER’S MANUAL V1.0... -
Page 28: St Main Screen For The Ip Input
Profile (4:2:0 or 4:2:2) Delay (Standard (S), Low delay (L) or Super Low delay (SL)) Number of services available Name of the selected service Table 6: Main screen for IP input UDR-70 H.265 Portable Receiver USER’S MANUAL V1.0... -
Page 29: Nd Main Screen (For The Dvb-T2/T)
C/N (Carrier to Noise Ratio): The possible values in this field are from 1 to • 9 where a received signal of value 1 is a very noisy signal whereas a received signal of value 9 means a very clean received signal. UDR-70 H.265 Portable Receiver USER’S MANUAL V1.0... -
Page 30: Menus
Furthermore, when in the submenus area, returning to the main screens is achieved by pressing the cross button as many times as it is needed. On the next page, a scheme that specifies the menu structure is shown. UDR-70 H.265 Portable Receiver USER’S MANUAL V1.0... - Page 31 IF Input Buffer Delay Sample Format Levels Analogue IF Input IF Input IF Input Bitrate Control HD Duplication Level Audio 1 Stream Frame Without Analogue Diagnostics Signal Level Audio 2 Error Concealment Status Genlock UDR-70 H.265 Portable Receiver USER’S MANUAL V1.0...
- Page 32 Continued Continued Decoder Autotracking IP Output Descrambler Local IP Config Manual Parabolic BISS-1 Dest IP & Port Auto Multisector BISS-E Omni AES-128 TP per IP AES-256 Protocol Time To Live Stream Diagnostics UDR-70 H.265 Portable Receiver USER’S MANUAL V1.0...
- Page 33 Load Encry Key Clock Signal counter Location Labels Admin Pass Quickset GPS Antenna User Pass Protocol Distance Units Menu OSD Menu OSD Speed units Position Timeout Reset Activation Key Restore Factory Settings Decoder S/N UDR-70 H.265 Portable Receiver USER’S MANUAL V1.0...
-
Page 34: Menu Navigation
4.2.1 Menu Navigation This section contains a detailed description of each parameter that can be configured in the UDR-70 receiver via the menu. To enter the MENU, press the Cross button if in principal screen or in any submenu. To select a parameter or a submenu use Up, Down arrows. Once selected, press the OK button to access to a submenu or to edit a parameter. -
Page 35: Menu Structure
Unit: Parameters related to the Web Server, UART and other internal options of the receiver are configured here as well as other characteristics owned to the UDR-70 receiver. 4.2.2.1 Input Select Menu By using the Up, Down arrow keys, select the Input Select option and press the OK button. -
Page 36: Dvb-T
ODU is set in Slave channel. If in the corresponding ODU a channel is selected, the number of the selected channel will appear next to the frequency value. If the ODU is not connected, some dashes will appear. UDR-70 H.265 Portable Receiver USER’S MANUAL V1.0... - Page 37 DVB-T IF Input: In this option, the IF input connector must be specified. To select the desired, Right, Left buttons must be pressed. (eligible parameter) Table 7: DVB-T Input Select menu options UDR-70 H.265 Portable Receiver USER’S MANUAL V1.0...
-
Page 38: Dvb-T2
ODU is set in Slave channel. If in the corresponding ODU a channel is selected, the number of the selected channel will appear next to the frequency value. If the ODU is not connected, some dashes will appear. UDR-70 H.265 Portable Receiver USER’S MANUAL V1.0... - Page 39 DVB-T2 IF Input: In this option, the IF input connector must be specified. To select the desired, Right, Left buttons must be pressed. (eligible parameter) Table 8: DVB-T2 Input Select menu options UDR-70 H.265 Portable Receiver USER’S MANUAL V1.0...
-
Page 40: Isdb-T
ODU is set in Slave channel. If in the corresponding ODU a channel is selected, the number of the selected channel will appear next to the frequency value. If the ODU is not connected, some dashes will appear. UDR-70 H.265 Portable Receiver USER’S MANUAL V1.0... - Page 41 ISDB-T IF Input: In this option, the IF input connector must be specified. To select the desired, Right, Left buttons must be pressed. (eligible parameter) Table 9: ISDB-T Input Select menu options UDR-70 H.265 Portable Receiver USER’S MANUAL V1.0...
-
Page 42: Dvb-S/S2 (Optional)
4.2.2.1.4 DVB-S/S2 (optional) Figure 11: DVB-S/S2 Input Select Menu UDR-70 H.265 Portable Receiver USER’S MANUAL V1.0... - Page 43 DVB-S/S2 IF Input: In this option, the IF input connector must be specified. To select the desired, Right, Left buttons must be pressed. (eligible parameter) Table 10: DVB-S/S2 Input Select menu options UDR-70 H.265 Portable Receiver USER’S MANUAL V1.0...
-
Page 44: Asi
By using the right and left arrow keys, select the IP Input option. Figure 13: IP Input selected Then press the Cross button and these IP options will appear on the main screen: Figure 14: 1 Main screen IP UDR-70 H.265 Portable Receiver USER’S MANUAL V1.0... - Page 45 OK button. Figure 15:IP Input Select Menu To setup the local IP address, network and gateway, select Local IP Config and press OK. The configuration menu is: Figure 16:Local IP Configuration menu UDR-70 H.265 Portable Receiver USER’S MANUAL V1.0...
- Page 46 In case the signal is received from a multicast address, that multicast address must be configured in this field. To enter the multicast address, press OK button to configure the multicast address. (editable parameter) UDR-70 H.265 Portable Receiver USER’S MANUAL V1.0...
- Page 47 This field shows the stream diagnosis. (reading parameter) The available values are: • Estimated Bitrate Jitter Tolerance • Jitter Errors • Lock Errors • Delay Factor • Table 11: IP Input Select menu options UDR-70 H.265 Portable Receiver USER’S MANUAL V1.0...
-
Page 48: Decoder Menu
By using the Up and Down arrow keys, select the Decoder option and press the OK key. Figure 17: Decoder Menu 4.2.2.2.1 Decoder Video Screen In this field, the video mode for the decoding process is selected. The available options are: Figure 18: Video Menu UDR-70 H.265 Portable Receiver USER’S MANUAL V1.0... - Page 49 Freeze. On input stream interruption last decoded frame is held, most effective when Genlock is not disabled. • Blue. On input stream interruption output will go to blue screen. • Pattern. Video pattern is displayed UDR-70 H.265 Portable Receiver USER’S MANUAL V1.0...
- Page 50 • External. Output synchronized to external reference, must have compatible frame rate. • Internal. Output synchronized to internal reference, use to prevent PCR jitter transfer to SDI output. Table 12: Video menu options UDR-70 H.265 Portable Receiver USER’S MANUAL V1.0...
-
Page 51: Decoder Audio Screen
In this option, the audio channel level is shown per each channel (reading parameters) Analogue Ref Level Audio 1: In this field, the analogue audio reference level can be configured. The available options are: • +24 dBu • +18 dBu UDR-70 H.265 Portable Receiver USER’S MANUAL V1.0... -
Page 52: Decoder Data
• PID Number. Service decoding is based on provided PIDs. • Program number. Service decoding is based on program number. Here the Program number must be entered. 1 to 65535 program number to be searched for in PAT. UDR-70 H.265 Portable Receiver USER’S MANUAL V1.0... -
Page 53: Decoder Ip Output
Left keys. To save the value, press the OK button. (editable parameters) • Video over IP MAC: In this field the MAC address of the Video over IP card is displayed (reading parameter) UDR-70 H.265 Portable Receiver USER’S MANUAL V1.0... - Page 54 The Local IP address and the destination IP address MUST be different. When a parameter of the TS over IP menu options is changed, it takes 30 seconds for the device to be configured and work again. UDR-70 H.265 Portable Receiver USER’S MANUAL V1.0...
-
Page 55: Decoder Descrambler
• BISS-E (Uses an encrypted key) • AES-128 (Optional) • AES-256 (Optional) The Keys can be saved via USB in unit->Miscellaneous menu. When encryption is enabled, the bitrate is limited to under 105 Mbps UDR-70 H.265 Portable Receiver USER’S MANUAL V1.0... -
Page 56: Autotracking Menu
Transmitter device throughout the GPS coordinates of the Transmitter and the Receiver. Once user has accessed to the Auto screen, three options to choose will appear: • Transmitter Position • Receiver Position • Receiver Configuration UDR-70 H.265 Portable Receiver USER’S MANUAL V1.0... - Page 57 TX Position: In this option, different parameters are shown (reading parameters): Number of satellites • Speed of the Transmitter (kn) • Direction of the Transmitter (degrees) • Height of the Transmitter (m) • UDR-70 H.265 Portable Receiver USER’S MANUAL V1.0...
- Page 58 In this line, the user can read the local altitude, speed and satellite number information provided by the external GPS source. When there is no GPS information, the local altitude is editable parameter by the user. UDR-70 H.265 Portable Receiver USER’S MANUAL V1.0...
- Page 59 North Heading, Pan and Tilt measurements and Antenna Calibration). Once the positioner has been pointed to the North, please make sure that the calibration is correct by comparing it with an external Compass. Table 16: Receiver Position menu UDR-70 H.265 Portable Receiver USER’S MANUAL V1.0...
- Page 60 Antenna Vertical Angle: The Antenna Vertical Angle must be set as the vertical beam width of the antenna used (this angle will determine the vertical increase done while the unit is in Search Profile mode). UDR-70 H.265 Portable Receiver USER’S MANUAL V1.0...
- Page 61 Transmitter Position and Receiver Position menus. For a correct calibration of the antenna, please point the Receiver Positioner to the Transmitter’s position and calibrate the antenna until you receive the highest signal level possible. UDR-70 H.265 Portable Receiver USER’S MANUAL V1.0...
- Page 62 +90º. (editable parameter) Fold the antenna: In this file, the user can fold the antenna. Table 18: Fold menu Make sure that when you fold the antenna, the dish does not make contact with anything. UDR-70 H.265 Portable Receiver USER’S MANUAL V1.0...
- Page 63 Figure 34: Sector Autotracking (Manual) If the Manual option is selected then, by pressing the OK button the user can select manually the sector antenna from which you want to receive the signal. UDR-70 H.265 Portable Receiver USER’S MANUAL V1.0...
- Page 64 Omni antenna In this option, the Autotracking is configured with an omnidirectional antenna. Figure 35: Omni Antenna option UDR-70 H.265 Portable Receiver USER’S MANUAL V1.0...
-
Page 65: Profile
In this field, you can configure up to 16 profiles. The configurable parameters are: Input type: • o DVB-T o DVB-T2 o ISDB-T o DVB-S/S2 o ASI o IP • Frequency Bandwidth • UDR-70 H.265 Portable Receiver USER’S MANUAL V1.0... -
Page 66: Unit Alarms Screen
Inclinometer Not Present • QPT Not Present • ODU:PLL NOT LOCKED • ODU: FREQUENCY OUT OF RANGE • ODU: RF LEVEL LOW • ODU:VOLTAGE OUT OF RANGE • • ODU:TEMPERATUE HIGH ODU:NOT CONNECTED • UDR-70 H.265 Portable Receiver USER’S MANUAL V1.0... -
Page 67: Measurements Screen
Figure 39: Alarms View selection The alarms are shown as indicated below: Figure 40: Present Alarms Measurements Screen 4.2.2.4.4 In this field, several monitor parameters of the device are displayed. Figure 41:Monitor Menu UDR-70 H.265 Portable Receiver USER’S MANUAL V1.0... - Page 68 4096. If the user wants to clear the LogBook, go to the LogBook Clear option and press the OK button. If the user wants to see all the events that have occurred, go to the option LogBook View and press the OK button. UDR-70 H.265 Portable Receiver USER’S MANUAL V1.0...
-
Page 69: Unit Remote (Webserver)
Gateway address first press OK button and then, with the Up and Down keys select the desired number. To change from one character to another, press Right and Left keys. (editable parameter) UDR-70 H.265 Portable Receiver USER’S MANUAL V1.0... -
Page 70: Unit Miscellaneous Screen
The IP address of the Webserver, the Local IP address and the destination IP address must be different. Unit Miscellaneous Screen 4.2.2.4.6 In this field, several parameters related to the mode of operation of the device can be configured. UDR-70 H.265 Portable Receiver USER’S MANUAL V1.0... - Page 71 If the ON option is selected then, a beep sound appears each time a key is pressed. To select between ON and OFF options, press the Right, Left keys. (eligible parameter) UDR-70 H.265 Portable Receiver USER’S MANUAL V1.0...
- Page 72 The available options are: Kilometers • Miles • Speed Units: In this field, the desired parameter is selected to measure the speed (eligible parameter). There are three options available: • Knots • Km/h • UDR-70 H.265 Portable Receiver USER’S MANUAL V1.0...
- Page 73 Load Encyption Keys: In this field you can load the encryption keys for BISS and AES modes by USB. The file must have “.svp” extension and the content must be as it is indicated in the following example: AES128:1202A3412348C9127348FE2348971234...
-
Page 74: Unit Firmware Screen
Update Firmware: This field is the one for updating the version of the device. To update the equipment properly, follow the instructions below. Table 22: Unit Firmware menu options UDR-70 H.265 Portable Receiver USER’S MANUAL V1.0... - Page 75 In this section, the firmware of the device can be updated. Next, they are explained the necessary steps to make a successful update. The latest firmware is allocated in the webpage of SVP Broadcast Microwave. So as to access to the firmware file, first enter www.svpbm.com...
- Page 76 6) Go to Firmware field and then press the current version option to check the number of the version installed in the device (the first two digits). Figure 49:Updating firmware step 5 UDR-70 H.265 Portable Receiver USER’S MANUAL V1.0...
- Page 77 Don’t power off the device during the updating process. Figure 50: Updating process 1 Figure 51: Updating process 2 UDR-70 H.265 Portable Receiver USER’S MANUAL V1.0...
- Page 78 Figure 52: Updating process 3 Figure 53: Updating process 4 Figure 54: Updating process 5 You must remove the USB before start working with the new firmware. UDR-70 H.265 Portable Receiver USER’S MANUAL V1.0...
-
Page 79: Chapter 5: Autotracking Antenna (Optional)
In this section, what the Autotracking antenna control consists of and the detailed steps to follow to configure this option properly is explained. The UDR-70 receiver can control a sectorial, parabolic antenna or omnidirectional antenna. This new feature constantly provides the highest signal level. -
Page 80: Autotracking Multisector Ams Antenna
Then, this signal is sent to the Receiver. It is important to orientate the AMS antenna correctly, so please make sure that the blue line on the antenna is faced to the North. North Line Video + Audio + GPS Figure 55: Autotracking with panel switching UDR-70 H.265 Portable Receiver USER’S MANUAL V1.0... -
Page 81: Installation And Configuration
When the Auto option is selected, it means that the sector antenna is automatically selected. The selected sector is the one which is marked with the square brackets. Value T means the antenna on the Top. Manual Figure 58:: Sector Autotracking (Manual) UDR-70 H.265 Portable Receiver USER’S MANUAL V1.0... - Page 82 GPS data is received. In case there is no GPS data, but the device is receiving the RF signal, the device will be kept in the same sector, it will not be tracking. UDR-70 H.265 Portable Receiver USER’S MANUAL V1.0...
-
Page 83: Autotracking Parabolic Antenna
Heading, and an Inclinometer should be used for the Pitch and Roll compensation, which is very useful when the positioner is installed in a mobile van or boat. The following diagram shows a typical configuration of Autotracking with MOOG QPT positioner, Compass and Inclinometer: UDR-70 H.265 Portable Receiver USER’S MANUAL V1.0... -
Page 84: Installation And Configuration
When the Compass is connected to the AUTOTRACKING connector, it can be powered directly by this connector. The GPS antennas of the Compass must be installed at a minimum 2 meters of distance between them. UDR-70 H.265 Portable Receiver USER’S MANUAL V1.0... - Page 85 HDT (Compass). Provides heading relative to True North. For the GPS Receiver and Compass, the serial port must be set as indicated • below: o 4800 baud rate. o Maximum 2 Hz data rate. o N-8-1 setting. UDR-70 H.265 Portable Receiver USER’S MANUAL V1.0...
- Page 86 RF signal received. For a correct operation of the Auto mode, the Receiver Position must be set, and Receiver Configuration menu must be configured. To start configuration please press OK on Auto mode. UDR-70 H.265 Portable Receiver USER’S MANUAL V1.0...
- Page 87 Search Profile selected. Once that RF signal has been received, the receiver waits for GPS signal. Once that GPS signal has been received. The status changes to BY HDT. Figure 62:Transmitter Position source UDR-70 H.265 Portable Receiver USER’S MANUAL V1.0...
- Page 88 GPS source. In that case, this option is named Local Manual. When GPS information if given by an external source, the GPS information is automatically updated and not editable. In that case, this option is named Local GPS. UDR-70 H.265 Portable Receiver USER’S MANUAL V1.0...
- Page 89 Pitch and Roll measurements is shown. It is necessary the use of an Inclinometer sensor when the QPT Positioner is installed on an irregular surface or in a mobile Car or Boat. UDR-70 H.265 Portable Receiver USER’S MANUAL V1.0...
- Page 90 (GPS position, North Heading, Pan and Tilt measurements and Antenna Calibration). Once the positioner has been pointed to the North, please make sure that the calibration is correct by comparing it with an external Compass. UDR-70 H.265 Portable Receiver USER’S MANUAL V1.0...
- Page 91 The positioner will look for the helicopter on the horizon (0º, +VA and -VA) and will increase the horizontal sweep to 45º in each sweep. This profile makes the H and V sweeps at the same time. UDR-70 H.265 Portable Receiver USER’S MANUAL V1.0...
- Page 92 • Level and C/N Indicator: In this line the level of the signal received is shown, this measurement is used to guarantee the maximum signal received while Antenna Calibration is made. UDR-70 H.265 Portable Receiver USER’S MANUAL V1.0...
- Page 93 The number of degrees that are needed to fold the antenna is configured here. The fold limits are -30º and +90º. In the second line, by pressing the OK button, the antenna folds. UDR-70 H.265 Portable Receiver USER’S MANUAL V1.0...
-
Page 94: Chapter 6: Gps
Type a name for the connection and an icon from the list. Figure 70: HyperTerminal new connection Configure a COM port for the communication and select the COM port configured. Figure 71: COM port configuration UDR-70 H.265 Portable Receiver USER’S MANUAL V1.0... - Page 95 1 sentence per second. 10. When GPS data is obtained, go for example to the Google Earth application and type the received coordinates. 11. The Transmitter’s position will be drawn on the map. UDR-70 H.265 Portable Receiver USER’S MANUAL V1.0...
- Page 96 Figure 73: Google Earth example UDR-70 H.265 Portable Receiver USER’S MANUAL V1.0...
-
Page 97: Introduction
Mask address first press OK button and then, with the Up, Down keys select the desired number. To change from one character to another, press Right, Left keys. Press the OK button to save the introduced value. Figure 76: Subnet Mask UDR-70 H.265 Portable Receiver USER’S MANUAL V1.0... - Page 98 Pass must be set to 0 (00000000). However, if you want to set a user’s password, it is necessary to introduce 8 digits. In this way, with this password, the user can access the Webserver and make any monitoring. Figure 80: User Pass UDR-70 H.265 Portable Receiver USER’S MANUAL V1.0...
- Page 99 Once the IP, Subnet Mask, Gateway, Admin Pass and User Pass are set and the laptop or PC is connected to the Receiver, open the web browser and enter the given IP to the Receiver in the address bar of the browser. UDR-70 H.265 Portable Receiver USER’S MANUAL V1.0...
-
Page 100: Web
If this field shows the locked word then, it means that signal is present in the input of the device. If this field displays the word unlocked then, it means that there is no signal in the input of the device. (reading parameter) UDR-70 H.265 Portable Receiver USER’S MANUAL V1.0... - Page 101 The available options are 2K, 8K for DVB-T. (reading parameter) Spectrum: Here the type of the spectrum of the received signal is shown. The available options are inverted or normal spectrum. (reading parameter) UDR-70 H.265 Portable Receiver USER’S MANUAL V1.0...
- Page 102 When the enter button is pressed, the new values are saved, and the text will appear in black colour. It is necessary to press the enter button to keep and save the new values on the screen. UDR-70 H.265 Portable Receiver USER’S MANUAL V1.0...
-
Page 103: Dvb-T2 Input
The available options are 1.7, 5, 6, 7 and 8 MHz for DVB-T2. (eligible parameter) Constellation: In this field the type of modulation of the received signal is displayed. The available options are QPSK, 16QAM, 64QAM and 256QAM for DVB-T2. (reading parameter) UDR-70 H.265 Portable Receiver USER’S MANUAL V1.0... - Page 104 Time IL Length: In this field, the number of frames in one interleaving frame is displayed. (reading parameter) Level: In this field, the level of the received signal is shown in dBm. (reading parameter) UDR-70 H.265 Portable Receiver USER’S MANUAL V1.0...
- Page 105 When the enter button is pressed, the new values are saved, and the text will appear in black colour. It is necessary to press the enter button to keep and save the new values on the screen. UDR-70 H.265 Portable Receiver USER’S MANUAL V1.0...
-
Page 106: Dvb-S2/S Input
In this field the value of the FEC of the received signal is displayed. The available options are 1/4, 1/3, 2/5, 1/2, 3/5, 2/3, 3/4, 4/5, 5/6, 8/9, 9/10 for DVB-S2. (reading parameter) UDR-70 H.265 Portable Receiver USER’S MANUAL V1.0... -
Page 107: Asi Input
If this field shows the locked word, it means that signal is present in the input of the device. If this field displays the word unlocked, it means that there is no signal in the input of the device. (reading parameter) UDR-70 H.265 Portable Receiver USER’S MANUAL V1.0... -
Page 108: Ip Input
In this field, the port number of the device through which is going to receive the signal must be set. (editable parameter) Protocol: This field displays the protocol used for the communication. (reading parameter The possible options are: o UDP/RTP o SRT UDR-70 H.265 Portable Receiver USER’S MANUAL V1.0... - Page 109 OK button. (editable parameter) Bitrate Control: This field you can choose which technique do you want to use for the bitrate control: o PCR Estimate o Fixed Buffer o Stream Estimate o Disable Buffer UDR-70 H.265 Portable Receiver USER’S MANUAL V1.0...
-
Page 110: Decoder
“Decoding” appears in this field. (reading parameter) Video: • Coding type: This field shows the video coding type of the received video signal. The available options are H.264 and MPEG-2. (reading parameter) UDR-70 H.265 Portable Receiver USER’S MANUAL V1.0... - Page 111 1 video. Standard mode for single HD/UHD operation. 4 x HD-SDI 1080i 4 x HD-SDI 1080psf 4 x HD-SDI 1080p 4 x 3G-SDI 1080p 4 x HD-SDI 720p UDR-70 H.265 Portable Receiver USER’S MANUAL V1.0...
- Page 112 The available options are 1 and 2. (eligible parameter) Genlock: • Mode: In this field, genlock mode can be configured. The available options are: Off. Genlock frame buffer disabled, video output at rate recovered by PCR. UDR-70 H.265 Portable Receiver USER’S MANUAL V1.0...
- Page 113 In this field, the audio 1 packet identifier must be introduced. (editable parameter) • Audio8 PID: In this field, the audio 2 packet identifier must be introduced. (editable parameter) • Ancillary PID: In this field, the data packet identifier must be introduced. (editable parameter) UDR-70 H.265 Portable Receiver USER’S MANUAL V1.0...
- Page 114 When the enter button is pressed, the new values are saved, and the text will appear in BLACK. It is necessary to press the enter button to keep and save the new values on the screen. UDR-70 H.265 Portable Receiver USER’S MANUAL V1.0...
-
Page 115: Ip Output
In case you want to send data to a multicast address just enter the desired multicast address. (editable parameter) • Port: In this option, the port number of the device to which data is sent must be configured. (editable parameter) UDR-70 H.265 Portable Receiver USER’S MANUAL V1.0... - Page 116 When the enter button is pressed, the new values are saved, and the text will appear in BLACK. It is necessary to press the enter button to keep and save the new values on the screen. UDR-70 H.265 Portable Receiver USER’S MANUAL V1.0...
-
Page 117: Unit
7.2.8 UNIT Figure 88: Web Server Unit screen UDR-70 H.265 Portable Receiver USER’S MANUAL V1.0... - Page 118 In this field, the MAC address of the device is shown. (reading parameter) • Phy speed: Communication speed can be configured here. • Detected speed: Communication detected speed Is shown here. • TSoIP Local IP: UDR-70 H.265 Portable Receiver USER’S MANUAL V1.0...
- Page 119 In this field, user can enter the administrator password. (eligible parameter) • User Password: In this field, user can enter the user password. (eligible parameter) • S/N: In this field, the serial number of the device is shown. (reading parameter) UDR-70 H.265 Portable Receiver USER’S MANUAL V1.0...
- Page 120 When the enter button is pressed, the new values are saved, and the text will appear in BLACK. It is necessary to press the enter button to keep and save the new values on the screen. UDR-70 H.265 Portable Receiver USER’S MANUAL V1.0...
- Page 121 LEVEL, MER and C/N of each signal is displayed. To export this information in a text file, it is important to consider the following items: This feature is supported using Firefox and Chrome navigators. Internet Explorer is not supported. UDR-70 H.265 Portable Receiver USER’S MANUAL V1.0...
- Page 122 If you want to clear the captured data in one session, it is necessary to use the "Clear" button or change to another tab of the Webserver. Once the data is captured, open the text file to access the information. UDR-70 H.265 Portable Receiver USER’S MANUAL V1.0...
- Page 123 In this section, you can update the firmware of the receiver remotely. Please select the latest SVP file available in the website for UDR V10 receiver and click on submit, it will take 20-30 minutes to finish, the receiver will be automatically rebooted once the upgrade has finished.
-
Page 124: Introduction
All the DB-9 pinouts refer to the connector that is fixed to the cable. The pinout of the cable connector is shown as if it is watched from the soldering side. All input and output connections of the UDR-70 receiver are shown in the figure below: DVB-T2/T... -
Page 125: Power Supply
Power supply AC connection technical features Item Features Connector label POWER A.C. Connector type MLC Neutrik Supply voltage 90-240 V. (50/60Hz) Table 23: AC Power supply features Pinout Description Table 24: Power supply connector pinout UDR-70 H.265 Portable Receiver USER’S MANUAL V1.0... -
Page 126: Dc Power Supply
Power supply DC connection technical features Item Features Connector label POWER D.C. Conector type XLR-4 male Supply voltage 20-36 V. Table 25: DC Power supply features Pinout UDR-70 H.265 Portable Receiver USER’S MANUAL V1.0... - Page 127 Description + VCC + VCC Table 26: DC Power supply connector pinout Connector needed The DC input is protected by a fuse (ATO model) UDR-70 H.265 Portable Receiver USER’S MANUAL V1.0...
-
Page 128: Intermediate Frequency
Never connect receiver control unit directly to the transmitter control unit. 8.2.3 DVB-ASI Transport Stream DVB-ASI Transport Stream Input The UDR-70 receiver has a DVB-ASI Transport Stream input, compatible with the EN50083-9 standard, available on an insulated 75Ω BNC connector on the rear panel of the rack-mount demodulator unit. -
Page 129: Dvb-Asi Transport Stream Output
DVB-ASI Transport Stream Output The UDR-70 receiver has a DVB-ASI Transport Stream output, compatible with the EN50083-9 standard, available on an insulated 75Ω BNC connector on the rear panel of the rack-mount demodulator unit. This output might be useful if an intermediate ASI feed is required without needing to decode the audio and video signals and then modulate it in the transmitter equipment;... -
Page 130: Genlock
Table 31: SDI output 8.2.5 Genlock Genlock Input The UDR-70 receiver has an external Genlock reference input to lock all video outputs to it. The connection is available on a 75Ω insulated BNC connector located on the rear panel of the rack-mount demodulator unit. - Page 131 For correct operation, it is recommended to use a Cat 5 or higher UTP cable. 4K Transport Stream over IP Output TS over IP connection technical features Item Features Connector Label 4K TS OUT Connector Type RJ-45 Table 34: Transport stream over IP connection technical features UDR-70 H.265 Portable Receiver USER’S MANUAL V1.0...
-
Page 132: Audio Output
Number of audio channels Connector label 1 AUDIO 1 L&R Connector label 2 AUDIO 2 L&R Cable Connector type DB-9 female Table 35: Analogue audio outputs connections features Pinout of the cable connector Figure 95:Analogue connectors UDR-70 H.265 Portable Receiver USER’S MANUAL V1.0... -
Page 133: Gps / Data
8.2.8 GPS / Data GPS Data Input and Output In order to provide GPS information about the receiver, the UDR-70 receiver incorporates a GPS RS232 connector. The data to be obtained is the positioning of the receiver. GPS / DATA connection technical features... -
Page 134: Remote Control
8.2.9 Remote control The UDR-70 receiver can be controlled and monitored remotely over an Ethernet link throughout a Web Server and SNMP. The link is connected via an 8-pin RJ-45 connector with a 10/100 Base-T network interface. This connector is located on the rear panel of the rack-mount demodulator. -
Page 135: Rack Unit Installation
Before operation, the Receiver must me earthed to the rack chassis. The Receiver incorporates a grounding point (M4 screw) on the left side of the rear panel. There are 3 fans on the Receiver, 2 air outputs and 1 air input. UDR-70 H.265 Portable Receiver USER’S MANUAL V1.0... -
Page 136: Down-Converter And Parabolic Antenna Installation
The form that the antenna is connected to the down-converter input is through mechanical hook. The down-converter is connected to the UDR-70 receiver though a triax cable. For better performance high quality cables and connectors should be used. Do not connect wrongly up-converter to the receiver. In this case, the up converter doesn’t switch on. -
Page 137: Antenna Installation
8.5 Antenna Installation Parabolic antenna is connected to the down-converter through a mechanical hook as shown in figure 9.8. Figure 98: UDR-70 receiver system installation UDR-70 H.265 Portable Receiver USER’S MANUAL V1.0... -
Page 138: Front Panel
Chapter 9: Down Converter This chapter provides all the information needed about the UDR-70 receiver down-converters. 9.1 Front Panel The figure below shows the front panel of the down-converter. Lemo connector for IF Autotracking Antenna connector Channel selector: with 15 preset channels ... -
Page 139: Display
Parameters displayed in the panel are: Level of the received signal Quality of the received signal Frequency: received frequency in MHz Transmission standard Chanel (MHz) Bit Rate (Mbps) UDR-70 H.265 Portable Receiver USER’S MANUAL V1.0... -
Page 140: Receiver Threshold
These values were measured with different modulations, constellations and FECs. 9.2.1.1 DVB-T2 QPSK FEC: 1/2 • -107 -101 -100 -100 FEC: 2/3 • -104 - 98 FEC: 5/6 • -102 16 QAM FEC: 1/2 • -101 FEC: 2/3 • UDR-70 H.265 Portable Receiver USER’S MANUAL V1.0... - Page 141 FEC: 5/6 • 64 QAM FEC: 1/2 • FEC: 2/3 • FEC: 5/6 • 256 QAM FEC: 1/2 • UDR-70 H.265 Portable Receiver USER’S MANUAL V1.0...
- Page 142 FEC: 2/3 • FEC: 5/6 • 5 MHz -80 dBm UDR-70 H.265 Portable Receiver USER’S MANUAL V1.0...
-
Page 143: Dvb-T
6 MHz 7 MHz 8 MHz -93 dBm -92 dBm -91 dBm -90 dBm FEC: 7/8 • 5 MHz 6 MHz 7 MHz 8 MHz -91 dBm -90 dBm -89 dBm -89 dBm UDR-70 H.265 Portable Receiver USER’S MANUAL V1.0... - Page 144 6 MHz 7 MHz 8 MHz -87 dBm -85 dBm -85 dBm -85 dBm FEC: 7/8 • 5 MHz 6 MHz 7 MHz 8 MHz -85 dBm -83 dBm -83 dBm -82 dBm UDR-70 H.265 Portable Receiver USER’S MANUAL V1.0...
-
Page 145: Alarms
“Down-converter power supply low/High” alarm is displayed on the alarms list. The unit stops displaying the alarm when the power supply voltage is 18V or greater, but below 36V. UDR-70 H.265 Portable Receiver USER’S MANUAL V1.0... -
Page 146: Connections
Connector label Connector type (equipment) Lemo 3 triax Part Number (equipment) EHP.3T Part Number (cable) FFA.3T Manufacturer Lemo Required cable Draka – Triflex 8 – Y HDTV Table 40: Intermediate frequency connector technical features UDR-70 H.265 Portable Receiver USER’S MANUAL V1.0... -
Page 147: Chapter 10: Preventive Maintenance
• Inspect antenna installation to ensure all components are secure and in good conditions. • Inspect cables and connections. • Check with a multimeter the point-to-point continuity of the Triax cable that connect the Control unit and RF head unit. UDR-70 H.265 Portable Receiver USER’S MANUAL V1.0... -
Page 148: Spare Parts
10.3 Spare parts The transmitter system has no user replaceable parts. Contact SVP Broadcast Microwave for all service and repair inquiries. Contact email: info@svpbm.com Note: Any attempts to service individual components may make the warranty void. UDR-70 H.265 Portable Receiver... -
Page 149: Chapter 11: Warranty
All claims under warranty must be made promptly after occurrence of circumstances giving rise to the claim and must be received within the applicable warranty period by SVP Broadcast Microwave or its authorized representative. SVP Broadcast Microwave reserves the right to reject any warranty claim not promptly reported. After expiration of the applicable warranty period, products are not subject to adjustment. - Page 150 Any Product returned without complete information will be considered not to have met all contractual requirements. Information required includes (as a minimum): Model Number, Serial Number, Description, Hours of Use, Type of Failure, and Operating Conditions during failure. UDR-70 H.265 Portable Receiver USER’S MANUAL V1.0...
-
Page 151: Transportation And Packaging
Product. By returning a Product, the owner grants SVP Broadcast Microwave permission to open and inspect the returned Product to determine the cause of failure, and SVP Broadcast Microwave’s determination with regard hitherto shall be final. If it is found that the Product has been returned without cause and... -
Page 152: Annex A: Qpt User's Guide
4. Only authorized personnel should open the unit and any repair or warranty will be invalidated if the seals are broken. Figure 101: QPT Pan & Tilt Positioner UDR-70 H.265 Portable Receiver USER’S MANUAL V1.0... -
Page 153: Description
When it is powered by the receiver, it provides 24V when the receiver is powered by AC power. When the receiver is powered in DC, the same voltage will be provided to the positioner. Digital Serial Integrated Control (IC) units communicate with SVP receiver models HDR-10X and UDR-70. UDR-70 H.265 Portable Receiver... -
Page 154: Technical Specifications
Mil-Spec grade Materials Housing 6061-T6 Aluminium, stainless steel hardware, permanently sealed radial ball bearings Finish/Colour White powder coat paint over alodined chromate for corrosion resistance standard Weight 16.8 kg Table 42: QPT-90 Standard Performance UDR-70 H.265 Portable Receiver USER’S MANUAL V1.0... - Page 155 Table 43: QPT-90 Serial features Mil-Spec Shock Vibration Item Specifications Passed Shock MIL-STD-810F Meth. 516.5 Passed Vibration MIL-PRF-49256A Table 44: QPT-90 Mil-Spec Shock Vibration Figure 102:QPT-90 Pan & Tilt Positioner Figure 103: QPT-90 Dimensions UDR-70 H.265 Portable Receiver USER’S MANUAL V1.0...
-
Page 156: Annex B: Scda User's Guide
3. The high performance of this equipment is only guaranteed when using high quality cables and connectors. 4. Only authorized personnel should open the product and any repair or warranty will be invalidated if the seals are broken. Figure 104: SCDA Duplexor UDR-70 H.265 Portable Receiver USER’S MANUAL V1.0... -
Page 157: Description
The equipments can be up-converters or down-converters. This configuration makes possible for both equipments to share the same tripod and the same antenna. The bracket has two clasps, one for each equipment, to prevent an unwanted manipulation. UDR-70 H.265 Portable Receiver USER’S MANUAL V1.0... -
Page 158: Technical Specifications
10 GHz Band: 10.20 – 10.35 GHz / 10.50 – 10.65 GHz Material Aluminium, powder coated Weight 4.5 kg Size Width: 259 mm (without bracket) Height: 112.5 mm (without bracket) Depth: 291.5 mm Table 45: SCDA Main Characteristics Figure 105: SCDA Duplexor UDR-70 H.265 Portable Receiver USER’S MANUAL V1.0... -
Page 159: Mechanical Drawings
B.3 Mechanical Drawings UDR-70 H.265 Portable Receiver USER’S MANUAL V1.0... -
Page 160: Configurations
B.4 Configurations Figure 106: 1+1 Configuration Figure 107: Bidirectional Configuration UDR-70 H.265 Portable Receiver USER’S MANUAL V1.0... - Page 161 Figure 108: Single link Configuration UDR-70 H.265 Portable Receiver USER’S MANUAL V1.0...
-
Page 162: Annex C: Hap-60 User's Guide
3. The high performance of this equipment is only guaranteed when using high quality cables and connectors. 4. Only authorized personnel should open the product and any repair or warranty will be invalidated if the seals are broken. Figure 109:HAP-60 Parabolic Antenna UDR-70 H.265 Portable Receiver USER’S MANUAL V1.0... -
Page 163: Description
60 cm diameter. This antenna works in the 2 GHZ, 6 GHz, 7 GHz and 10 GHz frequency bands. It has been especially designed to be used in portable SVP links. So, it can be clamped to the RF head of SVP equipment. -
Page 164: Technical Specifications
2 GHz, 6 GHz, 7 GHz and 10 GHz bands Bandwidth 500 MHz Gain Depends on the frequency Polarization Linear VSWR Typ: < 1.8 Connector N female Diameter 60 cm Weight 5 kg Table 46: HAP-60 Main Characteristics UDR-70 H.265 Portable Receiver USER’S MANUAL V1.0... -
Page 165: Annex D: Modulation Standards
• Can operate in 6, 7 or 8MHz channel bandwidths. Using different combinations of the above parameters a DVB-T network can be designed to match the requirements of the network operator, finding the right balance between robustness and capacity. UDR-70 H.265 Portable Receiver USER’S MANUAL V1.0... -
Page 166: Dvb-T2
In the error correction stage, the DVB-T2 standard implements a combination of LDPC codes with BCH codes. LDPC codes allow a close performance to Shannon limit and the BCH codes are used to eliminate the floor error of the LDPC codes. UDR-70 H.265 Portable Receiver USER’S MANUAL V1.0... - Page 167 This means that with only one component (the I or the Q) it is possible to know exactly the symbol to which it belongs. This new feature provides additional robustness for low order constellations. Figure 111: Constellation Rotation UDR-70 H.265 Portable Receiver USER’S MANUAL V1.0...
-
Page 168: Dvb-T Vs Dvb-T2
40 Mbit/s (UK) Max. Data rate 31.7 Mbit/s (using 45.5 Mbit/s (@20 dB C/N) 8 MHz) (using 8 MHz) Required C/N ratio 16.7 dB 10.8 dB (@24 Mbit/s) Table 47:: DVB-T vs DVB-T2 UDR-70 H.265 Portable Receiver USER’S MANUAL V1.0... -
Page 169: Dvb-S
This operation is called rate adaptation. DVB-S uses QPSK modulation and concatenated error protection based on a convolutional Viterbi code and a shortened Reed Solomon code. Figure 112: Future Extension Frames UDR-70 H.265 Portable Receiver USER’S MANUAL V1.0... -
Page 170: Dvb-S2
The FEC system is based on concatenation of BCH (Bose, Chaudhuri – Hocquengham) with LDPC (Low density Parity Check) inner coding. UDR-70 H.265 Portable Receiver USER’S MANUAL V1.0... - Page 171 VCM allows optimizing the parameters of each stream to get the best performance for each receive station, instead of dimensioning the whole link according to the smallest station. Figure 115: VCM mode UDR-70 H.265 Portable Receiver USER’S MANUAL V1.0...
- Page 172 • The ability to carry several signals on a single satellite carrier, without multiplexing in front of the modulator. This is called Multi-Stream. • The ability to carry signals other than MPEG transport stream. This is called Generic Stream. UDR-70 H.265 Portable Receiver USER’S MANUAL V1.0...
-
Page 173: Pilots In Dvb-S2
- When using one of the following ModCods: - 8PSK 3/5 and 2/3 - 16APSK 3/4 - 32APSK 3/5 D.4.3. DVB-S vs DVB-S2 Next there are shown a series of comparisons between DVB-S and DVB-S2 standards. UDR-70 H.265 Portable Receiver USER’S MANUAL V1.0... - Page 174 QPSK – 8PSK – 16APSK – 32APSK 35% and 25% Roll-off carrier 20% Roll off carrier Consumer LNB’s work in QPSK Pilot tones for extra synch in only 8PSK Table 48: Main differences between DVB-S and DVB-S2 UDR-70 H.265 Portable Receiver USER’S MANUAL V1.0...
- Page 175 Direct current or Down Converter Digital Video Broadcasting – DVB-T Terrestrial Digital Video Broadcasting – DVB-T2 Terrestrial Second Generation European ETSI Telecommunications Standards Institute Forward Error Correction Fast Fourier transform Global Positioning System UDR-70 H.265 Portable Receiver USER’S MANUAL V1.0...
- Page 176 High Definition HDMI High-Definition Multimedia Interface High Definition Receiver UDR-70 H.265 Portable Receiver USER’S MANUAL V1.0...
- Page 177 NLOS Non Line of Sight Phase Alternating Line Phase Locked Loop Packet Identification Quadrature Amplitude Modulation QPSK Quadrature Phase-Shift Keying RadioFrequency Remote Control Standard Delay Serial Digital Interface Simple Network SNMP Management Protocol UDR-70 H.265 Portable Receiver USER’S MANUAL V1.0...
- Page 178 Thin-Film Transistor Transport Stream User Datagram Protocol Ultra High Frequency VSWR Voltage Standing Wave Ratio UDR-70 H.265 Portable Receiver USER’S MANUAL V1.0...
- Page 179 UDR-70 H.265 Portable Receiver USER’S MANUAL V1.0...
- Page 180 Notes UDR-70 H.265 Portable Receiver USER’S MANUAL V1.0...
- Page 181 Final note SVP Broadcast Microwave S.L. is constantly striving to improve all its products. Therefore, we ask you to understand that modifications may occur in designs, equipment and technology. Consequently, no responsibility can be derived from the information, illustrations or descriptions contained in this manual.
- Page 182 SVP Broadcast Microwave reserves the right to make changes to this manual and to the equipment without prior notice. C/Zubiaurre 7 bajo 48215 Iurreta Vizcaya – Spain Tel: (+34) 94620 3722 info@svpbm.com www.svpbm.com...
Need help?
Do you have a question about the UDR-70 and is the answer not in the manual?
Questions and answers