Chapters
Table of Contents

Subscribe to Our Youtube Channel
Summary of Contents for AudioAffairs CCX 010
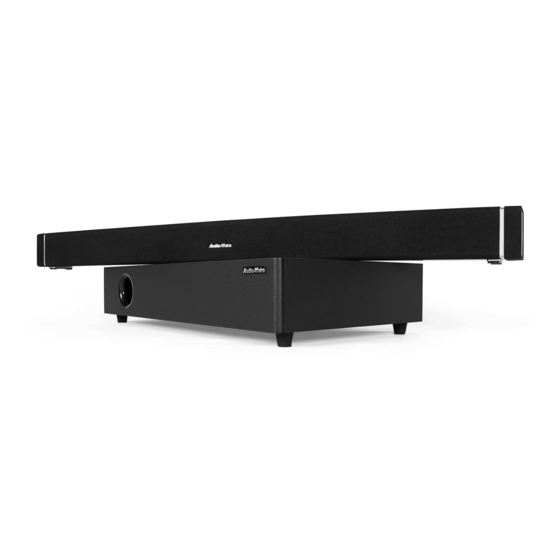
- Page 1 2.1 Soundsystem / 2.1 Sound System / Système de sonorisation 2.1 / Impianto stereo 2.1 Bedienungsanleitung / Operating instructions / Mode d'emploi / Manuale di istruzioni per l'uso CCX 010...
- Page 2 2.1 Soundsystem KUNDENDIENST www.gt-support.de 00800 - 456 22 000...
- Page 3 2.1 Soundsystem Deutsch ......4 English ......38 Français ......70 Italiano ......104 KUNDENDIENST 00800 - 456 22 000 www.gt-support.de...
-
Page 4: Table Of Contents
2.1 Soundsystem INHALT Herzlichen Dank für Ihr Vertrauen! ............5 Allgemein ....................5 Lieferumfang..................7 Sicherheitshinweise................7 Geräteübersicht ................... 11 Aufstellen des Gerätes / Wandmontage ..........15 6.1. Aufstellen ......................15 6.2. Wandmontage ....................16 Externe Geräte anschließen ..............17 7.1. -
Page 5: Herzlichen Dank Für Ihr Vertrauen
Ihre persönliche Sicherheit zu gewährleisten: Lesen Sie vor der ersten Inbetriebnahme diese Bedienungsanleitung gründlich durch und befolgen Sie vor allen Dingen die Sicherheitshinweise! Artikel 2.1 Soundsystem Modell CCX 010 Manual ID 05/18_CCX 010_V.2 Hersteller Globaltronics GmbH & Co. KG Domstrasse 19 - 20095 Hamburg Germany www.gt-support.de... - Page 6 Allgemein 2.1 Soundsystem Auszeichnungen/Symbole Falls erforderlich, finden Sie folgende Warnhinweise in dieser Bedienungsanleitung: GEFAHR! Hohes Risiko: Missachtung der Warnung kann Schaden für Leib und Leben verursachen. WARNUNG! Mittleres Risiko: Missachtung der Warnung kann Verletzungen oder schwere Sachschäden verursachen. VORSICHT: Geringes Risiko: Missachtung der Warnung kann leichte Verletzungen oder Sachschäden verursachen.
-
Page 7: Lieferumfang
2.1 Soundsystem Lieferumfang 3. LIEFERUMFANG • 2.1 Soundsystem • Fernbedienung • Batterie Typ CR 2025, 3 V (bereits eingelegt) • Netzkabel EU • Netzkabel UK • Audiokabel 3,5 mm Klinkenstecker auf 2x Cinch-Stecker • Audiokabel 3,5 mm Klinkenstecker mit 1x Winkelstecker •... - Page 8 Sicherheitshinweise 2.1 Soundsystem • Sollten Flüssigkeiten oder Fremdkörper in das Gerät gelangen, sofort den Netz- stecker aus der Steckdose ziehen. Vor einer erneuten Inbetriebnahme das Gerät prüfen lassen. GEFAHR durch Stromschlag • Ziehen Sie bei Beschädigungen des Netzkabels oder des Gerätes sofort den Netz- stecker aus der Steckdose.
- Page 9 2.1 Soundsystem Sicherheitshinweise GEFAHR durch Batterien • Halten Sie neue und alte Batterien von Kindern fern. • Batterien können lebensgefährlich sein. Bewahren Sie deshalb Batterien und Fernbedienung für Kleinkinder unerreichbar auf. Wurde eine Batterie verschluckt oder ist auf andere Art in den Körper gelangt, muss sofort ärztliche Hilfe in An- spruch genommen werden.
- Page 10 Sicherheitshinweise 2.1 Soundsystem WARNUNG vor Sachschäden • Wird das Gerät von einem kalten an einen warmen Ort gebracht, kann Kondens- feuchtigkeit im Gerät entstehen. Das Gerät einige Stunden ausgeschaltet lassen. • Stellen Sie das Gerät auf eine stabile, ebene Oberfläche. •...
-
Page 11: Geräteübersicht
2.1 Soundsystem Geräteübersicht 5. GERÄTEÜBERSICHT Gerät - Vorderseite Infrarotsensor 2 LED Standby-Betrieb: leuchtet rot 3 LED AUX: leuchtet grün Bluetooth: bestehende Verbindung: leuchtet blau Verbindungssuche: blinkt blau OPTICAL: leuchtet orange COAXIAL: leuchtet lila HDMI ARC: leuchtet weiß 4 LED Doppelblinken weiß: Gerät befindet sich im WLAN-Netzwerk-Ein- richtungsmodus Leuchtet weiß: Gerät befindet sich im Chromecast-Modus Doppelblinken orange: Software-Update... - Page 12 Geräteübersicht 2.1 Soundsystem Gerät - Seitliches Bedienfeld Eingangsquelle auswählen Einschalten / in Standby schalten Lautstärke erhöhen Auf Bluetooth umschalten 10 – Lautstärke verringern Gerät - Rückseite 13 14 Schrauben für Wandhalterung 12 AC~ Anschluss für Netzkabel 13 RESET Taste ca. 3 Sekunden drücken, um das Gerät auf Werkseinstellung zurückzusetzen.
- Page 13 2.1 Soundsystem Geräteübersicht Subwoofer Cinch-Stecker KUNDENDIENST 00800 - 456 22 000 www.gt-support.de...
- Page 14 Geräteübersicht 2.1 Soundsystem Fernbedienung Infrarot-Sender 2 MUTE Ton stumm schalten / auf eingestellte Lautstärke schalten 3 VOL+ Lautstärke erhöhen Bei Bluetooth: zum nächsten Titel 5 II Bei Bluetooth: Start/Pause / aus Pause wieder starten Auf Bluetooth umschalten gedrückt halten: Bluetooth-Verbindung aufbauen/lösen 7 COAXIAL Auf Eingang COAXIAL schalten 8 EQ...
-
Page 15: Aufstellen Des Gerätes / Wandmontage
2.1 Soundsystem Aufstellen des Gerätes / Wandmontage 6. AUFSTELLEN DES GERÄTES / WANDMONTAGE • Entfernen Sie alle Verpackungsteile vollständig. • Setzen Sie das Gerät keiner extremen Hitze oder Feuchtigkeit aus. Achten Sie auf eine ausreichende Belüftung des Gerätes von allen Seiten. AUFSTELLEN GEFAHR! Setzen Sie das Gerät keiner extremen Hitze oder Feuchtigkeit aus. -
Page 16: Wandmontage
Aufstellen des Gerätes / Wandmontage 2.1 Soundsystem WANDMONTAGE WARNUNG! Beachten Sie bei der Wandmontage: Das Befestigungsmaterial muss auf die Beschaffenheit der Wand abgestimmt sein. Verwenden Sie ggf. anderes Befestigungsmaterial als das Mitgelieferte. Vergewissern Sie sich, dass sich am Montageort in der Wand keine Leitungen (z. B. Strom, Wasser, Gas) befinden. -
Page 17: Externe Geräte Anschließen
2.1 Soundsystem Externe Geräte anschließen 7. EXTERNE GERÄTE ANSCHLIEßEN WARNUNG! • Regeln Sie die Lautstärke der Geräte herunter, bevor Sie sie miteinander verbin- den. • Schalten Sie alle Geräte aus, bevor Sie sie miteinander verbinden und beachten Sie die Anleitungen der Geräte, die Sie anschließen möchten. HDMI ARC-ANSCHLUSS HDMI (ARC) ARC steht für „Audio Return Channel“... -
Page 18: Optical-Anschluss
Externe Geräte anschließen 2.1 Soundsystem 1. Prüfen Sie, … ... ob das externe Gerät über einen HDMI ARC Eingang verfügt..ob am externen Gerät die ARC Funktion dauerhaft auf allen HDMI-Anschlüssen verwendet werden kann, oder, ob die ARC Funktion erst eingeschaltet werden muss. -
Page 19: Coaxial-Anschluss
2.1 Soundsystem Externe Geräte anschließen 4. Für die Wiedergabe drücken Sie die Taste OPTICAL auf der Fernbedienung des 2.1 Soundsystems. Die LED leuchtet orange. 5. Starten Sie dann die Wiedergabe am externen Gerät. Die Lautstärke kann über das externe Gerät und das 2.1 Soundsystem eingestellt werden. -
Page 20: Aux-Anschluss
Externe Geräte anschließen 2.1 Soundsystem AUX-ANSCHLUSS Über die Buchse AUX können Sie z. B. den Kopfhörer- oder den Stereoausgang Ihres Fernsehers anschließen. Das Kabel muss an einem Ende einen 3,5 mm Klinkenstecker für die Buchse AUX haben. Welcher Stecker sich am anderen Ende befinden muss, hängt vom Audio-Ausgang des externen Gerätes ab. -
Page 21: Service Only
2.1 Soundsystem Stromversorgung SERVICE ONLY Diese USB-Buchse ist nur für Service-Zwecke vorgesehen und nicht zum Aufladen von Geräten geeignet. 8. STROMVERSORGUNG Batterie der Fernbedienung einlegen/wechseln GEFAHR! Explosionsgefahr bei unsachgemäßem Auswechseln der Batterie. Er- satz nur durch denselben oder einen gleichwertigen Typ. HINWEIS: Die Fernbedienung wird mit einer eingelegten Batterie geliefert. -
Page 22: Bedienen
Bedienen 2.1 Soundsystem 9. BEDIENEN Dieses Kapitel stellt die Grundbedienung des 2.1 Soundsystems vor. Alle Einstellungen können Sie bequem mit der Fernbedienung vornehmen. Die Grundfunktionen können Sie auch mit den Tasten am Gerät ausführen. In der Anlei- tung wird in der Regel die Bedienung mit der Fernbedienung beschrieben. EIN- UND AUSSCHALTEN MIT DEM NETZSCHALTER Nach dem Verbinden der Soundbar mit der Stromversorgung schaltet sich das Gerät in den Stromsparmodus (Standby-Betrieb). -
Page 23: Lautstärke Regeln
2.1 Soundsystem Bedienen LAUTSTÄRKE REGELN • Verwenden Sie die Tasten VOL +/-, um die Lautstärke einzustellen. Wenn die maxi- male oder minimale Lautstärke erreicht ist, erscheint VOL MAX oder VOL MIN im Display. • Am Gerät drücken Sie die Tasten +/-, um die Lautstärke zu verstellen. •... -
Page 24: Bluetooth-Verbindung Herstellen
Bluetooth-Verbindung herstellen 2.1 Soundsystem 10. BLUETOOTH-VERBINDUNG HERSTELLEN Die Funktechnik Bluetooth ermöglicht es, mit dieser Schnittstelle ausgerüsteten Gerä- ten, kabellos Daten zu übertragen. Sie können z. B. von einem mit Bluetooth ausgerüs- teten Mobiltelefon dort gespeicherte Musikdateien abspielen und mit dem 2.1 Soundsystem wiedergeben. Die Reichweite zwischen den gekoppelten Geräten kann bis zu 8 Metern betragen. - Page 25 2.1 Soundsystem Bluetooth-Verbindung herstellen Bluetooth-Verbindung beenden • Schalten Sie eines der Geräte aus. • Verlassen Sie bei einem der verbundenen Geräte den Bluetooth-Modus. • Wenn die Entfernung zwischen den Geräten mehr als 8 Meter beträgt wird die Verbindung unterbrochen. HINWEISE: •...
-
Page 26: Chromecast
Chromecast 2.1 Soundsystem 11. CHROMECAST Mit dieser Funktion können Sie Lautsprecher von einem Smartphone, Tablet oder Lap- top aus ansteuern, um aus Chromecast-fähigen Apps den Ton wiederzugeben. Dazu werden Smartphone, Tablet oder Laptop mit Hilfe der App „Google Home“ mit dem Lautsprecher in einem WLAN-Netzwerk verbunden. - Page 27 2.1 Soundsystem Chromecast 5. Tippen Sie auf das Icon oben rechts in der Ecke. Es beginnt ein Suchprozess nach im Netzwerk verfügbaren Geräten. 6. Wenn der Lautsprecher mit der Kennung „AudioAffairsCCX010xxxx“ gefunden wird, nehmen Sie die erforderlichen Einstellungen in der App vor. Folgen Sie den Anweisungen der App.
-
Page 28: Software-Update
Software-Update 2.1 Soundsystem 12. SOFTWARE-UPDATE Wenn das Gerät mit einem WLAN verbunden ist und eine neue Software vorliegt, wird diese automatisch heruntergeladen und installiert. Während des Updates blinkt die LED orange (Doppelblinken). Nach Beenden des Updates startet das Gerät automatisch wieder. 13. -
Page 29: Problemlösungen
2.1 Soundsystem Problemlösungen 15. PROBLEMLÖSUNGEN Sollte Ihr Gerät einmal nicht wie gewünscht funktionieren, gehen Sie bitte erst diese Checkliste durch. Vielleicht ist es nur ein kleines Problem, das Sie selbst beheben kön- nen. GEFAHR! Versuchen Sie auf keinen Fall, das Gerät selbstständig zu reparieren. Wenn Sie den Fehler nicht beheben können, wenden Sie sich an unser Service- Center. -
Page 30: Entsorgen
Entsorgen 2.1 Soundsystem Ist Ihr mobiles Gerät Bluetooth-fähig? Lesen Sie die Bedienungsanleitung des mobilen Gerätes. Kontrollieren Sie die Einstellungen. Aktivieren Sie ggf. Bluetooth. Keine Bluetooth- Kontrollieren Sie, ob das 2.1 Soundsystem in der Liste der Verbindung gefundenen Geräte auftaucht. Wenn nicht, verbinden Sie die Geräte neu. -
Page 31: Technische Daten
2.1 Soundsystem Technische Daten 17. TECHNISCHE DATEN Elektrische Daten Netzspannung: 230 V ~ 50 Hz Schutzklasse: Leistungsaufnahme: Maximal ca. 20 W In Standby: < 2 W Audioausgangsleistung: 2x 30 W + 60 W Subwoofer WLAN Datenrate: WLAN: max 433,3 Mbit/s Verschlüsselung: WPA, WPA2 und WEP Standards:... -
Page 32: Hotline
Hotline 2.1 Soundsystem 18. HOTLINE Sollte ein technisches Problem auftreten, so setzen Sie sich bitte mit unserer Hot- line in Verbindung, da hier die meisten Fehler bereits behoben werden können, ohne dass das Gerät eingesendet werden muss. Sollte sich im Gespräch herausstellen, dass es sich tatsächlich um ein defektes Gerät handelt, so werden Sie gebeten, das Gerät mit einer genauen Fehlerbeschreibung zur Reparatur einzusenden. -
Page 33: Garantie
2.1 Soundsystem Garantie 19. GARANTIE Liebe Kundin, lieber Kunde, vielen Dank für Ihre Wahl eines Produktes aus unserem Hause. Unser Produkt ent- spricht den gesetzlichen Anforderungen und wurde unter ständiger Qualitätskontrol- le gefertigt. Die technischen Daten entsprechen dem aktuellen Stand zum Zeitpunkt der Drucklegung. - Page 34 Garantie 2.1 Soundsystem KUNDENDIENST www.gt-support.de 00800 - 456 22 000...
- Page 35 2.1 Soundsystem Garantie SERVICE-KARTE Produktdaten: Modell ___________________________________________________________ Seriennummer ___________________________________________________________ Kaufdatum (laut beiliegendem Beleg) ___________________________________________________________ Besitzerdaten: Name ___________________________________________________________ Telefonnummer ___________________________________________________________ Adresse ___________________________________________________________ E-Mail ___________________________________________________________ Fehlerbeschreibung: ________________________________________________________________________________________ ________________________________________________________________________________________ ________________________________________________________________________________________ ________________________________________________________________________________________ ________________________________________________________________________________________ KUNDENDIENST 00800 - 456 22 000 www.gt-support.de...
- Page 36 Garantie 2.1 Soundsystem KUNDENDIENST www.gt-support.de 00800 - 456 22 000...
- Page 37 2.1 Soundsystem Garantie KUNDENDIENST 00800 - 456 22 000 www.gt-support.de...
- Page 38 2.1 Sound System CONTENTS Thank you for your confidence in our product! ........ 39 General ....................39 Scope of supply ................... 41 Safety instructions ................41 Device overview .................. 44 Setting up the device / wall mounting ..........48 6.1. Setting up ......................
-
Page 39: Thank You For Your Confidence In Our Product
Before using the device for the first time, read through the operating instructions care- fully and ensure you comply with the safety instructions! Article 2.1 Sound System Model CCX 010 Manual ID 05/18_CCX 010_V.2 Manufacturer Globaltronics GmbH & Co. KG... - Page 40 General 2.1 Sound System Markings/symbols If necessary, you will find the following warnings in these operating instructions: DANGER! High risk: failure to observe this warning may result in injury to life and limb. WARNING! Moderate risk: failure to observe this warning may result in injury or serious material damage.
-
Page 41: Scope Of Supply
2.1 Sound System Scope of supply 3. SCOPE OF SUPPLY • 2.1 Sound System • Remote control • Battery type CR 2025, 3 V (already inserted) • EU mains lead • UK mains lead • Audio cable 3.5 mm jack plug to 2x cinch plug •... - Page 42 Safety instructions 2.1 Sound System DANGER! Risk of electric shock • If the mains lead or the device is damaged, immediately pull the mains plug out of the power socket. • Do not use the device if there is visible damage to the casing or the mains lead. •...
- Page 43 2.1 Sound System Safety instructions • Clean the battery and device contacts before you insert the battery. • There is a danger of explosion if the battery is not correctly replaced. Replace only with the same or an equivalent type. •...
-
Page 44: Device Overview
Device overview 2.1 Sound System 5. DEVICE OVERVIEW Device - Front Infrared sensor 2 LED Standby mode: lights up in red 3 LED AUX: lights up in green Bluetooth: Connection established: lights up in blue Searching for connection: flashing in blue OPTICAL: lights up in orange COAXIAL: lights up in purple HDMI ARC: lights up in white... - Page 45 2.1 Sound System Device overview Device lateral operating panel Select input source Switch on / to standby mode Increase the volume Switch to Bluetooth 10 – Reduce the volume Device rear 13 14 Screws for wall bracket 12 AC~ Connection for mains lead 13 RESET Press button for approx.
- Page 46 Device overview 2.1 Sound System Subwoofer Cinch plug CUSTOMER SERVICE www.gt-support.de 00800 - 456 22 000...
- Page 47 2.1 Sound System Device overview Remote control Infrared transmitter 2 MUTE Mute sound / switch to the adjusted volume 3 VOL+ Increase the volume When using Bluetooth: skip to next track 5 II When using Bluetooth: Start/Pause / restart from Pause Switch to Bluetooth Keep pressed: establish/disconnect Bluetooth connection 7 COAXIAL...
-
Page 48: Setting Up The Device / Wall Mounting
Setting up the device / wall mounting 2.1 Sound System 6. SETTING UP THE DEVICE / WALL MOUNTING • Completely remove all packaging components. • Do not expose the device to extreme heat or moisture. Ensure that the device is well ventilated on all sides. -
Page 49: Wall Mounting
2.1 Sound System Setting up the device / wall mounting WALL MOUNTING WARNING! Please ensure the following when mounting on a wall: The fixing material must be matched to the properties of the wall. If necessary, use fixing material other than that supplied. Make sure that in the installation location there are no pipes or cables in the wall (e.g. -
Page 50: Connecting External Devices
Connecting external devices 2.1 Sound System 7. CONNECTING EXTERNAL DEVICES WARNING! • Turn down the volume on the devices before you connect them to one another. • Switch off all devices before you connect them to one another, and comply with the instructions for the devices that you wish to connect. -
Page 51: Optical Connection
2.1 Sound System Connecting external devices 1. Check ..whether the external device has an HDMI ARC input..whether the ARC function can be used permanently on all HDMI connections on the external device or if the ARC function must be switched on first. Please refer to the manual of the external device. -
Page 52: Coaxial Connection
Connecting external devices 2.1 Sound System 4. For playback, press the OPTICAL button on the remote control of the 2.1 Sound System. The LED lights up in orange. 5. Start playback on the connected device. The volume can be adjusted from the external device and via the 2.1 Sound Sys- tem. -
Page 53: Aux Connection
2.1 Sound System Connecting external devices AUX CONNECTION The AUX socket allows you, for example, to connect the headphones or stereo output of your television. The cable must have a 3.5 mm jack plug at one end for the AUX sock- et. -
Page 54: Service Only
Power supply 2.1 Sound System SERVICE ONLY This USB port is only intended for servicing purposes, and is not suitable for charging the device. 8. POWER SUPPLY Inserting/changing the battery of the remote control DANGER! There is a danger of explosion if the battery is not correctly replaced. Replace only with the same or an equivalent type. -
Page 55: Operation
2.1 Sound System Operation 9. OPERATION This section introduces the basic operation of the 2.1 Sound System. All settings can be conveniently carried out with the remote control. The basic func- tions can also be carried out with the buttons on the device. Operation of the device in the instructions is usually described with the remote control. -
Page 56: Controlling The Volume
Operation 2.1 Sound System CONTROLLING THE VOLUME • Press the VOL +/- buttons to adjust the volume. If the maximum or minimum vol- ume is reached, VOL MAX or VOL MIN appears in the display. • Press the +/- buttons on the device to adjust the volume. •... -
Page 57: Establishing A Bluetooth Connection
2.1 Sound System Establishing a Bluetooth connection 10. ESTABLISHING A BLUETOOTH CONNECTION Bluetooth radio technology makes it possible to wirelessly transmit data to devices equipped with this interface. For example, you can play music files stored on a Blue- tooth enabled mobile device and play them back through the 2.1 Sound System. The range between the paired devices can be up to 8 metres. - Page 58 Establishing a Bluetooth connection 2.1 Sound System Terminating the Bluetooth connection • Turn off one of the devices. • On one of the connected devices, exit the Bluetooth mode. • If the distance between the devices is more than 8 meters, the connection is inter- rupted.
-
Page 59: Chromecast
2.1 Sound System Chromecast 11. CHROMECAST This function allows you to control the loudspeaker from a smartphone, tablet or lap- top, in order to play sound from Chromecast enabled apps. To do this, the smartphone, tablet or laptop is connected to a loudspeaker on a WLAN network via the “Google Home”... - Page 60 Chromecast 2.1 Sound System You will know when the connection has been successfully established, both from a no- tification in the app and because the MODE LED lights up in white. NOTES: • xxxx in the identification gives the last 4 digits of the MAC address of the loud- speaker, which you can find on the back of the loudspeaker.
-
Page 61: Software Update
2.1 Sound System Software update 12. SOFTWARE UPDATE When the device is connected to a WLAN and new software is available, this will be downloaded and installed automatically. During the update, the LED will flash orange (double flashes). After the update is complete, the device will automatically restart. 13. -
Page 62: Troubleshooting
Troubleshooting 2.1 Sound System 15. TROUBLESHOOTING If your device fails to function as required, please try this checklist first. Perhaps it is just a small problem that you can resolve yourself. DANGER! Do not attempt to repair the device yourself under any circumstanc- es. -
Page 63: Disposal
2.1 Sound System Disposal Is your mobile device Bluetooth enabled? Read the operating instructions of the mobile device. Check the settings. Activate Bluetooth if necessary. No Bluetooth Check whether the 2.1 Sound System appears in the list of connection devices found. If not, reconnect the device. Has the 2.1 Sound System already been connected to another Bluetooth device? Press the button to establish a new con-... -
Page 64: Technical Specifications
Technical specifications 2.1 Sound System 17. TECHNICAL SPECIFICATIONS Electrical data Mains voltage: 230 V ~ 50 Hz Protection class: Power consumption: Maximum approx. 20 W In standby mode: < 2 W Sound Audio output port: 2x 30 W + 60 W subwoofer WLAN Data transfer rate: WLAN: max 433.3 Mbit/s... -
Page 65: Hotline
2.1 Sound System Hotline 18. HOTLINE If a technical problem occurs, please contact our hotline, as most errors can be cor- rected by this method without having to send in the device for repair. If it is determined during the call that the device is actually defective, you will be asked to send us the device for repair, together with an exact description of the fault. -
Page 66: Warranty
Warranty 2.1 Sound System 19. WARRANTY Dear Customer, Thank you for selecting a product from our company. Our product corresponds to the legal requirements, and was manufactured with continuous quality control. The tech- nical data correspond to the current state of the art at the time of printing. Specifica- tions are subject to change without notice. - Page 67 2.1 Sound System Warranty SERVICE CARD Product data: Model ___________________________________________________________ Serial number ___________________________________________________________ Purchase date (as shown on enclosed ___________________________________________________________ receipt) Owner data: Name ___________________________________________________________ Telephone number ___________________________________________________________ Address ___________________________________________________________ Email ___________________________________________________________ Description of fault: ________________________________________________________________________________________ ________________________________________________________________________________________ ________________________________________________________________________________________ ________________________________________________________________________________________ ________________________________________________________________________________________ CUSTOMER SERVICE 00800 - 456 22 000 www.gt-support.de...
- Page 68 Warranty 2.1 Sound System CUSTOMER SERVICE www.gt-support.de 00800 - 456 22 000...
- Page 69 2.1 Sound System Warranty CUSTOMER SERVICE 00800 - 456 22 000 www.gt-support.de...
- Page 70 Système de sonorisation 2.1 SOMMAIRE Merci beaucoup pour votre confiance ! ..........71 Généralités ................... 71 Éléments livrés ..................73 Consignes de sécurité ................. 73 Aperçu de l'appareil ................77 Installation de l'appareil / Montage mural ........81 6.1. Installation ......................81 6.2.
-
Page 71: Merci Beaucoup Pour Votre Confiance
Lisez attentivement ce mode d'emploi avant la première utilisation et respectez en priorité les consignes de sécurité ! Article Système de sonorisation 2.1 Modèle CCX 010 Réf. mode d'emploi 05/18_CCX 010_V.2 Fabricant Globaltronics GmbH & Co. KG Domstrasse 19 - 20095 Hamburg... - Page 72 Généralités Système de sonorisation 2.1 Balises/Symboles Si nécessaire, vous trouverez les avertissements suivants dans ce mode d'emploi : DANGER ! Risque élevé : le non-respect de l’avertissement peut provoquer des blessures graves, voire la mort. AVERTISSEMENT ! Risque moyen : le non-respect de l’avertissement peut provoquer des blessures ou des dommages matériels graves.
-
Page 73: Éléments Livrés
Système de sonorisation 2.1 Éléments livrés Remarque relative aux marques Google, Chromecast built-in et Chromebook sont des marques déposées de Google LLC (Limited Liability Company). La marque verbale Bluetooth et le logo Bluetooth sont des marques déposées de Blue- tooth SIG Inc. (Special Interest Group). 3. - Page 74 Consignes de sécurité Système de sonorisation 2.1 DANGER ! Risque d'électrocution en raison de l'humidité • Protégez l'appareil contre l'humidité, les gouttes et les projections d’eau : Le non- respect de cette précaution risque de provoquer une décharge électrique. Ne po- sez pas, par exemple, un vase rempli de liquide ou tout autre récipient similaire sur ou à...
- Page 75 Système de sonorisation 2.1 Consignes de sécurité DANGER ! RISQUE D'INCENDIE • Les bougies et les flammes nues doivent toujours être tenues à dis- tance de ce produit pour éviter la propagation de feu. DANGER lié aux piles • Que les piles soient neuves ou usagées, tenez-les à l'écart des enfants. •...
- Page 76 Consignes de sécurité Système de sonorisation 2.1 AVERTISSEMENT : risque de dommages matériels • Si l'appareil est transporté d'un endroit froid à un endroit chaud, de la condensa- tion peut se former à l'intérieur. L'appareil doit rester éteint quelques heures. •...
-
Page 77: Aperçu De L'appareil
Système de sonorisation 2.1 Aperçu de l'appareil 5. APERÇU DE L'APPAREIL Face avant de l'appareil Capteur infrarouge 2 LED Mode Standby : s'allume en rouge 3 LED AUX : s'allume en vert Bluetooth : Connexion existante : s'allume en bleu Recherche de connexion : clignote en bleu OPTICAL : s'allume en orange COAXIAL : s'allume en violet... - Page 78 Aperçu de l'appareil Système de sonorisation 2.1 Appareil - Panneau latéral Sélectionner la source d'entrée Mettre en marche / mettre en Standby Augmenter le volume Commuter sur Bluetooth 10 – Baisser le volume Face arrière de l'appareil 13 14 Vis pour fixation murale 12 AC ~ Prise de raccordement pour cordon d'alimentation 13 RESET...
- Page 79 Système de sonorisation 2.1 Aperçu de l'appareil Subwoofer Connecteurs Cinch SERVICE APRÈS-VENTE 00800 - 456 22 000 www.gt-support.de...
- Page 80 Aperçu de l'appareil Système de sonorisation 2.1 Télécommande Émetteur à infrarouges 2 MUTE Couper le son / revenir au volume réglé 3 VOL+ Augmenter le volume Lors de la lecture Bluetooth : passer au titre suivant Lors de la lecture Bluetooth : Start/Pause / redémarrer depuis II pause Commuter sur Bluetooth...
-
Page 81: Installation De L'appareil / Montage Mural
Système de sonorisation 2.1 Installation de l'appareil / Montage mural 6. INSTALLATION DE L'APPAREIL / MONTAGE MURAL • Retirez la totalité des emballages. • N'exposez pas l'appareil à une chaleur extrême ou à l'humidité. Veillez à garantir une ventilation suffisante autour de l'appareil. INSTALLATION DANGER ! N'exposez pas l'appareil à... -
Page 82: Montage Mural
Installation de l'appareil / Montage mural Système de sonorisation 2.1 2. Branchez l'/les élément(s) source (voir « Raccordement d'appareils externes » à la page 83). Ce faisant, veillez constamment à ce que tous les appareils installés soient posés de manière bien stable. MONTAGE MURAL AVERTISSEMENT ! Veuillez tenir compte des points suivants lors du montage mural :... -
Page 83: Raccordement D'appareils Externes
Système de sonorisation 2.1 Raccordement d'appareils externes 6. Branchez tous les câbles utilisés dans les connecteurs situés à l'arrière de l'appareil. 7. Branchez le cordon d'alimentation à l'appareil. 8. Accrochez l'appareil avec les fixations murales sur les vis. 7. RACCORDEMENT D'APPAREILS EXTERNES AVERTISSEMENT ! •... - Page 84 Raccordement d'appareils externes Système de sonorisation 2.1 Pour utiliser la fonction ARC, les périphériques externes connectés au système de so- norisation 2.1 doivent également disposer d'une interface HDMI compatible ARC. En combinaison avec un téléviseur compatible HDMI ARC, le son peut ainsi être émis sans nécessiter un câble audio supplémentaire de raccordement au système de sonorisa- tion 2.1.
-
Page 85: Prise De Raccordement - Optical
Système de sonorisation 2.1 Raccordement d'appareils externes PRISE DE RACCORDEMENT - OPTICAL Vous avez besoin d'un câble TOSLINK pour raccorder les appareils externes à la prise OPTICAL. Le câble n'est pas compris dans les éléments livrés. 1. Retirez le bouchon de protection de la prise OPTICAL et retirez les bouchons de protection des fiches du câble TOSLINK. -
Page 86: Prise De Raccordement Coaxial
Raccordement d'appareils externes Système de sonorisation 2.1 PRISE DE RACCORDEMENT COAXIAL REMARQUE : la sortie sonore de votre téléviseur doit éventuellement être commutée sur la sortie coaxiale. Vous avez besoin d'un câble coaxial pour raccorder les appareils externes à la prise COAXIAL. -
Page 87: Prise De Raccordement Aux
Système de sonorisation 2.1 Raccordement d'appareils externes PRISE DE RACCORDEMENT AUX Via le port AUX, vous pouvez p. ex. raccorder le casque d'écoute ou la sortie stéréo de votre téléviseur. Le câble doit avoir à son extrémité un connecteur jack de 3,5 mm pour le port AUX. -
Page 88: Service Only
Alimentation électrique Système de sonorisation 2.1 SERVICE ONLY Cette prise USB n'est destinée qu'à des fins d'entretien et ne convient pas à la charge des appareils. 8. ALIMENTATION ÉLECTRIQUE Mise en place/remplacement de la pile de la télécommande DANGER ! Risque d'explosion en cas de remplacement non conforme de la pile. Utilisez uniquement les mêmes piles ou des piles de type équivalent lors du remplacement. -
Page 89: Commande
Système de sonorisation 2.1 Commande 9. COMMANDE Ce chapitre présente les fonctions de base du système de sonorisation 2.1. Vous pouvez procéder à l'ensemble des réglages facilement à partir de la télécom- mande. Les touches sur l'appareil permettent également d'exécuter les fonctions prin- cipales. -
Page 90: Réglage Du Volume
Commande Système de sonorisation 2.1 RÉGLAGE DU VOLUME • Utilisez les touches VOL +/- pour régler le volume. Quand le volume maximal ou minimal est atteint, VOL MAX ou VOL MIN apparaît sur l'écran. • Appuyez sur les touches +/- de l'appareil pour modifier le volume. •... -
Page 91: Établir Une Connexion Bluetooth
Système de sonorisation 2.1 Établir une connexion Bluetooth 10. ÉTABLIR UNE CONNEXION BLUETOOTH La technologie radio Bluetooth permet aux appareils dotés de cette interface de trans- mettre des données sans câble. P. ex. vous pouvez lire des fichiers musicaux mémori- sés sur un téléphone doté... - Page 92 Établir une connexion Bluetooth Système de sonorisation 2.1 Arrêter la connexion Bluetooth • Éteignez l'un des appareils. • Quittez le mode Bluetooth pour l'un des appareils connectés. • La connexion est interrompue lorsque la distance entre les appareils dépasse 8 mètres. REMARQUES : •...
-
Page 93: Chromecast
Système de sonorisation 2.1 Chromecast 11. CHROMECAST Cette fonction vous permet de contrôler le haut-parleur à partir d'un smartphone, d'une tablette ou d'un ordinateur portable pour faire jouer le son à partir des applica- tions compatibles Chromecast. Pour ce faire, un smartphone, une tablette ou un ordi- nateur portable est connecté... - Page 94 Chromecast Système de sonorisation 2.1 5. Tapez sur l'icône dans le coin supérieur droit. Un processus de recherche des périphériques disponibles dans le réseau commence. 6. Si le haut-parleur avec l'identifiant « AudioAffairsCCX010xxxx » est trouvé, vous devez effectuer les réglages nécessaires dans l'application. Suivez les instructions de l'application.
-
Page 95: Mise À Jour Du Logiciel
Système de sonorisation 2.1 Mise à jour du logiciel 12. MISE À JOUR DU LOGICIEL Si l'appareil est connecté à un Wi-Fi et qu'un nouveau logiciel est disponible, il est au- tomatiquement téléchargé et installé. Pendant la mise à jour, la LED clignote en orange (double clignotement). Une fois la mise à... -
Page 96: Dépannage
Dépannage Système de sonorisation 2.1 15. DÉPANNAGE Si votre appareil ne fonctionne pas correctement, procédez dans un premier temps aux tests de cette liste de contrôle. Il s'agit peut-être seulement d'un problème mineur que vous pouvez résoudre vous-même. DANGER ! En aucun cas vous ne devez essayer de réparer vous-même l'appa- reil. -
Page 97: Élimination
Système de sonorisation 2.1 Élimination Votre appareil mobile est-il compatible Bluetooth ? Lisez le mode d'emploi de l'appareil mobile. Contrôlez les réglages. Pas de Activez Bluetooth en cas de besoin. connexion Blue- Contrôlez si le système de sonorisation 2.1 figure dans la liste tooth des appareils trouvés. -
Page 98: Caractéristiques Techniques
Caractéristiques techniques Système de sonorisation 2.1 17. CARACTÉRISTIQUES TECHNIQUES Caractéristiques électriques Tension secteur : 230 V ~ 50 Hz Classe de protection : Puissance absorbée : Maximal env. 20 W En Standby : < 2 W Puissance de sortie audio : 2 x 30 W + 60 W subwoofer Wi-Fi Taux de transfert :... -
Page 99: Assistance Téléphonique
Système de sonorisation 2.1 Assistance téléphonique 18. ASSISTANCE TÉLÉPHONIQUE Si un problème technique devait apparaître, mettez-vous alors en relation avec notre hotline, ce qui permet d'éliminer rapidement la plupart des défauts sans devoir renvoyer l'appareil. S'il s'avère lors de la conversation qu'il s'agit effectivement d'un appareil défectueux, il vous sera demandé... -
Page 100: Garantie
Garantie Système de sonorisation 2.1 19. GARANTIE Chère cliente, cher client, merci d'avoir choisi un produit de notre entreprise. Notre produit satisfait aux exi- gences légales et a été fabriqué avec un contrôle qualité constant. Les caractéristiques techniques répondent à l'état actuel au moment de l'impression. Sous réserve de mo- difications. - Page 101 Système de sonorisation 2.1 Garantie CARTE DE SERVICE CLIENT Caractéristiques produit : Modèle ___________________________________________________________ Numéro de série ___________________________________________________________ Date d'achat (selon justificatif joint) ___________________________________________________________ Données propriétaire : ___________________________________________________________ Numéro de téléphone ___________________________________________________________ Adresse ___________________________________________________________ E-mail ___________________________________________________________ Description des défauts : ________________________________________________________________________________________ ________________________________________________________________________________________ ________________________________________________________________________________________...
- Page 102 Garantie Système de sonorisation 2.1 SERVICE APRÈS-VENTE www.gt-support.de 00800 - 456 22 000...
- Page 103 Système de sonorisation 2.1 Garantie SERVICE APRÈS-VENTE 00800 - 456 22 000 www.gt-support.de...
- Page 104 Impianto stereo 2.1 INDICE Vi ringraziamo per la vostra fiducia! ..........105 Indicazioni generali ................105 Materiale in dotazione ..............107 Istruzioni per la sicurezza ..............107 Panoramica dell'apparecchio ............111 Posizionamento dell'apparecchio / montaggio a parete ....115 6.1. Posizionamento ...................115 6.2.
-
Page 105: Ringraziamo Per La Vostra Fiducia
Leggere attentamente le presenti istruzioni per l'uso prima della prima messa in fun- zione e attenersi soprattutto alle istruzioni per la sicurezza! Articolo Impianto stereo 2.1 Modello CCX 010 ID manuale 05/18_CCX 010_V.2 Produttore Globaltronics GmbH & Co. KG Domstrasse 19 - 20095 Hamburg Germania www.gt-support.de... - Page 106 Indicazioni generali Impianto stereo 2.1 Contrassegni/simboli Dove necessario, le presenti istruzioni per l'uso riportano le avvertenze di sicurezza de- scritte di seguito: PERICOLO! Rischio elevato: la mancata osservanza dell'avvertenza può com- promettere la vita e l'integrità delle persone. AVVERTENZA! Rischio medio: la mancata osservanza dell'avvertenza può causare le- sioni o gravi danni materiali.
-
Page 107: Materiale In Dotazione
Impianto stereo 2.1 Materiale in dotazione 3. MATERIALE IN DOTAZIONE • Impianto stereo 2.1 • Telecomando • Batteria tipo CR 2025, 3 V (già inserita) • Cavo di alimentazione EU • Cavo di alimentazione UK • Cavo audio 3,5 mm jack su spinotto doppio •... - Page 108 Istruzioni per la sicurezza Impianto stereo 2.1 PERICOLO di scossa elettrica • In caso di danni al cavo di alimentazione o all'apparecchio, estrarre immediata- mente la spina dalla presa. • Non utilizzare l'apparecchio se presenta danni visibili all'alloggiamento o al cavo di alimentazione.
- Page 109 Impianto stereo 2.1 Istruzioni per la sicurezza PERICOLO legato alle batterie • Tenere le batterie vecchie e nuove fuori della portata dei bambini. • Le batterie possono essere mortali. Conservare quindi le batterie e il telecomando fuori dalla portata dei bambini. Se la batteria è stata ingerita o è giunta altrimenti all’interno del corpo, rivolgersi immediatamente a un medico.
- Page 110 Istruzioni per la sicurezza Impianto stereo 2.1 AVVERTENZA: rischio di danni materiali • Se si porta l'apparecchio da un luogo freddo ad un luogo caldo, al suo interno può formarsi umidità di condensa. Lasciare l'apparecchio spento per alcune ore. • Collocare l'apparecchio su una superficie stabile e piana.
-
Page 111: Panoramica Dell'apparecchio
Impianto stereo 2.1 Panoramica dell'apparecchio 5. PANORAMICA DELL'APPARECCHIO Lato anteriore dell'apparecchio Sensore a infrarossi 2 LED Modalità stand-by: acceso con luce rossa 3 LED AUX: acceso con luce verde Bluetooth: collegamento presente: acceso con luce blu ricerca del collegamento: lampeggia con luce blu OPTICAL: acceso con luce arancione COAXIAL: acceso con luce lilla HDMI ARC: acceso con luce bianca... - Page 112 Panoramica dell'apparecchio Impianto stereo 2.1 Pannello di comando laterale dell'apparecchio Selezione dell'ingresso Accensione / messa in stand-by Aumento del volume Passaggio a Bluetooth 10 – Riduzione del volume Lato posteriore dell'apparecchio 13 14 Viti per il supporto a parete 12 AC ~ Collegamento per cavo di alimentazione 13 RESET Premere il tasto per circa 3 secondi per ripristinare le impostazioni...
- Page 113 Impianto stereo 2.1 Panoramica dell'apparecchio Subwoofer Connettore a spinotto SERVIZIO CLIENTI 00800 - 456 22 000 www.gt-support.de...
- Page 114 Panoramica dell'apparecchio Impianto stereo 2.1 Telecomando Trasmettitore a infrarossi 2 MUTE Silenziamento / passaggio al volume impostato 3 VOL+ Aumento del volume In caso di Bluetooth: passaggio al brano successivo 5 II In caso di Bluetooth: avvio/pausa / nuovo avvio da pausa Passaggio a Bluetooth Mantenere premuto: stabilimento/annullamento del collega- mento Bluetooth...
-
Page 115: Posizionamento Dell'apparecchio / Montaggio A Parete
Impianto stereo 2.1 Posizionamento dell'apparecchio / mon- 6. POSIZIONAMENTO DELL'APPARECCHIO / MONTAGGIO A PARETE • Rimuovere completamente tutte le parti dell'imballaggio. • Non esporre l’apparecchio né a calore né a umidità estremi. Provvedere ad una ventilazione sufficiente dell'apparecchio da tutti i lati. POSIZIONAMENTO PERICOLO! Non esporre l’apparecchio né... -
Page 116: Montaggio A Parete
Posizionamento dell'apparecchio / mon- Impianto stereo 2.1 MONTAGGIO A PARETE AVVERTENZA! Per il montaggio a parete tenere conto dei seguenti aspetti: Il materiale di fissaggio deve essere idoneo alle caratteristiche della parete. Even- tualmente, usare materiale di fissaggio diverso da quello fornito. Assicurarsi che nel punto della parete scelto per il montaggio non si trovino linee o condotte (ad es. -
Page 117: Collegamento Di Apparecchi Esterni
Impianto stereo 2.1 Collegamento di apparecchi esterni 7. COLLEGAMENTO DI APPARECCHI ESTERNI AVVERTENZA! • Abbassare il volume degli apparecchi prima di collegarli tra di loro. • Spegnere tutti gli apparecchi prima di collegarli tra di loro e attenersi alle istruzio- ni degli apparecchi che si desidera collegare. -
Page 118: Collegamento Optical
Collegamento di apparecchi esterni Impianto stereo 2.1 1. Controllare..se l'apparecchio esterno dispone di un ingresso HDMI ARC..se nell'apparecchio esterno la funzione ARC può essere utilizzata in continuo in tutti i collegamenti HDMI, o se la funzione ARC deve essere innanzitutto atti- vata. -
Page 119: Collegamento Coaxial
Impianto stereo 2.1 Collegamento di apparecchi esterni 4. Per la riproduzione premere il tasto OPTICAL del telecomando dell'impianto ste- reo 2.1. Il LED si accende con luce arancione. 5. Avviare poi la riproduzione dall'apparecchio esterno. Il volume può essere regolato dall'apparecchio esterno e dall'impianto stereo 2.1. NOTA: può... -
Page 120: Collegamento Aux
Collegamento di apparecchi esterni Impianto stereo 2.1 COLLEGAMENTO AUX Tramite la presa AUX è possibile collegare ad es. la cuffia o l'uscita stereo del televisore. Un'estremità del cavo deve terminare con un jack di 3,5 mm per la presa AUX. Il tipo di connettore che deve trovarsi all'altra estremità... -
Page 121: Service Only
Impianto stereo 2.1 Alimentazione di corrente SERVICE ONLY Questa presa USB è destinata solo a scopi di assistenza e non è adatta a caricare apparecchi. 8. ALIMENTAZIONE DI CORRENTE Inserimento/sostituzione della batteria del telecomando PERICOLO! Pericolo di esplosione in caso di sostituzione inadeguata della bat- teria. -
Page 122: Uso
Impianto stereo 2.1 9. USO Questo capitolo presenta il funzionamento di base dell'impianto stereo 2.1. È possibile modificare comodamente tutte le impostazioni con il telecomando. Le fun- zioni di base possono essere eseguite anche con i tasti che si trovano sull'apparecchio. Nelle istruzioni è... -
Page 123: Regolazione Del Volume
Impianto stereo 2.1 REGOLAZIONE DEL VOLUME • Utilizzare i tasti VOL +/- per impostare il volume. Quando viene raggiunto il volu- me massimo o minimo, sul display compare VOL MAX o VOL MIN. • Sull'apparecchio, premere i tasti +/-, per regolare il volume. •... -
Page 124: Stabilimento Di Un Collegamento Bluetooth
Stabilimento di un collegamento Impianto stereo 2.1 10. STABILIMENTO DI UN COLLEGAMENTO BLUETOOTH La tecnologia radio Bluetooth consente di trasmettere dati senza fili agli apparecchi dotati di questa interfaccia. Ad es. è possibile riprodurre i file musicali memorizzati in un telefono cellulare provvisto di Bluetooth e ascoltarli con l'impianto stereo 2.1. La portata tra gli apparecchi accoppiati può... - Page 125 Impianto stereo 2.1 Stabilimento di un collegamento Terminazione di un collegamento Bluetooth • Spegnere uno degli apparecchi. • In uno degli apparecchi collegati, uscire dalla modalità Bluetooth. • Se la distanza tra gli apparecchi supera gli 8 metri, il collegamento viene interrot- NOTE: •...
-
Page 126: Chromecast
Chromecast Impianto stereo 2.1 11. CHROMECAST Questa funzione consente di gestire l'altoparlante da uno smartphone, un tablet o un laptop, in modo da riprodurre l'audio da app compatibili con Chromecast. A tale scopo, lo smartphone, il tablet o il laptop vengono collegati all'altoparlante in una rete WLAN con l'ausilio dell'app "Google Home". - Page 127 Impianto stereo 2.1 Chromecast 6. Quando viene trovato l'altoparlante con l'ID "AudioAffairsCCX010xxxx", procedere alle necessarie impostazioni nell'app. Seguire le istruzioni dell'app. Il procedi- mento di configurazione può durare qualche minuto. Il corretto stabilimento del collegamento lo si riconosce sia da un messaggio dell'app che dal fatto che il LED MODE si accende con luce bianca.
-
Page 128: Aggiornamento Del Software
Aggiornamento del software Impianto stereo 2.1 12. AGGIORNAMENTO DEL SOFTWARE Se l'apparecchio è collegato ad una WLAN ed è disponibile un nuovo software, esso viene scaricato e installato automaticamente. Durante l'aggiornamento il LED lampeggia con luce arancione (doppio lampeg- giamento). Al termine dell'aggiornamento l'apparecchio si riavvia automaticamente. -
Page 129: Risoluzione Dei Problemi
Impianto stereo 2.1 Risoluzione dei problemi 15. RISOLUZIONE DEI PROBLEMI Qualora l'apparecchio non funzioni correttamente, scorrere l'elenco di controllo se- guente, poiché l'anomalia di funzionamento potrebbe essere dovuta a un piccolo pro- blema che l'utente è in grado di risolvere autonomamente. PERICOLO! Non tentare mai di riparare autonomamente l'apparecchio. -
Page 130: Smaltimento
Smaltimento Impianto stereo 2.1 Il dispositivo mobile è compatibile con Bluetooth? Leggere le istruzioni per l'uso del dispositivo mobile. Controllare le impostazioni. Eventualmente attivare il Bluetooth. Nessun collega- Controllare se l'impianto stereo 2.1 è presente nell'elenco degli mento Blue- apparecchi trovati. In caso contrario collegare nuovamente gli tooth apparecchi. -
Page 131: Dati Tecnici
Impianto stereo 2.1 Dati tecnici 17. DATI TECNICI Dati elettrici Tensione di rete: 230 V ~ 50 Hz Classe di protezione: Assorbimento di potenza: circa 20 W massimo In stand-by: < 2 W Audio Potenza di uscita audio: 2x 30 W + 60 W subwoofer WLAN Velocità... -
Page 132: Hot-Line
Hot-line Impianto stereo 2.1 18. HOT-LINE Qualora si presentasse un problema tecnico, si prega di rivolgersi alla nostra hot- line, poiché la maggior parte degli errori possono essere eliminati senza necessità di spedire l'apparecchio. Qualora durante il colloquio dovesse evidenziarsi che si tratta effettivamente di un ap- parecchio difettoso, si prega di spedire l'apparecchio per la riparazione con una descri- zione esatta dell'errore. -
Page 133: Garanzia
Impianto stereo 2.1 Garanzia 19. GARANZIA Gentile cliente, la ringraziamo di aver scelto uno dei nostri prodotti. Il nostro prodotto soddisfa i requi- siti di legge ed è stato realizzato con costanti controlli di qualità. I dati tecnici rispec- chiano lo stato attuale al momento della messa in stampa. Con riserva di modifiche. La garanzia per gli apparecchi elettronici soddisfa le disposizioni di legge vigenti al momento dell'acquisto. - Page 134 Garanzia Impianto stereo 2.1 SERVIZIO CLIENTI www.gt-support.de 00800 - 456 22 000...
- Page 135 Impianto stereo 2.1 Garanzia SCHEDA DI ASSISTENZA Dati del prodotto: Modello ___________________________________________________________ Numero di serie ___________________________________________________________ Data d'acquisto (come da scontrino allegato) ___________________________________________________________ Dati del possessore: Nome ___________________________________________________________ Numero di telefono ___________________________________________________________ Indirizzo ___________________________________________________________ E-mail ___________________________________________________________ Descrizione del guasto: ________________________________________________________________________________________ ________________________________________________________________________________________ ________________________________________________________________________________________ ________________________________________________________________________________________...
- Page 136 Garanzia Impianto stereo 2.1 SERVIZIO CLIENTI www.gt-support.de 00800 - 456 22 000...
- Page 137 Impianto stereo 2.1 Garanzia SERVIZIO CLIENTI 00800 - 456 22 000 www.gt-support.de...
Need help?
Do you have a question about the CCX 010 and is the answer not in the manual?
Questions and answers