Table of Contents
Advertisement
Quick Links
GW-7828 Quick Start
v1.00, January 2020
What's in the box?
In addition to this guide, the package includes the following items:
CA-0910
Screw Driver
GW-7828
CD
(1C016)
More detail about GW-7828
http://www.icpdas.com/root/product/solutions/industrial_communi
cation/fieldbus/m-bus/converter/gw-7828.html
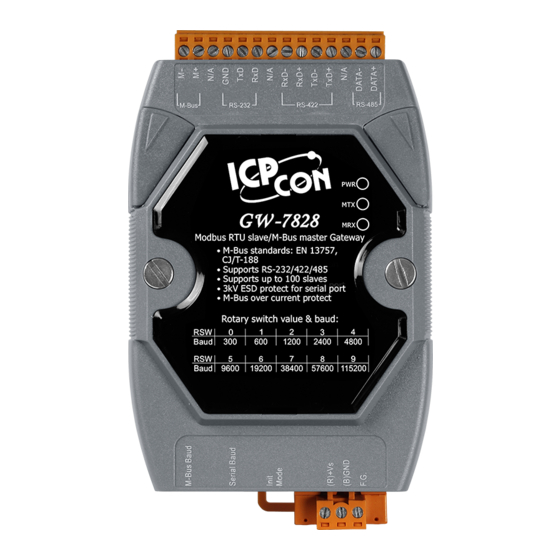
1.
Appearance
Technical support:service@icpdas.com
P1
Advertisement
Table of Contents

Related Manuals for ICP DAS USA GW-7828

Summary of Contents for ICP DAS USA GW-7828
- Page 1 GW-7828 Quick Start v1.00, January 2020 What’s in the box? In addition to this guide, the package includes the following items: CA-0910 Screw Driver GW-7828 (1C016) More detail about GW-7828 http://www.icpdas.com/root/product/solutions/industrial_communi cation/fieldbus/m-bus/converter/gw-7828.html Appearance Technical support:service@icpdas.com...
- Page 2 The GW-7828 utility (MBus Utility) can be downloaded from the website: http://ftp.icpdas.com.tw/pub/cd/fieldbus_cd/mbus/gateway/gw-7828/software/ Step1: Connect the PC COM port to the RS-232 port of the GW-7828 and Meter. Set the DIP switch to the configuration mode (Mode ON) and then power it on. Technical support:service@icpdas.com...
- Page 3 “Configure” tab. Then, click the connect button. Step3: Afterwards, the M-Bus utility shows all settings stored in the GW-7828 if it had been configured before. You can refer to the “GW-7828 user’s manual” to configure the M-Bus meter setting according to the kind of meter or to configure the custom baud rate and data format of serial port or M-Bus.
- Page 4 Step4: After configuration, set the DIP switch to operation mode and reboot the GW-7828. Step5: Re-execute M-Bus utility and switch to “Gateway Reader” tab. Step6: Select the COM Port and timeout related parameters and press “Start Reader” button. To import the configuration file that exported by step 3. Then the utility will read the meter data according to the set cycle time and display it on the utility.
Need help?
Do you have a question about the GW-7828 and is the answer not in the manual?
Questions and answers