Table of Contents
Advertisement
Advertisement
Table of Contents

Related Manuals for CHCNAV D270

Summary of Contents for CHCNAV D270
- Page 1 D270_User_Manual...
- Page 2 This paper is the user manual of D270 depth sounder of Shanghai Huace Navigation Technology Co., LTD. About the instructions This user manual describes in detail how to install, configure and use the D270 sounder. Experience requirements In order to better use the D270 sounder, Shanghai Huace Navigation Technology Co., Ltd.
- Page 3 Shanghai Huace Navigation Technology Co., LTD. Website opened the "service and download" section, if you have questions can leave a message through the "feedback", or directly call the technical consultation telephone: 4006206818, we will timely answer your questions.
-
Page 4: Table Of Contents
Directory Preface ............................... 1 1.Introduction and installation of depth sounder ............2 2 .Introduction to data link of depth sounder ..............4 3. Depth finder web page introduction ................. 5 3.2 Storage and Download ....................7 3.3 The map ..........................8 3.4 System Settings ...................... -
Page 5: 1.Introduction And Installation Of Depth Sounder
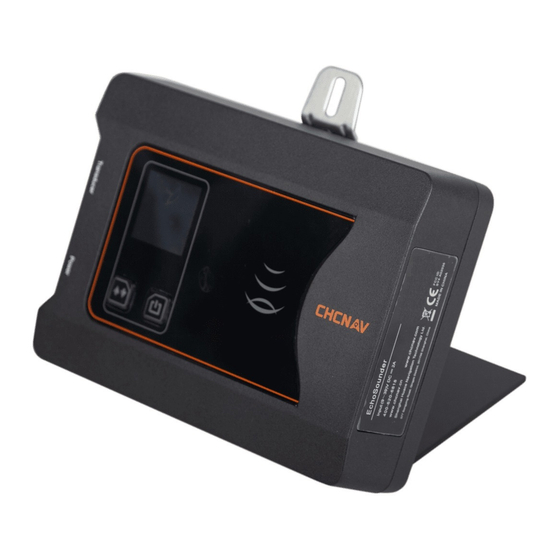
1.Introduction and installation of depth sounder 1.1Introduction to depth sounder The D270 sounding instrument can be used with the unmanned vessel series of APACHE series of CHCNAV, and can also be installed separately on the manned boat, rubber boat and other floating platforms. - Page 6 On the right is the screen power button, long press to close/open the screen display; The depth sounder has no switch button of the whole machine. It will start automatically when powered on and shut down when powered off. Screen Information Description 1.2 Installation Instructions for depth sounder (shipborne platform)
-
Page 7: Introduction To Data Link Of Depth Sounder
2 .Introduction to data link of depth sounder D270 sounder interacts with external devices in three ways: wifi, Bluetooth, serial port; Bluetooth:The sounder receives GPGGA and other position data of RTK through Bluetooth connection;... -
Page 8: Depth Finder Web
Serial port:The sounder outputs the bathymetric data in SDDPT format through the serial port. 3. Depth finder web page introduction After connecting the computer to WIFI: D270-XXXXxxx, you can enter 192.168.53.27 in the browser to enter the web page of the D270. 3.1 Parameter Settings... - Page 9 Communication Settings: The D270 can be set up to connect to an external WIFI hotspot to provide network to load the satellite map function; It can also be set to connect to RTK Bluetooth, obtain positioning data, and set parameters of RTK antenna to water surface and transducer.
-
Page 10: Storage And Download
3.2 Storage and Download Data Storage: Record1 starts automatically upon startup by default, and starts recording automatically when water depth data and GNSS data are detected;... -
Page 11: The Map
Record2 can be set manually and is linked to the HydroSurvey software when used in conjunction with the software. Record3 and RECORD4 are reserved for use. The data download : Download the measurement data stored in the depth sounder, and select the corresponding date data to download. 3.3 The map The satellite map of the current location can be loaded after connecting to external WIFI in the communication Settings. -
Page 12: System Settings
3.4 System Settings Version information:The current firmware version number is displayed in the upper right corner. Control Firmware Upgrade:To upgrade the control firmware of the host, select the file first and then click Start Upgrade. Bathymetry firmware upgrade : For the firmware upgrade operation of the sounding part, first select the file and then click Start Upgrade. -
Page 13: Data Access
Figure Project parameter setting 4.2、Data access 2.1 One Click Connection (available only when supporting the use of APACHE USV) Figure One Click Connection 2.2 WIFI connection to the depth sounder The computer is connected to theWIFI of the D270 sounder: D270-XXXXXXX... - Page 14 Open the HydroSurvey software, go to Settings - System Settings - Double click Sounder1, use the Settings shown in the following image and check Connect...
- Page 15 Figure Communication Settings 2.3 Serial port connection depth sounder &RTK After connecting the D270 to the computer through the serial port, open the Hydrosurvey software, click Settings - System Settings - Double click Sounder1, as shown in the following figure (choose COM number according to computer...
-
Page 16: Data Records
Figure Communication Settings 4.3、Data records Left mouse button click【Setting】→ 【Recording Control】 The recording mode can be recorded by time or by distance, the recording limit can be fixed solution, the RMS limit can be checked or not checked, and the RMS information changes with the change of the location state and the solution state limit. -
Page 17: Measure Mode
Figure Set Recording Control 4.4、Measure Mode Click 【Settings】 → 【Work Mode】 → 【Measure Mode】with the left mouse button. The left screen displays local coordinates and water depth. - Page 18 Figure Measure Mode When the ship is sailing to the specified route to be tested, click 【Measure】→ 【Start】 to display the interface for setting line survey information. The default setting of line survey name and line survey number is enough. Automatic line change Select 3500 points for automatic line change.
-
Page 19: Post Data Processing
4.5、Post data processing The raw data folder of the measurement results is stored in the Project folder in the HydroSurvey software installation directory;You can also download D270 internal storage data for processing. Open HydroSurvey software, Click 【Data Process】 → 【Depth Sample】, the... -
Page 20: Depth Sample
right, and process the dep files in the side line list in turn. Figure False water depth treatment 4.6、Depth Sample After processing the dep files in turn, select all the dep files in the side line list (you can also select all of them) and set the sampling interval, such as: 1 (sampling a point every 5 meters on this test line), click 【Sample】... - Page 21 Figure Sample Figure Generate the HTT file...
-
Page 22: Export Data
4.7、Export data Click【Date Process】→【Date Export】 Select【Open Htts】,select all the HTT files you want, and select the appropriate file type. The navigation software provides a variety of export formats to choose from, or you can customize the export format as shown in the figure. Figure Generation HTT file... - Page 23 Figure Export a custom format...
- Page 24 FCC warning statements: This equipment has been tested and found to comply with the limits for a Class B digital device, pursuant to part 15 of the FCC Rules. These limits are designed to provide reasonable protection against harmful interference in a residential installation. This equipment generates, uses and can radiate radio frequency energy and, if not installed and used in accordance with the instructions, may cause harmful interference to radio communications.
Need help?
Do you have a question about the D270 and is the answer not in the manual?
Questions and answers