Table of Contents
Advertisement
Quick Links
Advertisement
Table of Contents

Related Manuals for Teac RC-L800


Summary of Contents for Teac RC-L800
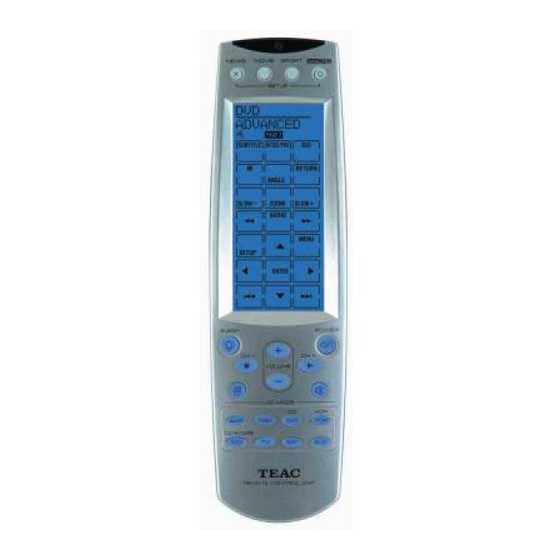
- Page 1 9A09526900 RC-L800 Remote Control Unit OWNER’S MANUAL...
-
Page 2: Table Of Contents
Loading Data from a PC ....32 Loading Data from Another RC-L800 ..33 Re-setting Unit ......34 Debugging Code . -
Page 3: Precautions
Precautions Battery Installation Precautions Remove the battery compartment cover. Insert four AAA (R03, UM-4) batteries. Make < Avoid storage or use in high temperatures, sure that the batteries are inserted with their exposed to direct sunshine or near the room positive + and negative _ poles positioned heaters. -
Page 4: Name Of Each Control 1
Name of each Control 1 Remote Control Transmitting Area Transmits the remote control signal to components. Light Sensor Measures ambient light levels to turn on/off back-light illumination. Quick Channel Button Calls up listing of channels grouped by content. Return Button Press this button during setup to cancel an operation or toggle off the setup screen. - Page 5 Name of each Control 2 Screen Icons and Indicators Macro Button Used to display keys to which a Macro has been assigned. Setup Button Pressing buttons at the same time, enters the setup mode. Displays when key beep is on. Power Button Indicates the device’s screen key page number.
- Page 6 BASIC or ADVANCED screens. information on how to use the Learning Feature. MD (CD-R/TAPE) A layout to operate the TEAC MD Deck (MD-H series), CD Recorder (Except RW-D series) and Cassette Deck (Displaying the “UR” remote mark) is stored. Pressing the button switches between the MD, CD-R and TAPE.
-
Page 7: Setup Mode
Setup Mode If you wish to add/delete a device, alter keys or When the desired menu item is displayed, press their functions and many other actions, you will ENTER. have to first enter the setup mode. If your remote control is off, press the POWER button to turn it on before attempting to enter the setup mode. -
Page 8: Setting Key Codes 1
By just selecting a code, your RC-L800 emulates the original remote control. There are two methods to select these Device devices, Manual and Auto. These methods are... - Page 9 Setting Key Codes 2 6. Once the target component is on, point the remote control towards the target component and press the POWER button. If the target component responds to the POWER button, the device 4-digit code has been entered successfully. Note: If the target component does not respond to the POWER button the 4-digit code may be incorrect.
- Page 10 Setting Key Codes 3 Auto 5. Once the target component is on, point the unit towards the target component and press 1. Enter the setup mode. the key between the g and t keys. AUTO displays and the remote control sends a off signal to the target component for each 4- digit device code.
-
Page 11: Learning A Device
If you have a target component that is not included is located at the bottom of the unit. in the list of pre-codes, you can still use RC-L800 to control the component by using your RC-L800 remote control to learn the control codes from the remote control of the target component. - Page 12 The selected key blinks. function of the key again. < There may be some functions of your target device remote control that the RC-L800 cannot emulate. 7. Press the corresponding button on the target component’s remote control. The code is sent to the RC-L800.
-
Page 13: Deleting Key Code 1
Deleting Key Code 1 Deleting an Individual Key Code 5. By pressing the device and page buttons, select the screen page from which you wish The code assigned to a key or a MACRO can be to delete a key. deleted from keys individually. -
Page 14: Deleting Whole Key Codes Of A Device
< If you delete a device by mistake you can re- program the RC-L800 by following the steps on page 8, Pre-programmed Code Setting, or page 11, Learning a Device. -
Page 15: Changing Key Layout
After changing the layout, set suitable key code preferences such as adding, deleting or changing to each changed key. See page 11, Learning a keys or key labels. Your RC-L800 allows you to Device. layout up to 21 keys per page. -
Page 16: Macro Function 1
Macro Function 1 4. Once a device and page have been selected < This function enables you to set up to 60 by pressing device and page keys, select sequential operations into a single key. and press the blank key you wish to set as a <... - Page 17 Macro Function 2 5. Press the button for the confirmation. 6. Press the button to save and complete the Macro setting. 7. Press the button repeatedly to exit and return to the previously displayed screen layout. Note: If at any point during setup you wish to exit from the setup screens, press the button to go back through the displayed screens one by one.
-
Page 18: Viewing Macros
Macro Function 3 Viewing Macros 4. By pressing the device and page buttons, select the device and then the page that contains the Macro key. 1. Enter the setup mode. 2. Press 5 or b to select MACRO and press ENTER. -
Page 19: Deleting Macro-Assigned Key
Macro Function 4 Deleting Macro-Assigned Key 4. By pressing the device and page buttons, select the device and then the page that contains the Macro key. 1. Enter the setup mode. Only keys that have been assigned a Macro are displayed on the screen. -
Page 20: Channel Assignment 1
Channel Assignment 1 This function allows you to assign TV or SAT 4. Press the TV or SAT device button to select channels into one of three groups, NEWS, SPORTS the TV or SAT device. or MOVIES. Each group can contain up to 50 channels. -
Page 21: Viewing An Assigned Channel
Channel Assignment 2 Viewing an Assigned Channel 7. Press the button to save and complete the setting. Once a channel has been assigned to a NEWS, MOVIE or SPORT button it can be selected quickly by following the steps below. 1. -
Page 22: Deleting A Channel Assignment
Channel Assignment 3 Deleting a Channel Assignment 5. Select and press the channel classification button including the channel you wish to delete. 1. Enter the setup mode. 2. Press 5 or b to select CHANNEL and press ENTER. 6. Press 5 or b to select the channel you want to delete. -
Page 23: Re-Labeling Assignment Key Labels
Channel Assignment 4 Re-labeling Assignment Key 4. Select and press the channel classification button you wish to change the label. Labels The three channel assignment buttons are NEWS, MOVIE and SPORT but their labels on the display can be changed. Follow these steps to assign new names to the buttons. -
Page 24: Timer/Macro Mode
Timer/Macro Mode Timer/Macro Mode transmits a Macro command 3. Press ENTER. at a specific time delay within 23 hours and 50 minutes. The time delay can be set in 10-minute increments. Start to define the Macro: Example: TV-Power on w TV-TV/Video w DVD-Power on (5-second interval) w DVD-Play Setting Timer/Macro Mode Press the device button of TV. -
Page 25: Setting Device
Setting a Device 1 Creating a New Device 5. Edit device label and press ENTER. Twelve device screens are factory preset as defaults. When setting a new device, the preset Editing the label: screen is assigned to the newly made device <... -
Page 26: Re-Labeling A Device
Setting a Device 2 Re-labeling a Device 5. Edit device label and press ENTER. You can change the device label once set on the unit. Editing the label: < Press g or t to move the cursor. < Press 5 or b to scroll through the characters: 1. -
Page 27: Deleting A Device
Setting a Device 3 Deleting a Device 5. Press the button. A confirmation message appears. When you wish to delete a device that is no longer used, delete the device with the following steps. 1. Enter the setup mode. 6. Press ENTER to delete the device. Press MENU to escape the deletion. -
Page 28: Other Settings 1
Other Settings 1 Setting Date and Time 5. Press ENTER. 1. Enter the setup mode. 6. Set Hour and Minute. 2. Press 5 or b to select OTHER and press Week Day is determined automatically by ENTER. linking the entered date to the calendar. Setting Time: <... -
Page 29: Auto Power Off
Other Settings 2 Auto Power OFF 4. Press 5 or b to select a waiting time from 1– 90 minutes. Auto power off is available to save the batteries by turning off the unit when not used for a specified amount of time. -
Page 30: Back-Light
Other Settings 3 Back-light 4. Select the amount of time the screen remains back-lit after use by pressing 5 or You can change amount of the time the screen b. The amount of time ranges from 1–60 remains back-light after use and the sensitivity of seconds in 1-second increments, then press the light sensor determining when the back- ENTER. -
Page 31: Beep On/Off
Other Settings 4 Beep on/off 4. Press ENTER to switch key beep on or off. is indicated when activated. When a key is pressed a beep sounds. The beep sound can be turned on/off. 1. Enter the setup mode. 2. Press 5 or b to select OTHER and press ENTER. -
Page 32: Viewing Version Numbers
Other Settings 5 Data Transmission 1 Viewing Version Numbers Your RC-L800 is equipped with a data loading function. By using this function you can easily VERSION in the OTHER menu in setup mode is perform updates. Data loading can be done from used only for servicing and not during normal use. -
Page 33: Loading Data From Another Rc-L800
PROGRAM, PRE-CODE, or MEMORY to be L800 loaded. Note: To program a RC-L800 put the receiving RC-L800 in the program mode by removing the batteries and switching the program switch to PROGRAM. Then reinsert the batteries. After programming is finished return the switch to the NORMAL position. -
Page 34: Re-Setting Unit
Re-setting the Unit Debugging Code The following operation will reset all settings to DEBUG in the CODE menu in setup mode is used the default settings. only for servicing and not during normal use. 1. Enter the setup mode. 2. Press 5 or b to select RESET and press ENTER. -
Page 35: Troubleshooting
USB cable ......1 Owner’s Manual (RC-L800)... . 1 RemoteComm Getting Started . - Page 36 TEAC NEDERLAND BV Oeverkruid 15, NL-4941 VV Raamsdonksveer, Nederland Phone: 0162-510210 TEAC BELGIUM NV/SA c/o TEAC NEDERLAND BV, Oeverkruid 15, NL-4941 VV Raamsdonksveer, Nederland Phone: +31-162-510860 TEAC ITALIANA S.p.A. Via C. Cantù 11, 20092 Cinisello Balsamo, Milano, Italy Phone: 02-66010500 TEAC AUSTRALIA PTY., LTD.
Need help?
Do you have a question about the RC-L800 and is the answer not in the manual?
Questions and answers