Table of Contents
Advertisement
Quick Links
Advertisement
Table of Contents

Related Manuals for DALLEE ELECTRONICS HOSTLER 2100

Summary of Contents for DALLEE ELECTRONICS HOSTLER 2100
- Page 1 HOSTLER 2100 Operating Instructions with remote inputs 246 W. Main St., Leola, PA 17540 (717) 661-7041 www.dallee.com Caution - Electrically operated product. Please read and follow instructions to insure safe operation and handling. Refer all service to Dallee Electronics, Inc.
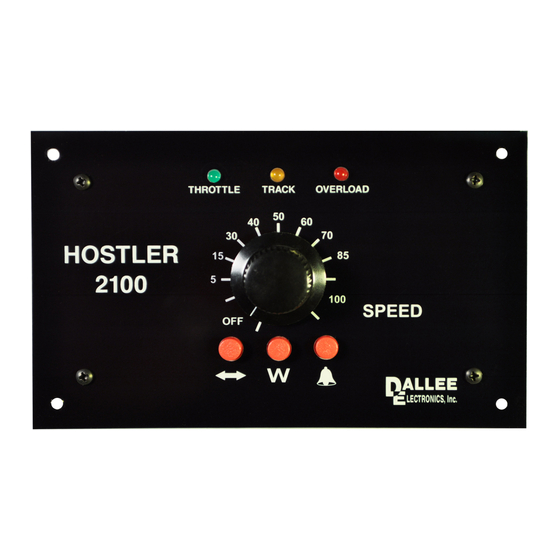
- Page 2 "SPEED" control to do that! Now here comes the more interesting part. When On the face of the HOSTLER 2100 you will find you set the "SPEED" control to say 55 or so and the main SPEED control in the center. Just above you want to sequence your engine (change the that are 3 LED's.
- Page 3 12 amp power transformer or two 3 amp and one 6 amp HOSTLER 2100 can also be connected to one 12 amp power transformer. It is however much better Item #2118, an 18v, 12.5amp, 225 VA power to operate one HOSTLER 2100 on it's own power transformer for all AC operators, is also available.
- Page 4 Wiring: When viewing from the back of the Hostler 2100, locate the wiring barrier strip on the lower right hand side. Using appropriate wire gauge, connect the AC input power to the terminals to the left. The AC output power, which goes to the track, to the two terminals on the right.
- Page 5 Wiring of the remote inputs: When viewing from the back of the Hostler 2100, locate the four pin connector (shown below). Plug the 4 pin wiring harness that came with your remote input Hostler-2100 and wire as shown. If remote inputs are not used, tie off wire end...
- Page 6 A center punch used on the corners of the outer green area and mounting screw center locations is an easy way to tranfer the information from the page to your panel. Outlined in this box, on the back of the Hostler 2100 PC board, are the large black heat sinks which and cannot touch any other metal or electrical item.
- Page 7 2 - Never connect a DC power to the input, it can only accept AC power! 3 - Never use a small gauge wire to connect to the Hostler 2100. A small gauge wire will get extremely hot and possilby start a fire! Remember the recommended minimum wire size for the Hostler 2100 is: 18AWG - 3 Amp, 16AWG - 6 Amp, 12AWG - 12 Amp.
Need help?
Do you have a question about the HOSTLER 2100 and is the answer not in the manual?
Questions and answers