Table of Contents
Advertisement
Quick Links
Advertisement
Table of Contents

Summary of Contents for BVF Heating Solutions Heato9
- Page 1 DETAILED USER MANUAL BVF Heato9 Programmable room thermostat bvfheating.com...
-
Page 2: Table Of Contents
CONTENTS Scope of application Technical data (dimensions, switching current, connection) Installation Electrical connection Display Fix modes of operation Programming Factory settings menu points Fault finding v1.0 ENG (19.11.2019.) -
Page 3: Scope Of Application
1. SCOPE OF APPLICATION The BVF Heato9 thermostat is a device suitable for controlling electrical heating systems (underfloor heating, wall or ceiling heating, infrapanel, electric radiator). The BVF thermostat is not directly suitable for controlling other systems (such as gas boilers, heat pump, air conditioner, etc.); if you need information about any of these systems, please, contact your dealer. -
Page 4: Installation
The BVF Heato9 thermostat can be mounted in a recessed mounting box or on a surface mount frame. The dimensions of the recessed mounting box can be seen in the figure below:... - Page 5 MOUNTING Electrical box recessed into the wall (65x 55mm) horizontal screw locations...
-
Page 6: Electrical Connection
4. ELECTRICAL CONNECTION The connection of the thermostat should in every case be left to an electrician or a certified heating engineer. The connection should always be performed in accordance with the following. The connection may only be made when the power supply is turned off, therefore make the relevant circuit dead before doing any work in it and check the lack of voltage using a phase indicator/voltage tester or a multimeter. -
Page 7: Display
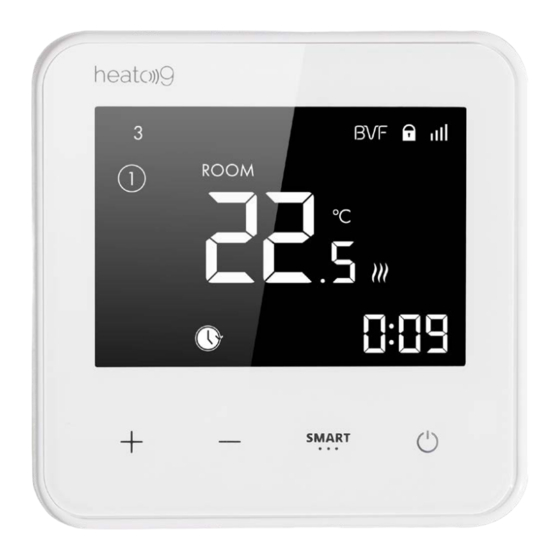
Modes & Parameter Decrease temperature Power On / Off With mains power supply provided, the BVF Heato9 thermostat can be turned on by momentarily touching the right side lower button once. Depending on the settings, the following values will appear on the display: Days of the week –... -
Page 8: Fix Modes Of Operation
Heating active icon – if the setting temperature of the thermostat is higher than the current tem- perature of the room or the heating surface, the heating active icon can be seen. In this case the thermostat’s relay makes the circuit and the voltage will get to the output point 4. Time –... - Page 9 2 – Tuesday, etc.). For approval and proceeding touch the button again briefly. Now in the left upper corner of the display the numbers indicating the weekdays, i.e. 12345 will appear. Also appears the (1st program cycle) icon, and the óó:pp (hh:mm) indication in the right bottom corner starts flashing.
-
Page 10: Factory Settings Menu Points
8. FACTORY SETTINGS MENU POINTS The factory-set values can be checked and, if needed, modified by entering the factory menu. To enter the factory menu, first turn the thermostat off. The display will only show the brand letters in the upper right corner. Now touch and keep depressed at the same time the buttons for at least 5 seconds. - Page 11 DETAILED DESCRIPTION OF THE MENU POINTS: Calibration of the thermometer – a true-to-sign difference between the value shown by the thermostat and the real temperature of the room. If, for example, the thermostat, when turned on, shows 21.5°C and the real temperature of the room is 20.0°C, then in menu point 01 of the factory settings a value of -1.5°C should be set.
- Page 12 Keyboard locking (child lock) – 0 – off; 1 – on. In the turned on condition a icon will appear in the display’s right upper corner on the starting screen of the thermostat within 15 seconds after the last intervention (touching of a button) and at the same time the child lock function will get activated and the device will not react upon touching any button.
-
Page 13: Fault Finding
Brightness (Standby Mode) – brightness of thermostat’s backlight in standby mode. Du- ring setting of thermostat, the screen is illuminated on 100% brightness; the screen will fade to the percentage value defined here. This value can be changed between 0-100%. Software version –... - Page 14 The display is lit, but heating is not working. Is it the real room temperature that can be seen on the display? NO – The thermostate needs calibration. Calibrate the device according to the description in the instructions manual. YES – see next answer. When the thermostat is turned on touch the button so that the set value exceeds the room temperature.
Need help?
Do you have a question about the Heato9 and is the answer not in the manual?
Questions and answers