Table of Contents
Advertisement
Advertisement
Table of Contents

Related Manuals for GALAXY SPAS Draco I


Summary of Contents for GALAXY SPAS Draco I
- Page 1 Your Spa Pool Guide Draco I • Ara I...
- Page 2 Introduction This document will guide you through the process of becoming a Galaxy spa owner, preparing you for the delivery and installation of your spa pool and its accessories. Many important considerations and actions are required so please read this guide thoroughly and refer to the pre-delivery checklist before the arrival of your spa.
-
Page 3: Table Of Contents
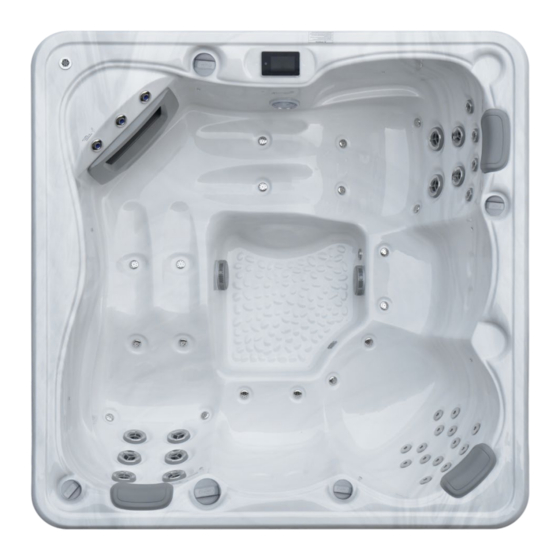
Contents Draco I Ara I Pre-Delivery Guide Delivery Options Choosing Your Spa’s Placement Positioning Requirements Foundation Requirements Building Regulations and Consent Pre-Delivery Checklist Installation Guide First Steps Hard Cover Installation Cover Lifter Installation Electrical Installation Filling Your Spa Draining Your Spa... - Page 4 2 x 2 x 0.82 5 layer 1 + 1 Circ 15-25 The Galaxy Draco I is a 15 amp family spa pool that delivers transformative massage and hydrotherapy through dual loungers, three seated positions and 46 powerful jets. Five layers of insulation reduce...
- Page 5 Ara I T R A N S F O R M S E R I E S People Size (m) Jets Insulation Pumps Amps 2 x 2 x 0.82 5 layer 1 + 1 Circ 15-25 The Ara I is a spacious 15 amp pool designed with the whole family in mind.
-
Page 6: Pre-Delivery Guide
S E C T I O N 1 . Pre-Delivery Guide Everything you need to plan and consider before your Galaxy spa arrives. -
Page 7: Delivery Options
This includes removing the outer packaging and ensuring no damage has occurred during freight. Claims for damage can only be accepted if issues are written on the consignment / delivery note you’ll be asked to sign and communicated to Galaxy Spas within 24 hours of delivery. -
Page 8: Choosing Your Spa's Placement
Choosing Your Spa’s Placement For the best spa experience, the placement and orientation of your new pool should be carefully planned. There are important positioning, foundational and electrical requirements outlined in this section to ensure smooth delivery and installation. Refer to the checklist on page 13. Whether to ensure a private sanctuary, have line of sight to supervise your kids in the spa, or to entertain guests easily, here are our top three considerations when designing your outdoor spa space. -
Page 9: Positioning Requirements
1.2m away. safest spa environment and adhere to any local spa fencing bylaws. Draco I and Ara I - At 0.82m deep, no fencing See page 12 for further details on building is required. consent. - Page 10 Not only does a lifter help you remove the cover with ease, it also protects the cover from damage during the process. Draco I and Ara I. 50cm rear and 10cm side clearance is required (5cm on each side).
-
Page 11: Foundation Requirements
Foundation Requirements Once full, your new Galaxy spa pool can weigh over two tonnes, so it needs to sit on a level surface that supports the entire base. Concrete Foundation We recommend a cured concrete pad with a minimum thickness of 10cm, slightly larger than your spa’s dimensions. -
Page 12: Building Regulations And Consent
Building Regulations and Consent Building Code Compliance As the homeowner, you are responsible for understanding and complying with legislation and local bylaws related to installing a spa pool. Your local council may have additional rules and regulations you must adhere to. Building consent is required for some installation applications (outlined below). -
Page 13: Pre-Delivery Checklist
Pre-Delivery Checklist Have you checked your property’s access and discussed delivery access with our team? Have you considered your chosen spa placement’s view, privacy and weather conditions? Have you checked if you need to fence your spa? Do you need to arrange any electrical requirements before delivery? Have you considered the service area, cover lifter and cover clip clearances? Do you have a concrete pad foundation with room for steps? Has the deck load rating been checked if the spa is being placed on a deck? -
Page 14: Installation Guide
S E C T I O N 2 . Installation Guide Everything you need to know once your spa pool arrives. -
Page 15: First Steps
First Steps 1. Remove the spa’s packaging. This includes the plastic outer and the thermal wrapping, which you may wish to save for future use. 2. Assemble your cover lifter. Once the spa is full, it will be too heavy to lift and you will not be able to fit your cover lifter. We recommend assembling the cover lifter before delivery so that you can attach it once the spa is placed into position. -
Page 16: Hard Cover Installation
Hard Cover Installation Position the spa cover on the spa, ensuring that the spa skirt is smooth and not folded in any location. Pull the spa strap tightly downward, then press the buckle against the spa cabinet. Whilst holding the buckle against the cabinet, release the top strap from the buckle by pressing the sides and unclipping. -
Page 17: Cover Lifter Installation
Cover Lifter Installation Before Starting You will need a drill and a tape measure. Please ensure all parts listed are present in preparation for the assembly of your cover lifter. All left-to-right instructions are from standing in front of the spa. Ensure your spa is placed onto a level surface, such as a concrete pad or load-checked decking. - Page 18 (the width). Spa Pool Model Spa Pool Dimensions Total Cover Lifter Width (length x width x depth) Draco I 2m x 2m x 0.82 200cm + 10cm = 210cm Ara I 2m x 2m x 0.82 200cm + 10cm = 210cm Step 2.
- Page 19 Step 3. Place one straight coupler tube between the two brackets. Step 4. It is optional to screw the base brackets to the base of the spa from within the cabinetry, or onto decking (if placing the spa on a deck). However, the weight of the spa once filled with water will be sufficient to hold the bracket securely.
- Page 20 Step 7. Place another straight coupler tube to the other end of the bent arm without foam on the right and the left. You can keep them lying flat on the ground for now. Step 8. Slide nylon pivot straps over each of the straight coupler tubes on each side.
- Page 21 Step 10. Place bent arms with foam in front of the centre seam of the cover as shown. Do this for the left and right side. Important: If the length of the face parallel to the cover is less than 2m, place the short ends on the seam of the spa.
- Page 22 Step 13. The white dotted arrow demonstrates the importance of the 5cm allowance space for the cover lifter to move without damaging the spa cover. Step 14. Slide the long ends of the bent arms with foam into the side straight coupler tubes. Now the four bent arms and the four straight coupler tubes make up a square frame.
-
Page 23: Electrical Installation
Electrical Installation A registered electrician must complete all electrical work to be covered under our warranty. Galaxy Spas is unable to arrange or advise on electrical services. By this stage, you should have your RCD and 15A outdoor electrical socket installed. -
Page 24: Filling Your Spa
Filling Your Spa We water test each spa at our factory and water residue may remain in the pipework. You may notice a smell related to this and may also notice some residue on or in the spa that has settled during production, testing or transport. This is completely normal and therefore, it is important you wipe out and then sanitise your spa prior to first use, following the steps below: Make sure the power to your spa pool is turned off. -
Page 25: Draining Your Spa
Draining Your Spa You will need to know where the drain valve is located so that you can change your water. Draco I Ara I Drain Valve Drain Valve Push in slightly to Twist the drain Unscrew the Attach a hose dial half a turn dial’s retaining... -
Page 26: Gecko Touchpad Startup Guide
Gecko Touchpad Startup Guide Gecko Touchpad Notification icons Direct to function selection wheel (settings and All-on or all-off key additional options) (one touch activation) 38 C Mode selection wheel (settings On-screen and accessories) system messages and reminders Interactive display icons (main spa functions) This guide will help you to set up your Gecko touchpad when your spa first arrives. - Page 27 Spa mode Control your temperature, jets, lights and display. Settings Control filtration cycles, spa modes and more. Icon Not applicable for Galaxy Spas Sanitization mode Sanitization with in.clear connected. We use a state-of-the-art mixing chamber system instead. Colour mode Colour with in.mix installed.
- Page 28 Water Temperature The temperature at the bottom of the screen indicates the current water temperature. Use the up and down icons to change the desired temperature. The temperature you set your spa to will appear in blue. Do not leave more than three seconds between setting the temperature or the system will exit the process without saving.
- Page 29 Sleep Mode To modify the sleep settings, slide the right wheel until the display contrast icon is highlighted in the middle. Press the key in the centre to go directly into sleep mode. As touchpads are very sensitive equipment, we always recommend putting them into sleep mode when you are using the spa to ensure splashing water does not inadvertently engage a setting.
- Page 30 Water Care Settings Choose, set or modify one of the five pre-set water care configurations below. In economy mode, your set temperature will be reduced by six degrees and the heating system will not be engaged unless the water drops further below this temperature. Why only six degrees? The colder your water is, the more expensive it is to heat.
- Page 31 Modifying Water Care Schedules To modify the water care setting, touch the pen icon at the right end of the desired mode. Your spa’s default setting is the standard - beginner mode, with two six-hour filtration times, starting at 12 am and 12 pm. Filter Cycles To modify a filter cycle, touch the cycle you wish to edit.
-
Page 32: Water Guide
S E C T I O N 3 . Water Guide Everything you need to know about balancing your water for the first time. For ongoing maintenance and troubleshooting support, please visit www.galaxyspas.co.nz/support. Refer to the relevant section based on your chosen water care. Galaxy Super Chlor Start-Up Kit ................33 simplesilver™... -
Page 33: Galaxy Super Chlor Start Up Kit
Before Starting Spa volume. You will need to know your spa’s volume (number of litres) to use the charts in this guide. Small deviations in the volume will not affect the water balancing. Draco I 960L Ara I 960L First Treatment - Chlorine Shock Dosing You must shock dose your spa the first time you fill it with water. - Page 34 Daily Treatment Super Chlor should be used every day at roughly the same time, ideally straight after using the spa. Super Chlor daily dosage chart. Draco I Ara I Shock dose 2 ¼ tsp 2 ¼ tsp Start Up Kit Contents Below are the contents of the kit and how to use the products to achieve optimum water chemistry.
- Page 35 Recommended Water Quality It is important to check your chemical balance weekly. When carrying out your water test, results should fit within these ranges. Minimum Ideal Maximum pH ppm 7.4 - 7.6 Free Chlorine ppm 3.0 - 5.0 10.0 Alkalinity ppm 100 - 200 Calcium hardness ppm 200 - 400...
- Page 36 Decrease - lowering total alkalinity and decreasing your pH levels. Desired ppm decrease Draco I Ara I 2 tsp 2 tsp 4 tsp 4 tsp 6 tsp 6 tsp 8 tsp 8 tsp 10 tsp 10 tsp Alkalinity Up - balancing total alkalinity with alkalinity up.
-
Page 37: Simplesilver
simplesilver ™ What Is simplesilver ™ simplesilver™ is a combination of naturally occurring minerals and a small amount of silver oxide encapsulated in soluble silicon. Silver oxide is a chemical compound with oxidising properties used in cleaning applications. simplesilver™ is proven safe and used in many water treatment applications worldwide. simplesilver™... - Page 38 One 500g tablet is standard for spa pools with a volume of up to 1500L. For larger spa pools or swim spas, you will need to use a larger volume tablet: Spas Spa Volume Dose Draco I 960L 1 x 500g Tablet Ara I 960L...
- Page 39 Note, if you use the spa pool before the seventh day, there will not be sufficient simplesilver™ minerals in the water to inhibit the growth of bacteria or effectively balance the water, therefore the water will not be able to be maintained in a pristine, clear and clean condition. Step Three - Use the Spa Pool After the seven day resting period.
-
Page 40: Safety Information
Safety Information We want your Galaxy spa experience to be enjoyable and relaxing. We care deeply about your spa safety, so please read through the guidelines below: Ensure you have read and understood this guide thoroughly and have followed all the instructions outlined in this spa guide. - Page 41 Wishing you many relaxing soaks in your new spa.
Need help?
Do you have a question about the Draco I and is the answer not in the manual?
Questions and answers
Flow rate of the pump
The flow rate of the GALAXY SPAS Draco I pump is 80,000 to 100,000 litres per day.
This answer is automatically generated