
Related Manuals for All Medicus metene AGM-513S


Summary of Contents for All Medicus metene AGM-513S
- Page 2 TEST SUMMARY This summary is intended only as a Remove the battery quick reference and is not a substitute cover and put the Blood Glucose Monitoring battery with “+” sign System User Manual. Please read the facing up. entire User Manual before you begin the test.
- Page 4 PRECAUTIONS Intended Use Blood Glucose Monitoring System is intended to be used for the quantitative measurement of glucose (sugar) in fresh capillary whole blood from ngertip. Blood Glucose Monitoring System is intended to be used by a single person and should not be shared. It is intended for self-testing outside the body (in vitro diagnostic use) by people with diabetes at home as an aid to monitor the e ectiveness of diabetes control.
- Page 5 - The Meter is designed for use only with Test Strips. (manufactured by All Medicus Co., Ltd.) - The Blood Glucose Monitoring System is calibrated to produce values equivalent to the results on plasma specimens on a laboratory analyzer (YSI 2300 STAT Plus).
- Page 6 Precautions for Test Strip - Store test strip vials in the place with temperature between 36~86℉ (2~30℃) and humidity of 15-85% RH. - Avoid direct sunlight, heat and excessive humidity. - Always close the vial cap immediately after removing a test strip from the vial. If the test strip vial is left open for a long time, the test strips will become unusable.
- Page 7 IMPORTANT SAFETY INSTRUCTIONS For single patient - home use Reports of Hepatitis B virus infection outbreaks linked to multiple people sharing glucose meters have been increasing. This notice serves as a reminder that use of this device on multiple patients may lead to transmission of Human Immunode ciency Virus (HIV), Hepatitis C Virus (HCV), Hepatitis B Virus (HBV), or other bloodborne pathogens.
- Page 8 Table of Contents • Getting Started Blood Glucose Monitoring System l 01 Meter l 02 Meter LCD Display l 04 Test Strip l 05 • Before Testing Checking Your System with Control Solution l 06 • Performing the Blood Glucose Test with l 11 •...
- Page 10 Meter LCD Display - Test results, icons, symbols and simple messages appear here. </> Button - Recall the stored test result in the MEMORY MODE. - Select an event in the EVENT RECORD MODE. - Change the date, time and options in the SET MODE. Power Button - Turn the meter on/o .
- Page 11 Micro USB Port - Transfer your test results from the meter to a computer. Battery Cover Test Strip Eject Button...
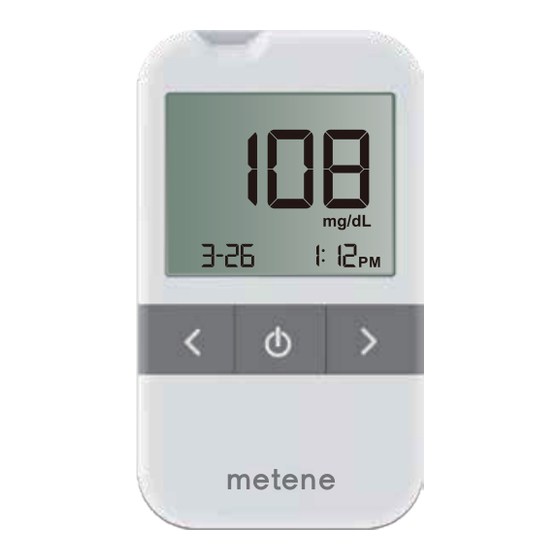
- Page 12 Meter LCD Display BATTERY LIFE. SET MODE. AVERAGE MODE. MEMORY MODE. MEMORY NUMBER. The meter displays the current memory order number in the MEMORY MODE. STRIP ICON. When the STRIP ICON blinks, insert a test strip to the meter. BLOOD DROP ICON. When the BLOOD DROP ICON blinks, apply blood sample.
- Page 13 Test Strip Grip - Hold this part to insert a test strip. Yellow Side-edge - Apply blood sample here; blood is absorbed automatically. Con rmation window (Reaction chamber) - Con rm if enough blood entered the con rmation window. Gold electrodes - Insert this part into the meter’s test port.
- Page 14 Checking Your System with Control Solution Control solution test is to check the performance of your meter and test strips. Control Solution contains a measured amount of glucose that reacts with the Test Strips. The control solution test con rms that your meter and test strips are working correctly. Compare your control solution test results with the range printed on the test strip vial label.
- Page 15 - Do not drink the control solution. - Tightly close the cap of control solution vial and store at 1 ~ 32 ~ 90 ) after the test. Check the expiration date printed on the test strip vial. Do not use the test strip beyond the expiration date. Lot No.: Exp.
- Page 16 Checking Your System with Control Solution Prepare the control solution Remove the vial cap and place it on a at surface with the top of the cap pointing up. Squeeze the vial to discard the rst drop. Squeeze a drop into the small well on the top of the cap or onto another clean, non-absorbent surface.
- Page 17 CONTROL SOLUTION ICON Check the CONTROL SOLUTION ICON ‘ ’ to appear. If CONTROL SOLUTION ICON ‘ ’ is not displayed, repeat the test with a new test strip. If the ICON ‘ ’ still does not appear, contact your healthcare provider.
- Page 18 Checking Your System with Control Solution Out-of-range test results may be caused by one or more of the followings: - Expired or contaminated control solution, - Expired or damaged test strip, - Use of control solution or test strip past its discarding date, - Error in performing the test, - Failure to shake the control solution vial well, - Meter, test strips or control solution are kept too warm or too cold,...
- Page 19 Performing the Blood Glucose Test with Meter Test Strip Lancing Device Lancets...
- Page 20 Performing the Blood Glucose Test with Preparing the Lancing Device (For single patient – home use) Getting a blood sample from the ngertip Remove the cap Turn the cap of the lancing device counter-clockwise to remove the cap. Insert a Lancet into the Lancet Holder. Insert the lancet rmly into the holder until it comes to a full stop.
- Page 21 Adjust the Puncture Depth Setting The dial for setting the puncture depth is at the tip of the lancing device. Higher number indicates deeper puncture. Thus, dial to the lower number for thin skin. Charge the Lancing Device. Draw back the end part of lancing device until it clicks, and then release it. Check the expiration date printed on the test strip vial.
- Page 22 Lance your Finger Place the lancing device carefully on the tip of your nger and press the release button. Obtain a Blood Drop Gently squeeze and/or massage your ngertip until a round drop of blood forms on your ngertip. - Before puncturing, gently massage the ngertip to obtain a round drop of blood. - Do not squeeze the nger to obtain a drop of blood.
- Page 24 Performing the Blood Glucose Test with Applying blood and reading results Apply the Blood Sample Apply the round drop of blood to the side edge of the yellow window of the test strip and then blood drop will be absorbed into the narrow channel. Touch and hold the blood drop to the side edge of the yellow window of test strip until blood completely lls the con rmation window and the meter beeps.
- Page 25 Test Results Appear in 5 seconds Once the meter completes the countdown from “5” to “1”, your test result will appear on the meter display. Without recording the event: If you remove the test strip immediately, only the test result will be automatically saved in the meter memory. (Only Test Results) With recording the event: To enter the EVENT RECORD MODE, you may press </>...
- Page 26 Entering the EVENT RECORD MODE For e ective diabetes management, stored test results with your condition(Pre-Meal, Post Meal) will help you and your healthcare professional to track changes in your blood glucose level. Press </> Button after the Test Press </> button after the test. Once the test result appears on the meter display, press any of </>...
- Page 27 Entering the EVENT RECORD MODE Once you remove the test strip from the meter, you cannot go back to the EVENT RECORD MODE. Do not remove the test strip from the meter until selecting an EVENT ICON is completed. POST MEAL ICON Select this icon when you have a test after meal (food intake).
- Page 28 Understanding Your Test Results Meter will display test result between 20 and 600 mg/dL. If your test result is lower than 20 mg/dL, “Lo” will appear on the meter display. If your test result is higher than 600 mg/dL, “HI” will appear on the meter display. - If “HI”...
- Page 29 Understanding Your Test Results Your meter uses the low and high range limits set in your meter to tell you when a test result is within, below or above the range limits. If your test result is Low range limit set, “ ”...
- Page 30 Recalling the Previous Test Results Meter has a memory capacity to store up to 500 most recent test results with date, time and event. It also provides you averages of your blood glucose test results over a period of time (Options: 7d, 14d, 30d, 60d, or 90d average). You can review the test results stored in the memory by the following steps.
- Page 31 Recalling the Previous Test Results Indicate the Average Value You can select the number of days for the average (7d, 14d, 30d, 60d, or 90d) in the SET MODE. “7d” shown in the right side indicates that the value 96 is a calculated average for the past 7 days.
- Page 32 Recall your Test Results Press and release </> button once to make the most recent test result appear on the meter display. Every time you press and release </> button, the meter will display the next result up to 500 test results. Press and hold </>...
- Page 36 Always keep the meter free from dirt, blood and liquid. The meter should be periodically cleaned and disinfected. If the meter is operated by a second person providing testing assistance to the user, the meter and lancing device should be decontaminated prior to use by the second person.
- Page 39 Setting Meter Meter comes with date ( 1-1), date format(dd.mm) time (12:00AM), time format (12h), alarm(0), average day(7d), hypoglycemic limit, hyperglycemic limit and unit of measurement (mg/dL), beep (On) preset. However, if you need to change the setting of the meter, or if you replace the battery, you need to enter the SET MODE and reset them. It is important to set the correct time and date.
- Page 40 Press and release the power button in order to advance to the next setting steps in the SET MODE. Press and release </> button to adjust the number in the SET MODE. To move faster, press and hold </> button. Set the Month The Month ashes.
- Page 41 Setting Meter Set the Hour The Hour ashes. Press and release </> button until you get the correct hour. If you press and release the power button, the meter advances next to the Minutes Setting. Set the Minutes The Minutes ash. Press and release </> button until you get correct minute.
- Page 42 Set the Average Period The Average Period ashes. Press and release </> button until you get the period of average setting that you want (7,14,30,60,or 90). If you press and release the power button, the meter advances next to the Hypoglycemic Warning Limits Setting.
- Page 43 Setting Meter Set the Beep When “On” or “OFF” ashes, press </> button, then you can set the beeper “On” or “O ”. If you set it “On”, press and release the power button. And then the meter advances next to the Alarm Setting. If you set it “O ”, you don't need to set the alarm and the meter exits the SET MODE.
- Page 44 Installing Battery A battery (CR2032) will provide you enough power to perform about 1,000 tests. The meter will alert you when the energy level is getting low by displaying the message ). In this case you can test a few more times but the battery should be replaced to new one as soon as possible.
- Page 45 Installing Battery Remove the Battery Cover Remove the battery door from the back of the meter by pushing the tab in the direction of the arrow and pulling up the door. Replace the Battery Remove the old battery and put the new one with "+" sign facing up. Close the Battery Cover Put the battery door back in place and snap it closed.
- Page 46 Data Transfer How to Use LinkDr. 2.0 is designed to connect with PC using Micro USB cable and to transfer test results to PC. Through diabetes management software LinkDr. 2.0, you can review your test results and print the report. To learn more about LinkDr.
- Page 47 Display Message Guide Message System check. The system is The meter is ready The meter displays This display always ready for you to for a blood drop or countdown from appears when you insert a test strip. control solution. 5 to 1, while What it means.
- Page 48 A blood glucose System is ready to Your blood Your blood test result in record the EVENT glucose result is glucose result is mg/dL ICON which higher than lower than correlates with 600 mg/dL 20 mg/dL your test result. No action is Select an EVENT Repeat the test Repeat the test...
- Page 49 Display Message Guide Message Your blood Your blood A blood glucose Battery is low but glucose result is glucose result is test result stored you can still higher than the lower than the in the memory. perform a few What it means. hyperglycemic hypoglycemic more tests.
- Page 50 The energy level of The average of The meter is No test result in The meter is used outside the proper the battery is too blood glucose test connected with PC memory range of low to provide results for the past using Micro USB temperature.
- Page 51 Display Message Guide Message The used test strip The test strip was There was an The meter has an was inserted in the electrical noise removed during internal electric test port. during the test. testing. circuit problem. What it means. Retest with a new Retest with a new Retest with a new...
- Page 52 The meter has a The meter has a Not enough blood Blood is applied to problem with strip or control solution wrong direction problem with strip connection. was drawn into the into the test strip. connection. test strip for a test. Contact your Contact healthcare Retest with a new...
- Page 53 Troubleshooting Guide Troubleshooting Cause Action 1. The meter does not turn on Battery is dead. Replace the battery. after inserting a test strip. Check if battery is correctly installed The battery is installed incorrectly with the positive "+" sign facing up. or there is no battery in the meter.
- Page 54 Speci cations Product Name Blood Glucose Monitoring System Model Name AGM-513S Assay Method Electrochemical method Sample Type Fresh capillary whole blood Sample Volume 0.5 ㎕ Measurement Range 20~600 mg/dL Measurement Time 5 seconds Plasma-equivalent Calibration Battery Type One 3-volt lithium battery (coin cell type CR2032) Battery Life Approximately 1,000 tests Unit of Measurement...
- Page 55 Performance Characteristics The performance of the Test Strips has been evaluated in clinical tests. Accuracy: The user performance for the Blood Glucose Monitoring System was evaluated by using capillary blood samples from 405 patients with those obtained using a YSI Model 2300 STAT Plus Glucose Analyzer.
- Page 56 Measurement precision: Measurement repeatability Intermediate measurement precision (using venous whole blood): (using control solution): Level Level 39.1 mg/dL 2.7 mg/dL 6.3% 37.2 mg/dL 1.4 mg/dL 3.7% 85.5 mg/dL 3.2 mg/dL 3.9% 80.4 mg/dL 1.8 mg/dL 2.2% 121 mg/dL 4.2 mg/dL 3.7% 118 mg/dL 2.6 mg/dL...
Need help?
Do you have a question about the metene AGM-513S and is the answer not in the manual?
Questions and answers