Table of Contents
Advertisement
Quick Links
Advertisement
Table of Contents

Summary of Contents for Calitec KP-50
- Page 1 Manual - Model KP-50 – 300L Version: March 2020 ...
-
Page 2: Table Of Contents
Content Page Installation & Maintenance Hot Water Cylinder – Installation Outdoor Unit – Installation Display Controller First start up Control panel Key lock function Mode select Clock setting Timer setting Defrosting & Water quality requirements Error messages Technical sheet Contact details... -
Page 3: Installation & Maintenance
Installation & Maintenance The installation of a Calitec Hot Water System is exclusively allowed by qualified tradesman. It has to be done according to NZ building codes and local regulations. Do not install the unit by yourself (customer). Incomplete installation could cause injury due to fire or electric shock. -
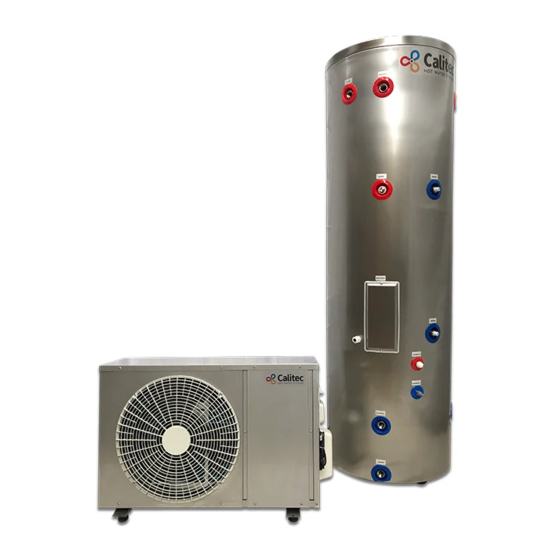
Page 4: Hot Water Cylinder - Installation
Hot Water Cylinder - Installation The hot water cylinder can be used as a low water pressure cylinder or as a mains water pressure cylinder. The installation must be carried out by a qualified plumber and installed according to local rules and regulations. The hot water cylinder is to be considered as a normal hot water cylinder . -
Page 5: Outdoor Unit - Installation
Outdoor Unit - Installation The outdoor unit needs to be installed by a qualified heat pump split system installer/ refrigerant filler. The best location for the outdoor unit is a place where: • It is not exposed to strong winds. •... -
Page 6: Display Controller
Display Controller - Installation The display controller is stored behind the front panel, together with the temperature sensor. The controller needs to be connected to the outdoor unit with a 3 core cable (cable not supplied). The sensor cable could be cut to the required length and connected on the same terminal block as the controller. -
Page 7: First Start Up
First start up Open the high and low pressure refrigerant valves. Open water switch and fill the hot water cylinder with water. Make sure that the cylinder is filled with water. Make sure that the temperature sensor is in the lower temperature probe pocket of the cylinder. -
Page 8: Control Panel
Control panel Description of display panel: ROOM COOL mode parameter setting ROOM HEAT mode key lock Cylinder HEAT mode timer on timer off Defrost mode first 88 is setting temperature, second 88 is current temperature setting temperature symbol for ROOM HEAT, ROOM COOL Clock adjust Clock/Timer/Parameter display... -
Page 9: Key Lock Function
Key Lock function When is on, key lock function is on. Press the button for 6 seconds to release key lock. The key lock function will be back on after not touching any button for 30 seconds. -
Page 10: Mode Select
Mode select (note: PK-50 models have only Cylinder HEAT) Cylinder HEAT mode: Left side is set temperature, right side is actual water temperature. Press to change the set temperature. Press button to go to the next mode. ROOM CO OL mode: Not at this model. -
Page 11: Clock Setting
Clock setting Press for 6 seconds and ‘minute’ will flash, Press to change minutes. Press and the ‘hour’ will flash, Press to change hour. -
Page 12: Timer Setting
Timer setting: Press and the ‘minute’ flash. Press to change minute of TIMER Press and the ‘hour’ flash. Press to change hour of TIMER ON. Press and the ‘minute’ flash. Press to change minute of TIMER OFF. Press and the ‘hour’ flash. -
Page 13: Defrosting & Water Quality Requirements
Defrosting When this symbol is lit, the outdoor unit is in defrosting mode. This is an automatic process to remove the ice from the evaporator. It takes about 17 minutes and the heat pump will resume working afterwards. Depending on the ambient temperature and humidity this could occur several times. -
Page 14: Error Messages
Error messages The outdoor unit is equipped with regulation and safety components; when a regulation component is defective or a safety sensor is activated, a message is posted like it’s illustrated below. Call your installer for help. Cylinder water sensor Low pressure protection Ambient sensor Compressor over-heat protection... -
Page 15: Technical Sheet
Technical Sheet Model KP-50/300L Power supply 220-240/1/50 v/ph/hz Rated heating capacity Rated power input Maximum power 1.54 input Water production Refrigerant R410A Rated / Maximum current 4.5 / 8 – heat pump heated Rated water temp. Level against electric shock... -
Page 16: Contact Details
Your local installer: Warranty Calitec Hot Water Systems are provided with a 5-year warranty on the outdoor unit and 20- year warranty on the stainless steel hot water cylinder, if installed through qualified installers. Check out full Warranty Terms & Conditions of Calitec Hot Water Systems ltd on www.calitec.nz...
Need help?
Do you have a question about the KP-50 and is the answer not in the manual?
Questions and answers