Table of Contents
Advertisement
Advertisement
Table of Contents

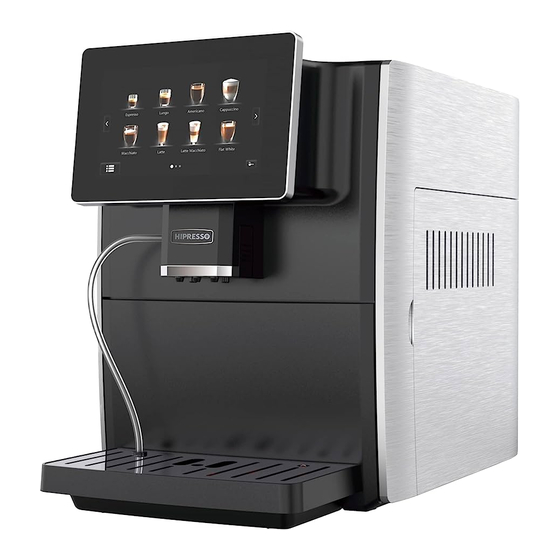
Summary of Contents for Hipresso DP2002
-
Page 2: Table Of Contents
1. CONTENTS CONTENTS 1 2. INTRODUCTION 4 3. IMPORTANT SAFEGUARDS 3.1 Safety warnings 3.1.1 Danger to the user 3.1.2 Damage to the appliance 3.1.3 Descaler 3.1.4 Health regulations 4. DESCRIPTION AND SPECIFICATION 4.1 Description 4.2 Technical Specifications 4.3 Accessories 5. INSTALLATION 5.1 Installing the appliance 5.2 Installing milk tube 5.3 Connecting the appliance... -
Page 3: Introduction
Touch and enjoy your automatic coffee machine! 3. IMPORTANT SAFEGUARDS The most important feature of the appliance DP2002 is optimum safety. Failure to observe the warnings could result in injury or damage to the machine. 3.1 Safety warnings 3.1.1 Danger to the user... -
Page 4: Damage To The Appliance
• If the problem cannot resolved as described in the trouble shooting, contact Customer Services. • Please use Hipresso original accessory attachments or spare parts only. • Do not use the appliance if it is visibly damaged or found of leakage. Contact the Customer Service for replacement or repair. -
Page 5: Descaler
• The appliance shall not be installed on a surface that may be sprayed with water. • The bean container can only be filled with coffee beans. Pre-ground coffee funnel can only be filled with pre-ground coffee, and manual entrance can only be filled with descaler for cleaning purpose. •... -
Page 6: Description And Specification
Warning!-Improper use of milk can be harmful to health! Please respect the following safety warnings: Do not use Raw milk. (2) Use milk at refrigerator temperature (3-5℃). (3) Use the milk in the original package. (4) Check whether there is any damage of the milk package before opening. (5) Milk should be stored in a dry and cool place (up to 7℃). -
Page 7: Technical Specifications
4.2 Technical specifications Name Grounds Coffee Milk Foam Temperature Warm Milk Espresso 7-12g 20-250ml 75-95℃ (single/double) Default 40ml 90℃ Name Grounds Coffee Milk Foam Temperature Warm Milk Lungo 7-12g 20-250ml 75-95℃ (single/double) Default 80ml 90℃ Name Grounds Coffee Milk Foam Temperature Warm Milk Cappuccino... - Page 8 Grounds Coffee Milk Foam Temperature Warm Hot Water milk Hot water 100-250ml Default 100ml Technical Data Item No. DP2002 Rating Voltage/Frequency AC220-240V, 50Hz Power 1150W-1350W Water Tank Capacity 1.8L Bean Container Capacity 160G Grounds Container Capacity 10PCS Weight 13.1KGS Size...
-
Page 9: Accessories
4.3 Accessories The following accessories are supplied with the appliance Power cord Milk tube Manual Spoon Brush 5. INSTALLATION 5.1 Installing the appliance About Place When you install the appliance, you should respect the following safety warnings to avoid damage to the appliance: The distance between the power outlet specified in the installation drawing and the appliance positioning shall not exceed 1m . -
Page 10: Installing Milk Tube
Carbonate hardness shall not exceed 5-6°dKH (German carbonate hardness) or 8.9-10.7°fKH (French carbonate hardness), and the total hardness value must always be higher than the carbonate hardness. The minimum carbonate hardness is 5°dKH or 8.9°fKH. pH value has to be between 6.5 and 5.2 Installing the milk tube Step 1:Find the milk tube and insert one end into the tube port. -
Page 11: Using The Appliance For The First Time
USING THE APPLIANCE FOR THE FIRST TIME 6.1 Filling coffee beans/pre-ground coffee and water Making coffee using Hipresso coffee beans Fill the coffee beans in the coffee bean container and cover the lid. Making coffee using pre-ground coffee Add one level measure of pre-ground coffee into the funnel and cover the lid. (Do not use pre-ground... -
Page 12: All The Settings
Step 3: The appliance is turned on successfully with display of main menu interface. 6.2 All the Settings Step 1: Touch main menu icon and choose menu setting. Touch main menu icon Choose menu setting Touch Clean - 4 clean functions... - Page 13 Touch Drink Setting-Setting Setting grounds, volume and temperature Touch Drink Setting- Drinks lock The locked drink will not display on the screen Touch Machine Setting-Language Touch Machine Setting-Timer Off,0.5h,1h,2h,3h,...24h for option...
-
Page 14: Turning The Appliance Off
Touch Machine Setting-Milk System Clean Time Touch Machine Setting-Descaling Setting (4 levels for option) Level 1: 880 cups, equal to Hardness test indicator paper 50mg/L and below Level 2: 440 cups, equal to Hardness test indicator paper 120mg/L and below Level 3: 280 cups, equal to Hardness test indicator paper 250mg/L and below Level 4: 220 cups, equal to Hardness test indicator paper 425mg/L and below Touch Machine Setting-Display (3 light levels for option) Touch Machine Setting - Process Control... -
Page 15: Making Drinks
Step 2: Long touch the icon for 3 seconds and the appliance performs automatic rinsing cycle. Step 3: After rinsing, press the power switch at the back of the appliance to power off. 7. MAKING DRINKS Below operations can be made directly by general users. The making of double coffee is same as single one. -
Page 16: Making Coffees
7.1 Making coffee Making Espresso Step 1: Choose Espresso to start making drink. Step 2: During this process, you can touch “ ” or “ ” to adjust the values temporarily according to your demands. (Make sure “Process Control” function in “Machine Setting” is on). Touch to stop making coffee immediately during the producing process. - Page 17 Step 2: During this process, you can touch “ ” or “ ” to adjust the values temporarily according to your demands. (Make sure “Process Control” function in “Machine Setting” is on). Touch to stop making coffee immediately during the producing process. Making Americano Step 1: Choose Americano to start making drink.
- Page 18 Touch to stop making coffee immediately during the producing process. Making Cappuccino Step 1: Choose Cappuccino to start making drink. Step 2: During this process, you can touch “ ” or “ ” to adjust the values temporarily according to your demands. (Make sure “Process Control” function in “Machine Setting” is on). Touch to stop making coffee immediately during the producing process.
- Page 19 Step 2: During this process, you can touch “ ” or “ ” to adjust the values temporarily according to your demands. (Make sure “Process Control” function in “Machine Setting” is on). Touch to stop making coffee immediately during the producing process. Making Latte Step 1: Choose Latte to start making drink.
- Page 20 Touch to stop making coffee immediately during the producing process. Making Latte Macchiato Step 1: Choose Latte Macchiato to start making drink. Step 2: During this process, you can touch “ ” or “ ” to adjust the values temporarily according to your demands.
- Page 21 Step 2: During this process, you can touch “ ” or “ ” to adjust the values temporarily according to your demands. (Make sure “Process Control” function in “Machine Setting” is on). Touch to stop making coffee immediately during the producing process. 7.2 Making warm milk,milk foam and hot water Making hot milk Step 1: Choose Warm Milk to start making drink.
- Page 22 Touch to stop making coffee immediately during the producing process. Making Milk Foam Step 1: Choose Warm Milk to start making drink. Step 2: During this process, you can touch “ ” or “ ” to adjust the values temporarily according to your demands.
-
Page 23: Meaning Of The Alarms
Step 2: During this process, you can touch “ ” or “ ” to adjust the values temporarily according to your demands. (Make sure “Process Control” function in “Machine Setting” is on). Touch to stop making coffee immediately during the producing process. 8. - Page 24 Waste water is full. Empty the drip tray The brew group is not in place. Check and insert the brew group properly Grounds container is full. Empty the grounds container The drip tray is not in place. Check and insert the drip tray properly The door is open.
-
Page 25: Cleaning And Maintenance
Insufficient water in water tank. Fill fresh water The grinding is too coarse. Check and turn the grinding adjustment knob towards “-” To make it finer. Press to resume. Insufficient water in the water flow system. Make sure there is sufficient water in the water tank. Press to resume. -
Page 26: Milk Froth System Cleaning
Touch main menu icon Touch Menu setting Choose rinsing Rinsing Shortcut of rinsing 9.1.2 Milk froth system cleaning: 1. Automatic cleaning Suggest to clean on time after milk froth operation. Method: Follow operation instruction in the appliance or as below: Step 1: Touch the main menu icon and choose menu setting. - Page 27 Touch main menu icon Choose Milk System Clean Choose clean /Return Step 2: Check if the milk tube is properly inserted in the coffee machine, touch to confirm or touch to cancel. Shortcut of Milk System Clean as below 2. Milk frother dismounting and cleaning Suggest Clean Frequency: Daily Take off the milk frother device from the machine and take it apart as below.
-
Page 28: Brewing Group Cleaning
9.1.3 Brewing group cleaning 1. Rinsing Suggest clean frequency: Daily Method: Refer to 9.1.1 2. Deep cleaning Suggest clean frequency: Every 500 cups Method: Follow operation instruction in the appliance or as below Step 1: Touch Main Menu Icon and choose menu setting-Clean-Brewer Deep Clean, touch start cleaning or touch to cancel Touch Main Menu Icon... -
Page 29: Descaling
3. Dismounting and cleaning Suggest cleaning frequency: Every week Method: Dismount the brewing group from the appliance and rinse thoroughly under water. 9.1.4 Descaling Level 1: 880 cups, equal to Hardness test indicator paper 50mg/L and below Level 2: 440 cups, equal to Hardness test indicator paper 120mg/L and below Level 3: 280 cups, equal to Hardness test indicator paper 250mg/L and below Level 4: 220 cups, equal to Hardness test indicator paper 425mg/L and below Step 1: Touch Main Menu Icon and choose Menu-Clean-Descaling. -
Page 30: Adjusting The Coffee Mill
9.2 Adjusting the mill The fineness of the mill can be corrected by adjusting the grinding adjustment knob. (Turn towards + to be coarser and towards - to be finer) 10. TRANSPORTATION AND DISPOSAL 10.1 Transportation (1) Please keep all the packages for future use of transportation. (2) Water remaining in the coffee machine must be emptied thoroughly before transportation, otherwise the coffee machine will be damaged. -
Page 31: Fundamental Warnings
recycled. (2) This appliance must not be disposed of with household waste. Please comply to correspondent national and local laws and regulations. (3) This appliance and all auxiliary equipment is designed and manufactured according to the requirements of environmental protection treatment. 11. -
Page 32: Warranty
13. WARRANTY 13.1 Warranty and Liability Hipresso is not liable for any damage or injuries depriving from improper use listed as below: The appliance is improperly used. The appliance and its additional parts are not correctly installed, debugged, operated, cleaned or maintained;... - Page 33 The appliance is used under abnormal conditions. Repair is not performed correctly. Use non-original parts produced by Hipresso. The damage is caused by foreign matters, accident, vandalism or other irresistible reasons. Our manual is available in more languages on our website.
Need help?
Do you have a question about the DP2002 and is the answer not in the manual?
Questions and answers