Advertisement
Quick Links
Advertisement

Summary of Contents for Mr. Winter Wintelligent W-6X8C
- Page 1 HOW TO BUILD A wintelligent® walk- in cooler or freezer WITH NO FLOOR...
-
Page 2: Table Of Contents
Wintellligent.com TABLE OF CONTENTS Introduction Inspecting and Handling Your Wintelligent® Panels Preparing Your Site Assembling Your Vinyl Screeds & Wintelligent® Panels Post-Assembly Finishes... -
Page 3: Introduction
Wintelligent.com INTRODUCTION If you're looking to build a Wintelligent walk-in cooler or freezer, you're in the right place. This guide for building a Wintelligent® with no floor is going to show you how to do just that. Click here if you need a step-by-guide on how to build a Wintelligent®... -
Page 4: Inspecting And Handling Your Wintelligent® Panels
Wintelligent.com INSPECTING AND HANDLING YOUR WINTELLIGENT® PANELS Take time to inspect the parts and equipment included in your shipment. Make sure the order number on the boxes and panels match the order number on your invoice. If you discover damaged parts or equipment, take photos and make a note of the damage on your delivery ticket. - Page 5 Wintelligent.com INSPECTING AND HANDLING YOUR WINTELLIGENT® PANELS Here is a list of tools and accessories you will need to complete assembly: Block wrench (included) or Drill (block drill bit included) Vinyl screeds (included) Vinyl caps for lock holes (included) Sanitary profiles (included) Drill, masonry anchors, screws for vinyl screeds (not included) Level (not included) Measuring tape (not included)
-
Page 6: Preparing Your Site
Wintelligent.com PREPARING YOUR SITE Site preparation is key to properly building your Wintelligent® walk-in cooler or freezer. Make sure the floor space allotted for your box is level and swept clean of dirt and debris. An uneven floor could result in a faulty assembly with doors and panels not sealing properly. -
Page 7: Assembling Your Vinyl Screeds & Wintelligent® Panels
Wintelligent.com ASSEMBLING YOUR VINYL SCREEDS & WINTELLIGENT® PANELS Save valuable time by reviewing the following "pro tips" before assembling your vinyl screeds and Wintelligent® panels: When attaching wall panels to each other, place the bottom of the wall panel in the vinyl screed before attaching the panels. Listen for a "clack"... - Page 8 Wintelligent.com Step 2: Start panel assembly by inserting the rear corner wall panel (CWNF1 or CWNF3) into the vinyl screed as per your assembly drawing. Note: The placement of the rear corner wall panel for your specific cooler or freezer may differ from the rendering below. Your assembly drawing may show the rear corner panel goes where the red arrow points below.
- Page 9 Wintelligent.com Step 4: Continue assembling wall panels and vinyl screeds in the direction of the other rear corner as per your assembly drawing and the renderings below. This provides stability as you build your box.
- Page 10 Wintelligent.com Step 5: Assemble your first ceiling panel by attaching the rear ceiling panel to the wall panels as per your assembly drawing and the rendering below. Fasten the ceiling panel to the wall panels. Step 6: Attach the wall panel serving as an end cap to the ceiling panel (WNF or CWNF on your assembly drawing) to the wall and ceiling panels.
- Page 11 Wintelligent.com Step 7: Continue assembling wall panel(s) on one side of the box as per your assembly drawing. Fasten the wall panels to each other. Your box should look similar to this: Step 8: Attach the next ceiling panel (as per your assembly drawing) to the rear ceiling panel and the wall panel(s) you assembled in the previous step.
- Page 12 Wintelligent.com Step 9: Continue working your way to the front of the box by assembling vinyl screeds, wall panels, and ceiling panels on each side of the box as per your assembly drawing and the following renderings:...
- Page 13 Wintelligent.com...
- Page 14 Wintelligent.com Step 10: Attach and fasten the door header panel to the door frame panel. Step 11: Attach the fully-assembled door panel to the wall and ceiling panels as per your assembly drawing. Fasten the door panel to the wall panel. Fasten the door panel to the ceiling panel.
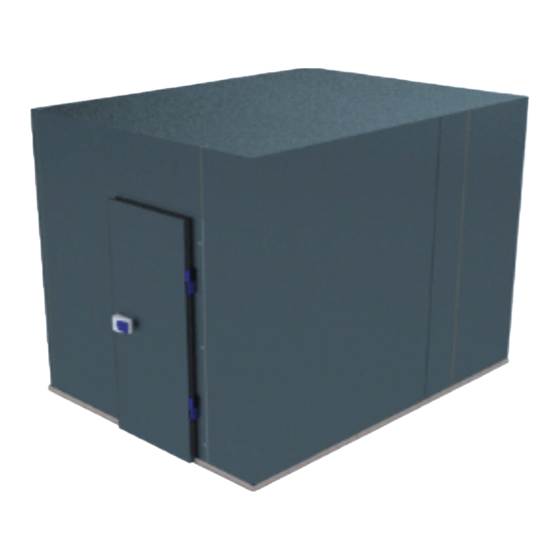
- Page 15 Wintelligent.com Step 12: Continue assembling wall panels as per your assembly drawing. The last panel assembled should be a corner wall panel (CWNF1 or CWNF3). Your assembled Wintelligent® walk-in cooler or freezer should look similar to this:...
-
Page 16: Post-Assembly Finishes
Wintelligent.com POST-ASSEMBLY FINISHES Step 12: Remove the protective vinyl coating from all panels. Step 13: Insert the protective vinyl caps in the panel lock holes. Step 14: Insert the sanitary profiles in all interior corners. No sanitary profiles are necessary for the ceiling joins. Note: You may have to cut the black seam tracks and white sanitary profiles to size prior to installing them. - Page 17 Wintelligent.com 2. Snap the white sanitary profiles into the black seam tracks. Congratulations! Your Wintelligent® walk-in cooler or freezer assembly is now complete. Please contact us at (800) 327-3371 or info@mrwinterinc.com if you have any questions.
- Page 18 Wintelligent.com YOU DON'T HAVE TO WAIT MONTHS FOR A NEW WALK-IN COOLER OR FREEZER ANYMORE Start keeping perishables fresh as early as next week. It's not fair to expect small businesses and aspiring entrepreneurs to wait months for a new walk-in cooler or freezer when they need cold storage solutions today.
Need help?
Do you have a question about the Wintelligent W-6X8C and is the answer not in the manual?
Questions and answers