Table of Contents
Advertisement
Quick Links
Advertisement
Table of Contents

Related Manuals for Dahua Technology DHI-ARK30T-W2

Summary of Contents for Dahua Technology DHI-ARK30T-W2
- Page 1 Wireless Keypad User’s Manual ZHEJIANG DAHUA VISION TECHNOLOGY CO., LTD. V1.0.0...
-
Page 2: Foreword
This manual introduces the installation, functions and operations of the wireless keypad (hereinafter referred to as the "keypad"). Read carefully before using the device, and keep the manual safe for future reference. Model DHI-ARK30T-W2 (868); DHI-ARK30T-W2 Safety Instructions The following signal words might appear in the manual. Signal Words... - Page 3 User’s Manual ● The manual will be updated according to the latest laws and regulations of related jurisdictions. For detailed information, see the paper user’s manual, use our CD-ROM, scan the QR code or visit our official website. The manual is for reference only. Slight differences might be found between the electronic version and the paper version.
-
Page 4: Important Safeguards And Warnings
User’s Manual Important Safeguards and Warnings This section introduces content covering the proper handling of the device, hazard protection, and protection of property damage. Read carefully before using the device, and comply with the guidelines when using it. Operation Requirements ●... -
Page 5: Table Of Contents
User’s Manual Table of Contents Foreword ........................................I Important Safeguards and Warnings ............................III 1 Introduction ......................................1 1.1 Overview ......................................1 1.2 Technical Specifications ................................. 1 2 Checklist ........................................3 3 Appearance ......................................4 4 Adding the Keypad to the Hub ..............................2 5 Installation ....................................... -
Page 6: Introduction
Low Battery Detection Tamper Measuring Range –15 °C to +65 °C (+5 °F to +149 °F) (indoor) (Temperature) Measuring Accuracy 1 °C (33.8 °F) DHI-ARK30T-W2 (868): DHI-ARK30T-W2: Carrier Frequency 868.0 MHz–868.6 MHz 433.1 MHz–434.6 MHz DHI-ARD821-W2 (868): DHI-ARD821-W2:Up to Communication Distance 1,200 m (3,937.01 ft) in... - Page 7 User’s Manual Type Parameter Description Power Supply 4 × AA batteries 3 years (if the device is used to arm and disarm once a Battery Life day) Product Dimensions 146.0 mm × 82.0 mm × 22.6 mm (5.75" × 3.23" × 0.89") Packaging Dimensions 180.0 mm ×...
-
Page 8: Checklist
User’s Manual 2 Checklist Figure 2-1 Checklist Table 2-1 Checklist Item Name Quantity Item Name Quantity Keypad IC card Battery Quick start guide Legal and regulatory Screw package information... -
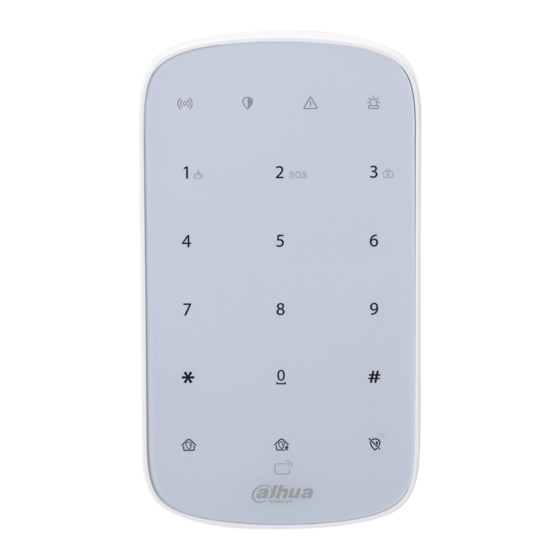
Page 9: Appearance
User’s Manual 3 Appearance Figure 3-1 Appearance... - Page 10 User’s Manual Table 3-1 Structure Name Description There are four indicators, including communication, arming and disarming, fault, and alarm indicators. ● All indicators are solid for 2 seconds: Powered on. ● All indicators are off: Not enter paring mode. ● Communication indicator status: ◇...
-
Page 11: Adding The Keypad To The Hub
User’s Manual 4 Adding the Keypad to the Hub Before you connect it to the hub, install the DMSS app to your phone. This manual uses iOS as an example. ● Make sure that the version of the DMSS app is 1.98 or later, and the hub is V1.001.0000000.8.R.220319 or later. -
Page 12: Installation
User’s Manual 5 Installation Prior to installation, add the keypad to the hub and check the signal strength of the installation location. We recommend installing the keypad in a place with a signal strength of at least 2 bars. The keypad supports wall mount. Step 1 Loosen the screw to open the keypad. - Page 13 User’s Manual Figure 5-4 Drill holes Step 4 Close the keypad. Figure 5-5 Close the keypad Step 5 Secure the keypad with screw. Figure 5-6 Secure the keypad...
-
Page 14: Configuration
User’s Manual 6 Configuration You can view and edit general information of the keypad. 6.1 Viewing Status On the hub screen, select a keypad from the accessory list, and then you can view the status of the keypad. Table 6-1 Status Parameter Value The status for whether the functions of the keypad are enabled or... -
Page 15: Configuring The Keypad
User’s Manual 6.2 Configuring the keypad On the hub screen, select a keypad from the accessory list, and then tap to configure the parameters of the keypad. Table 6-2 Keypad parameter description Parameter Description ● View keypad name, type, SN and device model. Device Configuration ●... - Page 16 User’s Manual Parameter Description Set the number of attempts to enter the wrong passcode and lock time for the keypad. ● Enable the keypad lock function first. ● For the number of attempts to enter the wrong passcode Keypad Lock Status within 30 minutes, you can select from 3 to 10 times.
-
Page 17: User Management
User’s Manual 7 User Management 7.1 Adding Users You can add, modify, or delete keypad users when it is disarmed. Only installer and admin users have permission to add users. Procedure Step 1 Go to the home screen. Step 2 Select a hub, and then select >... -
Page 18: Adding Card
User’s Manual On the User Manager screen, select the user, and then swipe left to delete the user. The admin user must be the last to be deleted. ● Modifying User's Information On the User Manager screen, select the user, and then you can modify user's information, including username, passcode, duress code and arming and disarming permission. - Page 19 User’s Manual Step 7 Tap Completed.
-
Page 20: Operations
User’s Manual 8 Operations 8.1 Frequently Used Commands Following are frequently used commands for the keypad. Before using the keypad, make sure you have created accounts on the DMSS or COS app. Table 8-1 Command Function Command Global away arming Enter the password + + #. -
Page 21: Disarming
User’s Manual To arm the system without a passcode, you can enable the No Passcode Arming function first, and then press and hold ● To arm a single room, you can enter the relevant arming command. ◇ If the arming is successful, the arming and disarming indicator light will flash blue 3 times slowly, and then will remain solid, with one short beep. - Page 22 User’s Manual ◇ The arming and disarming indicator light will glow blue for 6 seconds if the room is armed. ◇ The arming and disarming indicator light will slowly flash green 3 times slowly if the room is disarmed. ◇ The fault indicator light is solid on for 6 seconds if there are faults on the peripherals and the hub.
-
Page 23: Appendix 1 Cybersecurity Recommendations
User’s Manual Appendix 1 Cybersecurity Recommendations Cybersecurity is more than just a buzzword: it’s something that pertains to every device that is connected to the internet. IP video surveillance is not immune to cyber risks, but taking basic steps toward protecting and strengthening networks and networked appliances will make them less susceptible to attacks. - Page 24 User’s Manual 1024–65535, reducing the risk of outsiders being able to guess which ports you are using. 6. Enable HTTPS We suggest you to enable HTTPS, so that you visit Web service through a secure communication channel. 7. MAC Address Binding We recommend you to bind the IP and MAC address of the gateway to the device, thus reducing the risk of ARP spoofing.
- Page 25 User’s Manual device. More information Please visit Dahua official website security emergency response center for security announcements and the latest security recommendations.
- Page 26 User’s Manual...
Need help?
Do you have a question about the DHI-ARK30T-W2 and is the answer not in the manual?
Questions and answers