Advertisement
Installation Manual:
ID-4 4 Key Compact Controller
NOTE: Do not install and/or operate this product unless you have read and understand all the safety information and instructions contained in this
manual.
IMPORTANT!
This manual provides all the necessary information for your product to be properly and safely installed.
Please read all instructions before installation, and make sure you follow them carefully during the
installation process. Failure to follow these instructions may result in DAMAGE to the product or vehicle,
and/or SERIOUS INJURY to you and your passengers!
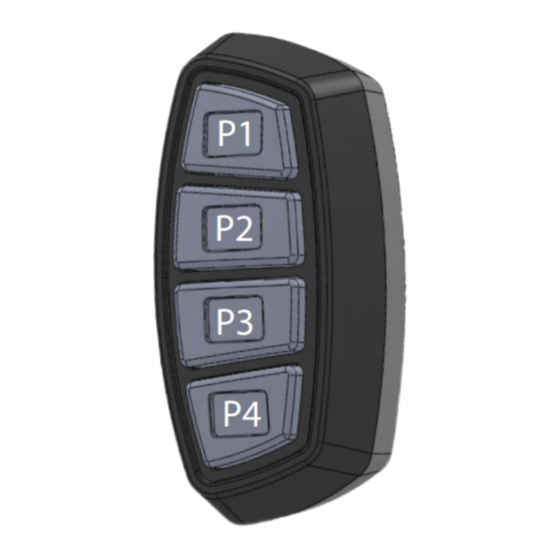
P1
P2
P3
P4
Functions and Programming
Default
All buttons are default as ON/OFF Button
Momentary Switch Programming
Function
To set function buttons as momentary switch
- Push the button for 5 second to set as momentary switch.
- Push the button for another 5 second to set as momentary switch.
Adjustable Arm Mount
Installation
Attach and secure the controller onto the panel stand. Place the device onto a
clean desired surface, where it can be easily accessible to the user. Use the
attached adhesive pad* to secure the device onto the surface. Should you
wish to remove / re-locate the controller, you may use alcohol or similar
cleaning formula to remove the left-over adhesive residue.
* The supplied adhesive pad is designed for one time use. You may replace it
with other double side adhesive tapes.
Product Code ID-4
10-30 VDC
Voltage
0.2Amp per cable
Output
IP65
IP Rating
38mm X 75.8mm X 23.8mm
Dimension
- Adjustable Arm Mount
Options
Wiring
Button Function Amp
Diagram
Red
Black
Yellow
P1
Blue
P2
Purple
P3
White
P4
- 1 -
-
Positive
-
-
Negative
-
Output
0.2A
Output
0.2A
Output
0.2A
Output
0.2A
Advertisement
Table of Contents

Subscribe to Our Youtube Channel
Related Manuals for Flash ID-4


Summary of Contents for Flash ID-4
- Page 1 Installation Manual: ID-4 4 Key Compact Controller NOTE: Do not install and/or operate this product unless you have read and understand all the safety information and instructions contained in this manual. IMPORTANT! This manual provides all the necessary information for your product to be properly and safely installed.
- Page 2 Motorcycle Handle-Bar Clamp Installation - Secure clamp mount part onto the controller. - Use the supplied screws to secure clamp mount part onto your desire mounting location. Use the supplied rubber pad to help adjusting the grip and size of the mount. - Insert clamp mount part into part #2.
Need help?
Do you have a question about the ID-4 and is the answer not in the manual?
Questions and answers