
Summary of Contents for Pathway connectivity solutions Cognito 2
- Page 1 User Guide Version 07.05.2016 1439 17 Ave SE Calgary AB T2G 1J9 403-243-8110 www.pathwayconnect.com...
- Page 2 Anytime Help Resources This full manual is on Cognito with hyperlinks between topics. Press for Hint Overlays, then to get the on-line version of this manual. There is a WWW version and a PDF version of this manual on www.pathwayconnect.com Operational Questions and Problem Reports support@pathwayconnect.com forums.pathwayconnect.com...
-
Page 3: Table Of Contents
Table of Contents SETUP..............................1 ..........................1 OWERING THE ONSOLE ......................... 2 ONNECTING TO THE IGHTS HOW TO..............................3 ............................3 OW TO ........................4 OW TO PEN A IFFERENT ..........................5 OW TO ATCH A IGHT ..........................6 OW TO NTENSITY ..................7 OW TO ET A OLOR OSITION OR... - Page 4 USB P ............................. 30 ORTS SETUP..............................31 ..............................32 YSTEM ..............................32 ENERAL ................................ 34 ISPLAY ..............................34 ............................. 35 STRONOMICAL ..............................35 DVANCED ............................... 36 ETWORK ............................37 NPUT UTPUT & B ........................37 ETWORK LIDERS UTTONS ..........................38 TATION ............................... 39 LAYLIST )........................
- Page 5 ............................61 ONTROL NTENSITY ............................62 ONTROL OLOR ............................... 63 OLOR PACES HSI DMX M ..........................64 ATIVE APPING ............................64 ONTROL OSITION ............................65 ONTROL HAPE ........................66 DVANCED TTRIBUTE ONTROL ..............................68 ECORD ............................69 ECORD EMORY ..............................70 ECORD ............................
- Page 6 API - A ....................121 PPLICATION ROGRAM NTERFACE ..........................122 ERIAL ONNECTIVITY ..........................123 ELNET ONNECTIVITY ..........................124 ONTACT LOSURES DMX I ............................... 125 NATURAL LANGUAGE CONTROL......................127 ............................127 ACKGROUND ..................... 129 ALKING TO THE IGHTS WITH ITS AND YTES ................130 ALKING TO THE IGHTS WITH ATURAL ANGUAGE...
-
Page 7: Setup
Initial Setup Initial Setup See Also Hardware Overview Powering the Console 1. Snap the correct wall plug adaptor (North American twin blade or European model) onto the 24V power supply that came with Cognito. 2. Plug the barrel connector into the DC IN port on the rear of the console. 3. -
Page 8: Connecting To The Lights
Connecting to the Lights 1. Plug the male end of an XLR cable into DMX Output A (Cognito Starter) or two XLR cables into DMX Outputs A and B (Cognito Pro). 2. Plug female end of the XLR cable to the DMX distribution or directly to the dimmers and lights you wish to control. -
Page 9: How To
How To... How to Get Help 1. Press the Help button to the right of the screen to get context- sensitive help overlays. 2. Amber overlays will point out and describe different controls on screen. You can continue to operate the console as normal. As the screens change, the overlays may update to show new controls. -
Page 10: How To Open A Different Show
How to Open a Different Show Each time Cognito starts, the last show is automatically loaded. To create a new show, or restore a different show: 1. Press the Power Button 2. Press Setup 3. Press Show File 4. Choose from the options to create a new show, restore a backup, or restore a previous show. -
Page 11: How To Patch A Light
How To... How to Patch a Light To patch a light you must know the light’s manufacturer, its model type, its operating mode, and its DMX start address. Select the position in the Fixture Grid where you wish to patch the light. -
Page 12: How To Set Intensity
NOTE You will find many generic color-changing LED lights under the Manufacturer "Generic". Generic is at the top of the alphabetically sorted list of manufactures on the left hand side for convenience. To patch several lights of the same time at the same time, select multiple ... -
Page 13: How To Set A Color, Position Or Shape Attribute
How To... How to Set a Color, Position or Shape Attribute As well as Intensity, the CONTROL task will display up to three other attribute families depending on the capabilities of the selected light. Only attributes supported by the selected light are shown. Select a light in the Grid... -
Page 14: How To Set An Effect
Touch Shape to adjust attributes that affect the light’s beam, such as gobo wheels and rotation, barrel zoom, and shutters. Wheels : Select Wheels to access attributes supported by the light. Libraries : Recall previously user-recorded shape libraries. NOTE There are Advanced tools for each of Intensity , Color... - Page 15 How To... 4. After setting an initial value, touch Effects then “New Effect” 5. The available effects will be shown. Select the one you want. Use the wheels to change how the lights behave. Some of the effect attributes may include: Rate : Affects the speed of the effect.
-
Page 16: How To Record A Memory
How to Record a Memory After setting the scene you want by giving lights an Intensity setting their Color, Position or Shape attributes you may want to record the look to a Memory for later recall. 1. Touch the Record icon to open the RECORD tasks. -
Page 17: How To Record A Cue
How To... NOTE The next time you press Record, the Record Memory button will already be active and the next available empty Memory location will be highlighted in red. If you're happy with the default Name and timing, just press Done. After recording one Memory, to record the next Memory with default a ... -
Page 18: How To Playback Memories
NOTE If you don't edit the Cue Properties, default timing will be used. See Tasks Record Cue for more information of recording Cues. Once a cue is recorded, pressing the Record button twice in succession will record to the next available cue location, using default timings. - Page 19 How To... 2. Touch either L.Playback or R.Playback 3. The currently assigned Playlist's name will be on the very left of the green Toolbar. If necessary, touch Select Playlist from the right hand side of the Toolbar and select the desired Playlist. The Status Bar also shows which Playlist is assigned.
-
Page 20: How To Edit, Move, Copy Or Delete A Cue Or Memory
How to Edit, Move, Copy or Delete a Cue or Memory 1. Touch the Play icon to open the PLAY task. 2. Touch the L Playback icon or the R Playback icon to edit Cues or the Memory icon to edit Memories. 3. -
Page 21: How To Strike/Unstrike An Arc Light Or Reset A Moving Light
How To... 2. Touch 3. Touch Showfile on the left hand side of the screen. 4. Select “Save to USB”. 5. Press Exit to return to programming once the Save to USB icon changes from red to grey again. It's then safe to remove you thumb drive. NOTE You will not see Save To or Open From USB options until a USB thumb ... -
Page 22: What To Do Before Each Performance
Once the console shuts down, the Power Button should be pulsing blue indicating it's in ‘stand-by’ mode. NOTE You can also press the Power Button twice to shut down the console. If you want to escape from the Power Off screen and return to programming, you can press the Release Button What to do before each Performance Warn anyone on stage before that all lights may be turned off (blackout). -
Page 23: Cognito Hardware
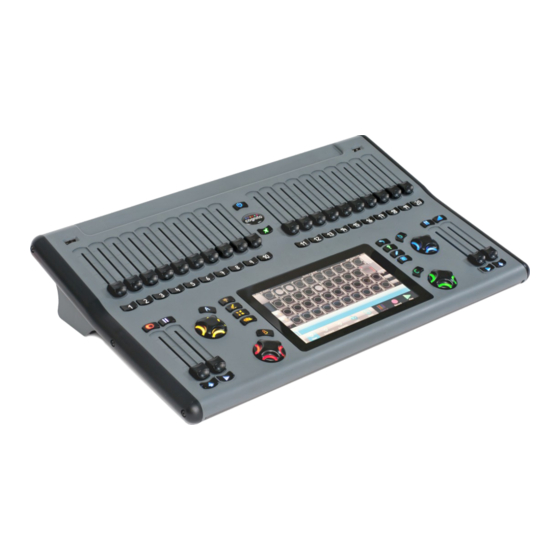
Cognito Hardware Cognito consists of two interrelated work surfaces. A 7” touch screen provides the main programming interface, while the surrounding backlit hardware controls, consisting of 24 sliders, four wheels and various buttons to provide programming support and playback control. Top Panel Rear Panel Data Connections... -
Page 24: Power Connections
Power Connections Cognito is designed to operate on a regulated 24VDC input received through the 2.5mm, center-positive barrel connector, or on Power-over-Ethernet as supplied by an IEEE 802.1af compliant source such an Ethernet switch. The wall transformer supplied with the Cognito may be connected to a mains voltage ranging from 90-240VAC at 50/60Hz. -
Page 25: Data Connections - Input / Output
Setup NOTE For quick shutdown, press the Power Button twice in succession. The • console will shut down after three seconds. Should the console become unresponsive, press and hold the Power Button • for six seconds to force the console to power down. Data Connections - Input / Output See Rear Panel in Hardware Overview... -
Page 26: Dmx512 Input
DMX512 Input The DMX512 Input allows Cognito to receive DMX from another source to run Memories and Actions. See DMX In in Show Control. Network DMX Cognito also supports DMX-over-Ethernet protocols. These protocols transmit the same DMX information as the XLR ports, at the same time, through the Ethernet port. -
Page 27: Db9 Connector
Setup Midi Show Control MIDI Show Control (MSC) commands can link two Cognitos together so that a Go on one desk triggers a Go on the backup console. Many other lighting console manufacturers and other show control devices can send and receive MSC. See MSC - Midi Show Control. -
Page 28: Sliders
Contact Closures The Contact Closures are enabled on Pro models. The same DB9 port provides three dry contact interface to trigger Memory bump buttons. NOTE: You can add up to 16 Actions to any Memory to perform many different functions from running a cue, disabling outputs to even shutting down the console. -
Page 29: Grand Master And Dead Blackout
Setup Set this way, when you are in the SELECT task, the Pin Button is red and Slider 1 controls Light 1's intensity, and so on. If there are more than 20 lights in the SELECT view, use the Left and Right arrows on the touch screen to page to the desired light. -
Page 30: Memory Master And Memory Black Out Button
When pressed, the Dead Black Out button will flash red and all lights will go dark (output intensity falls to zero percent). The intensity levels on the touch screen will be show with a red line above their values. The Grand Master level will turn red and read [DBO]. Press the button again to restore lights to their previous intensity. -
Page 31: Left And Right Playback
Setup When pressed, the Memory Black Out button will flash red, and all lights being played back within Memories will go dark (output intensity goes to zero percent). Press the button again to restore lights to their previous intensity. If you set a Memory's Priority to 2, intensity levels from that recorded (and active) Memory will not be affected by the Memory Master. -
Page 32: Attribute Family Shortcuts
Attribute Family Shortcuts Immediately to the left of the touch screen are four attribute family shortcut buttons. Intensity Color Position Shape Whenever a light is selected, these buttons act as shortcuts to the related CONTROL tasks. Not all lights support all attributes. Only the buttons for attributes supported by the selected light will be active, as shown by the button’s backlight. -
Page 33: Release
Setup The buttons are backlit when a given function is available, and flash when that function has been selected. Release SELECT or CONTROL, pressing the Release button progressively reverts or clears any changes made to the lights, in the following order: revert a selected light to its last state;... -
Page 34: Record
Record Press the Record button once as a shortcut to RECORD. If Memory was the last recording method used, press the Record button a second time to record the current stage look into the next available Memory. If Cues was the last recording method used, press the Record button a second time to record the current stage look into the next available cue. -
Page 35: Pin Button And Pin Crossfade Timings
Setup move the light using fine control, instead of full degrees. On color wheels, holding down shift while rolling the wheel may give you split colors. Similarly, you may adjust cue times in tenths of a second, instead of full seconds. When in CONTROL | WHEELS, use Shift in combination with the ABCD buttons to quickly set the attribute associated with a particular wheel to its... -
Page 36: Usb Ports
USB Ports There are a total of four USB ports on the console: two on the top surface, and two on the rear panel. Any port may be used for a mouse, keyboard or USB thumb drive. The top ports are also suitable for a USB-powered work light. NOTE The USB ports are fully functional, including charging, even when Cognito ... -
Page 37: Setup
Setup When used on DMX-only lighting systems, Cognito should require little or no configuration to start controlling lights. On Ethernet-based networks, some changes may be required to match an existing network. SETUP allows certain defaults to be changed to personalize the console to match an operator’s style or preferences. -
Page 38: System
System System preferences are divided into General, Display, Time Zone, Astronomical and Advanced sections, along with the following options: General Sliders Always Run Memories By default, sliders raise and lower the intensity of the lights in the Light Grid, and only play back Memories when PLAY is active. - Page 39 Setup Language Allows you to change the user interface language. A reboot will be necessary. Set Time Button Allows you to manually set the date and time on the console. Touch the upper half of the screen (background will turn red), then use the wheels to set the date.
-
Page 40: Display
Display LCD Brightness Valid backlight brightness levels are between 5% and 100%. When the screen saver is active, the backlight is lowered to 20% of this value. External Disaply Mode Choose the correct resolution for the monitor connected to the back of Cognito or choose Off. -
Page 41: Astronomical
Setup Region Choose from a list of zones, regions or cities, dependent on the Continent selection. The selection sets the time zone Cognito uses when displaying time, either as set by the user or as retrieved from an Internet time service. The Region also determines whether or not Cognito will apply Daylight Savings Time as required. -
Page 42: Network
a Cue or Memory. If more than one Playlist is in use at one time, this feature records updates to that Playlist without including information from other Playlists or active Memories. Network NOTE Write down your existing settings and values before making any ... -
Page 43: Input / Output
Setup Input / Output This option accesses four pages of settings for the console. NOTE: Cognito PC shows only two because of hardware only available on the console. See Cognito Hardware Data Connections for a full description of the I/O connectivity and functionality including 5-Pin DMX512 out of the back of Cognito, Network DMX, DMX512 Input, Serial RS232 control, Contact Closures and MIDI Timecode/MIDI Show Control. -
Page 44: Wall Station Mode
You can add up to 16 Actions to any Memory to perform other functions such as going to cues or disabling outputs etc. Wall Station Mode Pressing the Power button once, then touching Lock will turn the touch screen into a screen saver, virtual button/slider station or into a dedicated Playlist playback. -
Page 45: Playlist
Setup NOTE If you forget your password, contact Technical Support. Selecting Wall Station mode also affects the response of Cognito's hardware. In Button Station mode the Bump buttons below the sliders on the console will behave the same as the virtual icon ‘buttons’. In Playlist mode, the left GO button will also trigger the next cue in the Playlist. -
Page 46: Button Station (And Slider)
Button Station (and Slider) This option turns the Cognito into a virtual button/slider station. The number of Memories shown, the Memory Page associated with those buttons and password protection may be set. Once the parameters are set, touch the Lock icon to enter station mode. -
Page 47: Logo
Setup NOTE The on-screen icon reflects the operating mode of the bump button associated with each Memory. Single dot means the icon will act as a momentary. A slot indicates the icon will behave as a toggle. Three dots indicate the icon belongs to a radio group. -
Page 48: Software
Software Information is shown on the software version being run by the console as well as the current authorization level and Fixture Definitions installed. Pressing Shift prior to touching SOFTWARE will display a more detailed list of software, hardware and library version numbers. Copy Logs to USB Should you require support and you are asked to provide the operational and error log files, this option allows you to save these logs to a USB drive. -
Page 49: Obtaining And Applying Fixture Library Updates
Setup 5. Touch Choose a File. The filename of the update will be shown. If more than one update is present on the USB drive, then a list of releases will be shown. Use the red wheel to choose the release you wish to install – typically the one with the most recent date will be shown at the top of the list. -
Page 50: Show File
To apply the fixture library update 1. Use any computer to unzip the fixture update file to the root directory of a USB drive. The filename will be Cognito2Fixtures-xx-xxxx.CogFxd (or CognitoFixture-<date>.CogUpd for the original Cognito console). 2. Plug the USB drive into any of the USB ports on the console. 3. -
Page 51: Save Show To Usb
Setup Save Show to USB This button is only shown when a USB thumb drive is present. Touching this button copies the current show to the USB drive using the same name. The show that is open for editing is still the local one on the console. Create a New Show Clears the patch and all playlists and memories. -
Page 52: Delete A Show File
continue editing or adding to the new show with the assurance you have a copy of the original show to revert to. During longer productions you may want to do this every day of rehearsals. i.e., Othello (Monday); Othello (Tuesday) ... Delete a Show File Cognito has ample room to store show files with different names, but occasionally you may want to clean things up to free up space or just make the list of shows... -
Page 53: Tasks
Tasks Task Oriented Navigation The touch screen has four distinct displays, each corresponding to a specific programming task: SELECT, CONTROL, RECORD and PLAY. Each task is shown on the Task Bar at the bottom of the screen. Enter a task screen by touching its icon. -
Page 54: Select
SELECT SELECT is used to choose lights for programming. Pick lights by touching them individually, multi-selecting with the Shift key, or by using Groups. SELECT also accesses tools to patch lights into the Fixture Grid, set each light’s DMX start address, label individual lights and, optionally, associate a light with a specific gel. -
Page 55: Screen Navigation
Tasks Screen Navigation Status Bar Across the top of the screen in every task is the status bar. It shows: 1. On the very left, the level of the Grand Master which inhibits all intensity levels including levels of captured lights, from Playlists and any Memory with a Priority over 2. -
Page 56: Navigation Icons
Navigation Icons On either side of the main display are navigation icons. Not all methods of navigation are available on all pages. Icons are grayed out when not in use. The Left and Right Arrow icons allow you to reach additional pages of lights, Memories or swatch colors, for example. -
Page 57: Select
Tasks The Number icon box located below the Right Arrow reports how many lights are currently selected. If only one light is selected, its Fixture number will be shown with a number sign (for example "#1"). If more than one light is selected the box indicates how many light are selected (example "4"). - Page 58 Type The Type tool allows quick selection such as All Lights, No Lights or by fixture types. Cognito automatically creates Standard groups of identical lights, as the lights are patched into the Fixture Grid. Tools These tools allow for dynamic selection of lights based on the current state of the system.
- Page 59 Tasks Often when doing a rotating breakup gobo on the stage you might set them all rotating at the correct speed clockwise, then select the odd ones and change their direction to counterclockwise. Randomize The order in which you select lights or the order they were originally selected before recording a group is retained when using a group.
-
Page 60: Light Grid
Light Grid By default, SELECT displays your lights. The Grid consists of cells, each one representing a single light in the show. Each cell can have varying amounts of information depending on the zoom level describing the current state of that light. -
Page 61: Double Tap To Set Intensity
Tasks selected and Information is activated, this number changes to the light’s DMX start address. With a light or multiple lists selected, pressing will show more detail on what is controlling the lights' attributes. The color used to display the light's intensity also provides information about where it was set from or why it changed. -
Page 62: Settings & Patching Lights
This is handy because you can, for example, stay in CONTROL POSITION using NEXT and PREV to bounce through your lights, turning them on and positioning them one at a time without having to go back to CONTROL INTENSITY. Settings & Patching Lights The Settings tool allows you to assign specific lights (by model) to cells in the SELECT grid, and to set or “patch”... - Page 63 Tasks 7. Touch Apply . You will be taken back to the SELECT TYPE screen. 8. If desired, touch Settings again and set other Properties the light. Light Type Most color-changing-only lights will match one of the Generic profiles. Lights with position or shape attributes require specific profiles. If a light doesn’t appear in the Light Type, or a required operating mode is missing, email a pdf of the light’s manual to fixtures@pathwayconnect.com to request...
- Page 64 DMX Address A grid of DMX start addresses is shown, in blocks of 32 DMX slots. The DMX slot number is shown in the top left hand corner of each cell. The larger number in the middle of each cell is the Light's number. At the bottom of the cell is the attribute controlled by that slot, such as intensity, color, pan, gobo, etc.
-
Page 65: Copy Attributes
Tasks Choose the correct part, then touch another cell specifying the other part(s) as needed. Multi-part Fixtures Some lights support more than one intensity attribute. These lights will appear in Light Type as ‘Part 1’, ‘Part 2’, and so on, or as ‘Head 1’, ‘Head 2’ etc. In most cases, each part should be patched to consecutive, contiguous blocks of DMX slots. -
Page 66: Control
6. Press EDIT to finish the copy command. NOTE Natural Language Control makes this Copy command very powerful. Cognito can copy attributes that function very differently in one light to another. For example, if you mix a color in RGB, you can copy that to a light that uses a color wheel. Cognito will do its best to find the closest matched color in the color wheel. -
Page 67: Control Intensity
Tasks , it shows the color of the Light, where the Light is pointed and any shutter cuts that may be set. If you have multiple Lights selected, the mimic shows the state of the first Light in the selection set. There are also Fanning, Flip Highlight and Lowlight tools that appear to the left and right of the mimic. -
Page 68: Control Color
Control Color Different lights may have different color abilities, such as color wheels or scrollers. Only abilities specific to the selected light are automatically added to the tool bar. Wheels: Allow you to choose a Color Space and set RGB (default), CYM or color values. -
Page 69: Color Spaces
Tasks Effects: Shows any currently active effects on a secondary tool bar. Intensity must be higher than zero percent, with a color selected, for effects to be visible. Touching the New Effect icon displays a list of available Color effects. Color Spaces Natural Langue Control allows you to choose and fade in different color spaces: RGB - Red Green Blue - native to most LED lights... -
Page 70: Native Hsi Dmx Mapping
Native HSI DMX Mapping Although Cognito’s Natural Language Control allows you to mix colors in multiple color spaces (CMY, RGB, HSV) and specify a white point with Color Correction, most lights only utilize either RGB or CMY on the DMX wire. Some manufacturers have defined fixture profiles that expect to see Hue and Saturation in DMX slots. -
Page 71: Control Shape
Tasks Libraries: Recall custom positions saved using RECORD | LIBRARY | POSITION. Position Libraries are specific to the lights in use when recording the position. Updating a Library will automatically update any Cues and Memories that use it. Joystick: Adjust a light’s position relative to its current position. The further from center you touch, the quicker the light will move. -
Page 72: Advanced Attribute Control
Effects: Shows any currently active effects on a secondary tool bar. Intensity must be higher than zero percent, for effects to be visible. Touching the New Effect icon displays a list of available Shape effects. Advanced Attribute Control Each CONTROL attribute offers an Advanced tool. These tools – Desk Lock, Tech Lock, Attribute Default,... - Page 73 Tasks Desk Lock and Unlock can only be set from the console. The ‘locked’ intensity level is shown on the Information screen. Desk Lock Light: Available only from the Intensity tool. Freezes all attributes of the selected light(s). Individual attributes of the light may be changed and included in future cues or memories, as described above.
-
Page 74: Record
values (i.e., clear the color) and with some attributes successive presses will take the attribute to its extents. Releasing Attribute Control Releases changes made since the last RECORD action, to the chosen attribute of selected light(s). Advanced Release is an attribute-specific equivalent of the general Release button. -
Page 75: Record Memory
Tasks Record Memory Memory saves the current look into a slider. Memories are represented by rectangles across the top of the screen and are operated by the sliders. Any fader location may be chosen by touching it. The selected location is indicated by a red outline. -
Page 76: Record Cue
NOTE To quickly save a Memory, press the Record button twice to automatically record into the next available Memory fader, using default properties. To quickly designate a specific location, press the Record button then the Bump button of the fader where you want the Memory stored. - Page 77 Tasks By default, a Cue is recorded into the next available location, as marked by the green bar. If necessary use the icons to move the green bar. Touch the keyboard icon next to Name to label the cue. A number of timing options and other properties may also be set.
-
Page 78: Record Library
“Link” and “Follow” allow for the creation of loops that will play indefinitely. Press the playlist’s Go button to exit the loop and advance to the next cue in the playlist after the link. See Playlist as a Chase for additional dynamic playback options without using Follow and Link. -
Page 79: Record Group
Tasks Record Color Capture a light’s current color. Touch the Color icon on the tool bar. Select the record location. Name the color library, if desired. Touch the Done icon to record, or the Cancel icon to start again. The saved color may only be applied to the same light(s) in use when the library was recorded. -
Page 80: Rerecording And Inserting Cues
NOTE The selection order is also stored with the group, and is used when applying effects, Fanning and color rainbows. ReRecording and Inserting Cues Once changes are made to an existing cue, touch RECORD | CUE, then select the same cue location from the Playlist. The outline will turn red. If you press Done you will be offered three options: Replace Existing Cue... -
Page 81: Update
Tasks Insert New Cue After Existing Cue Records the current console ‘look’ as a new cue between the selected position and the immediately following cue. Inserting a cue will not affect adjacent cues. Update Existing Cue If you have selected to Record Only Change in SETUP | SYSTEM there is a fourth option presented to Update the Existing Cue. -
Page 82: Play
The Shift + Update combination may also be used to update Libraries, so that the revised Library will be used wherever it’s already included in a cue or memory. Shift + Record may also be used to quickly update values into Memories which are presently at full. -
Page 83: Play Memories
Tasks Play Schedule allows clock-based playback of Memories or Playlists and other Actions. Play Memories The Memories available for playback are shown across the top of the screen, as indicated by a label and a yellow level indicator. Changing Memory Pages Further Memory Pages are available for selection from the tool bar. - Page 84 timings, Memory Bump Buttom Modes Memory Priorities as desired then press Done Moving and Copying Memories Once in Edit, you may also rearrange the order of the Memories by drag-and- dropping the Memory to a new location. To copy the Memory, press and hold Shift prior to dragging the Memory to its new location.
- Page 85 Tasks Changing Memory Pages and Banking Within a Page From PLAY | MEMORIES you can freely change Memory Pages just by touching a new page in the green toolbar. Each Memory Page can have up to 400 Memories recorded in it and you can always Add another Memory Page.
- Page 86 Memory Bump Button Modes There are five different modes for Memory Bump buttons. They can be set when Record the Memory or by editing the Properties of a Memory in PLAY MEMORIES. The five modes are: The Memory is active only while the button is pressed. Momentary Press to recall the Memory.
- Page 87 Tasks Naming and Deleting Memory Page Rename a Memory Page 1. Touch More at the right end of the Memory Page bar. 2. Touch the Memory Page’s current name. Do not touch 3. An Edit Properties screen will open. Touch the keyboard icon next to the Memory Page’s name to enter a new name.
- Page 88 Airplane View in PLAY MEMORIES Similar to how pressing the Airplane in SELECT shows you banks of Lights, pressing Airplane in PLAY | MEMORIES shows you all 20 banks of memories on the current Memory Page and indication as to which are recorded and which are active.
- Page 89 Tasks Blind Memory Editing To make changes to a Memory while another Memory is live on-stage, select the desired Memory location. The outline will turn red. Then touch Edit in Blind. The display will change to the SELECT task, with a blue background to indicate Blind mode.
- Page 90 If you add more than one Action to a Memory, use the arrows to edit the additional actions. Press Done when you've finished editing the Actions. See also Contact Closures Memory Priorities When you edit the properties of a Memory, you can adjust its Priority which determines the pecking order of who 'wins' when multiple controls are attempting to set an attribute.
-
Page 91: Play Playbacks
Tasks Play Playbacks To change Playlists on a Playback press Select Playlist ... on the right of the toolbar. There you will be given the grid of all the Playlists in the show files. Touch one to select it. Once selected, you will see its name on the very left hand side of the toolbar. - Page 92 Once a Playlist is assigned to a Playback, further Playlists may be selected for that Playback without releasing the original Playlist, allowing more than two Playlists to be active at one time. To release a Playlist, press toolbar and hold Shift and Pause/Back above the appropriate Playback fader.
- Page 93 Tasks As the cue is running, a yellow bar shows its progress. Intensity, Color, Position and Shape timing is shown beside their appropriately colored clock icons. Amber, purple, green and pink bars show the relative placement of the cue timing. Both Playbacks may be used at the same time, operating different Playlists.
- Page 94 Pause/Back While a cue is fading, you will see . Pressing this will halt the fade. Press Go to resume the fade. If a fade is paused or complete the icon will be which takes you to the previous cue in 1 second. Release Turns off the Playlist using the time specified by Release Time in Options .
- Page 95 Tasks Name Touch the name bubble to change the name of your Playlist. Release Time Use the Blue Wheel or touch to type in a new release time. Shift Wheel changes of a second. This is the time the lights take to fade back to their other levels when you release the playlist.
- Page 96 a show. When a Playback is running a Playlist that is locked for editing, you will see the Lock icon in the status bar: After opening night, use Edit Lock to prevent any accidental changes. Reset On Release When this toggle is active, each time you release the Playlist, the cue pointer is set to the first cue.
- Page 97 Tasks Timecode Source Any Playlist can be synchronized to one of four clocks. Via the MIDI In port on the back of the desk you can set the Playlist to listen for External Midi Time Code or set the Playlist to use one of the three Internal clocks. Clock Shows you the current timecode for the selected source.
- Page 98 Learn TC Press this toggle button if you want cues to grab the current time and stamp the cue when you press the Go button. Even after you’ve “Learned Timing” on your show, you can select individual cues, press EDIT and tweak their time, perhaps just by a frame or two, until you get the timing perfect.
- Page 99 Tasks HH:MM:SS.FF This button allows you to specify what time the clock resets to when you press the Reset button. This option is not shown when the Source is External. Note that the Timecode tool is disabled when IS CHASE is set in OPTIONS.
- Page 100 Rate As mentioned above, cue timing is irrelevant when a Playlist is a chase. Each cue is now a step in the chase and a beat clock will advance from one step to the next automatically without the need for setting the Follow properties in each cue. Rate - The rate is measured in Beats Per Minute (BPM).
- Page 101 Tasks Chase Direction and Options This screen can adjust (in real time) how the chase is played back and may be a good screen to stay on when busking a show. You can build the chase steps in any order but alter how they hit the stage using this screen. Direction - The bottom four buttons change the direction of the chase, either Forward (top down), Reverse (bottom up), Bounce (down then up then down again) or Random.
- Page 102 time. If you set the Crossfade Time to 50%, it will take 0.5s to fade from one step to the next, hold that level for 0.5s then move on to the next. Hard/Soft - These are shortcut keys to set Crossfade Time to 0% and 100% respectively.
- Page 103 Tasks 4. To copy a cue, press and hold SHIFT prior to dragging it to the new location. 5. Press EDIT to complete the operation. Deleting Cues 1. Press EDIT 2. Touch on the left of the cue label to choose it for deletion. It will rotate vertically and DEL button will appear.
-
Page 104: Play Mixed Mode
3. The display will change to the SELECT task, with a blue background to indicate Blind mode. The clock on the status bar changes to ‘Blind’, followed by the label of the item being edited. An icon with a pin in the upper right corner of each cell indicates the light’s live state. -
Page 105: Play Schedule
Tasks Play Schedule Allows astronomical or clock based triggering of Action which can in turn run cues, play memories or automate other functions of Cognito. Two components make up event scheduling: the timing of the event, and the actions. Adding a Timed Event 1. - Page 106 Event Type None Event is disabled. Change Event Type to 'None' if you think you'll use the event in the future and want to keep it in your show file. At Time Set a specific start time of day for the associated action. Sunrise The associated action will begin at local sunrise, as determined by the astronomical clock setting under System Preferences.
- Page 107 Tasks Time or Offset You will either see a Time or an Offset based on the Type of event described above. Time Sets the time used by “At Time” to trigger the associated event. Use the red wheel to set the time by adjusting by minutes. Shift + the red wheel will change the time in seconds.
-
Page 108: Other Features
Other Features Pin Button Fader-based consoles, intended for dimmer control, often used the concept of preset control, particularly when the fades were operated manually. A look, or cue, would be active on the first bank of faders, while the next cue was set up on the second bank of faders. -
Page 109: Shift Key Magic
Shift Key Magic There are two Shift buttons on Cognito at the lower left and lower right. The Shift buttons may be used to select, or deselect, ranges of lights on the touch screen. Touch the first light required. Press and hold the Shift button, then touch the last light of the range desired. - Page 110 Other Features In SELECT, changes Arrow icons to Par Can icon. Par Left/Right Can icon moves the selection indicator to the next higher or lower light. Playlist Up In PLAY, jumps the screen to the top or bottom of the &...
-
Page 111: Info Screen
Info Screen If no lights are selected in the Fixture Grid, touching the information icon changes the light’s percentage intensity (normally shown in the lower left hand corner of each cell) to the light’s DMX start address. If the light is unpatched, the cell will gray out, and an exclamation point is shown instead of a start address. -
Page 112: Attribute
Other Features Below the Fixture Number, the following items are shown: Attribute Shows the attributes supported by the light, in the order of how they are patched within the light’s DMX footprint. Source Shows the name of the specific Playlist or Memory source of the existing attribute level. -
Page 113: Recorded Cues
Recorded Cues Shows the number of cues the light is used in. Can be used to identify unused lights. Recorded Memories Shows the number of memories the light is used in. Can be used to identify unused lights. Recorded Libraries Shows how many libraries have been recorded with this attribute. -
Page 114: Attribute Text Color Meaning
Other Features Attribute Text Color Meaning The color used to display an attribute’s value also provides information about changes made to that attribute. The colors related to Intensity changes are also shown on each light’s Intensity Indicator ring in SELECT grid. Color Attribute Condition Notes... -
Page 115: Flip
Flip Moving head lights can reach any point on stage with two (and sometimes more) combinations of Pan and Tilt. If your lights don’t move while they’re one, the automatic Move In Black feature of Cognito will set up your lights for you and you many never find the need for this new feature. -
Page 116: Highlight
Other Features Highlight The Highlight tool is often used in conjunction with NEXT and PREV to identify lights when a full look is on the stage already. When you turn on Highlight, regardless of the lights current intensity, it will be temporarily brought to full, it's color will be forced to white and if there are any gobos or shutters in the light, they will be opened. -
Page 117: Fanning
Fanning When you have a large rig of lights you often want to see them work with each other to create large, bold looks. Selecting lights individually and setting attributes manually, one by one, can be a tedious task. This tool in CONTROL WHEELS, makes setting attributes en masse a breeze. - Page 118 Other Features Remember that your selection order is maintained during fanning. Selecting Lights 1 through 10 is very different than selecting 1,10,2,9,3,8,4,7,5,6. Changing up the selection order can vastly increase your productivity and creativity with the same set of lights. (As an aside, the selection order is also maintained when you record Groups.
-
Page 119: Show Control
Show Control Actions Actions may be added to Cues, Memories, or Scheduled Events. Action are grouped by type including Playlist, Memory, Cognito, and Timecode: None : Event triggering is disabled. Default. Playlist : Triggers cue playback action, according to these further choices. Goto: Begins as a playlist at a specific cue, using the following: Playlist: Selects a playlist, by name. -
Page 120: Midi Timecode
Timecode : Used to control the Internal Timecode clocks. Reset Timecode: Uses the Playlist's reset time as specified by Pause Timecode: Stops an Internal Timecode clock. Start Timecode: Starts an Internal Timecode clock. Clock: Specified Internal 1, 2 or 3 for the three commands above. Midi Timecode Pro Cognito system can receive MTC from an external source like a Media Player and synchronize cues to trigger at specific times. -
Page 121: Msc - Midi Show Control
Show Control Once your external media sends timecode to Cognito, follow the instructions in Playback with Timecode in the Play Task section. MSC - Midi Show Control The following functionality is only available for the Pro models. Cognito can receive and act upon standard MIDI Show Control (MSC) strings sent by show control devices, including sound consoles. - Page 122 Device_ID Command Format Command Data All numbers are octet, hexadecimal values, sometimes denoted by the “H” symbol. F0 7F: indicates start of System Exclusive (sysex) real-time command Device_ID: specified which connected device should execute the command. Cognito uses 01 as its Device_ID 02: indicates ‘sentence’...
- Page 123 Show Control 02 [STOP] Command Data Cue Number <optional> 00 <delimiter> Playlist <optional> Halts all currently running transitions in the current Playlist. Equivalent to pressing the PAUSE button. A cue number may be specified, in which case only the specified cue will be halted. 03 [RESUME] Command Data...
- Page 124 Data Format Cue numbers and Playlist numbers are stated using the hexadecimal equivalents (30H through 39H) of the ASCII values for numbers 0-9 (zero through nine). MSC allows the use of point cues, using the hexadecimal value (2EH) for the ASCII decimal point character used to mark subsections.
-
Page 125: The Api - Application Program Interface
Show Control (SysEx (Cognito (Lighting STOP (no data) header) device ID) command) The API - Application Program Interface You can control many of the features of Cognito from external devices like show controllers or PCs. The connection may be either through Telnet (Ethernet) or Serial RS232... -
Page 126: Serial Connectivity
API.SetLevel('fixture_string', 'level_string' [,fade_time_seconds]) API.SystemRestart([<maintain state>true|false]) API.SystemShutdown() API.WriteLogMessage('message', 'category', severity_1_to_10) All commands, including item names in the command string, are case sensitive. A carriage return <CR> must be sent to execute the command. Examples Execute cue 4, on ‘Playlist 1’, using any programmed fade, wait, and follow times. API.PlayListGotoAndExecuteFollows('Playlist 1', 4) <CR>... -
Page 127: Telnet Connectivity
Show Control The other pins are not used. If controlling Cognito from a computer via RS232, a null modem serial cable is needed, with Pins 2 and 3 reversed at one end. Connection speed and attributes are: 9600 baud, no parity, 8-Bit, 1 stop bit, no flow control (9600, N, 8, 1) All commands, including item names in the command string, are case sensitive. -
Page 128: Contact Closures
Open a Telnet connection from the computer to the Cognito's IP address on port 11123. For example, if Cognito's IP address is 192.168.1.116, the following would be sent from the computer’s command window: telnet 192.168.1.116 11123 The use of a Telnet program with scripting capabilities is strongly recommended. -
Page 129: Dmx In
Show Control DMX In The DMX input port can receive DMX512 levels from another controller and use that information to trigger Memories. You can select which Memory Page the DMX triggers and the starting Memory number. Slot #1 from the DMX will control the first memory and subsequent memories will be controlled by the following DMX slots. - Page 130 5. Choose either Slider or Button. Slider control will map the incoming DMX value to the level of the Memory Button mode will hold the button down for any non-zero DMX level. It's best to keep the Memory Bump Mode "Momentary" when using this mode.
-
Page 131: Natural Language Control
Natural Language Control This essay explains the core technology used in Cognito's internal 'fade engine' that makes DMX512 and runs the lights and the end devices at the bits and bytes level. Reading this and understanding Natural Language Control is not necessary to operate the console, but it will give you an appreciation of how lighting control has advanced over the years. - Page 132 fixtures is a welcome addition to the designers' arsenal. Cognito embraces that challenge and makes programming today's complex lighting systems simple again. Let's go back to the advent of computer-controlled lighting to examine the issues that plagued communication in the theatre. Before computers entered the theatre, the most popular dimmer controllers were known as piano-boards.
-
Page 133: Talking To The Lights With Bits And Bytes
Natural Language Control controller that has been accepted on Broadway since has used core concepts introduced by Light Palette. With the advent of intelligent lighting, so many more parameters have entered the equation that the language conventions which have evolved are discordant and technologically inadequate. The language must be overhauled. -
Page 134: Talking To The Lights With Natural Language Control
Talking to the Lights with Natural Language Control Natural Language Control's objective is to provide an intuitive programming experience and a versatile control system that when played back can actually provide the operator information about the system it is controlling. Natural Language Control does this by porting the control to an 'abstract' layer. -
Page 135: Pan And Tilt Example
Natural Language Control recalled or GO is pressed to start a cue (and not before). That means that the protocol, the mode, the model or the manufacturer of the lighting fixture can be changed at any time. Moreover, each and every light, regardless of who makes it, appears similar to the user, giving a more consistent experience when programming the console. - Page 136 Now the numbers you just figured out for the first light mean nothing to this one. Worse yet, if you grab them both and pan them in tandem, you would get completely differing results: The angles of pan are completely different. The beams of light are not even close to parallel.
- Page 137 Natural Language Control units of degrees. Therefore, when you talk to the light, you tell it to pan so many degrees: Forty-five degrees is forty-five degrees. This makes controlling a rig that is made up of different types of lights easy to communicate with and easy to understand. Since Natural Language Control doesn't figure out DMX values until the very last second, it can also alter the way in which the conversion is done at run-time, producing new and exciting methods of transition during the fade from cue to...
- Page 138 Moving lights achieve movement by physically moving the source with two motors housed within a yoke. This Pan/Tilt relationship equates to a polar coordinate system using azimuth and elevation. When you pan more than you tilt the light will move in an arc: We have become used to this characteristic movement of intelligent lights.
-
Page 139: Zoom Example
Natural Language Control Cognito has a Positon attribute called P/T Mode that alters the way fades are calculated when you advance from one position to another. If you record a memory or a cue using specific Pan and Tilt values and specify the P/T Mode to be Linear Movement, the end points of the move do not change, but the intermediate steps of Pan and Tilt needed to get from the first position to the second position do change. - Page 140 All you have to do is turn them on and Cognito defaults them to the same value of 20°; they're already the same size! Your rig looks consistent and symmetrical with no undesirable surprises and no need for manual re-translation. If you want them to match your 19°...
-
Page 141: Shutter Control Example
Natural Language Control To be fair, Cue 2 could not have been written using the light on the right. This cue must have been recorded using a light that can achieve 70°. Even though in this example it was played back using a 50° light, it does not change the cue. If you later swapped it back to a 70°... - Page 142 The oval in the image above shows how the light would fall on stage if the fixture was hung in a typical Front of House position. You can imagine that trying to make shutter cuts can be a time consuming effort of hunting and pecking for the right channel or more likely, pair of channels.
- Page 143 Natural Language Control manipulates motors 1a and 1b in unison to Thrust the shutter into the aperture of the fixture. The yellow wheel above that adjusts the relationship between those two motors, giving you one handle for controlling the Angle of that shutter. If you rotate the yellow wheel to the right, the shutter rotates right: Note that the Thrust is measured in percentage.
-
Page 144: Gobo Control
position in the aperture and degree units to describe the angle, you can copy the shape of a shutter cut from one type of moving light with one set of physical constraints to another with predictable results. In the example below, the value of Top Thrust is set to 50% and the Top shutter is cutting the beam in half. - Page 145 Natural Language Control Different manufacturers use a variety of control channels to achieve all of these possible behaviors. Some use lots of channels which surprisingly makes the control of the gobo wheel easier, and other insist on bunching up behaviors on only a couple of channels.
- Page 146 (yellow wheel), Gobo Select (red wheel), Gobo Mode (blue wheel) and Gobo Index (green wheel). And, as well as showing "Dots" as the current selection, you can see that moving one 'tick' forward would give you "Pinwheel" and one tick backwards would give you "Open": To rotate the Dots gobo continuously in the clockwise direction, the first handle must be placed at 60%.
- Page 147 Natural Language Control Changing the direction of the rotation on a DMX based system means you must travel the second handle through a bunch of values that are of no interest to you. The gobo would slow down, then stop, then change direction and speed up again as you adjust the control channel.
-
Page 148: Conditional Abstract Attributes
Conditional Abstract Attributes Automated lights are riddled with control parameters. In earlier days, many fixture manufacturers combined DMX512 channels to achieve separate effects in an attempt to prevent the fixture from consuming an outrageous number of channels. A common practice is to use one channel as a mode channel to modify the behavior of another. - Page 149 Natural Language Control appropriately as to what it is doing at present based on the state of other attributes. Complex gobo wheels are a good example of how this is put to use. DMX512 mapping and the number of DMX512 slots used by the light have nothing to do with how the controls are laid out to the user.
- Page 150 Shown on the red wheel is Gobo 1 Wheel Speed which has been set to 10 RPM, and green wheel has Gobo 1 Mode set to Index preventing the individual gobos rotating. This is where Natural Language Control keeps you out of trouble by only showing you what's possible.
-
Page 151: Attribute Substitutions
Natural Language Control Cognito does keep the fact that you were rotating the gobos at 5 RPM, but if you set the Mode (blue wheel) to Index and Cognito will remember that Index was last set to 45° and you're back where you began: See CONTROL | COLOR and Color Correction for examples of working with lights with various methods of reaching a white point as color saturation approaches zero. - Page 152 Control. The real power of Natural Language Control can be seen when you start using similar, but not identical attributes and how Natural Language Control works with them. Color is a great example. There are three primary automated color systems in use today; Subtractive Color Systems like CMY, Additive Color Systems like RGB (or RGBA etc.) and Fixed Color Systems that use gel (like scrollers) or dichroic glass (like color wheels).
- Page 153 Natural Language Control By the way, the color value is not stored as Slot 5, it is stored as "Yellow" so that if it's ever applied to a different light with a different wheel (or mixing system), it would produce the correct or near correct color again. Gobos are also problematic when using stock fixtures.
-
Page 154: Phantom Abstract Attributes
Phantom Abstract Attributes Natural Language Control's ability to provide additional attribute controls the fixture manufacturer didn't allow for makes controlling some types of lights more convenient. An ideal example of this is RGB LED fixtures. Traditionally, the only controls the users can adjust are Red, Green and Blue. Distinctly absent is an Intensity attribute. - Page 155 Natural Language Control Attribute, Natural Language Control can automatically 'tune' your white or Correlated Color Temperature (CCT) when you're not mixing rich colors. Ignoring brightness for now, there are two parameters that define the color. Saturation is the amount of color or perhaps the distance from white, and Hue is the dominant wavelength of the light defining its color.
- Page 156 Equally you could run the cues again with the CCT set to 3200K and it might look like this: Another option offered by Natural Language Control is the ability to automatically lower the CCT when you dim the lights. This is called Dim-To-Warm. When tungsten lights are dimmed, they cool off (which makes the light 'warmer' or more red).
-
Page 157: Color Spaces
Natural Language Control Color Spaces Complimentary Color Spaces are basically different methods used to describe the individual components that make up what the eye perceives as color. None of them are right or wrong. They are individual and each one has its purpose. The selection of one over the other is primarily a matter of choice. - Page 158 When you start with white light and introduce CMY flags, midway between Cue 1 and Cue 2, most of the dichroic glass is in the lens tube sucking most of the color (and intensity) out of the light and you 'dip' toward mud. Regardless of what color system your fixtures use, if you fade in the HSV color space from, say, purple to green where the saturation is pretty much unchanged, the only attribute that moves is Hue.
- Page 159 Natural Language Control This sort of fade avoids white and mud and looks more natural on stage. Note that the Natural Language Control decides to fade clockwise around this color space. That is because going through blue seems natural when going from purple to green.
-
Page 160: Conclusion
Conclusion For years the language and control structure used to control lighting systems has been imposed upon designers by the equipment manufacturers. This was not conducive to an enjoyable experience for anyone involved in the process. Natural Language Control defines a common language that designers and programmers can share and the complex processes of translating this language into DMX or any other control protocol is taken care of for you. -
Page 161: Index
INDEX copy cue to memory......98 copy memory to cue......98 about light..........106 crossfade time........93 above 0%..........51 cue............11, 12, 70 actions...........83, 115, 123 cue list........... 25 advanced attribute control....61 cue numbering........74 airplane..........49, 79, 82 cue timing..........7 0, 96 all lights.......... - Page 162 follow............ 70 lock............32, 61, 62, 65, 66, lock playlist..........88 gel 56, 62, 72 lock screen..........38 get time..........32 logo............38 go 87 logs............42 gobo............65, 140 loop............70 goto cue..........96 lowlight..........110 Grand Master........23, 49, 84 lua 121, 122, 123 grid............
- Page 163 Warranty PoE............1, 18 sliders............ 22, 69 polar movement........64, 131 sliders always run memories....32 popup lists..........28 smart update......... 75 ports............1 SMPTE timecode........90 position..........64 sof/hard..........93 pots............22 sofware..........42 power off..........15 solo............93 power supply.........1, 18 source............106 preset desk..........103 spin gobo wheel........
- Page 164 wall station mode........38 wheel banks.......... 26, 28, 104 zoom............. 65, 135 which part..........56 zoom screen.......... 49 work light..........30 wrench..........49 # Selected Lights........49...
-
Page 165: Warranty
Warranty Limited Warranty Pathway Connectivity warrants to the original purchaser or retail customer that, for a period of three years from the date of shipment, its products will be free from defects in materials and workmanship under normal use and service.
Need help?
Do you have a question about the Cognito 2 and is the answer not in the manual?
Questions and answers