Table of Contents
Advertisement
Quick Links
Advertisement
Table of Contents

Related Manuals for FDomes GLAMPING 20

Summary of Contents for FDomes GLAMPING 20
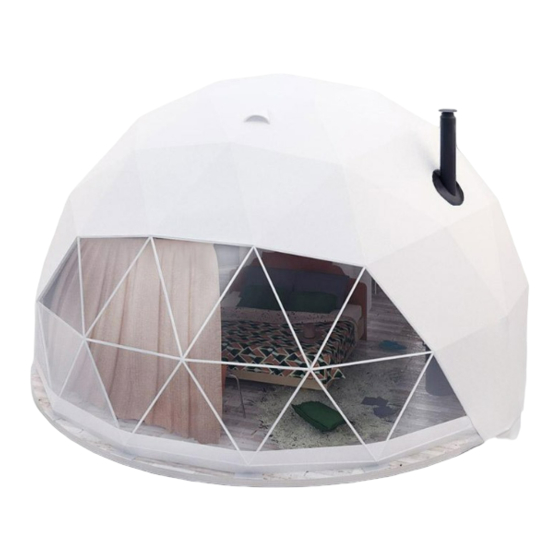
- Page 1 ASSEMBLY MANUAL GLAMPING 20, 30, 40, 50...
-
Page 3: Table Of Contents
CONTENTS FEET AND METAL BAND INSTALLATION GUIDE PVC GROUND MEMBRANE INSTALLATION MANUAL FRAMEWORK ASSEMBLY MANUAL CAMPING DOOR ASSEMBLY MANUAL FG20 CAMPING DOOR ASSEMBLY MANUAL FG30/40/50 GLASS DOOR / ALUMINUM DOOR FRAME ASSEMBLY MANUAL FG30/40/50 OUTER MEMBRANE & TRANSPARENT FRONT ASSEMBLY GUIDE PORTHOLE WINDOW ASSEMBLY MANUAL SOLAR FAN ASSEMBLY MANUAL STOVE &... - Page 4 TO BUILD THE FG20, FG30, FG30, FG40, FG50 YOU WILL NEED: • 4 people, • 3 ropes - 15 - 20 m long each, • a ladder of a minimum 4 m height, • a protective ground sheet at least: 6 x 4 m •...
- Page 5 OPTIONAL: NAME OF THE COMPONENT QUANTITY PHOTO SCREWS, ANCHORS OR PINS SCREWS, ANCHORS OR PINS TO FIX TO FIX THE FEET (OPTIONAL, THE FEET (OPTIONAL, DEPENDING DEPENDING ON THE DOME ON THE DOME CUSTOMIZATION) CUSTOMIZATION) WASHERS FOR FEET MOUNTING BOLTS (OPTIONAL, WHEN FEET 60 PCS SCREWS APPLIED) M12/60 SCREWS FOR THE...
- Page 6 LIST OF THE SUPPLIED COMPONENTS FOR THE PVC FLOOR ASSEMBLY: NAME OF THE ELEMENT QUANTITY PHOTO BLACK PCV MEMBRANE (HARD) VELCRO TO STICK G20 = 16 M G30 = 19 M ON THE METAL BANDS G40=22 M G50 = 25 M (SOFT) VELCRO TO STICK ON THE G20 = 16 M G30 = 19 M PCV MEMBRANE...
-
Page 7: Feet And Metal Band Installation Guide
Measuring tape, cord, chalk/marker (not included • 30x washers in FDomes Delivery) STEP 1 Mark the spot where the center of the dome is to be. Draw a circle with a radius consistent with the table below. It is best to make a permanent mark where the center is (with a marker or drive in a screw) so that you know which spot to go back to when double checking your measurements. - Page 8 STEP 2 Place the feet and metal bands on the perimeter of the circle which you have just drawn. Define the positions of the door and the transparent front window. Drawing 2 Drawing 3 Reference point for radius measurement Feet and baseplates P3 Entrance P4 Entrance Chalk line drawn...
- Page 9 STEP 3: Screw the feet and the metal bands together, placing them precisely along the previously drawn perimeter line. Align the plates together with the foot, push the bolt in from the outside. From the inside, place the washer first and the nut second.
- Page 10 STEP 4: Double check the positioning and the radius. Readjust the feet and metal bands. STEP 5: Tighten the nuts on the bolts which you have just installed.
- Page 11 STEP 6: Using the anchor bolts (if ordered) fix the feet to the deck / concrete slab. Pick two of four available holes and drive the screws into the deck / concrete slabs (two screws per one foot). CONGRATULATIONS! YOU ARE DONE WITH THE DOME’S FEET AND METAL BAND ASSEMBLY!
-
Page 12: Pvc Ground Membrane Installation Manual
STEP 4: Flip any excess material over the edges of the base plates If you will be installing the FDomes Interior Modules, - make sure it is evenly distributed around the perimeter of carefully pierce holes to let the media connections the dome. - Page 13 STEP 5: STEP 6: Take out your connections from underneath the membrane. Connect the male (hook) and the female (loop) sides of the velcro tape together. STEP 7: STEP 8: While standing on the inside of the dome’s perimeter, Peel the paper off from one side of the now connected gently flip the excess membrane off the legs and base velcro tape and place it along the bottom of the base plates, fully exposing them.
- Page 14 STEP 9: STEP 10: Peel the paper off from the other side of the velcro tape Wherever the bolts are an obstruction, cut through and glue the membrane right on. the membrane to let them through. NOTE: There is no need to pull the membrane tight, especially when you are installing it in warm climates.
-
Page 15: Framework Assembly Manual
FRAMEWORK ASSEMBLY MANUAL Drawing 4 Assembly diagram (Overwiev) Drawing 5 Dome framework map... - Page 16 The drawings below show a layout of the framework and the possible positions of the door in relation to the transparent front window. Door v1 Door v2 Drawing 6 Transparent Possible door positions STEP 1 Build the fist level of the framework according to the map presented below. Remember to unscrew the nuts of the screws connecting the feet with the metal bands.
- Page 17 Drawing 8 Drawing 9 Finished knot - view from Finished knot - view from the outside to the inside the inside to the outside STEP 2 Build the second level of the dome according to the map below. Drawing 10 Map of the framework’s 2nd level with the pipes’...
- Page 18 STEP 3 Build the third level of the framework according to the map below. Drawing 11 Map of the framework’s 3rd level with the pipes’ markings STEP 4 Build the fourth level of the framework according to the map below. Drawing 14 Map of the dome’s 4th level with the pipes’...
- Page 19 STEP 5 Build the fith level of the framework according to the map below. Drawing 15 Map of the dome’s 5th level with the pipes’ markings CONGRATULATIONS! YOU HAVE JUST FINISHED BUILDING THE DOME’S FRAMEWORK :)
-
Page 20: Camping Door Assembly Manual Fg20
CAMPING DOOR ASSEMBLY MANUAL FG20 STEP 1 Remove the C-C-D-D-C-C, B-A-B-C-C-B-A-B-B pipes as presented in the below drawing. P3 / P4 Drawing 16 Pipes to be removed NOTE: The dome might loose it's shape slightly - don't worry. It will all come back together once the doors are in place. STEP 2 Insert the door frame with the camping door and attach it to the framework using the pipes as presented in the drawing 11. -
Page 21: Camping Door Assembly Manual Fg30/40/50
CAMPING DOOR ASSEMBLY MANUAL FG30/40/50 STEP 1 Remove the C-C-C-C-D-D pipes as presented in drawing below. P3 / P4 Drawing 18 Pipes to be removed NOTE: The dome might loose it's shape slightly - don't worry. It will all come back together once the doors are in place. STEP 2 Insert the door frame with the camping door and attach it to the framework using the pipes as presented in the drawings below. - Page 22 Drawing 20 FG40 Scheme of inserting the camping door into the FG40 dome’s framework Drawing 21 FG50 Scheme of inserting the camping door into the FG50 dome’s framework STEP 3 Use the screws to tighten the metal band to the door frame.
-
Page 23: Glass Door / Aluminum Door Frame Assembly Manual Fg30/40/50
GLASS DOOR / ALUMINUM DOOR FRAME ASSEMBLY MANUAL FG30/40/50 STEP 1 Identify the correct position of your doors (P3 or P4) , in line with your dome design. Door v1 Door v2 Drawing 6 Transparent Possible door positions STEP Remove the metal band indicated with the arrow and C-C-C-C-D-D pipes as presented in drawing below. Drawing 22 Pipes and metal plate to be removed... - Page 24 STEP 3: Attach two metal band extensions that come supplied with the Glass Doors Installation Pack. Position them on either side of the door opening (left and right) and attach them to the metal bands, from the outside, using the same bolts as before. Contents of the pack: Metal plate extension (right side of the door opening) 2x M pipe, 2x L pipe, 2x K pipe, 2x plate extensions.
- Page 25 Drawing 23, 24, 25 The drawing shows how to insert the door in the dome framework of the indicated dome size. -Clamp -Clamp Drawing 23 Drawing 24 Drawing 25 FG30 FG40 FG50 STEP 5: Check the leveling of the doors by positioning the spirit level on top of the door wing. You are able to adjust the position of the door frame as the pipes supplied (M, L, K) give you the room for adjustment on both ends.
-
Page 26: Outer Membrane & Transparent Front Assembly Guide
OUTER MEMBRANE & TRANSPARENT FRONT ASSEMBLY GUIDE NOTE: The outer membrane and the transparent front come as two separate elements, to be joined together on site. STEP 1: Unfold the protective ground sheet (not supplied with the dome). Take the membrane out of the package and place it flat on the protective ground sheet. - Page 27 STEP 4: Pull the membrane slowly onto the structure. Be careful not to let it catch on any element of the framework as it may rip while pulling. Make sure the seams of the membrane roughly cover the pipe network of the framework and the door opening is roughly in the right place.
- Page 28 STEP 8: Go inside the dome. Attach the canvas straps around the transparent front to the framework and pull them tight. STEP 9: At the bottom of the membrane you will find metal eyelets. Place one hook in each eyelet and another one in each hole along the top edge of the metal bands.
-
Page 29: Porthole Window Assembly Manual
PORTHOLE WINDOW ASSEMBLY MANUAL Put the circular window into one of the available window slots in the membrane. The slots have two layers (colars) of membrane and all you need to do is put the window directly between these two membrane layers... -
Page 30: Solar Fan Assembly Manual
Scan to watch Scan to watch SOLAR FAN ASSEMBLY MANUAL a video manual a video manual Choose the location of the solar fan using one of the three slots provided in the membrane. In your Solar Fan package, you will find thee additional short pipes. Use them to install the solar fan plate to the framework from the inside of the dome. -
Page 31: Stove & Chimney Assembly Manual
Scan to watch STOVE & CHIMNEY ASSEMBLY MANUAL a video manual The chimney must be placed under one of the three The stove kit includes the stove and an exhaust slots provided in the membrane. Choose the location pipe that is to be connected to the chimney. We that suits you best. - Page 32 GLAMPING 20 GLAMPING 30 GLAMPING 40 GLAMPING 50 L= 100 cm L = 100 cm L = 100 cm L = 100 cm CHIMNEY PIPE CHIMNEY PIPE CHIMNEY PIPE CHIMNEY PIPE WITH FLASHING WITH FLASHING WITH FLASHING WITH FLASHING L = 100 cm +...
-
Page 33: Insulation Liner Assembly Manual
INSULATION LINER ASSEMBLY MANUAL From the list below, choose the right insulation liner map for the dome which you have purchased. The same map applies to both types of insulation - Insulation+ and Standard AlumAir Insulation. DOME TYPE PAGE NUMBER CAMPING DOOR FG20 - P3 ENTRANCE 34, 35 CAMPING DOOR FG20 - P4 ENTRANCE... - Page 34 CAMPING DOOR FG20 INSULATION - P3 ENTRANCE Map 1A...
- Page 35 CAMPING DOOR FG20 INSULATION LEVELS - P3 ENTRANCE CAMPING DOOR FG20 INSULATION LEVELS - P3 ENTRANCE G20 camping door Map 1B level 1. 5 elements Level 1. 5 elements level 2. 5 elements Level 2 5 elements level 3. 5 elements Level 3 5 elements panoramic...
- Page 36 CAMPING DOOR FG20 INSULATION - P4 ENTRANCE CAMPING DOOR FG20 INSULATION - P4 ENTRANCE Map 2A 20 INSULATION - P4 ENTRANCE G20 camping door G20 camping door Level 1. 5 elements Level 2. 5 elements Level 3. 5 elements Level 4. 8 elements We start building insulation from the first level Level 5.
- Page 37 CAMPING DOOR FG20 INSULATION LEVELS - P4 ENTRANCE G20 camping door GLASS DOOR FG20 INSULATION LEVELS - P4 ENTRANCE Map 2B Level 1. 5 elements Level 1. 5 elements Level 2. 5 elements Level 2 5 elements Level 3. 5 elements Level 3 5 elements panoramic...
- Page 38 CAMPING DOOR FG30/40/50 INSULATION - P3 ENTRANCE CAMPING DOOR FG30/40/50 INSULATION - P3 ENTRANCE 30/40/50 INSULATION - P3 ENTRANCE Map 3A G30,40,50 camping door G30,40,50 camping door 4.11 4.11 4.10 Level 1. 5 elements 4.10 Level 2. 5 elements 5 elements Level 3.
- Page 39 CAMPING DOOR FG30/40/50 INSULATION LEVELS - P3 ENTRANCE CAMPING DOOR FG30/40/50 INSULATION LEVELS - P3 ENTRANCE G30,40,50 camping door Map 3B level 1. 5 elements Level 1. 5 elements level 2. 5 elements Level 2 5 elements level 3. 5 elements Level 3 5 elements panoramic...
- Page 40 CAMPING DOOR FG30/40/50 INSULATION - P4 ENTRANCE CAMPING DOOR FG30/40/50 INSULATION - P4 ENTRANCE G30/40/50 INSULATION - P4 ENTRANCE Map 4A G30,40,50 camping door 30,40,50 camping door 4.11 4.10 Level 1. 5 elements Level 2. 5 elements Level 3. 5 elements Level 4.
- Page 41 CAMPING DOOR FG30/40/50 INSULATION LEVELS - P4 ENTRANCE CAMPING DOOR FG30/40/50 INSULATION LEVELS - P4 ENTRANCE G30,40,50 camping door Map 4B level 1. 5 elements Level 1. 5 elements level 2. 5 elements Level 2 5 elements level 3. 5 elements Level 3 5 elements Panoramic...
- Page 42 GLASS DOOR FG30/40/50 INSULATION - P3 ENTRANCE GLASS DOOR FG30/40/50 INSULATION - P3 ENTRANCE Map 5A G30,40,50 alu door /40/50 INSULATION - P3 ENTRANCE G30,40,50 alu door Level 1. 5 elements Level 2. 5 elements Level 3. 5 elements Level 4. 7 elements Level 5.
- Page 43 GLASS DOOR FG30/40/50 INSULATION LEVELS - P3 ENTRANCE GLASS DOOR FG30/40/50 INSULATION LEVELS - P3 ENTRANCE G30,40,50 alu door Map 5B level 1. 5 elements Level 1. 5 elements level 2. 5 elements Level 2 5 elements Level 3 5 elements level 3.
- Page 44 GLASS DOOR FG30/40/50 INSULATION - P4 ENTRANCE GLASS DOOR FG30/40/50 INSULATION - P4 ENTRANCE Map 6A G30,40,50 alu door /40/50 INSULATION - P4 ENTRANCE G30,40,50 alu door 5 elements Level 1. Level 2. 5 elements Level 3. 5 elements Level 4. 7 elements Level 5.
- Page 45 GLASS DOOR FG30/40/50 INSULATION LEVELS - P4 ENTRANCE GLASS DOOR FG30/40/50 INSULATION LEVELS - P4 ENTRANCE G30,40,50 alu door Map 6B Level 1. 5 elements level 1. 5 elements level 2. 5 elements Level 2 5 elements Level 3 5 elements level 3.
- Page 46 NOTE: That the same bolts will be used to install multiple panels of insulation - these will overlap with one another as seen on the image below. Secure the panels using a circular pad and cup nut. Alum-Air Insulation panels that are around the front transparent window have additional fabric flaps which will need to be folded inwards once the panels are installed.
- Page 47 DOME WITH THE ALUM AIR INSULATION ONLY: Dome WITH the skylight window 1. Start the installation of the Alum Air Insulation from Level 2 and work your way down. 2. Install all panels on Level 2 before installing the level below. Pay attention to the correct positioning of the panels - panels with ventilation openings need to be in line with the vents in the dome cover.
- Page 48 Dome WITHOUT the skylight window 1. Start the installation of the Alum Air Insulation from Level 1 and work your way down. 2. Install all panels on Level 1 before installing the level below. 3. Once level 1 is complete, move to Level 2. The top of Level 2 will overlap the bottom of Level 1. Pay attention to the correct positioning of the panels - panels with ventilation openings need to be in line with the vents in the dome cover.
- Page 49 INSTALLATION OF INSULATION+ Dome WITH the Skylight Window: 1. Start the installation of the Insulation+ from Level 2 and work your way down. 2. Install all panels on Level 2 before installing the level below. Pay attention to the correct positioning of the panels - panels with ventilation openings need to be in line with the vents in the dome cover.
- Page 50 ALUM AIR INSULATION 1. Install the Alum-Air Insulation on top of the Insulation+ following the same map and installation order. 2. The Openable Level 1 of the Alum-Air insulation is to be installed at the end of the process. Insulation+ and Alum Air Insulation WITH Skylight Window Level 1 Level 2...
- Page 51 INSTALLATION OF INSULATION+ Dome WITHOUT the Skylight Window: 1. Start your installation of the Insulation+ from Level 1 and work your way down. 2. Install all panels on Level 2 before installing the level below. Undo the bottom bolts from Level 1 and place the next layer of insulation on top of the previously installed level 1.
- Page 52 ALUM AIR INSULATION 1. Install the Alum-Air Insulation on top of the Insulation+ following the same map and installation order. Level 2 Level 2 Alum-Air Insulation Insulation+ Level 3 Level 3 Level 4 Level 4 Level 5 Level 5 Drawing 31 Insulation+ and Alum Air insulation Cross-section - Dome without Skylight Window...
- Page 53 Tag us in your Social Media posts and we will repost your content, promoting your glamping site and helping you reach your audience globally. Thank you for choosing our products and let's keep in touch :) FDomes Team. FIND US Website: www.fdomes.com Instagram:...
Need help?
Do you have a question about the GLAMPING 20 and is the answer not in the manual?
Questions and answers
We're trying to assemble the 8meter dome but your diagram doesn't fit our dome. We also have poles labeled DEF