
Related Manuals for Sysmac Omron NX Series

Summary of Contents for Sysmac Omron NX Series
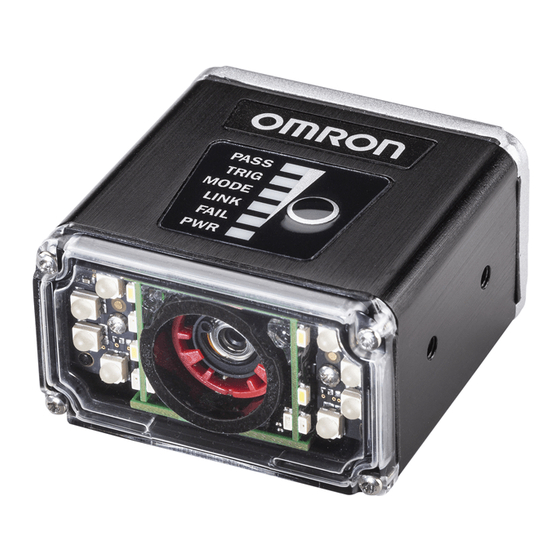
- Page 1 Machine Automation Controller NX Series EtherNet/IP Connection Guide Smart camera F430-F Series Z441-E-01...
- Page 2 Windows is a registered trademark of Microsoft Corporation in the USA and other countries. ODVA、EtherNet/IP are trademarks of ODVA. Sysmac and SYSMAC are trademarks or registered trademarks of OMRON Corporation in Japan and other countries for OMRON factory automation products. Company names and product names in this document are the trademarks or registered...
-
Page 3: Table Of Contents
Contents Related Manuals ..................3 Terms and Definitions ................4 Restrictions and Precautions ..............5 Overview ....................6 Applicable Devices and Device Configuration ........7 5.1. Applicable Devices ................7 5.2. Device Configuration ................8 EtherNet/IP Settings ................10 6.1. Parameters ..................10 6.2. -
Page 4: Related Manuals
NJ/NX Series CPU Unit Software User's Manual W506 NJ/NX Series NJ/NX Series CPU Unit Built-in EtherNet/IP Port User’s Manual W504 SYSMAC-SE2□□□ Sysmac Studio Version 1 Operation Manual W502 NJ/NX Series NJ/NX Series Instructions Reference Manual Z433 F430-F Series Smart Camera F430-F Series User Manual... -
Page 5: Terms And Definitions
2. Terms and Definitions Below is a list of terms used in this manual and their definitions. Term Description / Definition Node It refers to a relay point, a branch point or a terminal on an EtherNet/IP network comprised of equipment having an EtherNet/IP port. Devices with one EtherNet/IP port are recognized as one node on the EtherNet/IP network, and devices with two EtherNet/IP ports are recognized as two nodes. -
Page 6: Restrictions And Precautions
3. Restrictions and Precautions (1) Understand the specifications of devices which are used in the system. Allow some margin for ratings and performance. (2) Provide safety measures, such as installing a safety circuit, in order to ensure safety and minimize the risk of abnormal occurrence. (3) To ensure system safety, make sure to always read and follow the information provided in all Safety Precautions and Precautions for Safe Use in the manuals for each device which is used in the system. -
Page 7: Overview
EtherNet/IP tag data links. Note Settings described in 7.3. Controller Setup are made in advance in the Sysmac Studio project file (hereinafter referred to as project file) listed below. For how to use this project file, see "9. -
Page 8: Applicable Devices And Device Configuration
5. Applicable Devices and Device Configuration 5.1. Applicable Devices The applicable devices that can be connected are as follows: Manufacturer Name Model Version OMRON NX Series CPU Unit NX701-□□□□ Same or higher NX102-□□□□ version as NX1P2-□□□□ indicated in section 5.2. OMRON Smart camera F430-F□□□□□□□-□□□... -
Page 9: Device Configuration
5.2. Device Configuration The system components required for reproducing the connection procedures described in this document are as follows. NX1P2-9024DT Switching F430-F000M12M (Built-in EtherNet/IP Port) (Windows 10, with Sysmac W4S1-05C Studio installed OS: Windows I/O cable Ethernet cable V430-W8-3M V430-WE-3M... - Page 10 Precautions for Correct Use Ensure that Sysmac Studio is updated to at least the version specified in this documentation, or to a higher version. If you use a version other than the version specified in this section, there may be differences in the procedures in chapter 7 and after.
-
Page 11: Ethernet/Ip Settings
6. EtherNet/IP Settings The specifications for the parameters, global variables, tag sets, and tag data link table are shown. In subsequent chapters, the smart camera may also be referred to as the "Partner device", depending on the description. 6.1. Parameters The parameters that are set in this document are shown below. - Page 12 Data type name Data type Smart camera data STRUCT S_EIPOutput U_EIPFlag16 CONTROL Control signal (16bit) WORD ECHO Echo DWORD CmdCode Command code DWORD CmdArg Command parameters U_EIPFlag32 reserved1 Reserved for future use U_EIPFlag16 Virtual IO U_EIPFlag16 reserved2 Reserved for future use BOOL[64] Global Data Service (GDS ) bool101 to...
-
Page 13: Global Variables
DINT string1_length GDS string1 String length STRING[92] string1 GDS string1 DINT string2_length GDS string2 String length STRING[28] string2 GDS string2 DINT string3_length GDS string3 String length STRING[28] string3 GDS string3 DINT string4_length GDS string4 String length STRING[28] string4 GDS string4 Note For a description of how to use each bit, see "Chapter 2 Using EtherNet/IP"... - Page 14 GDS string101 String DINT EIPOutput.string101_length length GDS string101 EIPOutput.string101 STRING[92] GDS string102 String DINT EIPOutput.string102_length length GDS string102 EIPOutput.string102 STRING[28] GDS string103 String DINT EIPOutput.string103_length length GDS string103 EIPOutput.string103 STRING[28] GDS string104 String DINT EIPOutput.string104_length length GDS string104 EIPOutput.string104 STRING[28] *1: Control Signal Assignment Variable: The EIPOutput.CONTROL assignment RESET...
- Page 15 BYTE type instead of declaring it as BOOL type. Note With Sysmac Studio, two methods can be used to specify an array for a data type. After specifying, (1) is converted to (2), and the data type is always displayed as (2).
-
Page 17: Tag Set
6.4. Tag Set The Tag set settings to perform Tag data links is shown below. The data within the Tag set is in ascending order with the following OUT No. and IN No. ■ Output Area (Controller → Smart Camera) Originator Variable (Tag set name) Data size (byte) EIPOutput... -
Page 18: Ethernet/Ip Connection Procedure
Set the parameters for the Smart camera. 7.2.2. Set Parameters 7.3. Controller Setup Set up the Controller. ▼ Launch Sysmac Studio and set the IP address of 7.3.1. Set IP Address the controller. ▼ 7.3.2. Target Device Registration Register the target device. -
Page 19: Smart Camera Setup
7.2. Smart Camera Setup Setting up the Smart camera. 7.2.1. Install the (AutoVision) software Install the (AutoVision) software application used for setting up the Smart camera. For more details on installing the AutoVision software, please refer to the “AutoVISION Quick Start Guide”... - Page 20 Set the IP Address of the computer. For the IP address, “192.168.188.100”, set the subnet mask to "255.255.0.0". For the procedure to open the screen on the right, please refer to Step 4 below. Static connection (fixed IP address) (1) From the Windows Start menu, select Control Panel - Network and Internet - Network and Sharing Center.
- Page 21 After starting AutoVision, if the smart camera is displayed in the device selection list, proceed to Step 8. If the AutoVision startup screen does not appear, go to step 7. If the AutoVision startup screen does not appear, it means that communication between the smart camera and the PC has not been established so please check the following.
- Page 22 Create a new job and set the "Locate Shape", "OCR" and "Decode" tools. * In this chapter, you will create a job to output the detection points from the Locate Shape tool, the text string read by the OCR tool and character text decoded from a 2D Code using Ethernet/IP communications.
- Page 23 Select OCR, click the second icon (Output String) and set it to EIP Input String 1. Select Decode, click the first icon (Status), and set it to bool1 of EIP input. Select Decode, click the second icon (Decoded Text) and set it to EIP Input String 2.
-
Page 24: Controller Setup
The download is complete when you can successfully transition to the Run screen. 7.3. Controller Setup Set up the Controller. 7.3.1. Set the IP address Launch Sysmac Studio and set the IP address of the controller. Install Sysmac Studio on PC beforehand. - Page 25 Switching hub a switching hub to the controller as shown in "5.2. Device configuration". LAN cable Partner Device Start Sysmac Studio. * If the User Account Control Dialog Box is displayed at startup, select the option to start. Sysmac Studio starts.
- Page 26 Click "Create". The New project screen is displayed. The following panes are Tool Box displayed in this window. Left: Multiview Explorer Multiview Edit Upper right: Toolbox Explorer Pane Controller Lower right: Controller Status Status Window Pane Top middle: Edit Pane The following tabs are in the Output Build...
- Page 27 7.3.2. Install the EDS File Install the F430-F EDS file. After AutoVision software has been successfully installed, the EDS can be found in “C:¥OMRON¥Vscape¥Firmware¥eds¥F430”. Select "EtherNet/IP Connection Settings" from the "Tools" Menu. Double click "Built-in EtherNet/IP Port Settings". Right-click on the empty space below [Target Device] under [Toolbox], and select [Display EDS Library].
- Page 28 The EDS Library Dialog Box is displayed. Select [Install]. Select the EDS file you downloaded and then click on [Open (O)]. Verify that [Microscan Systems,Inc.]-[Vendor Specific, Machine Vision Smart Camera]-[F430-F] has been installed.
- Page 29 7.3.3. Target Device Registration Register the target device. From the Menu Bar, select [Tools] – [EtherNet/IP Connection Settings]. In the [Edit Pane], the [EtherNet/IP Device List] tab is displayed. With [Built-in EtherNet/IP Port Settings] selected, right-click the mouse and select [Edit] from the menu.
- Page 30 The Add Target Device dialog appears. In [Node Address] enter "192.168.188.2". Click on the [Model Name] and [Revision] fields and select the following from their pulldown menus. Model: F430-F Revision: 1 Confirm your selection and click [Add]. 192.168.188.2 is registered in [Target Device] in the Toolbox.
- Page 31 7.3.4. Set the Global Variables Set the global variables to use for Tag data links. The following Assemblies are used for this example flow. ・Input Assembly: Input Assembly (102) ・Output Assembly: Output Assembly (114) Note For information on input and output assemblies, refer to “Smart Camera F430-F Series User Manual for Communications Settings”...
- Page 32 Enter the [Name] and [Data Type] as shown in the figure on the right. For details of the content on the right, refer to "Smart Camera F430-F Series AutoVISION Industrial Protocol User Manual (SDNC-752)”. As described in steps 3 to 4, create new Data Types and Members.
- Page 33 The [Global Variable] tab is displayed in the [Edit Pane]. Click in [Name] to enter a new Variable. In the [Name] field, enter "EIPOutput". Enter [S_EIPOutput] as the “Data type”. In the [Network Publish] menu select "Output". Confirm this is entered correctly and then right-click on the mouse to select [Create New] from the menu.
- Page 34 Click on [ + ]. The new Area is added. Click the down arrow on the "Variable to be refreshed" (left side of the screen) of the added area. The variables set in this section are displayed. Select [EIPOutput]. [S_EIPOutput] is added. * Data Type is automatically set.
- Page 35 7.3.5. Tag Registration Register the Tags and Tag Sets. On the [Built in EtherNet/IP Port Connection Settings] tab, select [Tag Set]. In [Tag Set] select the [Input] tab. Right-click in the [Input] tab and select [Create New Tag Set] from the menu. Here you can enter the [New Tag Set Name].
- Page 36 Select the [Output] tab. Right-click in the [Output] tab and select [Create New Tag Set] from the menu. Here you can enter the [New Tag Set Name]. Following the same procedure described in Step 3, enter [EIPOutput]. Using the same procedures described in Step 4, add the Global variables as Tags in the OUT No.
- Page 37 7.3.6. Setting up a Connection Set the Target Variable (the side on which the connection will be established) and the originator variable (the side for establishing the connection) and set up the connection (Tag Data Link Table).。 On the [Built-in EtherNet/IP port Connection Settings] tab, select [Connection].
- Page 38 Click on [Target Variable] for [Input] If you enter “[Ctrl] + [Space]” from the keyboard, the available “Assembly Numbers” for use will be displayed. * As shown in the example figure on the right, by typing [1] as the first digit of the “Assembly Number”, all the possible Assembly Numbers beginning with that digit will be...
- Page 39 Connect online and transfer the connection settings and the project data to Controller. When transferring a user program, "configuration / setting" data, device variables, or memory values for the CX unit from Sysmac Studio, the device or machine may operate unexpectedly regardless of the operation mode of the CPU unit.
- Page 40 [Edit window]. Note Refer to Chapter 6 "Online Connections to a Controller" in the "Sysmac Studio Version 1.0 Operation Manual" (W504) for details on online connection to the controller. From the Menu Bar, select...
- Page 41 Click the [Transfer to Controller] Button. * Executing [Transfer to Controller] transfers the data of Sysmac Studio to the controller and checks that the data was received. Confirm that the dialog settings are as shown in the figure on the right and press the [Yes] button.
- Page 42 [Close]. * The “Synchronization Successful” message indicates that the data in the controller matches the Project data in Sysmac Studio. * If Synchronization fails, check the physical connections and perform the steps again from Step 1. In [Controller Status], confirm...
-
Page 44: Confirm Ethernet/Ip Communications
7.4. Confirm EtherNet/IP Communications Confirm that the EtherNet/IP Tag Data Links function correctly. 7.4.1. Check the Connection Status Verify the EtherNet/IP connection and connect to the smart camera with the AutoVision software. Verify that the Tag Data Links are operating normally by observing the LEDs on the controller. - Page 45 Select the [Connection status] tab. Verify that the connection shown in [Connection Name] has a blue dot ● beside it. Verify that the [Status] column is displaying [00:0000]. Select the [Tag Status] tab. Verify that all the Tags are listed under [Tag Name] and that there is a blue dot ●...
- Page 46 CPU unit. Sufficiently confirm safety before you change the values of variables on a Watch Tab Page when the Sysmac Studio is online with the CPU Unit. From Menu Bar in Sysmac Studio, select [View] - [Watch Tab Page].
-
Page 47: Initializing The System
Set the [Modify] column of EIPOutput.CONTROL.F[8] to "TRUE". Press the Enter Key and confirm that [Monitor] for EIPOutput.CONTROL.F[8] shows "True". When the measurement processing completes, the result will be reflected on the AutoVision screen. Launch Data Navigator and check the details of the measured values. The measured values confirmed in Step 6 are reflected for each variable of EIPInput. -
Page 48: Initializing The Controller
In order to initialize the controller, initialize the CPU Unit. Before initialization, put the controller in Program Mode and select [Controller]-[Clear All Memory] from the Sysmac Studio menu bar. [Clear All Memory] dialog is displayed, confirm the contents and click [OK]. -
Page 49: Appendices: How To Use The Project File
Setting up the Smart camera. 7.2. Smart Camera Settings 9.2. Controller Setup Set up the controller using the Project File. ▼ Launch Sysmac Studio and set the IP address of the 7.3.1. Parameter Settings controller. ▼ 9.2.1. Load the Project File Load the Project File in to Sysmac Studio. -
Page 50: Controller Setup
9.2. Controller Setup Set up the controller using the Project File. 9.2.1. Load the Project File Load the Project File in to Sysmac Studio. From the Menu Bar, select [File] – [Import]. The [Import File] dialog is displayed. Select [OMRON_F430_NX_EIP_V100. - Page 51 From the Menu Bar, select [Controller] – [Change Device]. The Change Device Dialog Box is displayed. Confirm that the [Device] and [Version] set to use are as shown in the figure on the right. Click [Cancel]. * If the settings are different, select from the pull-down menu and click [OK].
-
Page 52: Revision History
10. Revision History Revision Revised year and Revised Page and Reason Symbol date April 2022 First Publication... - Page 54 OMRON Corporation Industrial Automation Company Authorized Distributor: Kyoto, JAPAN Contact: www.ia.omron.com Regional Headquarters OMRON EUROPE B.V. OMRON ELECTRONICS LLC Wegalaan 67-69, 2132 JD Hoofddorp 2895 Greenspoint Parkway, Suite 200 The Netherlands Hoffman Estates, IL 60169 U.S.A. Tel: (31)2356-81-300/Fax: (31)2356-81-388 Tel: (1) 847-843-7900/Fax: (1) 847-843-7787 ©...
Need help?
Do you have a question about the Omron NX Series and is the answer not in the manual?
Questions and answers