Table of Contents
Advertisement
Available languages
Available languages
Quick Links
Advertisement
Chapters
Table of Contents

Related Manuals for SCENTYS R'PULSE 150

Summary of Contents for SCENTYS R'PULSE 150
- Page 1 R’ OMPE PULSE _ _ _____ ANUEL D UTILISATION 1/32...
- Page 2 CONSEILS DE SÉCURITÉ Prévoir une sortie d’air de dimensions 100 cm² pour la pompe R’Pulse 150 si elle est placée dans un espace clos. Cette sortie d’air peut être cachée par une grille. Si la pompe (R’Pulse 150) et la tête (S’Point 150 horizontale/verticale) sont dans le même espace clos, une sortie Cet appareil n'est pas prévu pour être utilisé...
-
Page 3: Table Of Contents
Merci de lire cette notice avec attention afin de pouvoir utiliser au mieux ce produit. Installation Raccordement du diffuseur Pour toute question au sujet de la pompe R’Pulse 150, merci de nous contacter à l’adresse e-mail : info@scentys.com Mise sous tension Initialisation Utilisation Réglage de l’intensité... -
Page 4: Caractéristiques Techniques
ARACTÉRISTIQUES TECHNIQUES ESCRIPTION DE LA POMPE 1/ Port RS232 Dimensions du diffuseur H 144 mm x L 134 mm x P 137 mm 2/ Control In : Contact sec à fermer pour piloter à distance la diffusion de parfum, par exemple Poids du diffuseur 1,1 kg par l’intermédiaire d’un automate (il faut être... -
Page 5: Outillage Nécessaire À L'installation
Un niveau à bulle ATTENTION : L’installation murale est de la responsabilité de l’installateur. La bonne tenue de la fixation est de sa responsabilité et Scentys Une perceuse adaptée au support mural à percer ne peut être tenu responsable d’une installation défectueuse. - Page 6 - Percer le mur aux 4 emplacements avec - Prendre la pompe à part et fixer l’équerre un foret adapté au mur et aux chevilles. supérieure sur le dessus de la pompe à l’aide des 2 vis prévues à cet effet. - Mettre en position les chevilles dans les - Fixer l’équerre inférieure sur le dessous trous réalisés.
-
Page 7: Raccordement Du Diffuseur
- Avant de serrer le montage définitivement, ACCORDEMENT DU DIFFUSEUR vérifier que la pompe est bien à l’horizontal. Quelque soit le mode de montage, le bloc pompe doit être raccordé à son câble d’alimentation électrique et au tube de sortie d’air. - Préparer le tuyau d’air comprimé... -
Page 8: Mise Sous Tension
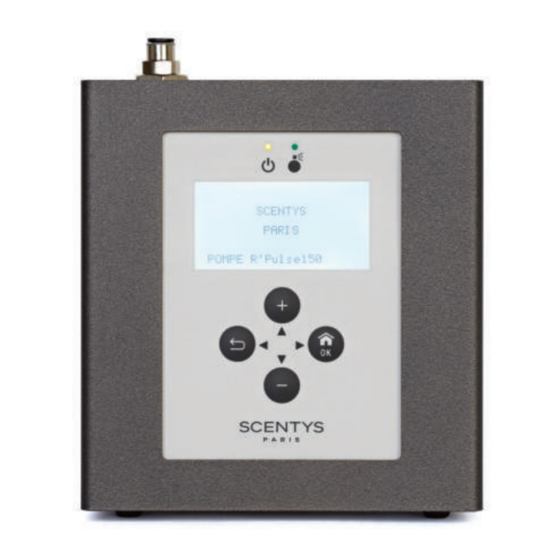
ISE SOUS TENSION Lors de la première mise en service de la pompe, une configuration initiale est nécessaire. Passer à l’étape suivante pour réaliser cette opération. Lors de la mise sous tension de la pompe, cet écran va apparaître. Les boutons physiques sont les suivants : : Voyant d’alimentation. -
Page 9: Initialisation
NITIALISATION La fenêtre suivante apparaît. Sélectionner la langue La fenêtre suivante apparaît. Appuyer sur + ou – pour activer (X) ou désactiver Appuyer sur OK pour lancer la diffusion. souhaitée grâce aux boutons + et – puis valider Appuyer sur OK pour passer à l’étape suivante. (-) le Lundi puis valider avec OK pour passer au votre choix avec OK pour passer à... -
Page 10: Utilisation
’ TILISATION ÉGLAGE DE L INTENSITÉ À partir de l’écran d’accueil : Le bouton + permet d’augmenter l’intensité de diffusion. Le bouton – permet de diminuer l’intensité. Lors de la mise sous tension de la pompe, cet écran Après quelques secondes, la pompe va se mettre va apparaître. -
Page 11: Paramétrage
ARAMÉTRAGE ESCRIPTION DU MENU 1/ Changer le parfum Accéder au menu de paramétrage en appuyant Se placer sur ce menu et appuyer sur OK pour sur OK. y accéder. Pour sélectionner un des onglets, il suffit d’appuyer sur le bouton – pour descendre et sur + pour monter. -
Page 12: 2/ Nettoyer La Tête
2/ Nettoyer la tête 3/ Régler la diffusion : a) Horaires de diffusion Se placer sur ce menu et appuyer sur OK pour L’écran indique la date à laquelle le nettoyage a été Se placer sur ce menu et appuyer sur OK pour y accéder. -
Page 13: 3/ Régler La Diffusion
3/ Régler la diffusion : 3/ Régler la diffusion : b) Jours de diffusion c) Puissance pompe La puissance de la pompe correspond au niveau de pression d’air souhaité à la sortie de la pompe : augmenter ce paramètre si vous éloignez la tête de diffusion de la pompe ou si vous souhaitez encore augmenter l’intensité... -
Page 14: Pilotage Externe
3/ Régler la diffusion : 4/ Régler l’horloge d) Pilotage externe Le pilotage externe permet d’asservir le fonctionnement de la diffusion à un périphérique externe. Un automate de climatisation peut ainsi couper automatiquement la diffusion quand la climatisation se coupe et l’allumer quand elle se rallume. -
Page 15: 6/ Tester La Pompe
6/ Tester la pompe 7/ Verrouillage du menu de la pompe Cette option de menu est utilisée pour la Pour qu’aucun accident ne survienne maintenance et le test de fonctionnement avec un utilisateur qui souhaiterait utiliser de la pompe. la pompe sans votre accord, vous pouvez activer un code de déverrouillage. -
Page 16: Faq
(Compatibilité Électromagnétique). ARANTIE Scentys garantit la pompe R’Pulse 150 pendant une période de 24 mois à compter de la date d’achat. La garantie couvre les défauts de fabrication, mais pas les mauvais usages. Si, pendant la période de garantie, ce produit s’avérait défectueux dans des conditions normales d’utilisation et d’entretien, merci de nous contacter à... - Page 17 s ce n ty s. c om 32/32...
- Page 18 R’ 150 P PULSE _ _ _____ UIDE 1/32...
- Page 19 SAFETY INSTRUCTIONS Ideally, the air outlet should be placed next to the air extractor fan on top of the pump. The power supply cable, plug and socket should all be accessible The appliance is not intended for use by persons (including children) with when the device is installed.
- Page 20 Tools required for installation Please read this guide carefully to ensure optimal use of the product. Installation Connecting the diffuser If you have any questions about the R’Pulse 150 Pump, please email us at info@scentys.com Powering on the diffuser Setup Diffusion intensity...
-
Page 21: Technical Characteristics
ECHNICAL CHARACTERISTICS ESCRIPTION OF THE PUMP 1/ COM RS 232 Diffuser dimensions H 144mm x W 134mm x D 137mm 2/ Control In: Dry contact to be closed when fragrance diffusion is controlled remotely, for Diffuser weight 1.1 kg instance through an automated system (diffusion can only start during the set time and the external Power supply Universal 100-240V... -
Page 22: Tools Required For Installation
The installer is responsible for properly securing the device, and A drill bit adapted to the wall on which the device Scentys cannot be held liable for improper installation. will be mounted Four anchors and four screws adapted to the wall on which the device will be mounted and to The R’Pulse 150 Pump unit can be simply placed on the ground on a flat surface, resting... - Page 23 - Drill holes as marked using a bit adapted - Secure the top bracket to the top of the to the wall and anchors. pump using the two screws provided. - Place the anchors in the holes drilled. - Attach the lower bracket to the bottom of the pump using the screws provided.
-
Page 24: Connecting The Diffuser
- Before tightening the screws completely, ONNECTING THE DIFFUSER ensure that the pump is level. Regardless of how the diffuser is installed, the pump unit must be attached to the power supply cable and air outlet tube. - Get the blue compressed air tube to the desired length to supply air to the diffusion point and attach it to the air connector on top of the pump. -
Page 25: Powering On The Diffuser
OWERING ON THE DIFFUSER When powering the pump on for the first time, initial settings must be entered. Go to the next step to complete this process. When the pump is powered on, this screen will appear. The physical buttons are: : Power light. -
Page 26: Setup
ETUP The following screen appears. Select the desired The following screen appears. Press + or – to activate (X) or deactivate (-) on Press OK to launch diffusion. language using + and – buttons and then press OK Press OK to go to the next screen. Mondays, confirm by pressing OK, then go on to to go to the next screen. -
Page 27: Use
IFFUSION INTENSITY From the home screen: Use + button to increase diffusion intensity. Use the – button to reduce intensity. This screen will appear when the pump is switched After a few seconds, the pump will turn on and this screen will appear. -
Page 28: Configuration
ONFIGURATION ESCRIPTION OF MENU 1/ Changing the fragrance Go to the settings menu by pressing OK. Select this menu then press OK. To select a tab, simply press the – button to scroll down or + to scroll up. To confirm your selection, simply press OK. The screen will indicate the date when the fragrance Follow the instructions on the screen then press OK. -
Page 29: 2/ Cleaning The Head
2/ Cleaning the head 3/ Diffusion settings: a) Diffusion times Select this menu then press OK. The screen will indicate when the head was last Select this menu then press OK. cleaned and the number of hours the diffuser has operated since. -
Page 30: Diffusion Days
3/ Diffusion settings: 3/ Diffusion settings: b) Diffusion days c) Pump power Pump power corresponds to the level of desired air pressure coming out of the pump: increase the setting if you place the diffusion head farther from the pump, or if you want to further increase diffusion intensity. -
Page 31: External Control
3/ Diffusion settings: 4/ Setting the time d) External control It is possible to control diffusion from an external source. For instance, an air conditioning system can be set up to automatically stop diffusion when air conditioning is off and power it back on when air conditioning turns back on. -
Page 32: 6/ Testing The Pump
6/ Testing the pump 7/ Protecting access to the pump menu Use this menu option for maintenance and To prevent accidents if someone is using to test the functioning of the pump. the pump without your consent, you can activate a security code. If someone tries to change a setting while using the pump, they will need to enter the code to get access to the menu. -
Page 33: Faq
Compatibility) ARRANTY The Scentys warranty on the R’Pulse 150 Pump extends for 24 months from the purchase date. It covers all manufacturing defects but not improper use. If, during the warranty period, this product proves defective under normal conditions of use and maintenance, please contact us by email at: assistance@scentys.com... - Page 34 s ce n ty s. c om 32/32...
- Page 35 150 气泵 ulse 使用说明书 1/32...
- Page 36 安全提示 本设备不适合身体、感官或智力有缺陷的人士以及缺乏相 关经验和知识的人士(包括儿童)使用,除非负责他们安 全的人员对他们使用设备进行监督或指导。 请监督好孩童,勿让孩童将本设备当成玩具玩耍。 本设备仅可与设备随附的电源线一起使用。 为确保设备正常运行,建议在 R'Pulse 150 气泵四周留 下 30 毫米的空间。 R'Pulse 150 气泵尺寸: 高 144 毫米 x 宽 134 毫米 x 深 137 毫米。更多信息请 参见本说明书第 6 页。 如果 R'Pulse 150 气泵放置在封闭空间内,该空间需要 有一个 100 cm 的进气口。进气口可以用格栅遮挡。如果 气泵 (R'Pulse 150) 和喷嘴 (水平/垂直款 S'Point 150) 位于同一个封闭空间内,只需一个进气口。 尽量让进气口正对着气泵下方的新风进气风扇。 2/32...
- Page 37 如果 R'Pulse 150 气泵放置在封闭空间内,该空间需要 有一个 100 cm 的排气口。排气口可以用格栅遮挡。 如果气泵 (R'Pulse 150) 和喷嘴 (水平/垂直款 S'Point 150) 位于同一个封闭空间内,只需一个排气口。 尽量让排气口正对着气泵顶部的旧风排风扇。 设备完成安装后,电源线、插头和插座应便于操作。 出现以下情况时,请勿使用该产品: - 产品出现可见的损坏或故障; - 电线出现损坏或存在缺陷。 切勿自行拆卸设备。 欧洲地区 8 岁及以上儿童,以及身体、感官或智力能力低下,或缺 乏相关知识和经验的人员,可在监督下或受到安全使用培 训后在完全知晓相关风险的情况下使用本设备。 不得让儿童玩弄本设备。 儿童未经监督不得进行清洁或维护工作。 3/32...
- Page 38 150 气泵 ulse 感谢您对我们的信任并购买 Scentys 香薰系统。 R'Pulse 150 气泵是我们 Pack Cosy 系列香薰机的技术核心。您可以通过本设备实现喷 香控制,比如喷香的浓度和时间段。 请仔细阅读本说明书,以便更好地使用本设备。 如果您对 R'Pulse 150 气泵有任何疑问,请通过电子邮件地址与我们联系: info@scentys.com 4/32...
- Page 39 目录 技术参数 设备描述 安装所需工具 安装 香薰机的连接 开机 初始设置 使用 浓度调整 1/ 浓度配置 2/ 喷香持续时间示例 设置 菜单说明 1/ 更换精油 2/ 清洁喷头 3/ 喷香设置 a) 喷香时间段 b) 喷香日 c) 气泵强度 d) 外部控制 4/ 时钟设置 5/ 更改语言 6/ 气泵测试 7/ 锁定菜单 常见问题 标记 保修期 5/32...
-
Page 40: 技术参数
技术参数 设备尺寸 高 144 毫米 x 宽 134 毫米 x 深 137 毫米 设备重量 1.1 kg 电源电压 通用电源 100-240V (50-60 Hz) 输出电压 12 V 功率 15 W 保修期 自购买之日起 24 个月(零件和人工) 144 mm 137 mm 134 mm 6/32... -
Page 41: 设备描述
设备描述 1/ RS232 接口 2/ 控 制 输 入 : 常 闭 干 接 点 , 用 于 远 程 控 制 喷 香 , 例 如 通 过 控 制 器 进 行 远 程 控 制 ( 需 要 在 喷 香 时 间 段 上 并 激 活外部控制)。... -
Page 42: 安装所需工具
安装所需工具 安装本设备时,请准备: 一把水平尺; 一个适合墙面的电钻,配相应钻头; 4个膨胀管和4个螺丝,需适合墙面、气泵的重量 及振动; 一个锤子; 一把与螺丝型号对应的螺丝刀。 8/32... -
Page 43: N 安装
安装 注意: 安 装人员需对本设备的墙面安装负责。 设 备的安装稳固由安装人员负责,Scentys 不对任何错误安装负责。 R'Pulse 150 气泵可以直接放置在平坦地面上使用,设备的4个支脚提供支撑。 但是,为了避免灰尘进入泵体,最好将气泵固定在墙面上。 - 将 钻孔模板放置在 R'Pulse 150 气泵的安装位置。 - 用 水平尺检查模板是否水平。 - 用 笔标记4个固定孔的位置,然后 取下模板和水平尺。 9/32... - Page 44 - 用 适合墙体及膨胀管的钻头在 4 个位置钻孔。 - 将 膨胀管放入钻好的孔中。 - 使 用锤子将膨胀管完全砸入孔内。 10/32...
- Page 45 - 取 出气泵,使用对应的 2 个螺丝 将上直角固定件安装在气泵顶部。 - 使 用对应的 2 个螺丝将下直角固 定件安装在气泵底部。 - 使 用螺丝刀,将 4 个螺丝(2 个 用于上直角固定件,2 个用于下直 角固定件)拧入对应的膨胀管中, 开始将气泵安装到墙面上。 11/32...
- Page 46 - 在 最终拧紧组件之前,检查气泵是 否水平。 - 尽 可能地拧紧螺丝以完成安装, 并通过尝试移动装置来检查设备是 否正确固定。 12/32...
-
Page 47: 香薰机的连接
香薰机的连接 无论采用何种安装方法,气泵都必须与电源线和排气管连接。 - 按 照所需长度准备蓝色压缩空气 软管,以便向喷嘴供气,并将软 管连接到气泵顶部的出气口。 - 将 电源线的插针式接头端连接到气 泵上。 在所有部件安装到位后,请检查安装和连接是否牢固。 13/32... - Page 48 14/32...
-
Page 49: N 开机
开机 首 次 使 用 本 设 备 时 , 需 要 进 行 初 始 设置。 请前往下一步进行初始设置。 开机后,您会看到上方的屏幕。 设备上的按钮有 : 电源指示灯 :喷香指示灯 : 增 加喷香浓度、选择页面或设置时 间、日期等。 : 降 低喷香浓度、选择页面或设置时 间、日期等。 : 返 回上一页面。 : 确 认选择/进入主菜单。 15/32... -
Page 50: 初始设置
初始设置 屏幕显示如上窗口。使用 + 和 – 按钮选 屏幕显示如上窗口。 择所需的语言,按 OK 确认选择以进入下 按 OK 进入下一步。 一步。 按 + 或 – 按钮设置喷香开始小时,然后 按 + 或 – 设置小时,然后按 OK 转到分 按 OK 转到分钟设置。重复该操作设置喷 钟设置。 重复该操作设置日期和星期,然后按 OK 香结束时间,然后按 OK 确认本页设置。 确认本页设置。 16/32... - Page 51 按 + 或 – 激活(X)或取消激活(-)周 按 OK 启动喷香。 一喷香,然后按 OK 确认以切换到星期 二。重复该操作对每一天进行设置,然后 按 OK 确认本页设置。 17/32...
-
Page 52: N 使用
使用 开机后,您会看到上方的屏幕。 几秒后,气泵将启动并显示以上屏幕。 设备上的按钮有 屏幕包含了以下信息: : 增 加喷香强度、选择页面或设置时 第一行 间、日期等。 日期、时间以及指示气泵是否被密码锁定 的符号。 : 降 低喷香浓度、选择页面或设置时 间、日期等。 第二行 喷香浓度 : 返 回上一页面。 第三行和第四行 : 确 认选择/进入主菜单。 开始时间和结束时间(如果已设置定时开 关机)。 第五行 提示您如何进入设置菜单。 18/32... -
Page 53: 浓度调整
浓度调整 自主屏幕: 按 + 增加喷香浓度。 按 – 降低喷香浓度。 1/ 浓度配置 设备根据选定的浓度百分比乘以 120 秒计算得出喷香持续时间: 喷香持续时间(秒) = 120 x 浓度百分比 间隔时间为剩余的时间,即 120 秒去除喷香的时间: 间隔时间(秒):120 x (1-浓度百分比) 2/ 喷香持续时间示例 浓度为 25% 30 秒 90 秒 浓度为 50% 60 秒 60 秒 浓度为 75% 90 秒 30 秒 浓度为 100% 120 秒 喷香秒数 间隔时间 19/32... -
Page 54: N 设置
设置 按 OK 进入设置菜单。 按 – 向下或按 + 向上选择选项。 按 OK 确认选项。 20/32... -
Page 55: 菜单说明
菜单说明 1/ 更换精油 选择该选项,按 OK 进入。 屏幕显示上次更换精油的日期以及本瓶精 按照屏幕上的提示进行操作,并在操作结 束时按 OK 确认。精油的更换日期和已用 油已使用的喷香时间。 按 OK 进入下一步。 喷香时间将自动重置。 21/32... -
Page 56: 2/ 清洁喷头
2/ 清洁喷头 选择该选项,按 OK 进入。 屏幕显示上次清洁喷头的日期以及自上次 清洁后的喷香时间。 按 OK 进入下一步。 按照屏幕上的提示安装清洁液(可选配 喷头清洁自动开始,需要 30 分钟。上次 件),并在操作结束时按 OK 确认。 清洁日期和自上次清洁后的喷香时间将自 动重置。 22/32... -
Page 57: 3/ 喷香设置
3/ 喷香设置 a) 喷香时间段 选择该选项,按 OK 进入。 按 + 或 – 选择上图中的选项,按 OK 按 + 或 – 按钮设置喷香开始小时,然后 确认。 按 OK 转到分钟设置。 重复该操作设置喷香结束时间,然后按 OK 确认本页设置。 23/32... - Page 58 3/ 喷香设置 b) 喷香日 按 + 或 – 选择上图中的选项,按 OK 确认。 按 + 或 – 激活(X)或取消激活(-) 星期一喷香,然后按 OK 确认以切换到 星期二。重复该操作对每一天进行设置, 然后按 OK 确认本页设置。 24/32...
- Page 59 3/ 喷香设置 c) 气泵强度 气泵强度指气泵出气口所需的气压水平: 如果喷头距离气泵较远,或者您希望进一 步加大喷香浓度,请增大此参数。 气泵强度调整对主页面的喷香浓度调整起 到补充的作用。 按 + 或 – 选择上图中的选项,按 OK 确认。 按 + 或 – 增加或降低气泵的强度,按 OK 确认。 25/32...
- Page 60 3/ 喷香设置 d) 外部控制 该功能可以让外部设备控制喷香。 通过该功能,空调控制器可以在空调断开 时自动切断喷香,并在空调重新开启时启 动喷香。 按 + 或 – 选择上图中的选项,按 OK 确认。 按 + 或 – 选择 ON (启用)或 OFF(不 主页面时间旁边将显示 “E”, 表示气泵 启用),按 OK 确认。 已设置为外部控制模式。 当干接点闭合时,气泵将在设定的时间段 内喷香。 26/32...
-
Page 61: 4/ 时钟设置
4/ 时钟设置 选择该选项,按 OK 进入。 按 + 或 – 设置小时,然后按 OK 转到分 钟设置。 重复此操作,直到设置好时间、日期和星 期,然后按 OK 进行最终确认。 5/ 更改语言 选择该选项,按 OK 进入。 按 + 或 – 选择需要的语言,按 OK 确认。 27/32... -
Page 62: 6/ 气泵测试
6/ 气泵测试 本选项用于气泵的维护和功能测试。 选择该选项,按 OK 进入。 按 OK 开始气泵测试。 如果气泵自动启动,则说明气泵运行正 常。按 OK 停止测试。 28/32... -
Page 63: 7/ 锁定菜单
7/ 锁定菜单 为防止用户在未经您同意的情况下使用本 气泵而发生意外,您可以启用密码锁屏。 此时,用户将需要输入密码才能进入设置 菜单。 选择该选项,按 OK 进入。 按 + 或 – 选择密码的第一个数字(1 到 需要输入密码。无论您按任何按钮,屏幕 9),按 OK 确认以转到第二个数字。重 均会要求输入密码,才能进入菜单: 复该操作选择其它几位数字,然后按 OK 按 + 或 – 选择密码的第一个数字(1 到 9),按 OK 确认以转到第二个数字。重 进行最终确认。 复该操作选择其它几位数字,然后按 OK 当气泵在运行且锁屏已激活时,访问菜单 进行最终确认。 29/32... -
Page 64: 常见问题
常见问题 气泵不启动: n 检查电源连接; n 检查时钟设置是否正确,以及当前时间是否在喷香时段。 标记 让我们一起保护环境。 您的设备包含许多可以回收或循环使用的材料。请将设备送到回收站,没有 回收站时,请送到经批准的服务中心进行处理。 CE 合格认证的有关信息 CE 标志表示产品符合以下欧洲指令的主要要求:2014/35/UE(低电压 指令)、2014/30/UE(电磁兼容性指令)。 保修期 Scentys 为 R'Pulse 150 气泵提供自购买之日起 24 个月的保修期。保修涵盖制造 缺陷,但不涵盖不当使用。如果在保修期内,在正常使用和维护条件下发现本产品存 在缺陷,请通过电子邮件与我们联系: assistance@scentys.com Scentys 的责任仅限于保修期内维修和/或更换设备的费用。 30/32... - Page 65 记录 31/32...
- Page 66 32/32...