Table of Contents
Advertisement
Quick Links
Installation, Operation & Maintenance
POWER-COMPACT SCOTCH YOKE
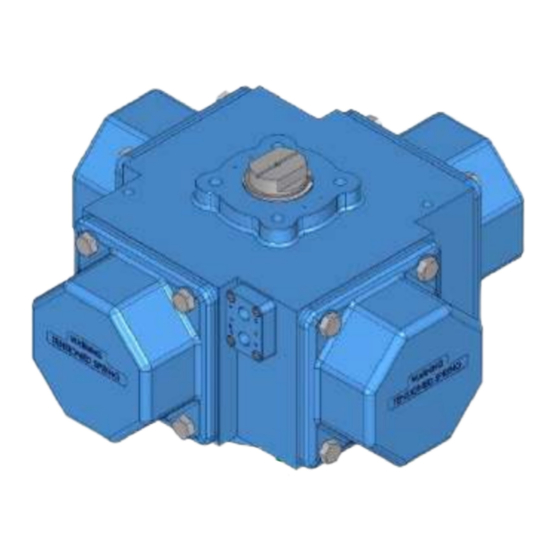
4 Pistons Pneumatic Actuator
Habonim ISRAEL
Tel: +972-4-6914911
Fax: +972-4-6914935
sales_international@habonim.com
Habonim USA
Toll Free Phone: 1-866-261-8400
Toll Free Fax: 1-866-243-9959
sales_usa@habonim.com
POWER-COMPACT SY - 4 Pistons Pneumatic Actuator
Valves Series
Habonim EUROPE
Tel: +34 640 384 759
sales_eu@habonim.com
Habonim CHINA
Tel: + 86 21 64453190 *146
sales_china@habonim.com
Habonim UK
Tel: +44-1633-484554
Fax: +44-1633-482252
sales_uk@habonim.com
Habonim AUSTRALIA
Tel: +61 3 9556 5428
sales_au@habonimau.com
EN-COMPACT REV00-12/21
Advertisement
Chapters
Table of Contents

Summary of Contents for HABONIM POWER-COMPACT SY
- Page 1 POWER-COMPACT SY - 4 Pistons Pneumatic Actuator Valves Series Installation, Operation & Maintenance POWER-COMPACT SCOTCH YOKE 4 Pistons Pneumatic Actuator Habonim ISRAEL Habonim EUROPE Habonim UK EN-COMPACT REV00-12/21 Tel: +972-4-6914911 Tel: +34 640 384 759 Tel: +44-1633-484554 Fax: +972-4-6914935 sales_eu@habonim.com Fax: +44-1633-482252 sales_international@habonim.com...
-
Page 2: Table Of Contents
POWER-COMPACT SY - 4 Pistons Pneumatic Actuator Valves Series Contents General ........................... 1 SIL ..........................2 Storage ........................2 Installation........................3 4.1. General ........................3 4.2. Identification ......................4 4.3. Lifting data ......................... 4 4.4. Mounting on a valve ....................5 4.5. -
Page 3: General
Improper use of the product may result in injuries or property damage. Refer to the Habonim Compact SY catalogue for additional product safety information or contact Habonim. 1. Assure that the actuator is isolated from the air supply or electrical ancillaries before attempting to perform any maintenance. -
Page 4: Sil
• Application temperature higher than +110 °C (+230 °F) for HT applications Habonim recommends a proof test interval of 12 months; in case of Fail to Open ESD system, a partial stroke is acceptable to confirm that the installation is functioning properly. -
Page 5: Installation
POWER-COMPACT SY - 4 Pistons Pneumatic Actuator Valves Series 4. Installation The installation procedure for COMPACT SY actuator is critical to ensuring both long life and satisfying performance. Actuators stored on site, awaiting installation, should be kept in their original packing, in dry conditions, where damage will not occur (see clause 3). -
Page 6: Identification
POWER-COMPACT SY - 4 Pistons Pneumatic Actuator Valves Series 4.2. Identification Compact SY actuators are supplied with a nameplate located on the side of the body. The information includes actuator size, model, type, spring set, threads, indicator, additional options, date of manufacture, protection rating, pressure limits and company logo. -
Page 7: Mounting On A Valve
POWER-COMPACT SY - 4 Pistons Pneumatic Actuator Valves Series 4.4. Mounting on a valve The actuator can be attached by a bracket (indirect mount) or mounted directly onto the valve. Indirect mount Direct mount The actuator bottom interface is in accordance with ISO 5211 and may come with square or with keyways drive slots to fit various valve shafts. - Page 8 POWER-COMPACT SY - 4 Pistons Pneumatic Actuator Valves Series COMPACT - 4 Pistons Pneumatic Actuator...
-
Page 9: Travel Adjustment
POWER-COMPACT SY - 4 Pistons Pneumatic Actuator Valves Series 4.5. Travel adjustment will quickly result in loss of bolt strain and subsequent leakage. The actuator comes factory adjusted to produce a 90° rotation. The rotation is restricted by the yoke stopping surfaces and two or four stop screws (29) which are threaded into the actuator body. -
Page 10: Solenoid Valve Mounting
POWER-COMPACT SY - 4 Pistons Pneumatic Actuator Valves Series 4.6. Solenoid valve mounting Connection of the air supply is accomplished by mounting a solenoid valve directly onto the NAMUR block (24) which has a mounting pad conforming to the NAMUR standards. (Only solenoids made to the NAMUR standard can be mounted in this way.) -
Page 11: Operation
POWER-COMPACT SY - 4 Pistons Pneumatic Actuator Valves Series 5. Operation 5.1. Operating conditions Work temperatures The standard temperature limits for the Compact SY actuators are -20°C (-4°F) to +80°C (+176°F). For temperatures below or above these figures special preparation and materials are required such as grease, O-rings, yoke bearings and pads. -
Page 12: Principle Of Operation
POWER-COMPACT SY - 4 Pistons Pneumatic Actuator Valves Series 5.2. Principle of operation The Compact SY actuator is a pneumatic quarter-turn (90°) scotch yoke actuator. Air pressure applied to the piston surface area generates thrust which transforms linear motion to rotary motion of the yoke. The Compact SY has four pistons centrally located around one yoke. - Page 13 POWER-COMPACT SY - 4 Pistons Pneumatic Actuator Valves Series Actuator configurations The actuator has two configurations: Double Acting (DA) and Spring Return (SR). In DA actuator in CW and CCW strokes the pistons are pushed by air pressure. In SR actuator in CCW stroke the pistons are pushed by air pressure and in CW stroke the pistons are pushed by springs, which are located at the piston’s chambers.
-
Page 14: Operating Media
5.5. Speed control Habonim recommends using reducers to properly control the opening / closing speed of Compact SY actuators, especially if mounted on butterfly valves or dumpers. -
Page 15: Maintenance
Habonim recommends actuator full maintenance operation every 500,000 cycles or 4 years, whichever comes first. Maintenance team must read and understand the Habonim product IOM before starting the operation. In case of a doubt please consult the Habonim engineering team. -
Page 16: Actuator Configuration Conversion
POWER-COMPACT SY - 4 Pistons Pneumatic Actuator Valves Series Springs sets replacement For SR actuator there are loaded spring cartridge sets for each model. The loaded cartridges are replaced entirely with new ones. For disassembly and assembly instructions refer to the sections 2 and 3 of the Disassembly and Assembly Manual. -
Page 17: Disassembly & Assembly Manual
POWER-COMPACT SY - 4 Pistons Pneumatic Actuator Valves Series Disassembly & Assembly Manual POWER-COMPACT SCOTCH YOKE 4 Pistons Pneumatic Actuator Series included: C100M COMPACT - 4 Pistons Pneumatic Actuator... - Page 18 POWER-COMPACT SY - 4 Pistons Pneumatic Actuator Valves Series Contents General ......................... Disassembly ......................2.1. Before starting ..................... 17 2.2. Identification ......................17 2.3. Disassembly of the double action covers ..............18 2.4. Disassembly of the spring return covers ..............18 2.5.
-
Page 19: General
• For stop screws use LOCTITE® SF 7649 and HERNON Nuts N’ Bolts® 420. • For O-ring seals use lubricants indicated in the clause 6.2 table of the Maintenance manual. • Equivalent agents may be applied, when approved by Habonim engineering. • For any discrepancies, please contact Habonim 2. -
Page 20: Disassembly Of The Double Action Covers
Warning: If after opening a 10 mm gap the cover is still under tension, close the cover by retightening the bolts and contact Habonim. DO NOT release the cover completely. Caution: springs in the actuator are under tension. - Page 21 Carefully examine the springs cartridge and make sure it’s not damaged, special attention must be given to the bent pipe at the center which holds the complete unit together. In case there are cracks or any other severe damage, close the cover by retightening the bolts and contact Habonim. Bent pipe.
-
Page 22: Disassembly Of The Scotch Yoke Mechanism
POWER-COMPACT SY - 4 Pistons Pneumatic Actuator Valves Series 2.5. Disassembly of the scotch yoke mechanism 2.5.1. For actuators with two stop screws: Untighten the locking nut (30) and unscrew the stop screw (29) on both sides of the actuator approximately 15-20 mm outward. - Page 23 POWER-COMPACT SY - 4 Pistons Pneumatic Actuator Valves Series 2.5.2. Secure the body of the actuator (1) to the worktable. Turn the yoke (12) counterclockwise (CCW) with appropriate tool to eject the 4 pistons from their cylinders. Alternatively, you may supply low pressure (1-2 bar) to the yoke chamber through port A to push the pistons out from the body.
- Page 24 POWER-COMPACT SY - 4 Pistons Pneumatic Actuator Valves Series 2.5.3. Remove the piston O-rings (3) by pressing them slightly from both sides of the piston, creating a loop and pull them out of their groove. Do not use a sharp object to pry them out.
- Page 25 POWER-COMPACT SY - 4 Pistons Pneumatic Actuator Valves Series 2.5.6. Remove the circlip (21), the metal disc bearing (20) and the polymer disc bearing (19). 2.5.7. Put the body (1) on its side, so that the yoke (12) comes to the horizontal orientation. Use plastic hammer to push the yoke out of the body.
-
Page 26: Disassembly Of The Drive Shaft Insert
POWER-COMPACT SY - 4 Pistons Pneumatic Actuator Valves Series 2.5.8. Remove the yoke upper ball bearing (15) and the lower slide bearing (14) either from the body, or from the yoke. 2.5.9. Remove the yoke upper (16) and lower (13) O-rings from the yoke. -
Page 27: Assembly
POWER-COMPACT SY - 4 Pistons Pneumatic Actuator Valves Series 3. Assembly 3.1. Before starting 3.1.1. Before assembling assembly, clean the grease in the cylinders and all the actuator parts. 3.1.2. Check the cylinder for any scratches. The surface should be smooth and without any damage, debris, rust, or other contaminants. - Page 28 POWER-COMPACT SY - 4 Pistons Pneumatic Actuator Valves Series 3.2.4. Insert the yoke upper ball bearing (15) into the body (1). 3.2.5. Assemble the yoke lower slide bearing (14). COMPACT - 4 Pistons Pneumatic Actuator...
- Page 29 POWER-COMPACT SY - 4 Pistons Pneumatic Actuator Valves Series 3.2.6. Insert the yoke (12) into the body (1) through the bottom hole. 3.2.7. Put polymer (19) and the metal (20) disc bearings onto the yoke’s upper stem and lock them with the circlip (21).
- Page 30 POWER-COMPACT SY - 4 Pistons Pneumatic Actuator Valves Series 3.2.8. Orient the yoke (12) so that its VDI groove is perpendicular to the block NAMUR’s surface. Apply a drop of a glue to the stop screw (29) thread and screw it into the right hole at the bottom of the body (1) until it is in contact with the yoke’s bottom stopper surface.
- Page 31 POWER-COMPACT SY - 4 Pistons Pneumatic Actuator Valves Series 3.2.10. Use external circlip plier to secure the roller pin (5) with the circlip (6). 3.2.11. Assemble the piston guide rings (4). 3.2.12. Apply grease to the pistons O-rings (3) and assemble them on the pistons (2).
- Page 32 POWER-COMPACT SY - 4 Pistons Pneumatic Actuator Valves Series 3.2.15. Apply grease to the body cylinders and to the rollers of the pistons. 3.2.16. Insert the four pistons (2) into the cylinders of the body (1). Make the rollers of each piston engage with appropriate slot of the yoke (12).
- Page 33 POWER-COMPACT SY - 4 Pistons Pneumatic Actuator Valves Series Alternatively, you can use vacuum pump connected to the port A to pull in the pistons. In this case, all pistons’ O-rings (3) must be seated on the cylinders surfaces before you activate the pump, otherwise the vacuum could not be built in the yoke’s chamber.
-
Page 34: Assembly Of The Double Action Covers
POWER-COMPACT SY - 4 Pistons Pneumatic Actuator Valves Series 3.2.19. Rotate the yoke back and forth till the pistons run smoothly in the cylinders. 3.2.20. Bring the pistons (2) in, to the closed position and once again apply grease in the cylinders behind the pistons. -
Page 35: Assembly Of The Spring Return Covers
POWER-COMPACT SY - 4 Pistons Pneumatic Actuator Valves Series 3.4. Assembly of the spring return covers 3.4.1. Apply grease to the cover O-rings (8) and insert them into the grooves of the SR covers (9). 3.4.2. Apply grease to all the spring sets (31). -
Page 36: Fasteners Tightening Sequence
POWER-COMPACT SY - 4 Pistons Pneumatic Actuator Valves Series 3.6. Fasteners tightening sequence 3.7. Fasteners tightening torques Table 1 Tightening Torque Actuator Fastener Type Fastener Size Lb-in Cover bolts 3100 C100M Drive shaft screws COMPACT - 4 Pistons Pneumatic Actuator... -
Page 37: Exploded Drawing And Bom
POWER-COMPACT SY - 4 Pistons Pneumatic Actuator Valves Series Full exploded view and BOM COMPACT - 4 Pistons Pneumatic Actuator...
Need help?
Do you have a question about the POWER-COMPACT SY and is the answer not in the manual?
Questions and answers