
Related Manuals for Psion VH10


Summary of Contents for Psion VH10
- Page 1 PSION VH10 Vehicle-Mount Computer User Manual (Windows ® Embedded CE 6.0) April 22, 2013 Part No. 8000275.B ISO 9001 Certified Quality Management System...
- Page 2 This document and the information it contains is the property of Psion Inc. This document is not to be used, reproduced or copied, in whole or in part, except for the sole purpose of assisting in proper use of Psion manufactured goods and services by their rightful owners and users.
- Page 3 Overview of the VH10 Vehicle-Mount Computer ........
-
Page 4: Table Of Contents
Key Repeat ....................58 Psion VH10 Vehicle-Mount Computer User Manual... - Page 5 Creating a Backup ..................93 Psion VH10 Vehicle-Mount Computer User Manual...
- Page 6 Antennas......................113 Psion VH10 Vehicle-Mount Computer User Manual...
- Page 7 Attaching the VH10 to the Heavy Duty Mount ....... . .
- Page 8 Index ................... I Psion VH10 Vehicle-Mount Computer User Manual...
- Page 9 Overview of the VH10 Vehicle-Mount Computer ........
-
Page 11: About This Manual
Start Menu: Programs and Settings>Control Panel. The software includes both Psion Soft- ware Advantage and Microsoft programs, and details how to use them to configure the VH10, along with Power Properties, Bluetooth, etc. This chapter also details the PsionVU program, which enables you to customize your computer settings. -
Page 12: Overview Of The Vh10 Vehicle-Mount Computer
The optional VH10f freezer model includes heating hardware to be used in cold environments to prevent condensation from developing on or inside the VH10. The heaters keep the display clear of frost, the key- board from freezing, and the ports dry. In addition, the heater clears fog from the display panel when the computer is moved in and out of cold environments. -
Page 13: Vh10 Views
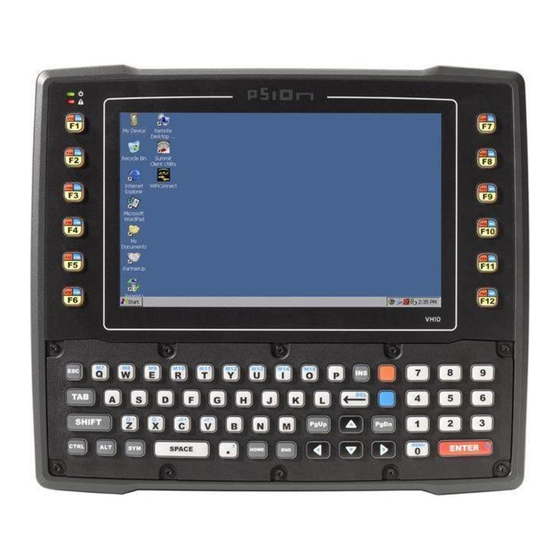
802.11a/b/g/n Standard Radio - with Bluetooth coexistence (Bluetooth V2.0 + EDR) • CCX v4 VH10 Views The following figures show the VH10 — for detailed illustrations, please see “VH10 Vehicle-Mount Computer Features” on page 9. Figure 1.1 VH10 Front View (standard unit) Figure 1.2... - Page 14 Chapter 1: Introduction VH10 Views Figure 1.3 Bottom (Ports) View Psion VH10 Vehicle-Mount Computer User Manual...
- Page 15 VH10 Vehicle-Mount Computer Features ........
-
Page 17: Basic Operation
Macro keys Blue Modifier key SYM key ENTER/POWER key Figure 2.2 Bottom View (cable bay cover in place) Latch each side of cable bay cover Cable bay cover Power cable UART RS-232 ports Beeper Psion VH10 Vehicle-Mount Computer User Manual... -
Page 18: Documents Available
Preparing the VH10 for Operation Typically the VH10 Vehicle-Mount Computer is configured at the factory and arrives ready for use. Although the VH10 is equipped with a MicroSD card on the MLB, this card is not intended for user modification. 2.3.1... -
Page 19: The Internal Backup Battery
The VH10 Vehicle-Mount Computer is equipped with a supercapacitor that will provide emergency memory retention to the unit for up to five minutes in case of power disruption. While the VH10 will not be opera- tional when external power is removed, the memory content is preserved during this period. It also pro- vides up to one week of real-time clock backup. -
Page 20: Performing A Warm Reset
Windows XP or earlier, Windows Vista , Windows 7 or later. For information on connecting the VH10 to a PC, please refer to “Data Transfer between VH10 and a PC” on page 52. - Page 21 3.8.2 Cleaning the VH10........
-
Page 23: Getting To Know Your Vh10
Embedded CE 6.0 The Keyboard The VH10 is available with an integrated keyboard in either QWERTY or AZERTY alphanumeric keyboard layout. It features 67 keys, 12 direct function keys, and an LED backlight. Most of the keys on the keyboard operate much like a desktop computer. Where a key or key function is not consistent with the PC keyboard, those differences are described in the following sections. -
Page 24: Modifier Keys
‘off’. Refer to “One Shot Modes” on page 59 for details. 3.2.3 Function Keys and Macro Keys In addition to the standard keyboard functions (see “The Keyboard” on page 15), the VH10 supports func- tion keys and macro keys. Psion VH10 Vehicle-Mount Computer User Manual... -
Page 25: Function Keys
Important: Refer to “Macro Keys” on page 61 for details about creating macros. The VH10 keyboard is equipped with a series of macro keys that can be programmed to replace frequently used keystrokes, along with the function of executable keys like the [ENTER] key, the [BACKSPACE] key, any function key, arrow key, etc. -
Page 26: The Display
Note: Refer to “Backlight” on page 53 for details about the Display Properties dialog box. 3.3.2 Calibrating the Touchscreen If you find that the stylus pointer is not accurate when you tap on an item on the VH10 screen, use the Stylus Properties dialog box in the Control Panel to recalibrate the screen. •... -
Page 27: Power Status Led
Figure 3.3 Taskbar The taskbar changes dynamically, and only those icons that are applicable are displayed. For example, if a radio is not installed in your VH10, the radio signal icon is not displayed in the taskbar. ® Windows Start Menu... -
Page 28: Audio Indicators
Audio Indicators The VH10 beeper emits a sound when a key is pressed, a keyboard character is rejected, scan input is ac- cepted or rejected, an operator’s entry does not match in a match field, etc. To adjust the volume, see “Volume Adjustments”... -
Page 29: Operating Two Dimensional (2D) Imagers
Chapter 3: Getting To Know Your VH10 Scan LED Indicators 3.5.2 Scan LED Indicators External scanners have integrated LED indicators that are not controlled by the VH10. 3.5.3 Troubleshooting If the scanner is not working, investigate the following: • Is the VH10 on? •... -
Page 30: Windows Embedded Ce 6.0
Refer to “Calibrating the Touchscreen” on page 18. The VH10 comes equipped with a stylus — a pointing tool that looks like a pen. The stylus is used to select objects on the touchscreen. You can also use gestures with your fingers. You can use two gestures: pan and flick. -
Page 31: The Windows Classic Shell Startup Desktop
The Taskbar The VH10 is equipped with a taskbar at the bottom of the screen. It displays icons through which you can view the battery capacity and radio signal quality of your unit. In addition, the taskbar displays the applica- tion(s) currently running on your unit. -
Page 32: The Start Menu
Chapter 3: Getting To Know Your VH10 The Windows Classic Shell Startup Desktop The taskbar also displays active modifier keys: [SHIFT], [ALT], [CTRL], [BLUE] and [ORANGE]. Keys that have been locked “on” are displayed with underlined letters. For example, if you have set the [CTRL] key lock to “on”... - Page 33 Chapter 3: Getting To Know Your VH10 The Windows Classic Shell Startup Desktop Note: Tap on the item in the menu with which you want to work. If you’re using the keyboard: • Use the arrow keys to highlight a menu item, and press [ENTER], or If the menu item has an underlined character: •...
- Page 34 “Remote Desktop Connection” on page 82 provides a website with details about this option. Wi-Fi Config The Wi-Fi Config application is used to configure the VH10 radio for one or more wireless network profiles. Windows Explorer The Windows Explorer installed on your VH10 is consistent with all Windows Embedded CE devices.
- Page 35 Control Panel. Network and Dial-Up Connections The Network and Dial-up Connections window allows you to configure the VH10 network interfaces or execute an existing configuration. Refer to “Connectivity” on page 12 for radio setup details.
- Page 36 VH10” on page 11. Suspend The Suspend option suspends the VH10 immediately. This is equivalent to turning the Vehicle-Mount off. Warm Reset The Warm Reset option resets the Vehicle-Mount, leaving all saved files and registry settings intact. Any unsaved data is lost.
-
Page 37: The Psionvu Desktop Shell
Figure 3.8 Switch to PsionVU Shell After resetting the VH10, the desktop appearance will be very different. The programs are accessed with finger (or stylus) taps and swipes. If there are more applications than shown on one screen, a white ani- mated dot will be present on the side of the screen in the direction of the next set of icons. -
Page 38: Restoring The Windows Classic Shell
Chapter 3: Getting To Know Your VH10 Restoring the Windows Classic Shell A different program, PsionVU Access, enables you to customize your computer settings, remove or add shortcuts to the Favourites Bar and Control Panel, and limit access to various different components on the computer and the system tray icons for security. -
Page 39: General Maintenance
The plastic is partially soluble in oils, mineral spirits and gasoline. The plastic slowly decomposes in strong alkaline solutions. • Exposure to aircraft de-icing fluids can degrade the plastics on VH10. If the VH10 is used near aircraft de-icing environments, regular rinsing with water is recommended. •... - Page 41 Psion Software Advantage........
- Page 42 4.25.1.3 Advanced Services Settings ........98 Psion VH10 Vehicle-Mount Computer User Manual...
- Page 43 4.28 WiFi Connect A.R.C............108 Psion VH10 Vehicle-Mount Computer User Manual...
-
Page 45: Overview Of Software
Overview of Software Overview of Software The VH10 programs and applications are accessed through two main areas from the Desktop Start Menu: Programs and Settings>Control Panel. This chapter details the configuration for the major software from both areas, listed alphabetically. -
Page 46: Control Panel Applications
Control Panel Applications The Control Panel provides a group of applications that allow you to customize and adjust settings on your VH10. This section shows the related icons in Control Panel and gives a brief description of each. App Launch Keys By mapping keys to applications using this program, you can then launch those applications from a single key-press. - Page 47 PC Connection Enables direct connection to a desktop computer (or through ActiveSync — see “Data Transfer between VH10 and a PC” on page 52). Selecting the Change Connection button allows you to change the type of direct connection to your PC.
-
Page 48: App Launch Keys
App Launch Keys Scanners Provides dialog boxes in which you can tailor barcode options and change the VH10 scanner port settings. Storage Manager Allows you to view information about the storage devices that are present. For details, see page 88. - Page 49 The cursor moves to the App field and a new screen is displayed where you can choose the application to which you want to assign the application key. If you need to, you can Browse through the information in your VH10 until you locate the application you want to launch. •...
-
Page 50: Bluetooth ® Setup
Keep in mind that Bluetooth and IEEE 802.11b/g/n radios both operate in the 2.4 GHz band. Although the VH10 includes features to minimize interference, performance of the system will not be optimal if you use both radios simultaneously. Typically, when both radios operate in the Vehicle-Mount at the same time, they cannot transmit simultaneously —... -
Page 51: Device
Disconnect Audio disconnects the audio connection from the Bluetooth headset. • Volume Control displays a dialog box where the headset and microphone volume can be adjusted. 4.4.2 Device In this tab, users can discover and display Bluetooth devices. Psion VH10 Vehicle-Mount Computer User Manual... -
Page 52: Discovering And Removing Devices
4.4.2.1 Discovering and Removing Devices Scan discovers Bluetooth devices in range of the VH10 and lists them in this tab. Any existing devices previ- ously discovered and listed will also be displayed. Clear removes all Bluetooth devices listed except those with currently paired and connected services. - Page 53 This dialog box offers a number of additional options such as enabling Encryption and selecting four differ- ent Modes: Serial, ActiveSync, Scanner, and Printer Port. Serial is used for simple serial port communication. ActiveSync is for ActiveSync-over-Bluetooth. Psion VH10 Vehicle-Mount Computer User Manual...
-
Page 54: Servers
‘Bluetooth master’ and the Vehicle-Mount, the ‘Bluetooth slave’. In order for the remote device to connect to the Vehicle-Mount, the VH10 must offer a service in the form of a server. The Servers tab allows these services to be enabled and configured. There are three server services available: Serial, Scanner and OBEX OPP. -
Page 55: Mode
Allow Bluetooth to wake system allows remote Bluetooth devices to wake the VH10 by requesting a Blue- tooth service that requires host intervention. This feature can also be used when the VH10 is waking from suspend to significantly to reduce the initialization time of the Bluetooth system. -
Page 56: Bluetooth Quick-Pairing
To disconnect your scanner from the VH10, scan the UNPAIR barcode label on the upper left side of the VH10. Note: If the scanner is out of range of the VH10, it may drop the connection. To pair the scanner again, scan the PAIR barcode on the front of the VH10. - Page 57 In the drop-down menu labeled Select a modem, choose the name of the modem with which you want to connect, then choose the Configure button to display the Device Properties dialog box. The VH10 communicates via Bluetooth to your Bluetooth equipped cellular telephone and retrieves the parameters for the Device Properties dialog box. VH10 then disconnects.
- Page 58 The phone number you enter is network carrier dependent. Once you’ve specified all the necessary information, choose the Finish button. In the Control Panel, choose the Dialing icon. 12. The values in the Dialing Properties dialog box need to be edited according to your network carrier specifications. Psion VH10 Vehicle-Mount Computer User Manual...
-
Page 59: Certificates
Windows Certificates Store, and allows you to import, delete, and view these certifi- cates. VH10 checks that the certificate has been digitally signed by a certification authority that the VH10 explicitly trusts. This option is used in conjunction with 802.1x authentication to enhance VH10 security. -
Page 60: Data Transfer Between Vh10 And A Pc
View VH10 files from Windows Explorer. • Drag and drop files between the VH10 and the PC in the same way that you would between PC drives. • Back up VH10 files to the PC, restore them from the PC to the Vehicle-Mount again, etc. -
Page 61: Display Properties
(no key press, etc.). Note: Keep in mind that this option may be restricted to supervisory use only. • In the Display Properties dialog box, open the Backlight tab. Psion VH10 Vehicle-Mount Computer User Manual... -
Page 62: Screen Blanking
Battery Power mode (see also “Power Saving Suspend” on page 70), and the backlight is auto- matically dimmed. Intensity This parameter is used to adjust the light intensity of the VH10 backlight. Sliding the bar to the left lowers the light intensity, and sliding it to the right raises the intensity. Bright For The value chosen from this drop-down menu determines the duration of time that the backlight stays on at the configured intensity after the last user action (e.g. -
Page 63: Dr. Debug
4.8.1 Status This tab indicates the status (on/off) of the debug engines. Tapping on Browse logs displays error logs for your review. The logs should be used as reference when working with Psion Technical Support personnel. 4.8.2 Utilities The Utilities tab can be used to log network traffic. When you tap on the Start button, debug data is col- lected so that, if necessary, it can be forwarded to a Psion technician for evaluation. -
Page 64: Settings
To change the location where debug information will be stored, tap on the button to the right of the Log Folder option. Error Reporting Error Reporting allows you to enable or disable Microsoft error reporting prompts. • Tap on the Error Reporting icon in the Control Panel. Psion VH10 Vehicle-Mount Computer User Manual... -
Page 65: Input Panel
Chapter 4: Configuration Input Panel 4.10 Input Panel The VH10 is equipped with a Soft Input Panel (SIP). Shown below is the standard Microsoft SIP, accessed from Control Panel. Soft Keyboard Input Panel Button Icon Tapping on the Input Panel button displays a soft input panel (soft keyboard) that can be customized using the Input Panel dialog box. -
Page 66: Keyboard Properties
Note: These settings apply when a key is held down continuously. • In the Keyboard Properties dialog box, open the Repeat tab. Enable Character Repeat Tapping in the check box next to this option enables the key behaviour you specify in this dialog box. Psion VH10 Vehicle-Mount Computer User Manual... -
Page 67: Backlight
In the Keyboard Properties dialog box, open the Backlight tab. Intensity This parameter is used to adjust the light intensity of the VH10 keyboard backlight. Sliding the bar to the left lowers the keyboard backlight intensity, and sliding it to the right increases the intensity. The backlight automatically turns off when the computer is on UPS battery. - Page 68 Chapter 4: Configuration One Shot Modes The options in this tab allow you to determine how modifier keys on your VH10 behave. For each modifier key — [ALT], [SHIFT], [CTRL], [ORANGE], and [BLUE] — you have the following options in the drop-down menu: Lock, OneShot, and OneShot/Lock.
-
Page 69: Macro Keys
• When you’ve finished recording your macro sequence, press the key sequence: [CTRL] [ALT] [ENTER], or select the Stop Recording button. A new screen ‘Verify Macro’ displays the macro sequence you created. Psion VH10 Vehicle-Mount Computer User Manual... -
Page 70: Unicode Mapping
If a Unicode mapping is not listed, the Unicode mapping is mapped to the default Unicode value. Adding and Changing Unicode Values Important: Changes to Unicode mappings are not saved until you exit the Keyboard Properties dialog box. • Choose the Add/Change button. Psion VH10 Vehicle-Mount Computer User Manual... -
Page 71: Scancode Remapping
[BLUE] modifier is on; the ORANGE table defines key presses that occur when the [ORANGE] modifier is on. The default mappings of these scancodes can be overwritten for each of these three tables using the Scan- code Remapping tab accessed from the Keyboard Properties dialog box. Psion VH10 Vehicle-Mount Computer User Manual... - Page 72 Note: The Label field displays the default function of the scancode you are remapping. Virtual Key, Function and Macro The radio buttons at the bottom of the dialog box allow you to define to what the scan code will be rema- pped: Virtual Key, Function or Macro. Psion VH10 Vehicle-Mount Computer User Manual...
-
Page 73: Lock Sequence
A locked keyboard icon is displayed in the softkey bar when the keyboard is locked. Locked Keyboard Icon • Type the key sequence to unlock the keyboard. Psion VH10 Vehicle-Mount Computer User Manual... -
Page 74: Manage Triggers
Tapping this button brings up the Add Mapping dialog (see page 67), so that you can add new trigger mappings. Edit Tapping this button brings up the Edit Mapping dialog (see page 67), so that you can edit existing trigger mappings. Psion VH10 Vehicle-Mount Computer User Manual... -
Page 75: Add And Edit Trigger Mapping
You can enable either an Up/Down or Double Click response to a trigger press. Normally, when a trigger (keyboard key, etc.) is pressed and released, a “trigger down” event is sent to the “owner” — that is, the ap- Psion VH10 Vehicle-Mount Computer User Manual... -
Page 76: Microphone
The VH10 includes unique features that support Open TekTerm, a Psion application that has the ability to maintain multiple simultaneous sessions with a variety of host com- puters. For detailed information, please refer to the Open TekTerm Software User Manual, PN 8000073. - Page 77 Chapter 4: Configuration PartnerUp Tapping on a preloaded client in this screen displays a drop-down menu from which the operator can choose from an array of related options. In the example following, Stay-Linked Documentation was chosen. Psion VH10 Vehicle-Mount Computer User Manual...
-
Page 78: Power Properties
This drop-down menu allows you to specify the Suspend Timeout for both power modes: AC Power and UPS Battery Power. Note: To maximize battery run time when the VH10 is on UPS Battery Power, the display backlight is auto- matically dimmed, the keyboard backlight is turned off, heaters are automatically switched off, and the powered external ports are limited to a total of 1A. -
Page 79: Advanced
This optional feature puts the VH10 in Suspend when the vehicle ignition is turned off, and powers the VH10 on when the ignition is on. You can enable this feature and set a delay time for the VH10 to go into Suspend. -
Page 80: Wakeup Sources
Note: The useable battery capacity is less than the actual battery capacity; this is to maximize the life of the battery in the VH10, while still providing a typical UPS run time of one hour when fully charged. Important: Battery Health is an estimate and should not be depended on to provide a 100% account of battery condition. - Page 81 This option allows you to enable the service. To access the menus after enabling the service, you will need to either restart the VH10 or wait until a resume from Suspend. Add Health Colour to the Taskbar Battery Tray Icon Enabling this option changes the background colour for the battery icon in the Taskbar, based on battery condition: Green (excellent), Yellow (used), and Red (battery should be replaced).
-
Page 82: Psionvu Access
By setting an Administrator Password, you can limit access to various different components on the compu- ter and the system tray icons for security. The default security setting allows User access to all options, therefore restrictions and settings can be configured without setting a password. Psion VH10 Vehicle-Mount Computer User Manual... -
Page 83: Shell Settings
The Shell Settings application has two menus: Applications and Advanced. Applications The Applications menu lists all the applications installed on the computer, alphabetically. The items checked in this view are shown on the Desktop. Psion VH10 Vehicle-Mount Computer User Manual... - Page 84 • Administrator Access in Start Menu: When this box is checked, the PsionVU Access program will be shown in the Start Menu>Programs list. The following item is not optional: • Administrator Key Sequence: Sets the key sequence to open PsionVU Access. Psion VH10 Vehicle-Mount Computer User Manual...
-
Page 85: Restrictions
4.17.3 Restrictions This section deals with items that are by default available to users but can be restricted by an administrator. Advanced The Advanced menu lists the system features you can restrict or block. Psion VH10 Vehicle-Mount Computer User Manual... -
Page 86: Control Panel Settings
Administrator has the option to import these settings from one device to multiple devices of the same operating system. Important: A copy of this file should also be saved in a central repository for all Psion .xml files with a predefined name so that other Psion utilities can locate it. -
Page 87: Quick Defrost (Heater Settings For Vh10F)
The model VH10f Vehicle-Mount Computer has several heaters that can be used in cold environments to prevent condensation from developing on or inside the VH10. The “Quick Defrost” heaters keep the display clear of frost, the keyboard from freezing, and the ports (serial and USB) dry. In addition, the heater clears fog from the display panel when the computer is moved in and out of cold environments. -
Page 88: Settings
4.18.2 Heater Info • In the Quick Defrost dialog box, open the Heater Info tab. This dialog box allows you to monitor the status of each heater and test the entire system. Psion VH10 Vehicle-Mount Computer User Manual... - Page 89 Temperature Shows the temperature measured for that module. System Test Allows you to turn on all the heaters for 20 seconds to be able to check their operating status. Psion VH10 Vehicle-Mount Computer User Manual...
-
Page 90: Remote Desktop Connection
Remote Desktop Connection Remote Desktop Connection, located in Start>Programs, is a VH10 application used to connect to a Windows Terminal Server so that you can run a “session” on the Server machine, using the VH10 (Windows Embedded CE device). Refer to the following website for step-by-step information about setting up this connection: http://www.microsoft.com/windowsxp/using/mobility/getstarted/remoteintro.mspx... -
Page 91: Double Click Parameters
Click Data This parameter determines which character is sent to the application installed in your VH10 following a dou- ble-click. A dialog box appears, asking that you press the key you want to insert. The ASCII/Unicode key value of the keypress is displayed. -
Page 92: Data Handling
Data Transmission There are two methods of data transmission between the scanner and VH10: Wedge data and Paste data. If Wedge data is chosen, each character that composes the barcode data is turned into a keyboard sequence that is transmitted to the cursor location of the current application –... - Page 93 Chapter 4: Configuration Translations • Tap on the No rule drop-down menu to display the rules. When you choose a rule, an associated screen is displayed in which you can define the rule. Psion VH10 Vehicle-Mount Computer User Manual...
-
Page 94: Case Rules
If the settings do not match exactly, the devices may not function. Note that some devices can auto-detect serial port settings (such as baud rate), and in this case the VH10 will dictate the settings. Baud rates often have a direct impact on performance — they should be set as high as possible while still ensuring reliable communication. - Page 95 Trigger On Sequence And Trigger Off Sequence If a SICK scanner connected to an VH10 computer port requires a serial stream of data bytes to trigger the scanner on and another to trigger the scanner off, the Trigger On Sequence and Trigger Off Sequence pa- rameters allow you to define these serial streams.
-
Page 96: Storage Manager
Type a name for the partition. If more than one partition is desired, uncheck the Use All Available Diskspace check box, then specify the desired number of sectors to be used by the partition. Psion VH10 Vehicle-Mount Computer User Manual... -
Page 97: Partition Management
Tap the Properties button. The Partition Properties dialog appears. Tap the Dismount button. The partition is dismounted. The asterisk disappears next to its name in the partitions list. Tap the Format button. The Format dialog appears: Psion VH10 Vehicle-Mount Computer User Manual... -
Page 98: Stylus Properties
• In the Control Panel, choose the Stylus icon. 4.22.1 Double-Tap • In the Double-Tap menu, follow the directions to tailor the sensitivity of the stylus when you tap on the touchscreen. Psion VH10 Vehicle-Mount Computer User Manual... -
Page 99: Calibration
Note: If you do not receive a prompt to save your data, there could be a problem with your touchscreen hardware. Contact your Psion representative. 4.22.3 Touch This tab allows you to disable the touchscreen. • Choose the Touch tab. Select the check box next to Disable the touch panel. Psion VH10 Vehicle-Mount Computer User Manual... -
Page 100: System Properties
Instead of expanding each section of items individually, you can also choose to open all the lists at once by choosing the Expand button, which will then change to a Collapse button to enable you to collapse all the sections as well. Psion VH10 Vehicle-Mount Computer User Manual... -
Page 101: Total Recall
Total Recall Total Recall is a Psion utility developed to maintain applications and settings during a cold boot, as well as clone settings to other devices. This utility creates a restore point of a device at a known state. This can be... -
Page 102: Creating A Clone
• Tap on the Create Clone button to begin the process. Your VH10 model type and OS will be identified in the cloning statement to ensure that you target devices of the same type. Give the clone profile a name and location, then tap on Next. -
Page 103: Managing Profiles
\Flash Disk\TotalRecall folder. In an autorestore, Total Recall only restores the profile located in the \Flash Disk\Total- Recall folder. If you store your profile anywhere else it will not be restored. Psion VH10 Vehicle-Mount Computer User Manual... -
Page 104: Deleting A Profile
USB drive prepared for cloning Autorun installation on next VH10 4.24.4 Deleting a Profile • In the Total Recall home screen, tap on Delete Profile. • In the next screen, locate your backup file, and tap on OK. Psion VH10 Vehicle-Mount Computer User Manual... -
Page 105: Tweakit
Temp folder — that is, data are always loaded from the FTP Server to the Temp folder and from the Temp folder to the FTP Server. If this option is disabled, a warm reset must be performed to accept the change. Psion VH10 Vehicle-Mount Computer User Manual... -
Page 106: Advanced Interface And Network Settings
4.25.1.3 Advanced Services Settings SNTP (Simple Network Time Protocol) Server The SNTP Server Name typed in this dialog box is used to synchronize VH10 time with the server time. A warm reset must be performed once the server name as been entered. -
Page 107: Registry Editor
4.26 Volume & Sounds Properties The VH10 has a beeper that is used for the standard sounds: key clicks, screen taps, and scanning. Note: Sounds (wave files) cannot be played on VH10 units. The conditions under which the VH10 emits sounds are tailored from within the application installed on your unit. -
Page 108: Wi-Fi Config
4.27 Wi-Fi Config The Wi-Fi Config application is used to configure the VH10 802.11a/b/g/n radio for one or more wireless network profiles. A network profile contains settings for SSID (Service Set Identifier) and security options. Note: In most situations, the configuration of your 802.11 radio will require parameter setting and access keys from a network administrator. -
Page 109: Manually Creating A Network
Enter the SSID (Service Set Identifier) for your network. 4.27.2.2 Authentication Mode The VH10 supports several classes of authentication — Open, WEP, WPA/WPA2 (Personal PSK, Enterprise, CCKM-WPA, CCKM-WPA2), and 802.1x with EAP. Tapping on the Auth. Mode menu displays your authentica- tion options. -
Page 110: Encryption
Note: Each Auth. Mode has a unique Configure Profile screen attached to it with fields appropriate to the authorization mode you’ve chosen. Open Authentication Open authentication does not provide security. When this option is chosen, the VH10 will connect to wire- less networks which do not use authentication or encryption. WEP (Wired Equivalent Privacy) WEP provides static security to prevent others from accidentally accessing your network. -
Page 111: Eap
Once you’ve completed the necessary fields, tap on OK. 4.27.2.5 Verify Server Certificate When the Verify Server Certificate box is checked, the VH10 will verify the certificate provided by the au- thentication server during the authentication process. This requires that an appropriate certificate be man- ually installed on the VH10 for the verification. -
Page 112: Connecting The Wireless Network
If your network is not using a DHCP server, you will need to assign an IP address. 4.27.3.1 IP Address To assign an IP address for your VH10: • Tap on the radio icon in the taskbar, Psion VH10 Vehicle-Mount Computer User Manual... - Page 113 Tap on Start>Settings>Network and Dial-up Connections. Tap on the radio icon for which you want to assign an IP address — in the sample screen below, the icon is labelled TIWLNAPI1. The Wireless Statistics screen is displayed. • Tap on the IP Information tab. Psion VH10 Vehicle-Mount Computer User Manual...
-
Page 114: Name Servers
Figure 4.6 TIWLNAPI1 IP Information Note: When DHCP is enabled, tapping the Renew button forces the VH10 to renew or find a new IP address. This is useful if, for example, you are out of communication range for a longer period of time and your Vehicle-Mount is dropped from the network. -
Page 115: Wi-Fi Config: Advanced
4.27.4.4 11n – Block Ack When 11n – Block Ack is enabled, the VH10 will not send an ACK for every packet received, but it will send an ACK after a block of data is received. The duration of time before sending an ACK is negotiated with the access point. -
Page 116: Roaming - Ap Discovery
4.27.4.10 Concluding the Wi-Fi Configuration If you’ve made changes in the Advanced menus, you will need to warm reset your VH10. • Choose Start>Shutdown>Warm Reset. - Page 117 Mount Assembly ..........120 5.6.2.2 Attaching the VH10 to the Heavy Duty Mount......122 5.6.2.3 Positioning the VH10 .
-
Page 119: Chapter 5: Accessories
Rail base (for 4" or 12" RAM arm), 2" to 2 1/2" MT3510 Cantilever mount MT1002 Heavy duty mount kit MT3410 Important: * If using the MT4210 Quick Release Adaptor, the VH10 Shock and Vibration specifica- tion is reduced from IEC 60721-3-5M3 to IEC 60721-3-5-5M2. Psion VH10 Vehicle-Mount Computer User Manual... -
Page 120: Power Supplies And Cables
Note: For helpful scanning tips, refer to “Scanning Techniques” on page 8. When a label is scanned successfully, the VH10 will beep if configured appropriately and the scan icon will be displayed on the screen. Occasionally, the barcode labels are poorly printed or damaged and cannot be read properly. -
Page 121: Antennas
The currently available antenna options are illustrated in Figure 5.1. Antenna hardware is listed in Figure 5.2 on page 114. For further information on 802.11b/g/n + Bluetooth co-existence, please see “Antennas” on page A-7. To determine which option is best for your location, please discuss the details with your Psion representative. -
Page 122: Linking A Vh10 To An Ethernet Network
(shown installed on magnetic mount base with 2.9m RPSMA plug pig tail) Linking a VH10 to an Ethernet Network A USB-Ethernet adaptor cable (Model WA4070) is used to connect the VH10 to an Ethernet network. Figure 5.3 USB-Ethernet adaptor Cable... -
Page 123: Network Access
The host application uses standard TCP/IP protocol to name, locate, and communicate with a specific VH10 on the network. If a link is established between a VH10 and a host, the application on the host and on the computer must have a recovery mechanism in the event that the VH10 is disconnected, interrupting the link. -
Page 124: The Mt43Xx Ram Mount Kit
5.6.1 The MT43XX RAM Mount Kit The VH10 may be installed using an articulating RAM Mount (Model MT43XX – 4 in. or 12 in. arm) secured to either a Vesa or circular base. The RAM articulating mount can be installed in a variety of orientations (see Figure 5.4). Select the best ori- entation for your specific application. -
Page 125: Installation
243 to the screw threads (Note: Loctite is not supplied by Psion). Match the four screw holes on the back of the VH10 with the appropriate pairs of holes on the base, then attach them by inserting the Screw (E) through the Washers (C, D) and the RAM Base (B). -
Page 126: Positioning The Vh10
5.6.1.2 Positioning the VH10 Place the VH10 into the position best corresponding to the RAM hardware used (see Figure 5.8) and tighten by hand until secure. Refer to “VH10 Mounting Accessories” on page 115 for warnings and proper tightening technique. Mount orientations shown in Figure 5.8 are considered the preferred configurations for the Cir- cular Base to Platform and the Vesa Base to Platform. -
Page 127: Optional Mount Kits
RAM Balls into both ends of the arm sockets. Figure 5.9 Optional Mount Kits SCREW SCREW CLAMP CLAMP BASE BASE LOWER LOWER BASE BASE MT3505 MT3507 CLAMP CLAMP BASE BASE LOWER LOWER BASE BASE SCREW SCREW MT3509 MT3510 Psion VH10 Vehicle-Mount Computer User Manual... -
Page 128: The Mt3410 Heavy Duty Mount Kit
5.6.2 The MT3410 Heavy Duty Mount Kit The VH10 may be attached to the MT3410 Heavy Duty Mount Kit and can be angled in three postions, as needed (see Figure 5.14 on page 123). The mounting platform on which you secure the computer must be strong enough to support 25 kg. Never attach the mount to a plastic dash or a wooden platform without the appropriate backing plate and bracing. - Page 129 Chapter 5: Accessories The MT3410 Heavy Duty Mount Kit Figure 5.10 Heavy Duty Mount with Blanking Plate and Bolts Assembly Figure 5.11 Heavy Duty Mount with Blanking Plate and U-Bolts Assembly Psion VH10 Vehicle-Mount Computer User Manual...
-
Page 130: Attaching The Vh10 To The Heavy Duty Mount
243 to the screw threads (Note: Loctite is not supplied by Psion). Match the two screw holes on each side of the VH10 with the appropriate pairs of holes on the bracket and screw them together by placing the Screw (P) through the Washers (M,N) and the Heavy Duty Mount (D), and then affixing it to the VH10. -
Page 131: Positioning The Vh10
5.6.2.3 Positioning the VH10 • Place the VH10 with mount into the location and position required (see Figure 5.14) and tighten until secure. Refer to “VH10 Mounting Accessories” on page 115 for warnings. Figure 5.14 Heavy Duty Mount Angles 30°... - Page 132 Chapter 5: Accessories The MT4200 Quick Release Mount Figure 5.15 VH10 and MT4200 Assembly A B C D Figure 5.16 MT4200 Quick Release Mount Installation Place hooks into slots on Mounting Base Plate, then snap spring clips into place. 1. Hook 2.
-
Page 133: The Mt4210 Adaptor Bracket Kit
The MT1002 Cantilever Mount Kit The VH10 may be installed using the MT1002 Cantilever Mount Kit with various bracket options so that it can be adjusted in angle, height, or easily released from the mount, as needed (see “Mount Assemblies”, below). - Page 134 Install the Cantilever Mount to the Forklift Post: In four places insert the Screw (A) through the Split/Lock Washer (B), Backing Plate (C), Cantilever Cylinder (D), through the Split/Lock Washer (B), then affix with Nut (E). Torque to 20 lbf-ft. +/- 2.0 lbf-ft. Figure 5.18 Cantilever Mount Assembly Forklift post Psion VH10 Vehicle-Mount Computer User Manual...
- Page 135 Chapter 5: Accessories The MT1002 Cantilever Mount Kit Cantilever Mount with RAM Mount Figure 5.19 Cantilever Mount with RAM Vesa Base Assembly Forklift post Figure 5.20 Cantilever Mount with RAM Mount Kit and VH10 Psion VH10 Vehicle-Mount Computer User Manual...
- Page 136 Chapter 5: Accessories The MT1002 Cantilever Mount Kit Cantilever Mount with Quick Release Mount Figure 5.21 Cantilever Mount with Quick Release Mount Cantilever Mount with Quick Release Adaptor Figure 5.22 Cantilever Mount with Quick Release Adaptor Psion VH10 Vehicle-Mount Computer User Manual...
-
Page 137: Vh10 Vehicle Installation
5.7.1 Wiring Guidelines The metal chassis of the VH10 is equipped with a ground lug (located on the underside adjacent to the power cable) to provide additional ground to the vehicle. It is strongly recommended that a grounding strap is used to connect the ground stud on the vehicle-mount to a solid, reliable contact point on the main portion of the vehicle chassis. -
Page 138: Installing The Power Pre-Regulator
You may have the option of connecting power before or after the ‘key’ switch. It is preferable to wire the VH10 after the key switch — that is, the VH10 cannot be switched on without turning the vehicle key on. -
Page 139: Power On/Off With Ignition Option: Wiring
This ignition detection application puts the VH10 into Suspend when the vehicle ignition is turned off, and powers the VH10 on when the ignition is turned on. You can enable this feature and set a delay time for the VH10 to go into Suspend. When a delay time is specified, a window appears on-screen at the time of ignition off. -
Page 140: Screen Blanking Option: Wiring
In the Display Properties dialog box, open the Screen Blanking tab. To be able to use Screen Blanking, you must connect one of the two DB9 serial ports on the VH10 to a user-supplied switch or relay. This switch/relay may be activated electrically (e.g. motion sensor, GPS) or mechanically (e.g. - Page 141 Chapter 5: Accessories Wiring Vehicle Power to the VH10 Figure 5.25 Connecting the Switch or Relay to the DB9 Cable Lines to screen-blanking sensor (optional) Note: Only CTS and RTS signals are used. User-supplied switch/relay DB9 cable VH10 power cable...
- Page 143 The VH10 Vehicle-Mount Computer ........
-
Page 145: Appendix A: Vh10 Specifications
Passive stylus or finger operation Optional heater* Note: * To maximize battery run time when the VH10 is not on vehicle or AC power, it enters into UPS Battery Power mode (see also “Power Saving Suspend” on page 70), and the heater is automatically switched off. -
Page 146: Power Management
1 x 3.5mm audio jack Note: To maximize battery run time, when the VH10 is not on vehicle or AC power, it enters into UPS Battery Power mode which limits the powered external ports to a total of 1A (see also “Power Saving Suspend”... -
Page 147: External Barcode Scanners
802.11b -78 dBm @ 11 Mbps 802.11g -67 dBm @ 54 Mbps 802.11a -67 dBm @ 54 Mbps 802.11n (2.4 GHz) -66 dBm @ 65 Mbps 802.11n (5 GHz) -66 dBm @ 65 Mbps Psion VH10 Vehicle-Mount Computer User Manual... -
Page 148: Bluetooth Radio
Max Instantaneous Peak Power North America Bluetooth (2402-2480MHz) +4dBm +4dBm (USA, Canada, and countries that follow FCC rules) RF Power Rating Radio Type and Operating Band Bluetooth Power Rating EIRP Bluetooth (2402-2481MHz) +4dBm +8.5dBm Europe Psion VH10 Vehicle-Mount Computer User Manual... -
Page 149: Antennas
Appendix A: VH10 Specifications Antennas A.3.3 Antennas A.3.3.1 Possible Antenna Configurations Figure A.1 VH10 Top View: Location of External Antenna Connectors 802.11 a/b/g/n Standard Radio External Antenna Connectors ANT1 ANT2 On/Off switch 802.11b/g/n + Bluetooth 802.11a/n Reverse Polarity SMA Reverse Polarity SMA... -
Page 150: Antenna - Bluetooth
802.11b/g/n+Bluetooth signal. If the VH10 is intended to be used with a Bluetooth peripheral located next to it, ensure that the left external mag mount antenna is placed in a location where it can still communicate with the Bluetooth peripheral. - Page 151 Enhanced Powered USB2 Port Interface Pinout ........B-4 Psion VH10 Vehicle-Mount Computer User Manual...
-
Page 153: Appendix B: Port Pinouts
Ports Diagram Warning: To maximize battery run time, when the VH10 is not on vehicle or AC power, it enters into UPS Battery Power mode which limits the powered external ports to a total of 1A (see also “Power Saving Suspend” on page 70). -
Page 154: Enhanced Usb1 Port Interface Pinout
Ring Indicator line on some devices such as modems. This port may provide up to 1A in normal mode (i.e. when the VH10 is powered by exter- nal vehicle battery or AC/DC adaptor). The maximum current available may be reduced in UPS mode (i.e. - Page 155 C.3.3 Changing Network Properties ......... . . C-7 Psion VH10 Vehicle-Mount Computer User Manual...
-
Page 157: Appendix C: Wireless Zero Config Settings
When you choose the Wireless LAN icon, an 802.11 Wireless LAN Settings window is displayed. This tab lists your radio statistics. Choosing the Zero button resets the statistics of the last four items — Packets IN, Packets OUT, IN errors and OUT errors. Psion VH10 Vehicle-Mount Computer User Manual... -
Page 158: Wireless Information
— networks that you have configured. Since access points are generally secure, they will most likely not be listed here. By default, the VH10 attempts to connect to preferred networks. This behaviour can be changed by enabling Automatically connect to non-preferred networks in the Advanced dialog box (see Figure C.6). - Page 159 Network name field can contain a maximum of 32 characters. The name assigned here is listed as a preferred network. Important: Keep in mind that the VH10 will only communicate with access points that are configured with the same SSID.
-
Page 160: Assigning An Ip Address
If your network is not using a DHCP server, you will need to assign an IP address. Refer to “IP Address” on page 104 for details about assigning an IP address. C.2.1 Name Server Refer to “Name Servers” on page 106 for details about this option. Psion VH10 Vehicle-Mount Computer User Manual... -
Page 161: Advanced Features
Rearranging Preferred Networks The VH10 attempts to connect with the networks listed in this dialog box in sequence, beginning at the top of the list. If you need to rearrange this list of networks — move networks up and down in the list: •... - Page 163 20 display specifications A-5 appearance (colour scheme) 53 battery background (image) 53 Battery Health dialog box 72 backlight 53 internal 11 backlight, adjusting 18 Baud, port replicator 87 Display Properties 53 Psion VH10 Vehicle-Mount Computer User Manual...
- Page 164 Index screen blanking 54 key repeat 58, 59 double-click One Shot Mode 59 appending characters to a decoded•arcode 83 onscreen, Microsoft SIP 57 scanner trigger 83 Properties 58 Double-Click, Manage Triggers menu 66 keyboard keys 15 Double-Tap (stylus settings) 90 ALT 16 Dr.
- Page 165 Import/Export to File 78 Soft Scan Timeout 83 Restrictions 77 techniques (scanning) 20 Shell Settings 75 troubleshooting tips 21 PsionVU Shell 29 warning message 83 punctuation marks, accessing (SHIFT Key) 16 scanning appending characters 83 Psion VH10 Vehicle-Mount Computer User Manual...
- Page 166 RAM Circular Base 118 Start Menu 24 RAM mount 117 cycle tasks 27 RAM Vesa Base 118 programs 25 VH10f, freezer model,freezer model, VH10 79 Run 28 Volume & Sounds Properties 99 Settings 27 Shutdown 28 system tray 26 task manager 27...
Need help?
Do you have a question about the VH10 and is the answer not in the manual?
Questions and answers