Advertisement
Quick Links
Advertisement

Related Manuals for Dune 4WD OUTBACK XL SWAG


Summary of Contents for Dune 4WD OUTBACK XL SWAG
- Page 1 OWNERS MANUAL OUTBACK XL SWAG ARTICLE # 90035185 ...
- Page 2 SAFETY Warning: Keep all flame and heat sources away from this swag fabric. Do not... Do not pitch swag near an open flame. Do not leave campfires unattended. Do not allow children or adults to use lighted candles, matches or other flame sources in or near swags. Do not use heating, lighting or cooking equipment with open flames in or near swags. Do not use fuel burning/oxygen consuming devices (i.e. heaters, lanterns or other flame sources) inside your swag at any time. Do not use other than recommended water repellent compounds for swag fly. Do not spray swag with insecticide. Extreme Caution: never use any fuel burning /oxygen consuming device, or any device that produces fumes (including stoves, lanterns, candles or heaters) in or around your swag. Inhalation of fumes may result in carbon monoxide poisoning, injury or death. ...
- Page 3 STUCTURAL INTEGRIRTY Although Dune swags and canvas tents are constructed to rigid specifications, periods of wind and rain soaking the ground may loosen pegs and cause the poles to sink into the ground. This will weaken the rigidity of the overall structure and may allow water pockets to form in the roof of the pole assembly is not taught, the weight of which may cause broken poles and torn fabric. This is not covered by warranty. IMPORTANT 1. Before using your swag it must be seasoned to make it fully waterproof. This involves erecting the swag, soaking it completely with water by either rain or hose and letting the swag dry. It is the drying process that waterproofs the swag. Ensure all windows and doors are closed. The wetting and drying process allows the fabric and stitching to shrink and take up. Some water may wick through the stitching during this process. Repeat ...
- Page 4 12 MONTH WARRANTY This product is guaranteed to be free from defects in workmanship & materials for a period of 12 months from date of purchase. The product will be replaced or refunded for a major failure. The product will be repaired or replaced at our discretion should the product fail to be of an acceptable quality and failure is not a major failure. Warranty will not apply if the product (a) is damaged through misuse (including failure to maintain), neglect, accident or ordinary wear & tear (including rust, corrosion & normal fading, weathering, staining, discolouration, scratching or chipping); (b) is damaged through exposure to heat; (c) is used commercially; (d) has not been used or installed in accordance with any applicable instruction; or (e) has been modified, repaired or tampered with by the purchaser ...
-
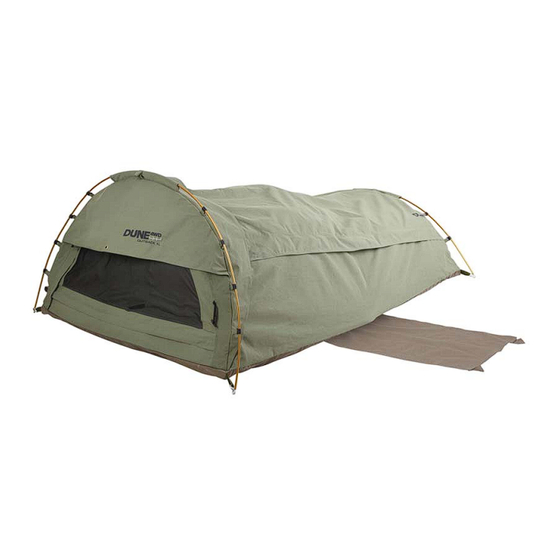
Page 5: Product Diagram
PRODUCT DIAGRAM Pole Sleeve Middle Pole Foot Pole Head Pole Please note, weights and measurements are approximate only. Due to our policy of continual product development, specifications and features may vary from time to time. OUTBACK XL SWAG PARTS LIST ARTICLE # 90035185 1x Head Pole 1x Mid Pole 1x Foot Pole 8x Pegs 2x Guy Ropes NOTE: Always mention the model number in all correspondence regarding your swag ... - Page 6 ASSEMBLY INSTRUCTIONS IMPORTANT: This swag is to be pitched once before going camping to ensure that all parts are present and to become familiar with the assembly of the swag. 1. Undo straps from clamp‐rings and unroll swag. 2. Unzip the top panel at the head end of the swag and locate the pole pocket containing the poles at the head‐end of the mattress. Head pole is the longest pole, mid pole is the next longest and the foot pole is the shortest. 3. a) Join the head pole and slide them through the centre sleeve at the large end of the swag. b) Place pole‐ends in the ring and pins in both corners of the swag. c) Attach “J” hook clips onto head pole. 4. a) Join the foot poles and slide them through the sleeve at the small end of the swag. b) Place pole‐ends in the ring and pins in both corners of the swag. c) Attach “J” hook clips onto foot pole. 5. Undo top canvas and mesh panel to below mid‐way down the swag. 6. a) Assemble and inset mid pole in the canvas sockets located mid‐way along the base‐ seams on either side of the mattress. b) Undo touch‐tape webbing located mid‐way down the canvas centre strip of the mesh panel. Wrap this webbing around the high‐point of the hooped pole and reattach the touch‐tape. 7. a) Attach guy ropes to the head‐end storm flap eyelet. Attach to tree/bumper bar/peg. b) O‐rings on each corner are for pegging out if necessary. c) Attach a guy rope to the foot storm flap and attach to a tree/peg. Incidentally, the O‐rings on the head end of the top panel allow for the panel to be tied up to a tree/bumper bar. Obviously this is a dry weather option. When a, b, and c are complete the swag should be taut and not sagging. 8. The touch‐tape webbing loop located on the head end of the centre canvas strip allows you to keep the mesh panel firm above your face. How to make the most of your swag if expecting bad weather. ...
- Page 7 DISASSEMBLY INSTRUCTIONS 1. Release the guy ropes 2. Unzip doors and windows and collapse the swag, removing and disassembling the poles. Place the poles inside the swag. 3. Remove pegs and place in the peg carry bag and tie it shut. Do not remove pegs from the ground by pulling on the peg loops –this may cause the peg loops to tear out of the seam. 4. Spread the swag out flat with all lose fabric within the edges of the swag base. Try to flatten the swag as much as possible. 5. Roll the swag from the head end to the foot then hold rolled up using the webbing straps provided. 6. When the swag is rolled up, place into swag carry bag, with peg bag, instruction sheet and other miscellaneous parts. If the swag does not fit into the carry bag, unroll and re‐roll more tightly. HELPFUL HINTS GUIDE CONDENSATION – this is caused by lower temperatures on the outside of the swag combined with your body heat on the inside of the swag. When this occurs, avoid touching the walls to reduce contact leakage. Leaving the doors and windows open will reduce moisture condensation. SEAM LEAKAGE – all Dune swags are manufactured by expert machinists. However, seepage may occur in the seams through the needle holes created during the sewing process. This is normal and can be corrected by applying a generous amount of seam sealer or wax on the inside on the seams. Seam sealer is available at all retail camping specialists. MILDEW – to avoid mildew, never store your swag away wet or damp. However if mildew occurs, use a soft bristle brush or sponge with mild detergent to clean. Let the swag dry in the sunlight and re‐apply seam sealer compound on the inside of the seams. REPAIRING A TEAR – for small tears, use a self‐adhesive patch kit. We recommend a canvas or awning repairer for larger tears. ...
- Page 8 CAMPER’S CHECKLIST SAFETY AND HEALTH AIDS Insect repellents KITCHEN EQUIPMENT Sun Screen Food and water First aid kit and manual Gas stove Tissues Portable stove / BBQ Stingoes Fire starters Compass Frying pan Binoculars Saucepans CAMP NEEDS Kettle Teapot / billy Swag / Tent Aluminium foil ...
Need help?
Do you have a question about the OUTBACK XL SWAG and is the answer not in the manual?
Questions and answers