Advertisement
Available languages
Available languages
Quick Links
Advertisement

Subscribe to Our Youtube Channel
Related Manuals for Orima ORF-630-VX


Summary of Contents for Orima ORF-630-VX
- Page 2 INDICE 1. INSTALAÇÃO INFORMAÇÃO TÉCNICA AVISOS IMPORTANTES NO CASO DE AVARIAS DESCRIÇÃO DO FORNO & PAINEL DE COMANDOS MODO DE UTILIZAÇÃO MODO DE UTILIZAÇÃO DO ESCUDO TÉRMICO MANUTENÇÃO E LIMPEZA...
- Page 3 INSTALAÇÃO Símbolos e Significados Este aparelho deve ser instalado de acordo com as normas e regulamentos em vigor, e apenas num espaço bem ventilado. No seu Os seguintes símbolos encontram-se no Manual de Instruções. próprio interesse e segurança, é uma exigência legal que todos os aparelhos a gás sejam instalados por um Instalador de gás registado seguro e a instalação seja também registada.
- Page 4 Não pise, encoste ou coloque itens pesados sobre a porta aberta, • ou desloque o forno utilizando a porta. Deve ser fornecida ventilação permanente ao rodapé/painel • inferior.(Como indicada a Figura –1) 600mm x 10mm corte no rodapé Figura 2 por baixo do encaixe do forno.
- Page 5 Figura–3 Os números indicados na etiqueta de Classificação foram calculados para O aparelho não deve entrar em contacto com as partes eléctricas, assim este tipo de instalação. que for instalado.
- Page 6 Ventilação O compartimento onde se encontra instalado este forno deve ter uma ventilação de ar de acordo com a directriz BS 5440: Parte 2: 2000. Todos os compartimentos necessitam de uma janela que se abra • directamente para o exterior ou equivalente e alguns compartimentos podem exigir uma ventilação permanente.
- Page 7 Se precisar de substituir o fusível de 13 Amp, por favor certifique- 7. O seu forno Orima deve ser instalado em um móvel que se de voltar a ligar a ficha de substituição da seguinte forma (Para proporcione uma boa ventilação superior e inferior.
- Page 8 Orima mantendo assim a sua Antes de fazer as ligações do aparelho. eficiência de consumo energético. Antes de começar a utilizar o aparelho, leia o Manual de Instruções Se precisar de instalar uma Placa a gás no topo do forno a gás, é...
- Page 9 (LPG ou GN) do seu Forno Orima. 3. Uma vez que a ficha do seu Forno Orima possui sistema Terra, certifique-se de que a tomada tem o mesmo sistema. Se for usado sem sistema Terra, o fabricante não é...
- Page 10 10. Ao fazer a verificação de vazamento de gás, nunca utilize qualquer tipo de chama como os de isqueiros, fósforos, cigarros ou similares. EM CASO DE AVARIA 11. O uso do seu aparelho cria humidade e aquecimento no compartimento onde se encontra instalado, Certifique-se de que a sua cozinha está...
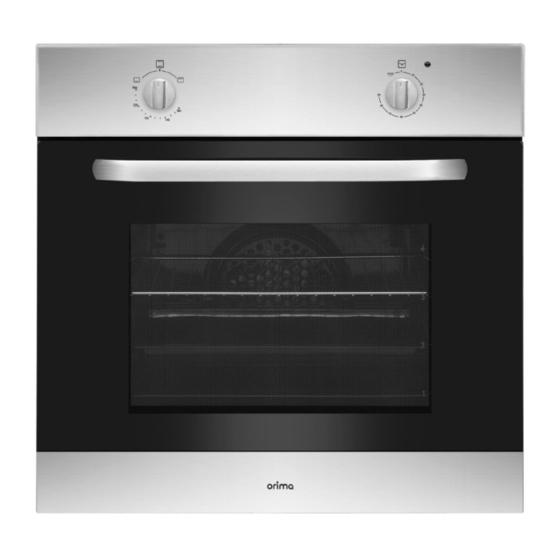
- Page 11 Características Técnicas Descrição do Forno e Painel de Comandos: ESPECIFICAÇÕES LARGURA EXTERIOR 595 mm PROFUNDIDADE EXTERIOR 610 mm ALTURA EXTERIOR 595 mm LARGURA INTERIOR 460 mm PROFUNDIDADE INTERIOR 400 mm ESPETO LAMPADA QUEIMADOR (FRANGO & RELÓGIO GRELHADOR LAMPADA ALTURA INTERIOR 350 mm INFERIOR GRELHADO)
- Page 12 SIGNIFICADO DOS SÍMBOLOS QUE POSSAM ESTAR NO SEU PAINEL DE CONTROLO: ESPETO (PARA FRANGO GRELHADO) BOTÃO DO TERMÓSTATO; Para colocar o seu forno a funcionar, o Esta função encontra-se mencionada na página 14. termóstato deve ser ajustado à temperatura desejada. O termóstato pode ser regulado entre 50º...
- Page 13 O aparelho poderá produzir um odor ligeiramente desagradável causado pela queima de substâncias protetoras utilizadas durante o processo de fabricação. Modo de Utilização do seu Forno Orima Como usar os queimadores Os queimadores do forno superior e inferior só podem ser utlizados um de cada vez.
- Page 14 Espeto Luz Do Forno Para a utilização do Espeto (ver imagem) proceda da seguinte forma: Esta liga-se ao girar o botão de comando do lado direito. O conjunto do Espeto consiste nas seguintes partes: Um Espeto giratório com um manípulo destacável. Utilização do Lembrete de Minutos Mecânico Dois garfos com parafusos, para a fixação de alimentos.
- Page 15 3. É importante manter a porta aberta a uma distância variar conforme o peso e a quantidade de alimentos a serem especificada ao grelhar. preparados. O escudo térmico irá proporcionar um desempenho de cozimento Poderá experimentar e descobrir sabores diferentes e adequados ao ideal, protegendo o painel de controlo e botões.
- Page 16 Não coloque materias inflamáveis no forno: se o aparelho estiver • Para garantir a longevidade do seu forno Orima, este deve ser ligado por engano, poderia causar um incêndio. cuidadosamente limpo com frequência, lembre-se de: Verifique sempre se os botões estão na posição OFF quando o •...
- Page 17 arame duro, 3. Após a secagem, re-instale o vidro da porta no perfil superior palha-de-aço ou faca. Não utilize detergentes ou da tampa de vidro. agentes abrasivos. Após a limpeza das partes internas do forno com um pano com sabão, lave-o e seque bem com um pano macio.
- Page 18 Substituição da Lâmpada do forno Primeiro desligue o forno e garanta que este se encontra frio. 1. Desligue o aparelho da corrente; 2. Retire a tampa de vidro da Lâmpada (se houver dificuldade, recomendamos o uso de uma luva de borracha, vai ajudar muito a segurar a tampa de vidro).
-
Page 20: Table Of Contents
CONTENTS 1.INSTALLATION OF YOUR OVEN TECHNICAL FEATURES OF YOUR OVEN IMPORTANT WARNINGS IF YOUR OVEN DOES NOT OPERATE DESCRIPTION OF OVEN & CONTROL PANELS USING OVEN SECTION USING HEAT SHIELD MAINTENANCE and CLEANING... -
Page 21: Installation Of Your Oven
INSTALLATION OF YOUR OVEN Symbols and Descriptions This appliance must be installed in accordance with the Standards and Regulations in force and only in a well ventilated space. Following symbols are to be located in Instruction manual. In your own interest and that of safety, it is a legal requirement, that all gas appliances be installed by a Gas Safe Registered Installer and the installation registered. - Page 22 Do not step-on, lean-on or rest heavy items on the open door, or • maneuver the oven by the door Permanent ventilation must be provided the plinth panel.(as shown • in Figure –1) 600mm x 10mm cut away in plinth Figure 2 panel below oven housing...
- Page 23 Figure–3 The figures indicated on the rating label have been calculated for this type The appliance must not come into contact with electrical parts once it has of installation. been installed.
- Page 24 Ventilation The room containing this cooker should have an air supply in accordance with BS 5440: Part 2: 2000. All rooms require a window opening directly to outside or • equivalent and some rooms may require a permanent vent as well. For room volumes up to 5 m an air vent of 100 cm is required.
- Page 25 5. If your electric supply cable becomes damaged, it should be Electrical Connection and Security replaced using 1 meter length of H05RR-F 3x1.5 mm² silicon power cable by an authorized service engineer or qualified 1. THIS APPLIANCE MUST BE EARTHED electrician.
- Page 26 Should you need install a gas hob on top of a built-in gas oven, it Keep this user manual in good order, by taking into consideration that is strictly forbidden to connect the two or use a single cut-off tap. the appliance may be used by others The two appliances should be connected separately, and each one should have its own stop tap in order to make them completely...
-
Page 27: Important Warnings
If your oven is adjusted for use on NG there is no need for an adapter at the end of the hose. Every change the pipe for the connection gas, IMPORTANT WARNINGS ensure that leak proofing between on the surface of the connection should be placed to the seal (2).This seal is only single-used 1. -
Page 28: If Your Oven Does Not Operate
10. When making gas leakage check, never use any flame type like IF YOUR OVEN DOES NOT OPERATE those of lighter, matches, cigarette fire or similar ones. 11. Usage of your appliance creates moisture and heath in the room it 1. - Page 29 Technical Features of Your Oven Descriptions of the oven and control panel: SPECIFICATIONS OUTER WIDTH 595 mm OUTER DEPTH 610 mm OUTER HEIGHT 595 mm INNER WIDTH 460 mm INNER DEPTH 400 mm TURNSPIT & BOTTOM GRILL LAMP (CHICKEN TIMER LAMP INNER HEIGHT 350 mm...
- Page 30 MEANINGS OF THE SYMBOLS THAT MIGHT BE ON YOUR CONTROL PANEL, ARE AS FOLLOWS: TURNSPIT (CHICKEN GRILL) THERMOSTAT CONTROL KNOB; In order to operate the oven, the This function is mentioned above other page. thermostat must be adjusted to desired temperature. Your thermostat can be regulated between 50º...
- Page 31 The appliance may produce a slightly unpleasant odour caused by burning away of protective substances used during the manufacturing process. Using the oven Using Oven Burner This gas ovens top and bottom burner can only be used one at a time. When you want use your chosen burner, first you press the tap knob and wait 5 seconds to purge air from the pipes.
- Page 32 Turnspit Oven Light To operate the rotisserie (see picture) proceed as follows: This is switched on by rotating the right hand control knob. Turnspit set consists of following parts: A turnable spit with a detachable handle. Two forks with screw for fixing to food. Using Mechanical Minute Reminder 1.
-
Page 33: Using Oven Section
3. It is important to keep the door open the specified distance A suggestion of cooking times and thermostat positions are given in when grilling. cooking table below – these are only a guide and will vary subject to The heat shield will provide an ideal cooking performance while weight and quantity of food being cooked. -
Page 34: Maintenance And Cleaning
inexperienced persons may cause injury or further malfunctioning The appliance must be used by adults only, to cook food according • to instructions in this manual. of the appliance. Do not place heavy objects on the open oven door. Do not touch the heating elements and parts of the oven door •... - Page 35 4. After cleaning the interior parts of the oven with a soapy cloth, rinse it and then dry thoroughly with a soft cloth. 5. Clean the glass surfaces with special glass cleaning agents. 6. Do not clean your oven with steam cleaners. 7.
- Page 36 Replacing the oven lamp At first turn off the oven and ensure the oven is cold. 1. Unplug the oven from the mains; 2. Remove the glass cover of the lamp-holder (if any difficulty is encountered, then we recommend wearing a rubber glove will greatly help to grip the glass cover) Remove the lamp and replace with a lamp resistant to high temperatures (300ºC) with the following characteristic:...
Need help?
Do you have a question about the ORF-630-VX and is the answer not in the manual?
Questions and answers