Advertisement
Quick Links
Advertisement

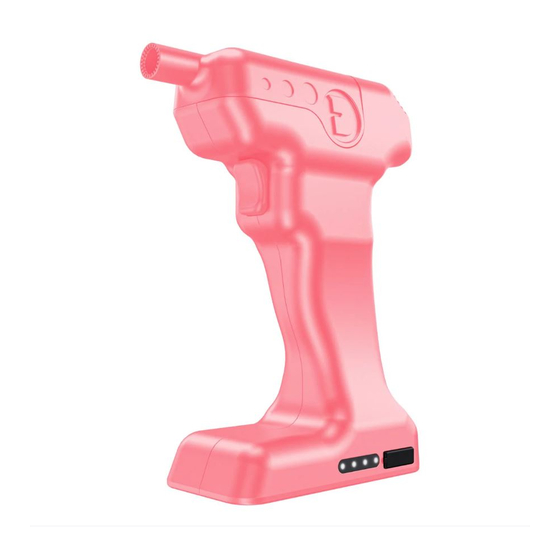
Summary of Contents for Flavour Blaster MINI
- Page 1 USER MA NUAL...
- Page 2 CONGRATULATIONS CONGRATULATIONS ON YOUR PURCHASE OF THIS FLAVOUR BLASTER MINI! FOR THE BEST EXPERIENCE PLEASE CAREFULLY READ AND FOLLOW THIS USER MANUAL. For the latest information and to be part of a great and growing community please join our Bubble Heads Club: https://www.
- Page 3 YOUR FLAVOUR BLASTER MINI AND ENJOY THE PRODUCT IN THE MOST SAFE EFFECTIVE WAY: This Flavour Blaster is designed to be used with Flavour Blaster Aroma’s and Bubble X only. It is not designed to be used with any e-liquids or loose tobacco leaf or herbal substances !...
- Page 4 Only use the original Flavour Blaster USB-C Cable to charge your Flavour Blaster. We strongly recommend that you always use a high quality USB wall charger (CE & UL Certified). The Flavour Blaster is not designed for use with a car charger and the Kit does not include a car charger.
- Page 5 MINI FLAVOUR BLASTER KIT INCLUDES 1x Mini Flavour Blaster 1x USB-C Cable 2x Disposable Tank 2x Aroma 1x Bubble X 180ml 1x Bubble X Bowl 1x Atomiser KIT INCLUDES...
-
Page 6: Quick Start
QUICK START 1. CHARGE BLASTER 2. PRIME COIL & FILL TANK 3. INSERT TANK InsertUSB-C Cable Pour Aroma into Tank Insert Tank & add Nozzle 4. TURN ON 5. DIP NOZZLE TIP 6. HOLD TRIGGER Press Trigger 3 times Into Bubble X Jigger Creates Aroma Filled Bubbles QUICK START... - Page 7 To charge your Flavour Blaster Battery connect the correctly powered USB-C Cable to the USB-C Input Port. The Screen will show the Battery charge %. A full Battery charge will take 8 hours, giving the Flavour Blaster 8 hours of usage time.
-
Page 8: Rgb Light
RGB LIGHT Flash 5 times Flash 5 times Flash 3 times Power on/o Tank detected Tank temperature too high Flash 3 times Flash 3 times Flash 3 times Flash 3 times Battery too low Overuse Tank resistance lower than 0.05 Tank not detected BATTERY 100% power... - Page 9 FILL DISPOSABLE TANK 1. OPEN FLAP 2. FILL TANK 3. FILL LINE Pull Outer Hole Flap open Pour Aroma into Outer (Not Inner) Hole Fill to Max then rest for 2 minutes 4. CONNECT TANK 5. REPLACE TANK 6. CLEANING Connect to Mag Base Every 8 weeks Clean Base with alcohol wipe...
- Page 10 LIQUIDS 1. STORE UPRIGHT 2. ONLY DIP NOZZLE END 3. DON’T TIP BACKWARDS Handle with care around liquids Don’t dip whole Nozzle into Bubble X To prevent Bubble X leaking into Blaster 4. NO BUBBLE X IN TANK 5. CLEANING 6.
- Page 11 ATOMISER Dry bar environments can sometimes be a challenge for the bubble. To improve it`s stability, we recommend using the Atomiser. 1. TWIST OPEN 2. REMOVE INNER BOTTLE 3. FILL WITH WATER Twist upper half of Remove inner tube from Unscrew lid and ll clear container with water Atomiser to open Atomiser outer casing...
- Page 12 CLEAR BUBBLE 1. PRESS TRIGGER TWICE 2. DIP NOZZLE IN BUBBLE X 3. PULL TRIGGER 4. PRESS TRIGGER TWICE To produce Aroma again CLEAR BUBBLE...
- Page 13 BUBBLE TECHNIQUE Create bubbles filled with aromatics, fill cloches with aromatic clouds, make your own aromatic clouds for cocktail & drinks, add theatrical clouds for desserts, and much more. 1. Bubble mixture should be shaken gently 2. Bubbles can be created on both wet and dry 3.
- Page 14 Always power o the Flavour Blaster when it is not being used and remove the Tank. 8 SECOND CUT OFF: If Trigger is pressed for 8 seconds Flavour Blaster will stop firing until Trigger is released and pressed again. TANK: Do not pour alcohol into tank, this can cause re.
-
Page 15: Technical Specifications
fi WARRANTY INFORMATION JetChill provides a 12 month warranty on parts and labour for the Flavour Blaster. Please consult www. avourblaster.com for full terms and conditions. For warranty assessment the Flavour Blaster needs to be returned to the factory. - Page 16 JetChill Ltd www.flavourblaster.com Print Centre Fulwell Road www.jetchill.com Roker info@jetchill.com Sunderland (uk): 00 44 (0) 208 1243014 SR6 0HR...
Need help?
Do you have a question about the MINI and is the answer not in the manual?
Questions and answers