Table of Contents
Advertisement
Quick Links
DEUS
-
ELECTROMECHANICAL GEAR MOTOR FOR SLIDING GATES
GB
WITH CONTROL UNIT
INSTRUCTIONS AND WARNINGS FOR INSTALLATION, USE AND MAINTENANCE
A
CONTROL UNIT TOUCH
WITH DISPLAY
Rev. 10 - 23/05/2022 LG
-
CT1 24 Display
B
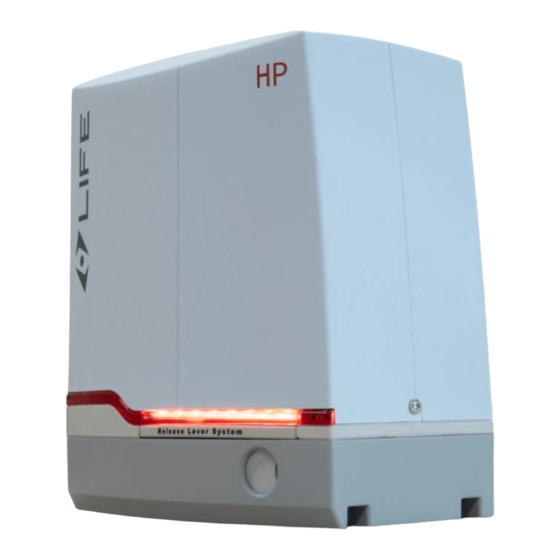
DEUS 4HP for gates Max 400Kg
DEUS 6HP for gates Max 600Kg
DEUS 4HS for gates Max 400Kg
Advertisement
Table of Contents

Summary of Contents for Deus CT1 24
- Page 1 ELECTROMECHANICAL GEAR MOTOR FOR SLIDING GATES WITH CONTROL UNIT INSTRUCTIONS AND WARNINGS FOR INSTALLATION, USE AND MAINTENANCE CONTROL UNIT TOUCH WITH DISPLAY DEUS 4HP for gates Max 400Kg DEUS 6HP for gates Max 600Kg DEUS 4HS for gates Max 400Kg Rev. 10 - 23/05/2022 LG...
- Page 2 WARNING Important safety instruc ons. For personal safety it is important to follow these instruc ons. Keep these instruc ons. The device must be disconnected from the power supply during cleaning and maintenance opera ons and the replacement of components. Do not allow children to play with the gate control devices.
- Page 3 GENERAL INDEX 1 - TECHNICAL DATA OF THE ENGINE --------------------------------------------------------------------------------------- P. 4 1.1 - Dimensions and limits of use 2 - INSTALLATION ---------------------------------------------------------------------------------------------------------------- P. 5 2.1 - Installa on of the gearmotor components 2.2 - Installa on and fixing of the anchoring plate 2.3 - Installa on and fixing of the gearmotor 2.4 - Rack moun ng 2.5 - Manual release...
- Page 4 Dimensioni del motore Weight Peso Electronic control unit CT1 24 Display Centralina elettronica 1.1 - Dimensions and limits of use. 1.1 - Dimensioni e limiti di utilizzo. The gearmotor installation area must provide the space necessary for maintenance and manual La zona di installazione del motoriduttore deve prevedere lo spazio necessario per effettuare la...
-
Page 5: Installation
2 - INSTALLATION 2.1 - Installa on of the gearmotor components. The gearmotor installa on area must provide the space necessary to carry out maintenance and manual release opera ons. Le -hand closing Right-hand closing 2.2 - Installa on and fixing of the anchoring plate. a) Respect the dimensions in the image. - Page 6 2.3 - Installa on and fixing of the gearmotor a) Remove the gearmotor cover by unscrewing the screws; place the gearmotor on the anchoring plate and screw the two M10 bolts with rela ve washers. b) Make any ver cal adjustment of the gearmotor by adjus ng the 4 dowels, leveling it; adjust the gearmotor so that it is parallel to the gate.
- Page 7 2.5 - Manual release ATTENTION: • Disconnect the power supply before proceeding. • Manual release can cause uncontrolled movement of the gate, ATTENTION due to mechanical damage, or condi ons of mechanical imbalance. • This command allows you to release the gearmotor transmission and move the leaf manually;...
- Page 8 2.6 - Wiring and connec ons Before proceeding with the connec ons, carefully read the sec ons related to SAFETY. All wiring and connec on opera ons must be performed with the control board disconnected. Power supply; if the disconnec on device is not visible, post a warning plate: “ATTENTION: MAINTENANCE IN PROGRESS”.
- Page 9 3 - ELECTRONIC CONTROL UNIT CONNECTIONS The installer must connect the 230 Vac 50 Hz power supply and the various devices provided for automa on. The connec ons between the control unit, motor, encoder and transformer are already made by the manufacturer and must not be modified in any way ATTENTION: To facilitate connec on to the control unit, remove the connector with the help of a screwdriver.
- Page 10 3.1 - Wiring and connec ons - Before proceeding with the wiring and connec ons, carefully read what is wri en in the REQUIREMENTS AND WARNINGS FOR SAFETY and INSTRUCTIONS AND WARNINGS FOR INSTALLATION. - All wiring and connec on opera ons must be carried out with the power supply disconnected. If the device is not visible, a warning plate must be affixed: “ATTENTION: UNDER MAINTENANCE”.
- Page 11 3.3 - Electrical connec on INTEGRATED CONN. RADIO FREQUENCY ANTENNA Diode COMMON COMMANDS Encoder + STOP Encoder A COND. MICRO Relay1 OPENS Encoder B PEDESTRIAN CLOSES Encoder - Motor STEP BY STEP COND. Motor OPENING SAFETY Relay2 Transformer - CLOSING PHOTO Transformer + N.O.
- Page 12 4 - CONFIGURAZIONE CENTRALINA 4 - CONTROL UNIT CONFIGURATION N.B. PLEASE NOTE Eventuali sicurezze (Fotocellule o Stop) devono essere collegati prima Any safety devices (Photocells or Stop) must be connected before della programmazione, altrimenti questi NON sono attivi. programming, otherwise they are NOT active. E’...
-
Page 13: Remote Control Settings
5 - REMOTE CONTROL SETTINGS 5.1 – Total opening remote learning Press and hold the A bu on, a er 5" on the display the icon [ A ] comes on; release the bu on, press the key of the remote transmi er that you want to program within 5"; the correct storage is highlighted by a brief flash on the display;... - Page 14 5.4 – Remote control learning via radio With the gate Opened and safety enabled: STOP and / or PHOTO. 1 - Press and hold for 10" in a row the key of a remote transmi er previously programmed: you enter the total opening setup, the memory is ready for storage, the flashing light flashes once briefly.
- Page 15 6 - SETTING Press and hold the B bu on, immediately a er press the A bu on, then release both bu ons; now every me you press the bu on A, the display will show the op on number [ 0 ] - [ 1 ]…[ 9 ] for 5”; in order to confirm the desired op on press B.
- Page 16 [3] - Obstacle Detec on Sensi vity [0] Minimum [1] ----- [2] (Default) [3] ----- [4] ----- [5] Maximum [4] - Slowdown Space Adjustment [0] Minimum [1] ----- [2] (Default) [3] ----- [4] ----- Minimum Maximum [5] Maximum [5] - Slowdown Speed level [0] Minimum [1] ----- [2] (Default)
- Page 17 [8] - Relay Output [0] Gate Open Light (Default) [1] Courtesy light 30 " [2] Courtesy light 1 ' [3] Courtesy light 3 ' [4] Impulsive radio contact [5] Step-by-step radio contact [9] - Enable NC safety inputs 7 - 11 - 12 With op on 9 it is possible to manually enable the safety inputs according to the indica ons given here.
- Page 18 8 - CONNECTION WITH EMERGENCY BATTERIES (OPTIONAL AGEX KIT) The backup ba eries allow you to have an emergency solu on in cases of power failure; the autonomy is around 8 hours and/or approximately ten maneuvers. For the connec ons follow the diagram shown here. Batteries Switching Transformer Transformer output...
-
Page 19: General Information
His document conforms to the state of the automa on which it is provided for sale. 9.1 - Informa on on the manufacturer LIFE home integra on is the manufacturer of the motor DEUS and the owner of all rights concerning this document. • Manufacturer: LIFE Home Integra on •... -
Page 20: Installation Warnings
11- INSTALLATION WARNINGS ATTENTION : Important safety instruc ons. Follow all instruc ons carefully, incorrect installa on may cause serious injury. Before start installa on we highly recommend reading the instruc ons and warnings contained in this manual carefully (see the SAFETY INSTRUCTIONS AND WARNINGS Chap) and observing the instruc ons it contains. - Page 21 12.2 - First usage The automa on may only be used for the first me once all the checks described in the TESTING chapter have been performed successfully. The automa on may not be used in precarious or temporary condi ons. a) Compile a technical file for the automa on, which must include at least: •...
-
Page 22: Maintenance
14 - MAINTENANCE 14 - MAINTENANCE 14 - MANUTENZIONE 14.1 Maintenance instructions and warnings 14.1 Maintenance instructions and warnings 14.1 Prescrizioni e avvertenze per la manutenzione • Once the automation has been tested, the parameters set must not be altered. If further adjustments (e.g. alterations to the voltage •... - Page 23 CONFORMITY DECLARATION EU OF THE MANUFACTURER LIFE home integration Via Sandro Pertini 3/5 31014 COLLE UMBERTO (TV) Italia Declares that the following product: DEUS4HP - DEUS6HP - DEUS4HS Electromechanical operator is for sectional doors. Serial number - Production lot It complies with the essential requirements of the following directives: DIRETTIVA MACCHINE (MD) 2006/42/CE DIRETTIVA BASSA TENSIONE (LVD) 2014/35/UE DIRETTIVA COMPATIBILTA’...
- Page 24 Adress: Via Sandro Pertini 3/5 31014 Colle Umberto (TV) ITALY Telephone: +39 0438 388592 Telefax: +39 0438 388593 http: www.homelife.it e-mail: info@homelife.it www.homelife.it...
Need help?
Do you have a question about the CT1 24 and is the answer not in the manual?
Questions and answers
Bonjour, ou placer le moteur? avez vous des cotes? merci
The engine for the Deus CT1 24 must be installed in an area that provides enough space for maintenance and manual release operations. The anchoring plate for the gearmotor must be placed according to the orientation (LEFT or RIGHT) as shown in the image, and the height dimensions must match those indicated with pinion Z16. The electric cable pipes should protrude and be capped to prevent debris entry. Dimensions must be respected as shown in the installation image.
This answer is automatically generated