Table of Contents
Advertisement
Advertisement
Table of Contents

Related Manuals for Orbic AirSurf 5G


Summary of Contents for Orbic AirSurf 5G
- Page 1 USER MANUAL...
-
Page 2: Table Of Contents
Table of Contents Device Overview .................4 Features and Specifications ...........7 Charge your Orbic Airsurf 5G PC ......... 8 Replacing the Nano SIM Card ..........9 Get Started with Your Computer ........10 Windows Desktop ..............12 Connecting to the Internet ..........14 5G Connectivity ............... - Page 3 Thank you for purchasing the Orbic AirSurf 5G PC. About This Guide • This guide applies to Copyright Orbic product model(s) listed below. Illustrations in this guide may look slightly different from your prod- uct. Model name R141TL5 Machine type (MT) YOGA •...
-
Page 4: Device Overview
Device Overview 1. Microphones: Capture or record sound and voice. 2. Camera: Take photos, record videos, and video chat using stills and moving images. Detect faces with face recognition. 3. Digital MIC: Recording function. 4. Screen: Display text, graphics, and videos. - Page 5 1. Wi-Fi Antennas: Send and receive radio waves for the Bluetooth and Wi- Fi modules. 2. Cellular Antennas: Send and receive radio waves for the 4G/5G cellular module. Note: Antennas are not visible from the outside of the computer. 3. Keyboard: Enter characters and interact with programs. Note: The keyboard also includes hotkeys and function keys for changing- settings and performing tasks quickly.
- Page 6 1. Power Connector/USB-C Connector: Connect to power with the included power cord and AC power adapter. Connect to an external display, storage, or data device. Note: An appropriate adapter may be needed for connecting external devices. 2. Charging LED: Indicate whether the computer is connected to AC power. 3.
-
Page 7: Features And Specifications
Features and Specifications Dimensions •Width: 324.0 mm (12.76 inches) •Depth: 215 mm (8.74 inches) •Thickness: 18.1 mm (0.71 inches) AC Power Adapter •Input: 100 V ac–240 V ac, 50 Hz–60 Hz •Output: 19 V dc, 3.42 A •Power: 65 W Battery pack •Capacity: 6000mAH •Number of cells: 2... -
Page 8: Charge Your Orbic Airsurf 5G Pc
Charge your Orbic Airsurf 5G PC Use only the Orbic provided Type-C adapter designed for this product. Using any other adapter may damage the computer and may void your warranty. Please refer to yourproduct warranty statement. Plug in the adapter provid- ed in your laptop box, and thenconnect the adapter to the right-side Type-C of your computer, as shown. -
Page 9: Replacing The Nano Sim Card
Replacing the Nano SIM Card Your device comes with a Pre-Installed SIM card . If you wish to replace it , please refer to the instructions below. Step 1. Use the ejection tool (included) to eject the nano SIM card tray, and then slide the tray out of the computer. -
Page 10: Get Started With Your Computer
Get Started with Your Computer Learn the basics of Windows 10 and start working with it right away. For more information about Windows 10, see the Windows help information. Windows account You must create at least one account to use the Windows operating system. It can be either a local account or a Microsoft account. - Page 11 Switch between a local and a Microsoft account If you are using a local account to sign into Windows 10, you can switch to using a Microsoft account instead. Step 1. Open the Start menu and select Settings > Accounts. Step 2.
-
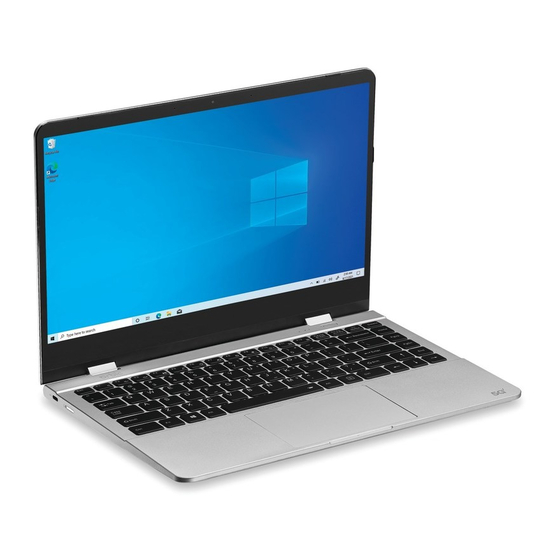
Page 12: Windows Desktop
Windows Desktop 9 10 1 112 Account: Change account settings, lock the computer, or sign out of the current account. Documents: You can save received files in the Documents folder, which is a default location. Pictures: You can save the received image files in the Pictures folder, which is a default folder. - Page 13 Battery Status Icon: Display power status and change battery or power settings. Network Icon: Connect to an available wireless network and display the network status. Battery Status Icon: Display power status and change battery or power settings. Network Icon: Connect to an available wireless network and display the network status.
-
Page 14: Connecting To The Internet
Connecting to the Internet 5G Connectivity Your Orbic Airsurf 5G PC has built in support for mobile broadband service on 5G and 4G networks . This capability gives you the power to access the internet, send emails, or connect to your corporate network without the need for a Wi-fi network. -
Page 15: Using Bluetooth Devices
To purchase Internet service and a modem, contact a local ISP. The ISP will help set up the modem, install a network cable to connect your wireless router to the modem and test the Internet service. Using Bluetooth devices A Bluetooth device provides short-range wireless communications that re- place the physical cable connections that traditionally link electronic devices such as the following: •... -
Page 16: Operating Modes
Operating Modes The screen of your computer can open to an angle of 360 , enabling you to use your computer for different purposes. Mode Suitable for Notebook mode Entering text, drag and drop operations using the touchpad. Stand mode / Giving a presentation, Tablet mode viewing a slide show and... -
Page 17: Entertainment Features
Turn on screen rotation lock In stand, tent, or tablet mode, auto-rotation is turned on so that the orienta- tion of the screen changes based on how you place or hold the computer. However, you can turn on the rotation lock to keep the screen in a fixed orientation. Step 1. - Page 18 Using audio You can download and listen to music, stream audio content (including radio) from the web, record audio, or mix audio and video to create multimedia. To enhance your listening enjoyment, attach head-phones or speakers. Connecting speakers You can attach wired speakers to your computer by connecting them to the audio-out (headphone) jack on your computer or on a docking station.
-
Page 19: Interact With Your Computer
IMPORTANT: Be sure that the external device is connected to the correct port on the computer, using the correct cable. Follow the device manufacturer’s instructions. You can connect to an external display by extended ports like an HDMI port, as shown below. NOTE: This cable is not included in the package. -
Page 20: Hotkey Mode
Hotkey mode Some hotkeys share keys with function keys (F1 to F12). The hotkey mode is a UEFI/BIOS setting that changes how hotkeys (or function keys) are used. Pressing Fn+ESC can also turn hotkey mode on or off. Hotkey mode setting How to use hotkeys How to use function keys Disabled Hold down the Fn key Press the function keys... - Page 21 To use the Windows and Applications keys The Windows key brings up the Windows Start menu. This is the same as clicking the start but-ton on the taskbar. Windows key combinations Windows key + E File Explorer Windows key + F1 Viewing Internet Connections Windows key + F Feedback usage information...
- Page 22 Slide Scroll through items, such as lists, pages, and photos. Drag an item to the location you want Move two fingers closer together Zoom out. Move two fingers farther apart Zoom in. Swipe in from the right edge Open the action center to see your notifica- tions and quick actions.
-
Page 23: Explore Your Computer
Explore Your Computer Manage power Use the information in this section to achieve the best balance between performance and power efficiency. Check the battery status The battery status icon or is in the Windows notification area. You can check the battery status, view the current power plan, and access battery settings quickly. - Page 24 To set up password protection You can protect your computer from access by another user when you setup password protection, which is available either through Windows (software) or through the BIOS Setup utility (hardware). Both provide protection when the computer is rebooted: a user must then enter the password. However, the BIOS password protection does not ask for a password when your com- puter resumes after standby (save to RAM) or hibernation (save to disk) To set up password protection through Windows 10...
- Page 25 Note: You can also change the startup sequence temporarily without opening the setup utility. To do so, turn off your device then power on the computer. In the process of powering on, press the ESC key or Delete key Set the UEFI/BIOS administrator password You set the administrator password to prevent unauthorized access to the UEFI/BIOS setup utility.
-
Page 26: Reset Or Restore Windows
Reset or restore Windows This section introduces the recovery options of Windows 10. Ensure that you read and follow the on-screen recovery instructions. Important: The data on your computer might be deleted during the recovery process. To avoid data loss, make a backup copy of all the data that you want to keep. -
Page 27: Create A System Restore Point Manually
Create a system restore point manually You can use Windows System Restore to create a restore point at any time. Step 1. In the Windows 10 search box, enter Create a restore point and select the matched result. Step 2. Select the System Protection tab and then select Create. -
Page 28: Create A Recovery Drive
Create a recovery drive Use a USB drive with a Type-A connector (not supplied) to create a Windows recovery drive. If Windows will not start, you can use the recovery drive to restore or reset Windows. Step 1. In the Windows 10 search box, enter Create a recovery drive and select the matched result. -
Page 29: Managing Power Consumption
Managing Power Consumption When you are not using your computer, you will want to maximize battery operating time without compromising performance. It is not necessary to turn the computer off to reduce power consumption and extend battery life. • Power management options can be set to occur automatically, based on timeout values that you have entered. -
Page 30: Trouble Shooting Your Windows Device
• From the Start menu, shut down, then power on the computer. • When you see the ORBIC logo, press Delete key to enter the BIOS Setup utility. • Open the Boot menu. The default boot sequence is usb flash drive. - Page 31 BIOS Setup and follow the steps below- 1. From the Start menu, shut down, then power on the computer. 2. When you see the ORBIC logo, press Delete key to enter the BIOS Setup utility. 3. Open the Boot menu. The default boot sequence is usb flash drive.
Need help?
Do you have a question about the AirSurf 5G and is the answer not in the manual?
Questions and answers