Advertisement
Available languages
Available languages
Quick Links
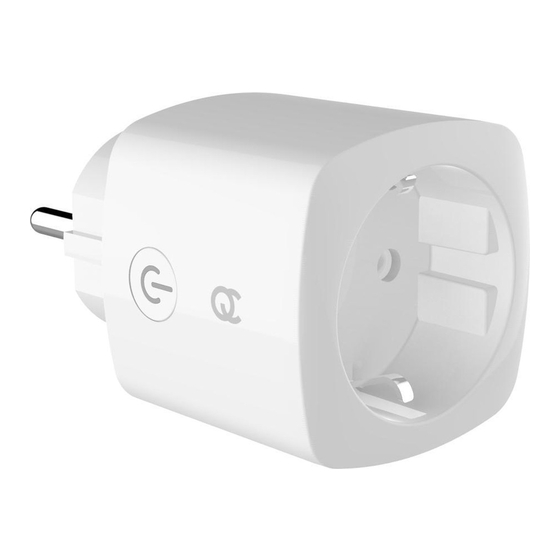
FlinQ 3-Pack Smart Power Plug with Voice Control
Model: FQC8149
Instruction Manual V1
NOTE : Do not install your smart plug till point 4!
1.
BEFORE YOU BEGIN
Make sure your mobile device is running: iOS 8.1 & higher or Android 4.4 & higher
Verify your WIFI network/name and ensure your mobile device is connected to the same
2.4 GHz WIFI network/name/Router (5GHZ Networks are NOT supported!)
2.
DOWNLOAD THE TUYA SMART APP
Download the app in the App store or the Google Play store and search for "TUYA SMART"
app. Or Scan the below QR Code below:
Advertisement

Summary of Contents for FLINQ FQC8149
- Page 1 FlinQ 3-Pack Smart Power Plug with Voice Control Model: FQC8149 Instruction Manual V1 NOTE : Do not install your smart plug till point 4! BEFORE YOU BEGIN Make sure your mobile device is running: iOS 8.1 & higher or Android 4.4 & higher Verify your WIFI network/name and ensure your mobile device is connected to the same 2.4 GHz WIFI network/name/Router (5GHZ Networks are NOT supported!)
- Page 2 REGISTER/LOGIN/PROFILE 1. Launch the “TUYA SMART” Application Tap “agree” to confirm the privacy policy To register, enter your mobile phone number or email address. Press “verification code retrieval” Enter the “verification code” that was send by phone number or email address Create a password and login for the new App use or go to Login if you already have an existing account (I WILL ARRANGE A NEW PICTURE)
- Page 3 Follow the instructions within the App during connection and configuration Congratulations your are ready to use the FlinQ Smart Plugs! RESET IF NEEDED In case your Wifi plug is not flashing follow these below steps clearly: 1. Click on “HELP” or use the FAQ inside the App 2.
- Page 4 “Alexa, turn of the table lamp” NOTE/WARNINGS: • Never connect several wifi plugs in series! • Make sure the WIFI networks are 2,4Ghz only during setup • The WIFI authorization method should be set as WPA2-PSK and Encryption type as AES or set both at AUTO •...
-
Page 5: Voordat Je Begint
FlinQ 3-Pack Slimme Stekker met Spraakbesturing Model: FQC8149 Gebruikershandleiding V1 Let Op : Installeer uw slimme stekker niet tot punt 4! 1. VOORDAT JE BEGINT Zorg ervoor dat uw mobiele apparaat actief is: iOS 8.1 en hoger of Android 4.4 en hoger Controleer uw wifi-netwerk / naam en zorg ervoor dat uw mobiele apparaat is verbonden met hetzelfde 2.4 GHz wifi-netwerk / dezelfde naam / router (5 GHz-netwerken worden... - Page 6 Download de app in de App store of de Google Play store en zoek naar de "TUYA SMART" - app. Of Scan de onderstaande QR-code hieronder: 3. REGISTREER/INLOGGEN/PROFIEL 1. Start de toepassing "TUYA SMART" 2. Tik op "Akkoord" om het privacybeleid te bevestigen 3.
- Page 7 4. Klik op "BEVESTIGEN" wanneer de wifi-plug snel knippert. 5. Volg de instructies in de app tijdens het verbinden en configureren 6. Gefeliciteerd, u bent klaar om de FlinQ Smart Plugs te gebruiken! 5. RESET INDIEN NODIG In het geval dat uw wifi-stekker niet knippert, volgt u deze onderstaande stappen duidelijk: 1.
- Page 8 WAARSCHUWINGEN: • Verbind nooit meerdere wifi-stekkers in serie! • Zorg ervoor dat de WIFI-netwerken alleen 2.4 GHz zijn tijdens de installatie • De WIFI-autorisatiemethode moet worden ingesteld als WPA2-PSK en het coderingstype als AES of beide worden ingesteld op AUTO •...
-
Page 9: Bevor Sie Beginnen
FlinQ 3er-Pack Smart Plug mit Sprachsteuerung Modell: FQC8149 Bedienungsanleitung V1 Hinweis: Installieren Sie Ihren Smart Plug erst unter Punkt 4! 1. BEVOR SIE BEGINNEN Stellen Sie sicher, dass Ihr Mobilgerät aktiv ist: iOS 8.1 und höher oder Android 4.4 und höher Überprüfen Sie Ihr WLAN-Netzwerk / Ihren WLAN-Namen und stellen Sie sicher, dass Ihr... - Page 10 1.Laden Sie die App im App Store oder im Google Play Store herunter und suchen Sie nach der App "TUYA SMART". Oder scannen Sie den unten stehenden QR-Code: 2. REGISTRIEREN / ANMELDEN / PROFIL 1. Starten Sie die Anwendung "TUYA SMART" 2.
- Page 11 4. Klicken Sie auf "BESTÄTIGEN", wenn der WLAN-Stecker schnell blinkt. 5. Befolgen Sie während der Verbindung und Konfiguration die Anweisungen in der App 6. Herzlichen Glückwunsch, Sie können jetzt die FlinQ Smart Plugs verwenden! 4. RESET, falls erforderlich Für den Fall, dass Ihr WiFi-Stecker nicht blinkt, gehen Sie folgendermaßen vor: 1.
- Page 12 DINGE, DIE SIE SAGEN KÖNNEN: "Alexa, mach den Ventilator aus" "Alexa, mach die Tischlampe an" WARHINWEISE: • Verbinden Sie niemals mehrere WLAN-Stecker hintereinander! • Stellen Sie sicher, dass die WLAN-Netzwerke während der Installation nur 2,4 GHz haben • Die WIFI-Autorisierungsmethode muss auf WPA2-PSK und der Verschlüsselungstyp auf AES oder beides auf AUTO eingestellt sein •...
-
Page 13: Avant De Commencer
FlinQ 3-Pack Smart Plug Avec Commande Vocale Modèle: FQC8149 Manuel Utilisateur V1 Remarque: n'installez pas votre prise intelligente jusqu'au point 4! 1. AVANT DE COMMENCER Assurez-vous que votre appareil mobile est actif: iOS 8.1 et supérieur ou Android 4.4 et supérieur Vérifiez votre nom / réseau Wi-Fi et assurez-vous que votre appareil mobile est connecté... - Page 14 Téléchargez l'application sur l'App store ou sur le Google Play et recherchez l'application "TUYA SMART". Ou Scannez le code QR ci-dessous: 1. ENREGISTREMENT / CONNEXION / PROFIL 1. Lancez l'application "TUYA SMART" 2. Appuyez sur "Accepter" pour confirmer la politique de confidentialité. 3.
- Page 15 4. Cliquez sur "CONFIRMER" lorsque la fiche WiFi clignote rapidement. 5. Suivez les instructions dans l'application lors de la connexion et de la configuration. 6. Félicitations, vous êtes prêt à utiliser les prises intelligentes FlinQ! 5. RÉINITIALISER SI NÉCESSAIRE Si votre fiche WiFi ne clignote pas, suivez les étapes suivantes: 1.
- Page 16 • Ne connectez jamais plusieurs prises WiFi en série! • Assurez-vous que les réseaux WIFI ne sont que 2,4 GHz lors de l'installation • La méthode d'autorisation WIFI doit être définie sur WPA2-PSK et le type de cryptage sur AES, ou les deux, sur AUTO. •...
Need help?
Do you have a question about the FQC8149 and is the answer not in the manual?
Questions and answers