Advertisement
What's in the Box

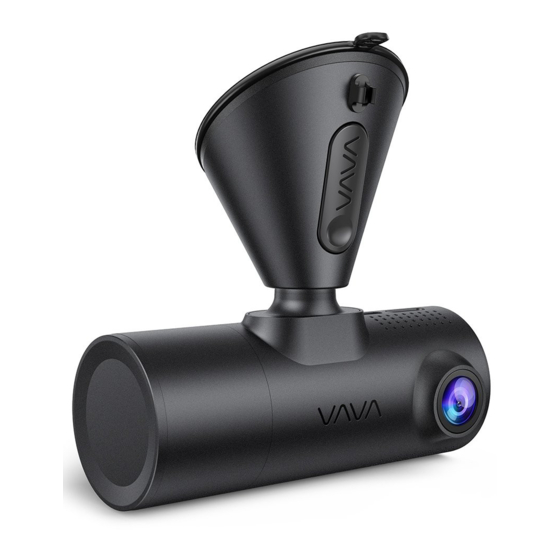
1 x VAVA Dash Cam

1 x Car Mount

1 x Car Charger

1 x Snapshot Button

1 x Charging Cable with GPS Module

1 x Crowbar

5 x Cable Clips

1 x User Guide
Product Overview
Product Diagram

- Car Mount
- Micro USB Port
- SD Card Slot
- Front Camera

- Power / Working Status LED
- Wi-Fi Status LED
- Menu Button
- Previous
- Next
- OK Button
- Rear Camera OFF Button
- Rear Camera Working Status LED
- Rear Camera
LED Indicator
| LED Indicator | Status |
| Slowly flashes blue | Working |
| Flashes red | Recording an emergency video clip / abnormal working |
| Solid on white | Mobile phone connected to Wi-Fi |
| Solid on green | Rear camera working |
Recording Screen Icon

 | Recording |
 | Microphone ON / OFF |
 | Rear Camera ON / OFF |
 | Emergency Recording |
 | LCD ON / OFF |
 | Stop Recording |
Product Specification
| CPU | Ambarella H22A55 |
| Video Resolution | Front Camera: 2560*1600P @30fps Rear Camera: 1920*1080P @30fps |
| COMS Sensor | Front Camera: IMX335 Rear Camera: IMX307 |
| Screen | 2" LCD |
| USB | USB2.0 |
| TF Card | Micro SD Card U3, 16GB-128GB |
| GPS | Supported |
| Built-in Battery Capacity | 320mAh |
| Wi-Fi | 2.4GHz 802.11b/g/n |
| Operating Temperature | -20°C~50°C / -4°F~122°F |
Getting Started
Memory Card Installation
- Insert the Micro SD card into the SD card slot.

- To remove the card, gently push it until it clicks and pull it out of the slot.

- The Micro SD card shall be formatted before using. To format the card, you can insert it into PC or connect with Dash Cam via APP.


Note:
- The Dash Cam supports a Micro SD card U3 16GB - 128GB.
- Do not remove or insert the Micro SD card when the camera is working.
- Suggested Micro SD card brands: Samsung, Sandisk.
Dash Cam Installation

- Turn off the car engine.
- Stick the car mount onto your car windshield (ideally right in the middle).
- Fix the VAVA
![]() Dash Cam onto the mount via the magnet.
Dash Cam onto the mount via the magnet. - Connect the USB cable to the micro USB port of the
![]() Dash Cam. Run the cable along the edge of the windshield, tuck it away in the seams, and extend it all the way to the USB port of the
Dash Cam. Run the cable along the edge of the windshield, tuck it away in the seams, and extend it all the way to the USB port of the ![]() Car Charger. Be sure to keep it away from the airbag area.
Car Charger. Be sure to keep it away from the airbag area. - Insert the Car Charger into your cigarette lighter, connect the
![]() Dash Cam to the
Dash Cam to the ![]() Car Charger.
Car Charger. - Adjust the
![]() Dash Cam to keep the lens level with the ground.
Dash Cam to keep the lens level with the ground. - Start the car engine to check if the
![]() Dash Cam is working properly.
Dash Cam is working properly.
VAVA Dash APP Download
- Before using the device, please download the "VAVA Dash" APP from the App Store (iOS devices) or Google Play (Android devices).
![]()
![]()
![]()
- Connect your Android / iOS smartphone with the VAVA Dash Cam through Wi-Fi: Settings > WLAN > Select "VAVA Wi-Fi" > Enter password (default: 12345678) > Open the VAVA Dash App.


Basic Operation
Video Resolution
- Select "Resolution" to manually set the resolutions for both front and rear cameras. Front camera supports 2560*1600p 30fps Max. Rear camera supports 1920*1080P 30fps Max.

- Resolutions for both front and rear cameras running at the same time:
2560*1600P @30fps+1920*1080P @30fps
1920*1080P @30fps+1920*1080P @30fps


Rear Camera ON / OFF
- Select "Rear Lens" to turn on/off the rear camera.

- You can turn off the rear camera individually with the front camera working normally to protect your privacy.


Wi-Fi Setting
- Select "Wi-Fi" to turn on/off the Dash Cam Wi-Fi.

- Select "Wi-Fi Info" to check the Wi-Fi SSID and the password.

- You can change the Wi-Fi SSID and password after connecting with VAVA Dash APP.


Note: Wi-Fi is off by default, please connect after turning it on.
Viewing Video/Photos on the Camera
Exit video mode, select ![]() by pressing "
by pressing " ![]() " button to preview the videos and photos recorded.
" button to preview the videos and photos recorded.


Note:
- Loop Record: Videos recorded during normal driving. The videos will be shown in chronological order.
- Event Record: Videos recorded in case of emergency or videos recorded in Parking Mode.
- Snapshot: Videos and photos captured via Bluetooth button or VAVA Dash APP.
Dash Cam and Snapshot Button Pairing
- Once the Dash Cam is turned on, press and hold the Snapshot Button for 5 - 30 seconds until beep sounds are heard indicating that they are synced. The Snapshot Button enters standby mode if there is no operation in 1 minute. Press again to restart and take a photo.
- Using the Snapshot Button
- Press once to take photos
- Press and hold for 3 seconds with a beep sound to take videos.
Note:
- After the Dash Cam and the Snapshot Button is successfully paired, the Snapshot Button enters standby mode when the dash cam is shut off. When the dash cam is turned on again, press the Snapshot Button to activate the button while taking a snapshot photo, it takes around 3 seconds to resume normal working status.
- Continually pressing the Snapshot Button will drain the button battery. Replace the battery when it runs out.
Senior Setting - IR LED Auto
- When the rear camera is under low light, IR LED will be turned on automatically. The infrared night vision mode will be enabled and the screen will display in black-and-white.
- Once the IR LED is turned off, the screen will always display in color.
![]()

Firmware Upgrade via Memory Card
- Download the firmware for the corresponding model from VAVA web site: https://www.vava.com/c/dash-cam
- Insert the Micro SD card into PC, then copy the firmware file into the SD card root.
- Insert the card back into the Dash Cam, and power it on.
- A dialog pops up to confirm Firmware Upgrade automatically. Press OK to start upgrading.


Important: The firmware file shall be copied in the SD card Root.
Note:
- Do not power off the Dash Cam during the upgrade.
- Please ensure enough power during this process. Dash Cam will restart automatically after upgrading.
- Do not operate or remove the card during the upgrade.
Restore to Factory Settings
- Select "Default Setting", a dialog pops up to confirm restoring the configuration parameters of Dash Cam to factory setting.
![]()
- After restoring to factory settings, settings for Language and Time&Date will not be changed.


FAQ
Fail to connect with Dash Cam Wi-Fi.
- For Android phones: Turn off the Cellular Data.
- Check if the Wi-Fi SSID and password are correct.
- Upgrade the firmware to the latest version.
- For any problem, please email us at support@vava.com with details.
How to change Wi-Fi password?
- Connect with Dash Cam Wi-Fi.
- Open VAVA Dash APP.
- Go to "Setting" to change the Wi-Fi password.
Is the rear camera able to be turned off individually?
Yes. You can turn off the rear camera individually with the front camera working normally to protect your privacy.
Snapshot button does not work
- Reset the Dash Cam, then re-pair the Snapshot button.
- Replace the battery of the Snapshot button.
- The Snapshot button shall be 5 meters range within the Dash Cam without any obstacles.
- For any problem, please email us at support@vava.com with details.
Customer Service
18-month Warranty
Life-time Support
E-mail: support@vava.com
Tel: 1-888-456-8468 (Monday-Friday: 9:00 – 17:00 PST)
Social Media: @LetsVAVA Facebook / Twitter / Instagram Product Link: https://www.vava.com/
FCC Compliance
This device complies with Part 15 of the FCC Rules.
Operation is subject to the following two conditions:
- This device may not cause harmful interference, and
- This device must accept any interference received, including interference that may cause undesired operation.
This device is acting as slave and operating in the 2.4 GHz (2412 ~2462 MHz) band. Ad Hoc function is supported but not able to operate on non-US frequencies.
NOTE: This equipment has been tested and found to comply with the limits for a Class B digital device, pursuant to Part 15 of the FCC Rules. These limits are designed to provide reasonable protection against harmful interference in a residential installation. This equipment generates uses and can radiate radio frequency energy and, if not installed and used in accordance with the instructions, may cause harmful interference to radio communications. However, there is no guarantee that interference will not occur in a particular installation. If this equipment does cause harmful interference to radio or television reception, which can be determined by turning the equipment off and on, the user is encouraged to try to correct the interference by one or more of the following measures:
- Reorient or relocate the receiving antenna.
- Increase the separation between the equipment and receiver.
- Connect the equipment into an outlet on a circuit different from that to which the receiver is connected.
- Consult the dealer or an experienced radio/TV technician for help.
Changes or modifications not expressly approved by the party responsible for compliance could void the user's authority to operate the equipment.
RF Radiation Exposure Statement:
This equipment complies with FCC radiation exposure limits set forth for an uncontrolled environment. This equipment should be installed and operated with minimum distance 20cm between the radiator & body.
WEEE Compliance
![]()
Correct Disposal of This Product (Waste Electrical & Electronic Equipment)(Applicable in countries with separate collection systems)
This marking on the product, accessories or literature indicates that the product and its electronic accessories should not be disposed of with other household waste at the end of their working life. To prevent possible harm to the environment or human health from uncontrolled waste disposal, please separate these items from other types of waste and recycle them responsibly to promote the sustainable reuse of material resources. Household users should contact either the retailer where they purchased this product, or their local government office, for details of where and how they can take these items for environmentally safe recycling. Business users should contact their supplier and check the terms and conditions of the purchase contract. This product and its electronic accessories should not be mixed with other commercial wastes for disposal.


EUROPE
E-mail:
support.uk@vava.com(UK)
support.de@vava.com(DE)
support.fr@vava.com(FR)
support.es@vava.com(ES)
support.it@vava.com(IT)
EU Importer: ZBT International Trading GmbH
Address: Halstenbeker Weg 98C, 25462 Rellingen, Deutschland
NORTH AMERICA
E-mail: support@vava.com
Tel: 1-888-456-8468 (Monday-Friday: 9:00 – 17:00 PST)
MANUFACTURER
Manufacturer: Shenzhen NearbyExpress Technology Development Co.,Ltd.
Address: 333 Bulong Road, Shenzhen, China, 518129
Learn more about the EU Declaration of Conformity: https://www.vava.com/pages/user-manual

MADE IN CHINA
11-27-2019
VA-VD009_V1.1_EN-JP

Documents / Resources
References
![www.vava.com]() https://www.vava.com/c/dash-cam
https://www.vava.com/c/dash-cam![www.vava.com]() VAVA Official Site - Evolve
VAVA Official Site - Evolve![www.vava.com]() VAVA Official Site - Evolve
VAVA Official Site - Evolve![www.vava.com]() User Manual – VAVA
User Manual – VAVA
Download manual
Here you can download full pdf version of manual, it may contain additional safety instructions, warranty information, FCC rules, etc.
Advertisement


Need help?
Do you have a question about the VA-VD009 and is the answer not in the manual?
Questions and answers